1. Introducción
The Muse M-192 CR is a versatile clock radio designed to provide reliable timekeeping, alarm functions, and FM radio reception. It features a large, easy-to-read digital display, dual alarms, and convenient functions such as snooze, sleep, and NAP. This manual provides detailed instructions for the proper setup, operation, and maintenance of your device.
2. Instrucciones de seguridad
- Lea atentamente todas las instrucciones antes de utilizar el dispositivo.
- Mantenga el dispositivo alejado del agua o la humedad.
- No bloquee las aberturas de ventilación. Asegúrese de que haya suficiente espacio alrededor de la unidad para una correcta circulación del aire.
- Use only the AC adapter supplied with the unit.
- Evite exponer el dispositivo a temperaturas extremas, luz solar directa o alta humedad.
- No intente desmontar ni modificar la unidad. Encargue cualquier reparación a personal cualificado.
3. Contenido del paquete
Por favor revise el paquete para ver los siguientes artículos:
- 1 x Muse M-192 CR Clock Radio
- 1 x adaptador de CA
- 1 x Manual de instrucciones (este documento)
4. Producto terminadoview
Familiarize yourself with the various parts and controls of your Muse M-192 CR Clock Radio.

Figura 1: Vista frontal en ángulo view of the Muse M-192 CR Clock Radio, showcasing its large digital display and control buttons.
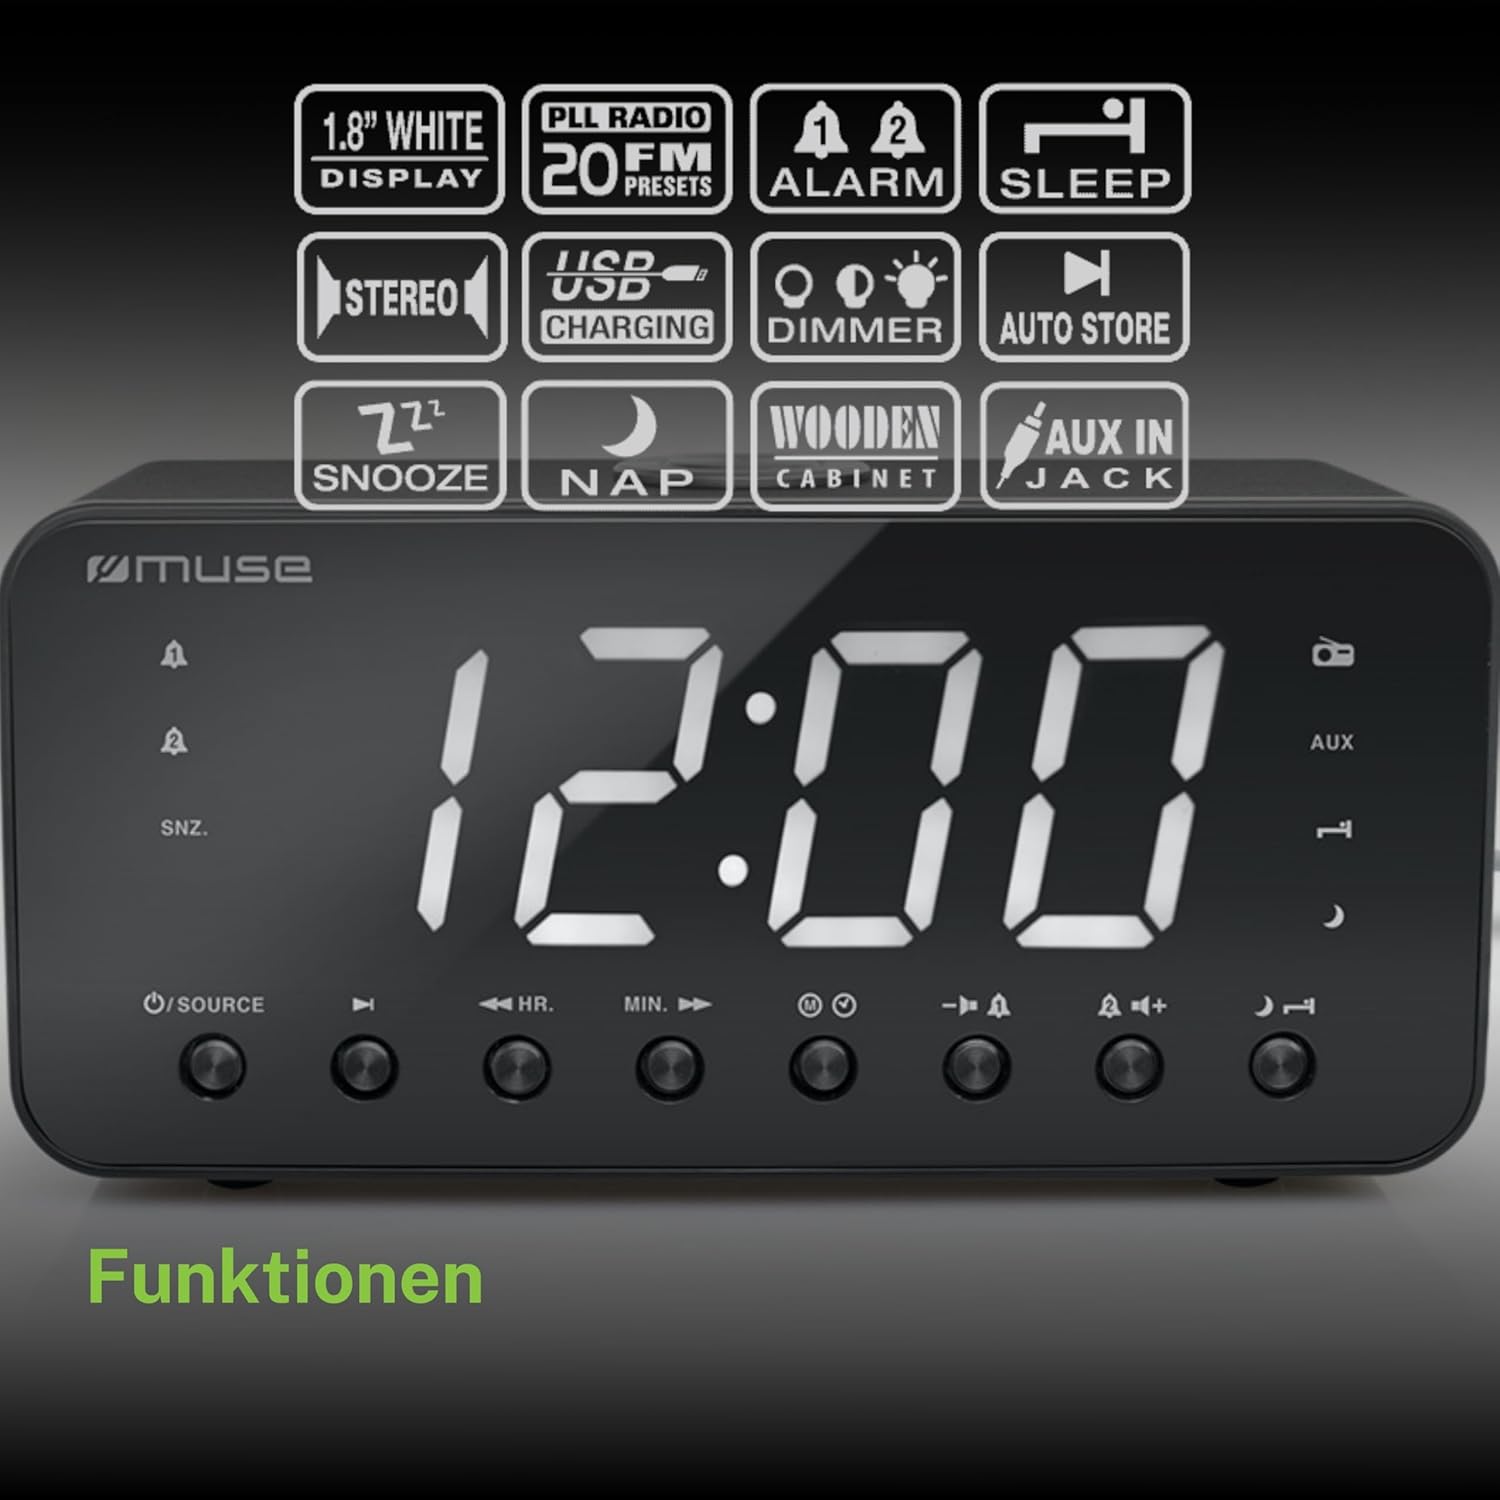
Figure 2: Diagram illustrating the key features and control buttons on the Muse M-192 CR Clock Radio, including the 1.8-inch white display, PLL FM radio with 20 presets, dual alarms, sleep, snooze, NAP functions, USB charging, dimmer, auto store, and AUX input jack.
Controles del panel frontal:
- Mostrar: Large 1.8-inch white LED display for time and status.
- Botón FUENTE: Selects between FM radio and AUX input.
- Botón HR (Hora): Adjusts hour for time and alarm settings.
- MIN (Minute) Button: Adjusts minute for time and alarm settings.
- Botón ALARMA 1: Sets and activates/deactivates Alarm 1.
- Botón ALARMA 2: Sets and activates/deactivates Alarm 2.
- Botón SNOOZE/DIMMER: Activates snooze during an alarm; adjusts display brightness (High/Low/Off) when not alarming.
- Botón de dormir: Sets the sleep timer for radio playback.
- Botón NAP: Sets a short nap alarm.
- Botones para subir / bajar el volumen: Ajusta el volumen del audio.
Conexiones del panel trasero:
- Toma AUX IN: Conecta dispositivos de audio externos.
- Puerto de carga USB: Provides power to charge compatible devices.
- Conector de entrada CC: Connects the AC adapter for power.
- Compartimento de la batería: Holds backup batteries.
5. Configuración
5.1 Conexión de alimentación
- Insert the small plug of the supplied AC adapter into the DC IN jack on the rear of the clock radio.
- Plug the AC adapter into a standard wall outlet. The display will light up.
5.2 Instalación de la batería de respaldo
The clock radio requires 2 x 1.5V AAA batteries (not included) for backup power. These batteries maintain the time and alarm settings during a power outage.
- Abra la tapa del compartimiento de la batería en la parte inferior de la unidad.
- Inserte dos pilas AAA, observando la polaridad correcta (+ y -) como se indica dentro del compartimento.
- Cierre bien la tapa del compartimento de la batería.
Note: Battery backup only preserves settings; the display will not illuminate and alarms will not sound during a power outage if only running on battery backup.
6. Instrucciones de funcionamiento
6.1 Configuración de la hora
- In standby mode (when the radio is off), press and hold the TIEMPO ESTABLECIDO button (if available, otherwise use HR/MIN directly or a dedicated time set button not explicitly listed but implied by HR/MIN). If no dedicated button, proceed to step 2.
- Presione el HR botón para ajustar la hora.
- Presione el MÍNIMO botón para ajustar los minutos.
- Release the buttons to confirm the time. The time will automatically set after a few seconds of inactivity.
6.2 Configuración de alarmas (Alarma 1 y Alarma 2)
The Muse M-192 CR features two independent alarms.
- Mantenga pulsado el ALARMA 1 Botón hasta que la hora de la alarma parpadee en la pantalla.
- Utilice el HR y MÍNIMO Botones para configurar la hora de alarma deseada.
- Presione el ALARMA 1 Presione nuevamente el botón para seleccionar la fuente de alarma: Zumbador or Radio.
- Presione el ALARMA 1 button a third time to confirm and activate Alarm 1. An alarm icon will appear on the display.
- Repita el proceso para ALARMA 2 utilizando el ALARMA 2 botón.
Para desactivar una alarma, presione el botón correspondiente ALARMA botón hasta que su icono desaparezca de la pantalla.
6.3 Función de repetición
Cuando suene una alarma, presione el SNOOZE / DIMMER Botón para silenciar temporalmente la alarma. La alarma volverá a sonar después de aproximadamente 9 minutos.
6.4 Función de suspensión
La función de suspensión te permite quedarte dormido escuchando la radio, que se apagará automáticamente después de un período establecido.
- Mientras la radio esté sonando, presione el botón DORMIR Presione el botón repetidamente para recorrer los tiempos de suspensión disponibles (por ejemplo, 90, 60, 30, 15 minutos o APAGADO).
- La radio se reproducirá durante la duración seleccionada y luego se apagará automáticamente.
6.5 NAP Function
The NAP function sets a short alarm for a specified duration.
- Presione el SIESTA button repeatedly to select a nap duration (e.g., 10, 20, 30, 60, 90, 120 minutes, or OFF).
- The alarm will sound after the selected duration.
6.6 Funcionamiento de la radio (FM)
- Presione el FUENTE Botón para seleccionar el modo de radio FM.
- Mantenga pulsado el HR or MÍNIMO button to automatically scan for the next available station. Briefly press to manually tune.
- Ajuste el volumen con el Subir/Bajar volumen botones.
Configuración de presintonías de radio:
The unit supports up to 20 FM radio presets.
- Tune to your desired FM station.
- Mantenga pulsado el PROGRAMAR button (often combined with a number or memory button, if not explicitly labeled, refer to the full manual for specific button). If no dedicated PRESET button, the HR/MIN buttons might serve this function in radio mode.
- Utilice el HR or MÍNIMO Botones para seleccionar un número preestablecido (P01-P20).
- Presione el PROGRAMAR Presione nuevamente el botón para guardar la estación.
- Para recuperar un ajuste preestablecido, presione brevemente el botón PROGRAMAR botón y luego use HR or MÍNIMO para seleccionar el número de presintonía deseado.
6.7 entrada auxiliar
Connect an external audio device (e.g., MP3 player, smartphone) to the AUX IN jack on the rear of the unit using a 3.5mm audio cable (not included).
- Connect one end of the audio cable to your external device's headphone jack.
- Connect the other end to the AUX IN jack on the clock radio.
- Presione el FUENTE button to select AUX mode. The display will show "AUX".
- Play audio from your external device. Adjust volume using the clock radio's Subir/Bajar volumen buttons and your external device's volume control.
6.8 Carga USB
The USB port on the rear of the unit can be used to charge compatible devices.

Figure 3: The Muse M-192 CR Clock Radio highlighting its jumbo white display and the USB charging port located on the rear of the unit.
- Connect your device's USB charging cable to the USB charging port on the clock radio.
- Ensure the clock radio is powered on.
- Su dispositivo debería comenzar a cargarse.
Note: The USB port is for charging only and does not support data transfer or audio playback.
6.9 Atenuador de pantalla
Adjust the brightness of the display to suit your preference.
- En el modo de espera, presione el botón SNOOZE / DIMMER botón repetidamente.
- Cycle through the brightness levels: High, Low, and Off.
7. Mantenimiento
- Limpieza: Limpie la unidad con un paño suave y seco. No utilice limpiadores abrasivos, ceras ni disolventes.
- Ventilación: Mantenga las aberturas de ventilación libres de polvo y residuos.
- Almacenamiento: Si va a almacenar la unidad durante un período prolongado, desconéctela del tomacorriente y retire las baterías de respaldo.
8. Solución de problemas
| Problema | Posible causa | Solución |
|---|---|---|
| Sin energía / Pantalla apagada | Adaptador de CA no conectado o defectuoso. | Asegúrese de que el adaptador de CA esté enchufado de forma segura a la unidad y a un tomacorriente de pared que funcione. |
| La alarma no suena | Alarma no activada o configurada incorrectamente. | Verify alarm time and source are set correctly and the alarm icon is visible on the display. |
| Mala recepción de radio FM | Antena no extendida o interferencia. | Extend the FM wire antenna fully. Reposition the unit to improve reception. |
| La pantalla es demasiado brillante/oscura | Es necesario ajustar la configuración del regulador de intensidad. | Presione el SNOOZE / DIMMER Botón para recorrer los niveles de brillo. |
9. Especificaciones

Figure 4: Technical drawing illustrating the dimensions of the Muse M-192 CR Clock Radio (226mm length, 86mm width, 108mm height).
- Modelo: M-192 CR
- Mostrar: 1.8-inch White Digital LED
- Radio: FM PLL Radio with 20 Presets
- Funciones de alarma: Dual Alarm, Snooze, Sleep, NAP
- Fuente de alarma: Radio o timbre
- Conectividad: AUX-in, USB Charging Port
- Fuerza: AC Power (Adapter Included), Battery Backup (2 x 1.5V AAA batteries, not included)
- Potencia de salida: 2 vatios
- Dimensiones (L x An x Al): 22.6 x 8.6 x 10.8 cm
- Peso: 800 gramos
10. Garantía y soporte
For detailed warranty information and technical support, please refer to the documentation provided with your purchase or contact your retailer. Keep your proof of purchase for any warranty claims.