1. Introducción
This instruction manual provides detailed guidance for the safe and efficient installation, operation, and maintenance of your Chamberlain T1EML-05 Basic Timer. Please read this manual thoroughly before attempting to install or use the device. Retain this manual for future reference.
The Chamberlain T1EML-05 is an embedded timer designed for various electrical applications, offering reliable time-based control for your devices.
2. Información importante de seguridad
ADVERTENCIA: Riesgo de descarga eléctrica.
- Desconecte siempre la alimentación del disyuntor o de la caja de fusibles antes de instalar o realizar mantenimiento al temporizador.
- Installation should only be performed by a qualified electrician or competent person in accordance with all local electrical codes and regulations.
- Do not use this device with loads exceeding its specified electrical ratings.
- Do not expose the timer to water or extreme moisture.
- Asegúrese de que todas las conexiones de cableado estén seguras y adecuadamente aisladas.
3. Contenido del paquete y producto terminadoview
3.1 Contenido del paquete
- 1 x Chamberlain T1EML-05 Basic Timer
- Manual de instrucciones (este documento)
3.2 producto másview
The Chamberlain T1EML-05 is a compact, embedded timer designed for flush-mounting. It features a digital display and three control buttons for easy programming.

Figura 1: Frente view of the Chamberlain T1EML-05 Basic Timer. This image displays the timer's white casing, a central square digital screen, and three rectangular buttons positioned horizontally below the screen. The buttons appear to have symbols for 'Up', 'Mode/Select', and 'Down'.
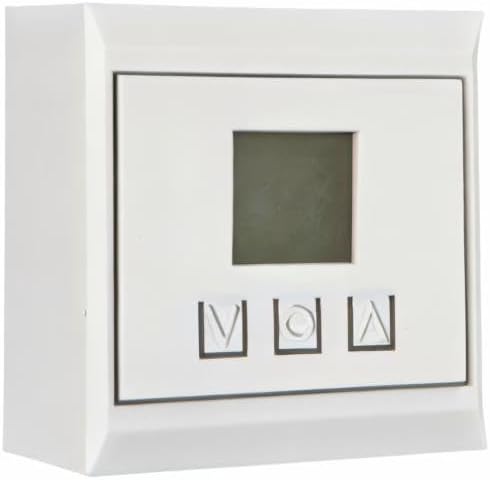
Figura 2: Side perspective view of the Chamberlain T1EML-05 Basic Timer. This image illustrates the depth of the timer unit, highlighting its design for embedded or flush installation within a wall or panel. The front face with the display and buttons is visible from an angle.
4. Instalación y configuración
This timer is designed for embedded installation. Ensure you have the necessary tools and electrical knowledge before proceeding. If unsure, consult a qualified electrician.
4.1 Herramientas necesarias
- Screwdriver (appropriate type for terminal screws)
- Pelacables
- Volumentage probador
- Mounting box (if not already present)
4.2 pasos de instalación
- Desconexión de energía: Localice el disyuntor o fusible que controla la alimentación del área de instalación y apáguelo. Verifique que la alimentación esté apagada usando un volímetro.tage probador.
- Preparar el cableado: Carefully remove the existing switch or outlet, if applicable. Strip the ends of the electrical wires (Live, Neutral, Load) to the appropriate length as indicated by the timer's terminals.
- Conectar cables: Connect the electrical wires to the corresponding terminals on the Chamberlain T1EML-05 timer. Refer to the wiring diagram provided with the product packaging (if available) or standard electrical wiring practices. Typically:
- Live (L) to Live input
- Neutral (N) to Neutral input
- Load (OUT) to the device being controlled
- Montar el temporizador: Gently push the wired timer into the wall mounting box. Secure it with screws provided (if applicable) or by tightening the mounting clamps.
- Instalar placa frontal: Attach the decorative faceplate (if separate) to the timer.
- Restaurar energía: Vuelva a encender la energía en el disyuntor o en la caja de fusibles.
- Prueba inicial: The timer display should illuminate. Proceed to the operating instructions.
5. Instrucciones de funcionamiento
The Chamberlain T1EML-05 timer features a digital display and three control buttons: Up (▲), Mode/Set (M), and Down (▼).
5.1 Configuración de la hora actual
- Mantenga pulsado el Mode/Set (M) Botón durante aproximadamente 3 segundos hasta que la pantalla de la hora comience a parpadear.
- Utilice el Arriba (▲) or Abajo (▼) Botones para ajustar la hora.
- Presione el Mode/Set (M) button again to move to the minutes setting. Use Arriba (▲) or Abajo (▼) para ajustar los minutos.
- Prensa Mode/Set (M) once more to confirm and exit the time setting mode.
5.2 Programación de ciclos de encendido y apagado
The timer allows you to set multiple ON/OFF programs. The exact number of programs may vary, but the general procedure is as follows:
- Presione el Mode/Set (M) button briefly to cycle through program settings (e.g., P1 ON, P1 OFF, P2 ON, P2 OFF, etc.).
- When you reach the desired program (e.g., "P1 ON"), the time will flash. Use the Arriba (▲) or Abajo (▼) buttons to set the desired ON time (hour and then minutes).
- Prensa Mode/Set (M) to confirm the ON time and move to the OFF time for that program (e.g., "P1 OFF").
- Utilice el Arriba (▲) or Abajo (▼) Botones para configurar el tiempo de apagado deseado.
- Repita este procedimiento para programas adicionales según sea necesario.
- Después de configurar todos los programas, presione el botón Mode/Set (M) botón hasta que la pantalla vuelva a la hora actual.
5.3 Anulación manual
To manually switch the connected device ON or OFF outside of the programmed schedule, briefly press the Arriba (▲) or Abajo (▼) button while the timer is displaying the current time. This will typically cycle through ON, OFF, and AUTO modes. Select AUTO for programmed operation.
6. Mantenimiento
The Chamberlain T1EML-05 Basic Timer requires minimal maintenance.
- Limpieza: Wipe the surface of the timer with a soft, dry cloth. Do not use abrasive cleaners, solvents, or excessive moisture, as these can damage the unit.
- Inspección: Periodically check the timer for any visible damage or loose connections. If any issues are found, disconnect power and consult a qualified electrician.
7. Solución de problemas
If you encounter issues with your Chamberlain T1EML-05 timer, refer to the following common problems and solutions:
| Problema | Posible causa | Solución |
|---|---|---|
| La pantalla del temporizador está en blanco. | No hay suministro de energía. | Check circuit breaker/fuse. Ensure wiring connections are secure. |
| El dispositivo conectado no se enciende ni se apaga según lo programado. | Incorrect program settings; Timer in manual mode; Wiring issue. | Verify program times. Ensure timer is in AUTO mode. Check load wiring. |
| Los botones no responden. | Fallo temporal del software; daño físico. | Try cycling power to the timer (turn off/on at breaker). If issue persists, contact support. |
| El tiempo es impreciso. | La hora inicial no está configurada correctamente. | Re-set the current time as per Section 5.1. |
If the problem persists after attempting these solutions, please contact Chamberlain customer support.
8. Especificaciones técnicas
| Característica | Detalle |
|---|---|
| Marca | Chambelán |
| Número de modelo | T1EML-05 |
| Color | Blanco |
| Material | Plástico |
| Dimensiones del producto (L x An x Al) | 19.5 x 8.5 x 8 cm |
| Peso del artículo | 12 gramos |
| Número de configuraciones | 14 (as per product specifications, likely referring to program slots) |
| International Article Number (EAN/UPC) | 04014243213833 |
| País natal | Alemania |
9. Información de garantía
Chamberlain products are manufactured to high-quality standards. This product is covered by a limited warranty against defects in materials and workmanship. The specific terms and duration of your warranty may vary by region and purchase date. Please retain your proof of purchase for warranty claims. For detailed warranty information, refer to the documentation included with your product or visit the official Chamberlain websitio.
10. Atención al cliente
If you have any questions, require technical assistance, or need to report a problem with your Chamberlain T1EML-05 Basic Timer, please contact Chamberlain customer support.
- Soporte en línea: Visita al Chamberlain oficial webSitio para preguntas frecuentes, recursos de soporte y formularios de contacto.
- Soporte telefónico: Consulte el embalaje de su producto o el de Chamberlain. websitio para números de contacto regionales.
When contacting support, please have your product model number (T1EML-05) and proof of purchase readily available.


