1. Instrucciones de seguridad
Please read all instructions carefully before using the NutriChef Vertical Countertop Oven. Retain this manual for future reference.
- Coloque siempre el horno sobre una superficie estable y resistente al calor.
- Do not touch hot surfaces. Use handles or knobs. Always use oven mitts or heat-resistant gloves when handling hot materials.
- Para protegerse contra descargas eléctricas, no sumerja el cable, los enchufes ni el aparato en agua u otro líquido.
- Es necesaria una estrecha supervisión cuando cualquier aparato sea utilizado por niños o cerca de ellos.
- Desenchufe el aparato del tomacorriente cuando no lo utilice y antes de limpiarlo. Deje que se enfríe antes de colocar o quitar piezas.
- No opere ningún aparato con un cable o enchufe dañado, o después de que el aparato funcione mal o haya sufrido algún daño de cualquier tipo.
- Do not use attachments not recommended by the appliance manufacturer, as they may cause injuries.
- No lo coloque sobre o cerca de un quemador de gas o eléctrico caliente, ni dentro de un horno caliente.
- Se debe tener mucho cuidado al mover un aparato que contenga aceite caliente u otros líquidos calientes.
- No utilice el aparato para otro uso que no sea el doméstico previsto.
- Asegúrese de que haya una ventilación adecuada alrededor del horno durante su funcionamiento.
2. Producto terminadoview
The NutriChef Vertical Countertop Oven PKRT97 is a versatile appliance designed for rotisserie, baking, broiling, and kebab functions. Its compact vertical design saves counter space while providing efficient cooking.

Figure 2.1: NutriChef Vertical Countertop Oven with various cooking functions.

Figure 2.2: The oven's compact design fits well on countertops.
Vídeo 2.1: Producto oficial terminadoview demonstrating the NutriChef Vertical Countertop Oven.
3. Componentes y accesorios
The NutriChef Vertical Countertop Oven comes with several accessories to enhance your cooking experience:
- Rotisserie Forks & Skewers (2)
- Rotating Kebab Rack (1)
- Bake Grill Racks (2)
- Bake Pan (1)
- Drip Tray Pan (1)
- Cable de alimentación

Figure 3.1: All included accessories for the oven.
4. Configuración
Siga estos pasos para la configuración inicial:
- Unpack the oven and all accessories from the packaging.
- Coloque el horno sobre una superficie plana, estable y resistente al calor, asegurando una ventilación adecuada alrededor de la unidad.
- Remove any protective films or packaging materials from the oven and accessories.
- Wash all removable accessories (rotisserie forks, skewers, racks, pans) with warm, soapy water, rinse thoroughly, and dry completely.
- Limpie el interior y exterior del horno con un anuncio.amp paño.
- Before first use, operate the oven empty for approximately 15 minutes at the highest temperature setting to burn off any manufacturing residues. Ensure the area is well-ventilated during this process.
5. Instrucciones de funcionamiento
The NutriChef Vertical Countertop Oven offers multiple cooking modes. Always ensure the oven is plugged into a grounded electrical outlet.
5.1 Función de asador
Use this function for roasting whole chickens, turkeys, or other large cuts of meat.
- Prepare your meat by seasoning it as desired. Secure the meat onto the rotisserie spit using the forks. Ensure the meat is balanced to allow for even rotation.
- Insert the rotisserie spit into the designated slots inside the oven. The heating elements should be in the vertical position for rotisserie cooking.
- Place the drip tray pan at the bottom of the oven to collect juices and fats.
- Close the tempered glass door gently.
- Establecer el MODO knob to 'Rotisserie'.
- Ajustar el TEMPERATURA knob to the desired temperature (e.g., 350-400°F for chicken).
- Establecer el MINUTERO knob to the desired cooking time. The oven will automatically turn off when the timer expires. For continuous operation, select 'Stay On'.
- Monitor the cooking progress through the glass door. Use a meat thermometer to ensure the internal temperature of the meat reaches safe levels.

Figure 5.1: The rotisserie function ensures even cooking with rapid air circulation.
Video 5.1: Demonstration of cooking a chicken using the rotisserie function.
5.2 Bake/Broil Function
For baking and broiling, the heating elements should be in the horizontal position.
- Adjust the heating elements to the horizontal position.
- Place the bake grill racks and/or bake pan into the desired slots.
- Place your food on the rack or in the pan.
- Cierre la puerta de vidrio templado.
- Establecer el MODO knob to 'Bake' or 'Broil'.
- Ajustar el TEMPERATURA knob to the desired temperature.
- Establecer el MINUTERO knob for the required cooking duration.
5.3 Kebab Function
Use the rotating kebab rack for perfectly cooked kebabs.
- Thread your meat and vegetables onto the kebab skewers.
- Attach the skewers to the rotating kebab rack.
- Insert the kebab rack into the oven, ensuring it is properly seated for rotation. The heating elements should be in the vertical position.
- Place the drip tray pan at the bottom.
- Cierre la puerta de vidrio templado.
- Establecer el MODO knob to 'Rotisserie'.
- Ajustar el TEMPERATURA knob to the desired temperature.
- Establecer el MINUTERO knob for the required cooking duration.
Video 5.2: Demonstration of using the rotisserie for cooking kebabs.
6. Limpieza y mantenimiento
La limpieza regular garantiza un rendimiento óptimo y la longevidad de su horno.
- Desenchufe siempre el horno de la toma de corriente y deje que se enfríe completamente antes de limpiarlo.
- Remove all removable accessories (rotisserie spit, forks, racks, pans, drip tray). Most accessories are dishwasher safe. For stubborn residue, soak in warm, soapy water before scrubbing.
- Limpie las superficies interiores del horno con adamp cloth and mild detergent. Avoid abrasive cleaners or scouring pads that could damage the non-stick coating or metal finish.
- Clean the tempered glass door with a soft cloth and glass cleaner.
- Limpia el exterior del horno con publicidad.amp paño. No sumerja la unidad principal en agua.
- Asegúrese de que todas las piezas estén completamente secas antes de volver a ensamblar y guardar el horno.
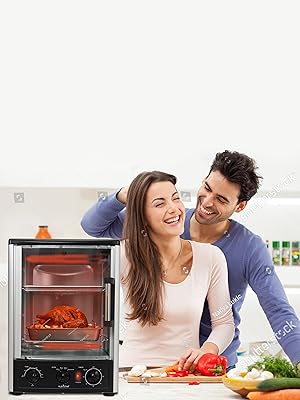
Figure 6.1: Cleaning the interior of the oven for hygiene and maintenance.
7. Solución de problemas
If you encounter any issues with your NutriChef Vertical Countertop Oven, refer to the following common problems and solutions:
- El horno no enciende: Ensure the power cord is securely plugged into a working outlet. Check if the timer knob is set to a cooking duration or 'Stay On'.
- Food not rotating (Rotisserie/Kebab): Verify that the rotisserie spit or kebab rack is correctly inserted into the motor drive and support bracket. Ensure the 'MODE' knob is set to 'Rotisserie'.
- Cocción irregular: Ensure food is properly centered and balanced on the rotisserie spit or kebab rack. Avoid overloading the oven. Check that the heating elements are clean and functioning.
- Humo excesivo: This may be due to accumulated grease or food particles. Clean the oven interior and drip tray thoroughly. Ensure the drip tray is in place during cooking.
- La puerta no cierra correctamente: Check for any obstructions preventing the door from closing fully. Ensure the door is properly aligned in its tracks.
Si el problema persiste después de intentar estas soluciones, comuníquese con el servicio de atención al cliente.
8. Especificaciones
| Característica | Detalle |
|---|---|
| Marca | NutriChef |
| Nombre del modelo | PKRT97 |
| Color | Negro |
| Dimensiones del producto (L x An x Al) | 13.5" de profundidad x 16.5" de ancho x 21.5" de alto |
| Peso del artículo | 13.2 libras |
| Fuente de poder | Adaptador de CA |
| Potencia del elemento calefactor | 1500 vatios |
| Rango de temperatura | 200 - 464 grados Fahrenheit |
| Tipo de control | Perilla |
| Tipo de material de la puerta | Vidrio templado |
| Número de estantes | 2 |
| Capacidad | 24 cuartos |

Figure 8.1: Detailed dimensions of the oven.
9. Información de garantía
This NutriChef appliance is covered by a manufacturer's warranty against defects in materials and workmanship. The warranty period typically lasts for one year from the date of purchase. Please retain your proof of purchase for warranty claims. For specific terms and conditions, refer to the warranty card included with your product or contact customer support.
10. Atención al cliente
For technical assistance, troubleshooting, or warranty inquiries, please contact NutriChef customer support:
- Visit the official NutriChef webSitio para preguntas frecuentes y recursos de soporte.
- Consulte la información de contacto proporcionada en el embalaje de su producto o en la tarjeta de garantía.


