1. Introducción
The Andonstar A1 Digital USB Microscope is a versatile tool designed for detailed observation and analysis. Featuring a CMOS sensor with 2 million pixels and 1-500 times magnification, it connects directly to your computer via USB, displaying images instantly. Its robust aluminum metal structure ensures durability, while 8 built-in LED lights provide optimal illumination. This microscope is ideal for examining coins, jewelry, circuit boards, and various other small objects, offering both photo and video capture capabilities.
2. Contenido del paquete
Al desembalar, asegúrese de que estén presentes todos los elementos siguientes:
- Andonstar A1 Digital USB Microscope Unit
- Metal Stand (Base, Vertical Rod, Horizontal Arm, Microscope Holder)
- Cable de conexión USB
- Mando a distancia
- Adjustable LED Lights (integrated into the stand)
- Various Nozzles/Accessories (Transparent Nozzle, Reflect Mirror, Cylindrical Nozzle, Black Nozzle)
- Manual de usuario (este documento)
- Professional Software (available for download)

Figure 1: Andonstar A1 Digital USB Microscope and its included accessories.
3. Instrucciones de configuración
- Ensamblar el soporte de metal: Securely attach the vertical rod to the base, then mount the horizontal arm and microscope holder. Ensure all knobs and screws are tightened to prevent wobble.
- Conecte la unidad del microscopio: Insert the microscope unit into the holder on the horizontal arm.
- Conectar a la computadora: Use the provided USB cable to connect the microscope to an available USB port on your Windows 10 or Mac computer.
- Instalar software: Download and install the professional software from the official Andonstar website. This software is necessary for viewing images, capturing photos/videos, and accessing advanced settings.
- Encendido: The microscope will typically power on automatically when connected to a computer. Ensure the computer recognizes the device.
4. Instrucciones de funcionamiento
4.1. PC Connection and Display
Once connected via USB, the microscope's live feed will be displayed on your computer screen through the installed software. This allows for a larger viewing area and easy sharing.
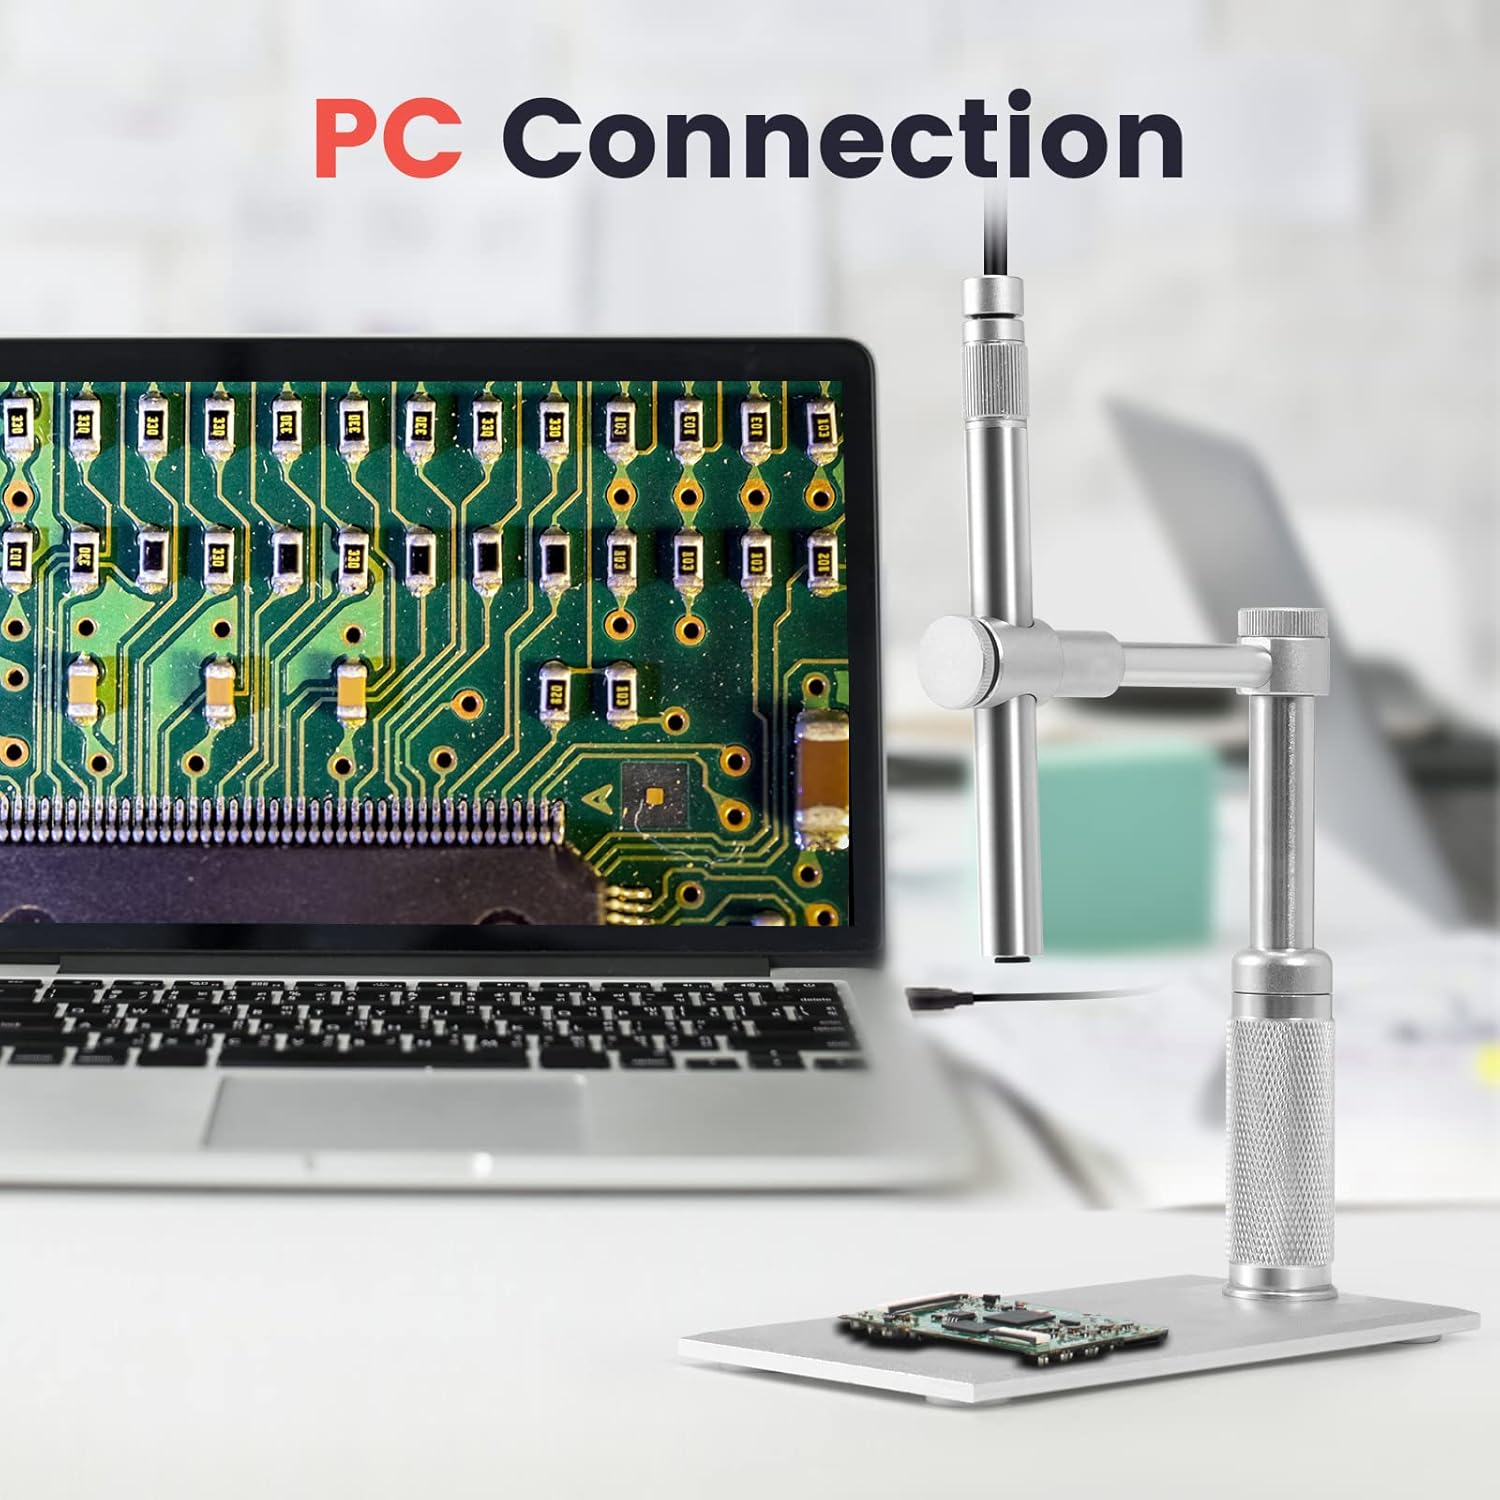
Figure 2: Microscope connected to a PC for live viewEn.
4.2. Magnification and Focus
The Andonstar A1 offers 1-500 times magnification. Adjust the microscope's height on the stand using the side knobs to change the focal distance. The optimal focal distance is between 5mm and 30mm. Use the silver knob on the microscope unit itself to fine-tune the image sharpness.

Figure 3: Adjusting focal distance for desired magnification.
4.3. Iluminación LED ajustable
The microscope features 8 built-in LED lights. These lights can be adjusted to provide optimal illumination for your observation object. Use the integrated controls on the USB cable to increase or decrease light intensity, ensuring a clear visual effect.

Figure 4: Controls for adjusting LED light intensity.
4.4. Captura de fotos y vídeos
Through the professional software on your computer, you can capture real-time video or still images of your observations. The remote control can be used to trigger these functions and navigate software menus without touching the microscope, minimizing vibrations.
4.5. Multi-function and Multi-purpose Observation
The microscope is suitable for various applications including coin inspection, jewelry observation, and circuit board maintenance. Its design allows for 360° omni-directional observation, enabling you to view objects from multiple angles. Various included nozzles can be attached for specific viewnecesidades de inversión.

Figura 5: Examples of accessories for diverse observation needs.

Figure 6: The microscope head can be adjusted 360 degrees for comprehensive viewEn.
5. Mantenimiento
- Limpieza de lentes: Use a soft, lint-free cloth or lens cleaning paper with a specialized lens cleaning solution to gently wipe the microscope lens. Avoid abrasive materials that could scratch the lens.
- Limpieza general: Wipe the microscope body and stand with a dry, soft cloth. Do not use harsh chemicals or solvents.
- Almacenamiento: Store the microscope in a dry, dust-free environment when not in use. Consider using a protective cover to prevent dust accumulation.
- Manejo: The microscope features a durable aluminum metal structure. However, avoid dropping or subjecting it to strong impacts to prevent damage to internal components.
6. Solución de problemas
- No Image on Computer:
- Asegúrese de que el cable USB esté conectado de forma segura tanto al microscopio como a la computadora.
- Verify that the professional software is correctly installed and running.
- Check your computer's device manager to see if the microscope is recognized.
- Imagen borrosa:
- Adjust the microscope's height on the stand to achieve the correct focal distance (5mm-30mm).
- Rotate the silver knob on the microscope unit for fine focus adjustment.
- Asegúrese de que el objeto sea viewed is stable and flat.
- Iluminación insuficiente:
- Adjust the intensity of the 8 built-in LED lights using the controls on the USB cable.
- Ensure the microscope is receiving adequate power (5V).
- El software no responde:
- Close and restart the software.
- Asegúrese de que su computadora cumpla con los requisitos mínimos del sistema para el software.
- Reinstale el software si el problema persiste.
7. Especificaciones
- Modelo: A1
- Marca: Andonstar
- Aumento: 1-500 veces
- Sensor: CMOS, 2 Million Pixels
- Fuente de luz: 8 Built-in LED Lights (adjustable)
- Distancia focal: 5 mm - 30 mm
- Material: Aluminio, metal
- Color: Plata
- Volumentage: 5 voltios
- Fuente de energía: Eléctrico con cable
- Dispositivos compatibles: Personal Computer (Windows 10, Mac with built-in camera)
- Descripción de la lente objetiva: Acromático
- Dimensiones del paquete: 6.75 x 4.5 x 2 pulgadas
- Peso del artículo: 13.6 onzas
- Código postal: 606034623965
8. Garantía y soporte
For warranty information, technical support, or any inquiries regarding your Andonstar A1 Digital USB Microscope, please refer to the documentation included in your package or visit the official Andonstar website. Customer support contact details are typically provided on the manufacturer's websitio.


