Introducción
This manual provides detailed instructions for the safe and effective use of your InnoGear 150ml Ultrasonic Essential Oil Diffuser, Model AD150. Please read this manual thoroughly before operation and retain it for future reference.

Image: The InnoGear 150ml Ultrasonic Essential Oil Diffuser, showcasing its compact design and LED light feature.
Información de seguridad
Para garantizar un funcionamiento seguro y evitar daños, observe las siguientes precauciones:
- Evite el contacto directo de la piel con aceites esenciales sin diluir.
- Mantenga el difusor fuera del alcance de los niños y las mascotas.
- Asegúrese de que haya una ventilación adecuada en el área donde se utilice el difusor.
- Always follow essential oil safety guidelines provided by the oil manufacturer.
- Do not exceed the maximum water fill line (150ml) to prevent water from entering the air outlet.
- Use only the provided power adapter (DQS121V-240050-U).
- The diffuser features a waterless auto shut-off system. It will automatically turn off when the water level is too low.
- Made of high-quality food-grade PP material, the diffuser is BPA-free and safe for use around babies and pregnant individuals.

Image: The diffuser is constructed from BPA-free materials and includes a waterless auto shut-off for safety.
Contenido del paquete
- 1 x InnoGear 150ml Aroma Diffuser
- 1 x DQS121V-240050-U Power Adapter
- 1 x Manual de usuario (este documento)
Instrucciones de instalación
- Coloque el difusor: Position the diffuser on a flat, stable surface away from direct sunlight or heat sources.
- Retire la cubierta: Levante suavemente la cubierta superior del difusor.
- Agregar agua: Fill the water tank with clean tap water up to the 150ml maximum fill line. Do not overfill.
- Agregue aceite esencial: Add 5-10 drops of your preferred essential oil directly into the water tank. Adjust the quantity based on personal preference and room size.
- Reemplace la cubierta: Securely place the top cover back onto the diffuser. Ensure it is properly aligned.
- Conecte la electricidad: Conecte el adaptador de corriente al puerto de entrada de energía del difusor y luego enchufe el adaptador a una toma de corriente eléctrica estándar.
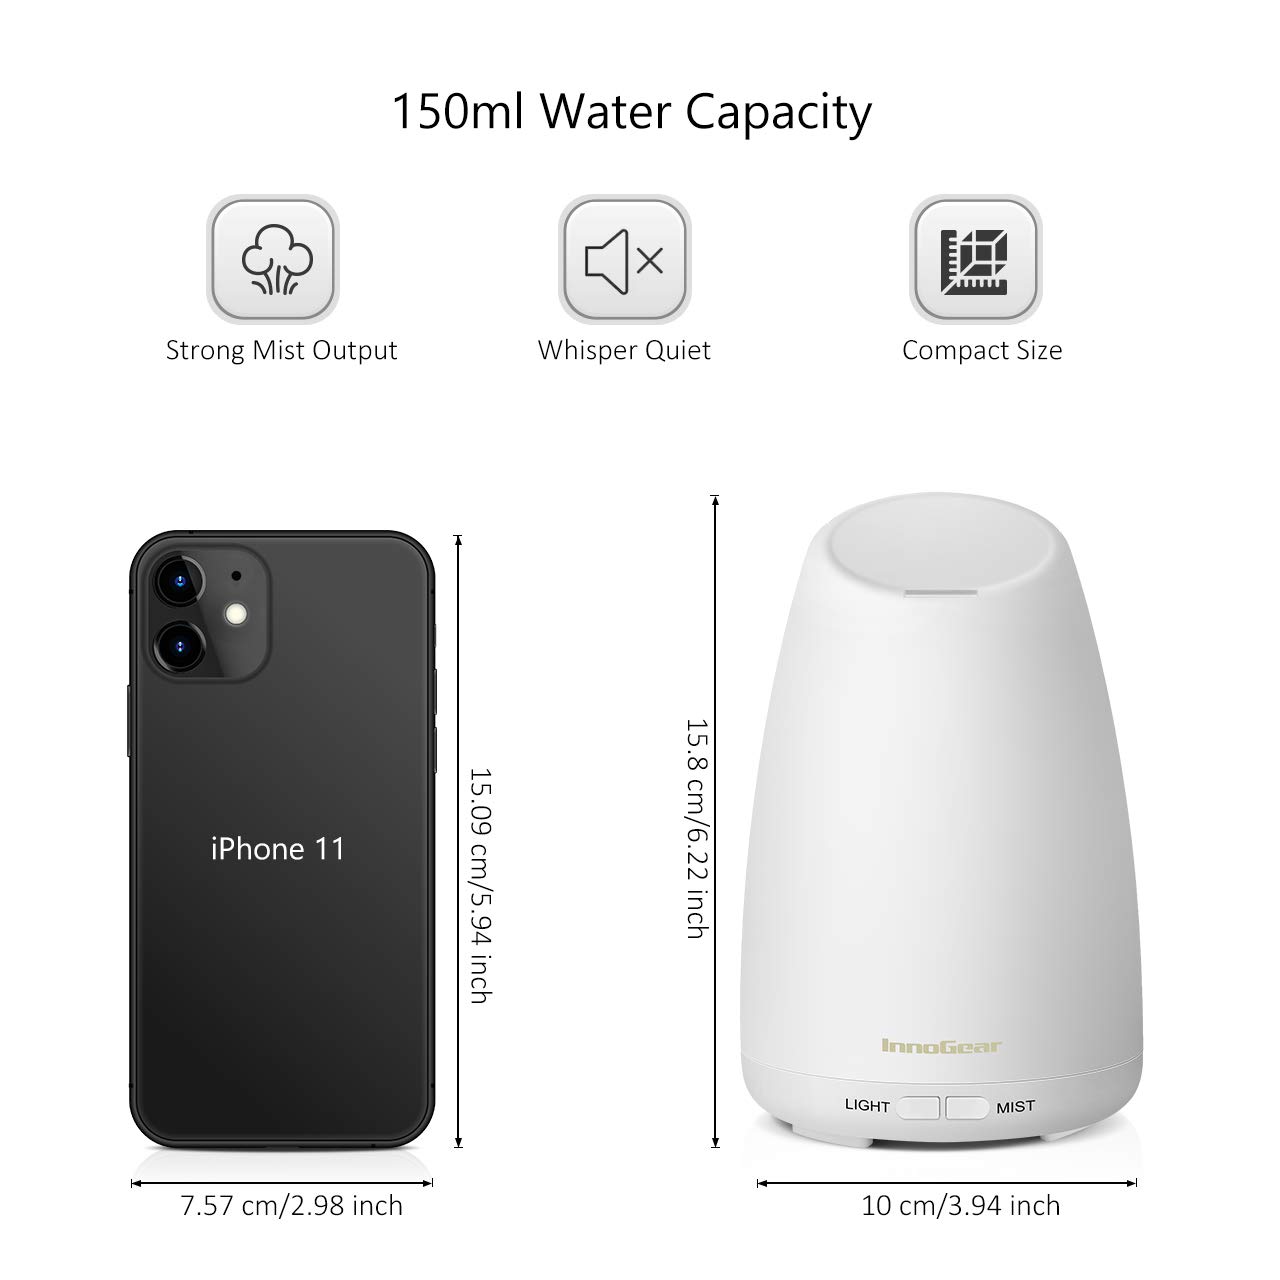
Image: The diffuser's compact size and 150ml water capacity, suitable for everyday use.
Instrucciones de funcionamiento
The diffuser features two buttons: LUZ y NEBLINA.
Control de niebla:
- Presione el NEBLINA botón una vez para Modo de niebla continua. The indicator light will be rojo. This mode provides mist continuously for approximately 5-6 hours.
- Presione el NEBLINA button a second time for Modo de niebla intermitente. The indicator light will be verde. This mode cycles mist on and off, extending operation to approximately 9-11 hours.
- Presione el NEBLINA button a third time to turn off the mist function.

Image: Mist button functionality, showing red light for continuous mist and green light for intermittent mist.
Control de luz:
- Presione el LUZ button once to turn on the 7-color cycling LED light.
- Presione el LUZ button again to fix the light to a specific color. Subsequent presses will cycle through the available colors.
- Mantenga pulsado el LUZ button for 2 seconds to turn off the light function.

Image: The diffuser providing soft light, ideal for nighttime use or as a night light.
Mantenimiento y limpieza
Regular cleaning helps maintain optimal performance and extends the lifespan of your diffuser. Clean the diffuser after every 3-5 uses, or when changing essential oils.
- Unplug and Empty: Disconnect the power adapter and remove the top cover. Carefully pour out any remaining water from the drain side of the tank. Avoid pouring water into the air outlet.
- Wipe the Tank: Use a cotton swab or soft cloth dampened with clean water to gently wipe the inside of the water tank and the ultrasonic plate.
- Limpiar la cubierta: Wipe the inside and outside of the top cover with a soft, damp paño.
- Secar completamente: Ensure all parts are completely dry before reassembling or storing the diffuser.
Importante: Do not use corrosive detergents or harsh chemicals to clean the diffuser. Do not immerse the diffuser base in water.

Image: Visual instructions for cleaning the diffuser, emphasizing proper water drainage and wiping.
Solución de problemas
| Problema | Posible causa | Solución |
|---|---|---|
| No hay niebla o la salida de niebla es baja. |
|
|
| El difusor se apaga automáticamente. |
|
|
| Sin electricidad ni luces. |
|
|
Presupuesto
| Número de modelo | Año 150 d.C. |
| Capacidad del tanque de agua | 150 ml |
| Material | Upper parts PP + lower base ABS (BPA-free) |
| Potencia de entrada | CA 100-240 V 50/60 Hz |
| Tecnología ultrasónica | 2.4 MHz |
| Dimensiones | Approximately 6.22 inches (15.8 cm) height, 3.94 inches (10 cm) diameter |
| Peso | Aproximadamente 11.68 onzas |
| Características especiales | 7-Color LED Night Lights, Waterless Auto Shut-Off |
Garantía y soporte
For product support, warranty information, or inquiries, please visit the official InnoGear webSitio web o contacte con el servicio de atención al cliente. Conserve el recibo de compra para reclamaciones de garantía.
Puede encontrar más información y datos de contacto en el InnoGear Store on Amazon.


