1. Introducción
This manual provides essential information for the safe and efficient installation, operation, and maintenance of your LUCECO Slimline Outdoor LED Floodlight. Please read this manual thoroughly before installation and keep it for future reference.
1.1 Información de seguridad
- Desconecte siempre la alimentación antes de realizar cualquier instalación o mantenimiento.
- La instalación debe ser realizada por un electricista calificado de acuerdo con todos los códigos eléctricos locales y nacionales.
- No intente modificar ni desmontar el dispositivo. No contiene piezas que el usuario pueda reparar.
- Asegúrese de que el accesorio esté montado de forma segura para evitar que se caiga.
- Evite la exposición directa de los ojos a la fuente de luz cuando esté iluminada.
- This product is designed for outdoor use and is UL outdoor listed for safety.
2. Producto terminadoview y características
The LUCECO Slimline Outdoor LED Floodlight is a compact yet powerful lighting solution designed for durability and versatility.
2.1 Características principales
- Construcción robusta: Características enamper-proof die-cast aluminum housing and tempered glass for enhanced durability.
- Super-Slim Design: Es de baja calidadfile design integrates seamlessly with various architectural styles.
- Montaje versátil: Suitable for junction box or conduit mounting (mounting plate not included).
- Luz ajustable: Equipped with a 180-degree adjustable mount for precise light direction.
- Sensor Compatible: Designed to work with most PIR motion sensors for automated lighting.
- Eficiencia energética: Provides generous lumen output with high energy efficiency.
- Temperatura de color: 5000K neutral white color temperature.
2.2 Producto Views

Figura 1: Frente view of the LUCECO Slimline Outdoor LED Floodlight, showcasing its compact design and robust housing.

Figure 2: Diagram highlighting key features including the heavy-duty heat sink, toolless 180-degree adjustable mount, tempered glass, slimline profiley roscas NPT de 1/2 pulgada.
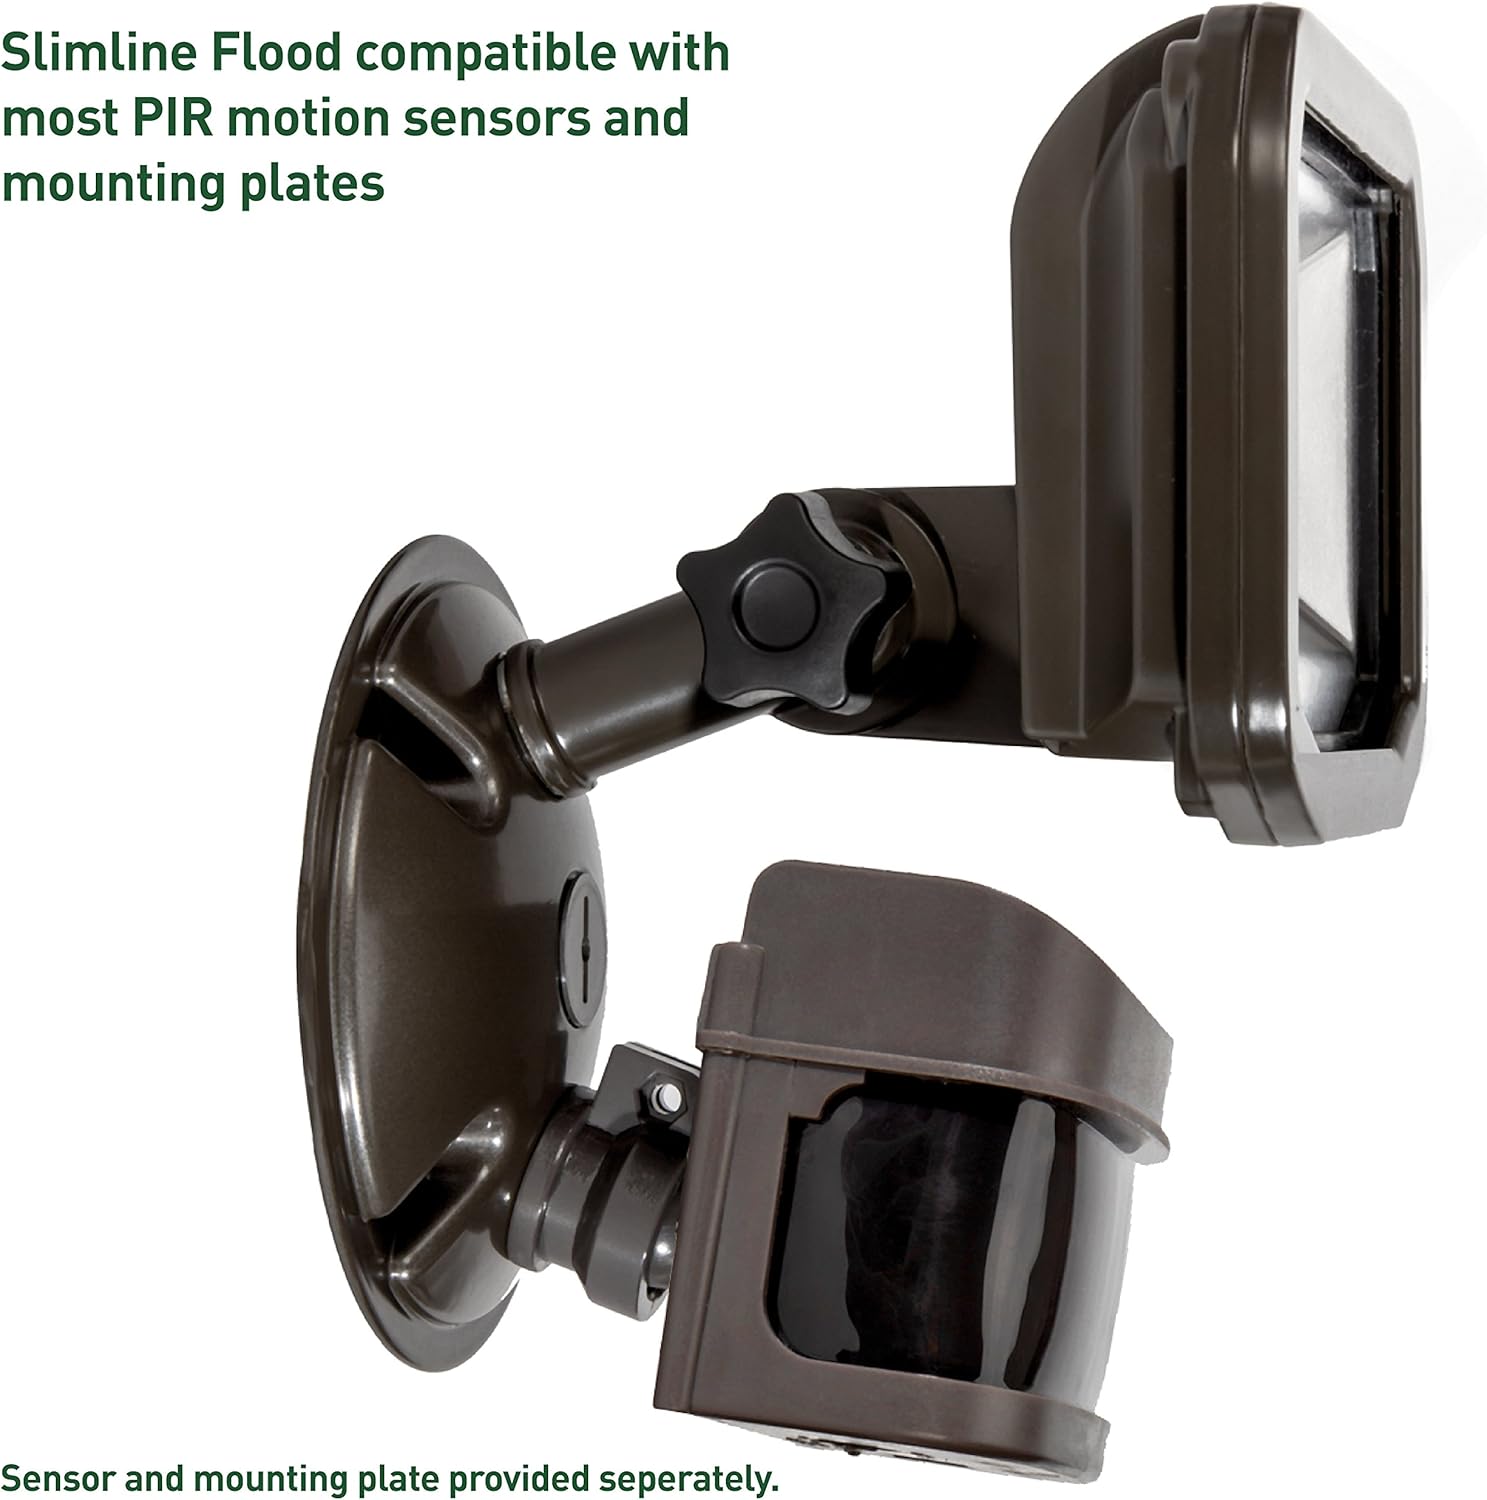
Figure 3: The floodlight shown with a compatible PIR motion sensor and mounting plate (sensor and plate sold separately), demonstrating its adaptability.
3. Instrucciones de instalación
Before beginning installation, ensure all necessary tools and components are available. It is recommended that installation be performed by a qualified electrician.
3.1 Tools and Materials (Not Included)
- Juego de destornilladores
- Pelacables
- Cinta aisladora
- Mounting plate (if not using direct conduit mount)
- PIR motion sensor (optional)
3.2 opciones de montaje
The floodlight offers versatile mounting options:
- Montaje de la caja de conexiones:
- Asegúrese de que la energía esté apagada en el disyuntor.
- Attach the appropriate mounting plate (not included) to your existing junction box.
- Thread the floodlight's 1/2-inch NPT stem into the mounting plate.
- Make electrical connections: connect the black wire from the fixture to the live wire, the white wire to the neutral wire, and the green/ground wire to the ground wire from your electrical supply. Secure connections with wire nuts.
- Adjust the floodlight angle using the 180-degree adjustable mount.
- Secure all connections and ensure the fixture is stable.
- Montaje de conductos:
- Asegúrese de que la energía esté apagada en el disyuntor.
- Directly thread the floodlight's 1/2-inch NPT stem into a compatible conduit fitting.
- Follow the electrical connection steps as described for junction box mounting.
- Adjust the floodlight angle and secure the fixture.
Importante: Always ensure proper grounding to prevent electrical shock.

Figura 4: Example of the floodlight installed on the exterior of a building, demonstrating its discreet profile and effective illumination.
4. Instrucciones de funcionamiento
Once installed, operating the LUCECO Slimline Outdoor LED Floodlight is straightforward.
- Encendido: After installation, restore power at the circuit breaker. The floodlight will illuminate.
- Ajustar ángulo: Loosen the knob on the adjustable mount, position the floodlight to the desired angle (up to 180 degrees), and then tighten the knob securely.
- Sensor Operation (if applicable): If connected to a PIR motion sensor, the floodlight will operate according to the sensor's settings (e.g., turn on when motion is detected, turn off after a set duration). Refer to your motion sensor's manual for specific programming instructions.
5. Mantenimiento
The LUCECO Slimline Outdoor LED Floodlight is designed for minimal maintenance.
- Limpieza: Limpie periódicamente la lente de vidrio templado y la carcasa con un paño suave.amp cloth to remove dirt and debris. Do not use abrasive cleaners or solvents. Ensure power is off before cleaning.
- Inspección: Annually inspect the fixture and wiring for any signs of damage or wear. If damage is found, disconnect power and consult a qualified electrician for repair or replacement.
- No hay piezas que el usuario pueda reparar: The LED light source is integrated and not replaceable. Do not attempt to open the fixture.
6. Solución de problemas
Si tiene problemas con su reflector, consulte los siguientes problemas y soluciones comunes:
| Problema | Posible causa | Solución |
|---|---|---|
| La luz no se enciende. | No power supply; loose wiring; faulty circuit breaker; sensor issue (if applicable). | Check circuit breaker. Ensure all wiring connections are secure. If using a sensor, check its settings and functionality. Consult a qualified electrician if issues persist. |
| La luz parpadea o es tenue. | Unstable power supply; loose wiring; incompatible dimmer (not recommended for this LED fixture). | Verify stable power. Check wiring connections. This fixture is not designed for use with dimmers. |
| Light stays on constantly (with sensor). | Sensor sensitivity too high; sensor in test mode; continuous motion detected. | Adjust sensor sensitivity. Check sensor mode. Ensure no constant motion is triggering the sensor. |
7. Especificaciones
| Atributo | Valor |
|---|---|
| Marca | LUCECO |
| Nombre del modelo | 10 W |
| Número de pieza | LSFLBZGL6AG150N-EE. UU. |
| Estilo | 10 W |
| Formulario de lámpara | Foco |
| Uso en interiores y exteriores | Exterior |
| Fuente de poder | Eléctrico con cable |
| Tipo de fuente de luz | CONDUJO |
| Quétage | 10 vatios |
| Brillo | 600 lúmenes |
| Temperatura de color | 5000 Kelvin (blanco neutro) |
| Material | Aluminio, vidrio |
| Característica especial | Tempered-Glass |
| Tipo de montaje | Wall Mount (via NPT threads) |
| Peso del artículo | 1.2 libras |
| Dimensiones del producto | 5.2 x 3.5 x 5.3 pulgadas |
| Listado UL | UL outdoor listed |
| Número de identificación comercial global (GTIN) | 05050765127738 |
8. Información de garantía
This LUCECO Slimline Outdoor LED Floodlight is covered by a Garantía de 3 año sin complicaciones a partir de la fecha de compra. Esta garantía cubre defectos de materiales y mano de obra en condiciones normales de uso.
The warranty does not cover damage resulting from improper installation, misuse, abuse, accidents, unauthorized repairs or modifications, or acts of nature. For warranty claims, please retain your proof of purchase.
9. Atención al cliente
If you have any questions, require technical assistance, or need to make a warranty claim, please contact LUCECO customer service.
Our customer service team is available to help you Monday through Friday.
Please visit the official LUCECO website for contact details or refer to the product packaging for specific support information.


