1. Información importante de seguridad
Observe siempre las siguientes precauciones de seguridad cuando trabaje en su vehículo:
- Disconnect the vehicle's battery before beginning any electrical work to prevent accidental starting or electrical shorts.
- Use equipo de protección personal adecuado, incluidas gafas de seguridad y guantes.
- Asegúrese de que el vehículo esté apoyado de forma segura sobre soportes de gato o un elevador antes de trabajar debajo de él.
- Allow the engine and exhaust components to cool down before handling to avoid burns.
- Consulte con un mecánico calificado si no está seguro acerca de alguno de los pasos de instalación.
2. Producto terminadoview
The JEGS Heavy-Duty Mini Starter, Model 10009, is designed for high-performance applications in Small Block and Big Block Chevy engines. This Hitachi-style mini starter offers a compact design and increased cranking power compared to many factory units.

Imagen 2.1: Frente view of the JEGS Heavy-Duty Mini Starter, Model 10009.
Características principales:
- Designed for Small Block and Big Block Chevy engines with a straight mounting configuration.
- Compatible with both 153-tooth and 168-tooth flywheels and flexplates, featuring an adjustable mounting block.
- Capable of cranking engines with up to a 14:1 compression ratio.
- Lighter in weight than many factory starters, weighing approximately 12 lbs.
- Features a 3.7:1 gear reduction for enhanced torque.
- Rated at 1.4kW (1.9 HP).
3. Configuración e instalación
3.1 Compatibilidad
- This starter fits all Small Block Chevy engines, with the exception of LS series engines (LS1, LS6, 4.8L, 5.3L, and 6.0L).
- It also fits Big Block Chevy engines.
- Ensure your engine uses a straight mounting configuration.
3.2 Herramientas necesarias (típicas)
- Juego de llaves de tubo
- llaves de boca
- Limpiador de terminales de batería
- Llave dinamométrica
- gafas de seguridad y guantes
3.3 pasos de instalación
- Prepare el vehículo: Park the vehicle on a level surface. Engage the parking brake. Disconnect the negative (-) battery cable first, then the positive (+) battery cable.
- Acceder al Starter: Depending on your vehicle, you may need to lift it and secure it with jack stands. Locate the existing starter motor.
- Quitar el motor de arranque antiguo: Disconnect all electrical connections from the old starter. Note their positions for reinstallation. Remove the mounting bolts securing the old starter to the engine block. Carefully remove the old starter.
- Inspeccionar la superficie de montaje: Clean the engine block's starter mounting surface to ensure proper contact and alignment.
- Instalar nuevo Starter:

Image 3.1: Close-up of the starter's mounting block and drive gear.
Position the JEGS Mini Starter against the engine block. The starter mounting flange must be in the correct position for the starter to engage properly with the flywheel/flexplate. Use the provided shims (Image 3.2) as necessary to achieve proper gear mesh. Insert the mounting bolts (Image 3.2) and tighten them to the manufacturer's specified torque.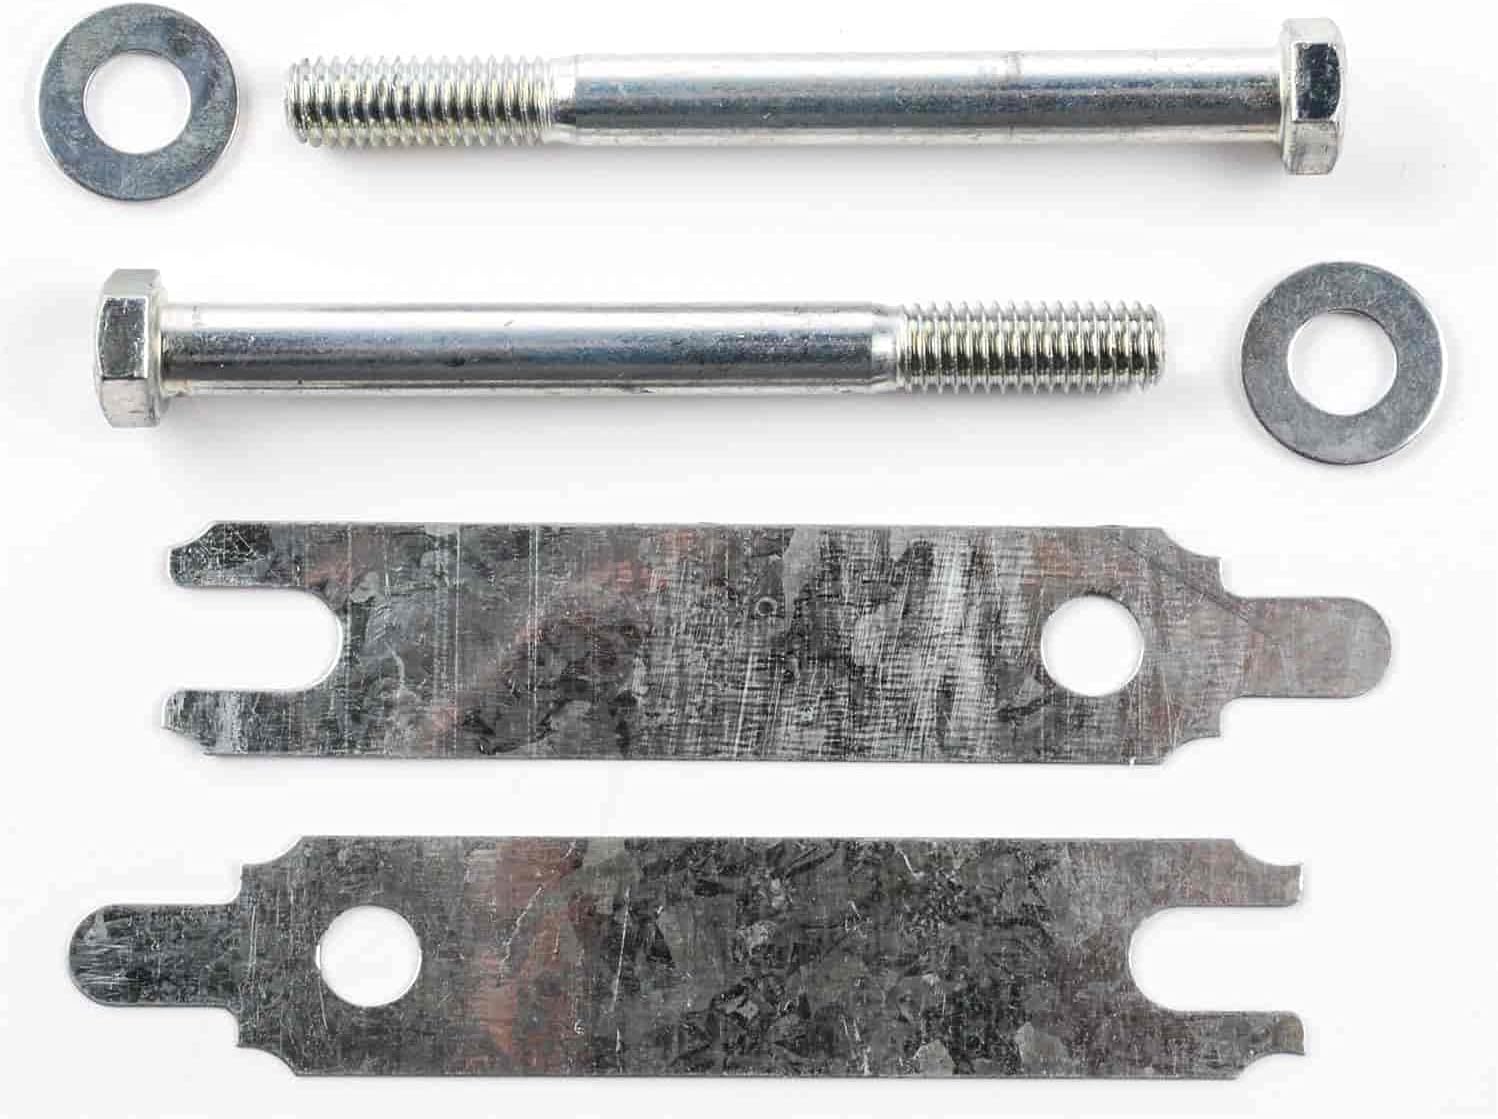
Image 3.2: Included installation hardware, including mounting bolts and shims.
- Conecte el cableado eléctrico:Connect the main battery cable to the large terminal (typically the positive terminal). Connect the solenoid trigger wire(s) to the appropriate smaller terminal(s) (Image 3.3). Ensure all connections are clean and secure.

Image 3.3: Electrical terminals on the JEGS Mini Starter.
Nota especial: If your GM vehicle was originally equipped with a breaker point ignition, you may require the use of an "R" Terminal Diode Kit (JEGS Part No. 555-10038) to ensure proper operation with this aftermarket mini starter. - Vuelva a conectar la batería: Vuelva a conectar primero el cable positivo (+) de la batería y luego el cable negativo (-).
- Operación de prueba: Start the engine and listen for any unusual noises. If the starter grinds or makes excessive noise, immediately shut off the engine and re-check the starter's alignment and shimming.
4. Instrucciones de funcionamiento
Once properly installed, the JEGS Heavy-Duty Mini Starter operates like any standard automotive starter. To start your engine:
- Asegúrese de que el vehículo esté en estacionamiento o punto muerto.
- Turn the ignition key to the "START" position.
- Hold the key in the "START" position until the engine begins to run, then release the key. Avoid prolonged cranking to prevent overheating the starter.
5. Mantenimiento
Regular maintenance helps ensure the longevity and reliable performance of your starter:
- Comprobar conexiones: Periodically inspect all electrical connections to the starter for tightness and corrosion. Clean any corroded terminals.
- Inspeccionar el montaje: Ensure the starter mounting bolts remain tight. Loose mounting can lead to improper gear mesh and premature wear.
- Estado de la batería: A healthy battery is crucial for starter performance. Ensure your vehicle's battery is fully charged and in good condition.
- Engine Condition: Address any engine issues that make starting difficult, as this can put undue strain on the starter.
6. Solución de problemas
If you experience issues with your starter, consult the table below for common problems and potential solutions:
| Problema | Posible causa | Solución |
|---|---|---|
| Starter does not engage or click | Dead or low battery; Loose or corroded battery cables; Faulty ignition switch; Faulty starter solenoid; Open circuit in wiring. | Check battery charge and terminals; Inspect and tighten all wiring connections; Test ignition switch and solenoid. |
| Starter clicks but does not crank engine | Low battery charge; Loose battery cables; Internal starter motor issue; Engine seized. | Charge or replace battery; Clean and tighten battery cables; Inspect starter motor; Check engine for seizure. |
| El motor de arranque gira lentamente | Low battery charge; Corroded battery cables; High resistance in starter circuit; Incorrect starter for application. | Charge or replace battery; Clean battery terminals and cables; Inspect wiring for damage; Verify starter compatibility. |
| Grinding noise during cranking | Improper starter shimming; Damaged flywheel/flexplate teeth; Loose starter mounting bolts. | Re-check starter shimming and alignment; Inspect flywheel/flexplate; Tighten mounting bolts. |
| Starter continues to run after engine starts | Faulty starter solenoid; Sticking ignition switch. | Replace starter solenoid; Inspect or replace ignition switch. |
7. Especificaciones
| Especificación | Valor |
|---|---|
| Número de modelo | 10009 |
| Marca | JEGS |
| Tipo | Heavy-Duty Mini Starter (Hitachi-Style) |
| Compatibilidad del motor | Small Block Chevy (excluding LS series), Big Block Chevy |
| Flywheel/Flexplate Compatibility | 153-tooth and 168-tooth |
| Configuración de montaje | Derecho |
| Reducción de engranajes | 3.7:1 |
| Compression Ratio Rating | Hasta 14:1 |
| Potencia de salida | 1.4 kW (1.9 HP) |
| Peso del artículo | Aproximadamente 11.91 libras |
| Dimensiones del producto (L x An x Al) | 10.3 x 6.3 x 6.3 pulgadas |
| Material | Metal |
| Código Postal | 889944003243 |
8. Garantía y soporte
For warranty information or technical support regarding your JEGS Heavy-Duty Mini Starter, please contact JEGS customer service directly. Keep your purchase receipt and product model number (10009) available when contacting support.
Normalmente puede encontrar información de contacto en el JEGS oficial websitio o a través de su punto de compra original.


