1. Introducción
This manual provides comprehensive instructions for the safe and efficient operation of your MasterChef 2-Pound Programmable Bread Maker, Model MTF-BRM-764. Please read all instructions carefully before first use and retain this manual for future reference.

Image 1.1: MasterChef Bread Maker, Model MTF-BRM-764, shown with its packaging and a freshly baked, sliced loaf of bread.
2. Instrucciones de seguridad importantes
Al utilizar aparatos eléctricos, siempre se deben seguir precauciones básicas de seguridad para reducir el riesgo de incendio, descarga eléctrica y lesiones a las personas, incluidas las siguientes:
- Lea todas las instrucciones antes de utilizar la panificadora.
- No toque superficies calientes. Utilice asas o perillas.
- Para protegerse contra descargas eléctricas, no sumerja el cable, los enchufes ni el aparato en agua ni en ningún otro líquido.
- Es necesaria una estrecha supervisión cuando cualquier aparato sea utilizado por niños o cerca de ellos.
- Desenchufe el aparato del tomacorriente cuando no lo utilice y antes de limpiarlo. Deje que se enfríe antes de colocar o quitar piezas.
- No opere ningún aparato con un cable o enchufe dañado, o después de que el aparato funcione mal o haya sufrido algún daño de cualquier tipo.
- El uso de accesorios no recomendados por el fabricante del aparato puede provocar lesiones.
- No utilizar en exteriores.
- No deje que el cable cuelgue del borde de la mesa o mostrador, ni que toque superficies calientes.
- No lo coloque sobre o cerca de un quemador de gas o eléctrico caliente, ni dentro de un horno caliente.
- Se debe tener mucho cuidado al mover un aparato que contenga aceite caliente u otros líquidos calientes.
- Para desconectar, gire cualquier control a la posición "apagado" y luego retire el enchufe del tomacorriente de pared.
- No utilice el aparato para ningún fin distinto del previsto.
3. Producto terminadoview
The MasterChef Bread Maker is designed for ease of use, featuring 19 programmable settings, a 13-hour delay timer, and a viewing window to monitor the baking process. It can produce 2-pound loaves with adjustable crust settings.

Image 3.1: Key features of the MasterChef Bread Maker, including its 2-pound loaf capacity, 13-hour delay timer, viewing window, keep warm function, included measuring cup and scoop, and 19 programmable settings.
Componentes:
- Unidad principal con panel de control y pantalla LCD
- Tapa con Viewventana de ing
- Bandeja para hornear (desmontable)
- Paleta de amasar
- Taza medidora
- Cuchara medidora
- Gancho para retirar la paleta amasadora

Image 3.2: The MasterChef Bread Maker with its lid open, showing the removable baking pan, measuring cup, measuring spoon, and kneading paddle removal hook.
4. Configuración y primer uso
- Desembalaje: Retire con cuidado la panificadora y todos los accesorios del embalaje. Conserve el embalaje para su posterior almacenamiento o transporte.
- Limpieza: Before first use, wash the baking pan and kneading paddle with warm, soapy water. Rinse thoroughly and dry completely. Wipe the interior and exterior of the main unit with a damp paño. No sumerja la unidad principal en agua.
- Colocación: Place the bread maker on a stable, flat, heat-resistant surface, ensuring adequate ventilation around the appliance.
- Quemado inicial (opcional): It is recommended to run the "Bake" program (Program 12) for 10 minutes without ingredients to burn off any manufacturing residues. Ensure the area is well-ventilated during this process. Allow the unit to cool completely afterward.
- Conexión de energía: Conecte el cable de alimentación a una toma de corriente con conexión a tierra. La pantalla se iluminará, indicando que la unidad está lista para usarse.
5. Instrucciones de funcionamiento
5.1 Funcionamiento básico
- Insertar paleta de amasado: Coloque la paleta amasadora sobre el eje dentro del molde para hornear.
- Añadir ingredientes: Add ingredients to the baking pan in the order specified by your recipe (typically liquids first, then dry ingredients, with yeast last). Ensure ingredients are measured accurately using the provided measuring cup and spoon.
- Coloque la bandeja para hornear: Inserte el molde en la panificadora y gírelo en sentido horario hasta que encaje. Cierre la tapa.
- Seleccionar programa: Press the "MENU" button repeatedly to cycle through the 19 available programs until your desired program is selected. The program number and corresponding time will appear on the LCD display.
- Seleccionar el color de la corteza: Press the "COLOR" button to choose your preferred crust color: Light, Medium, or Dark.
- Comience a hornear: Press the "START/STOP" button to begin the selected program. The bread maker will automatically perform kneading, rising, and baking cycles.
- Fin de ciclo: Once the program is complete, the bread maker will beep and automatically switch to the "Keep Warm" function for up to 60 minutes.
- Quitar el pan: Press and hold the "START/STOP" button for 3 seconds to stop the "Keep Warm" function. Unplug the appliance. Using oven mitts, carefully remove the baking pan by turning it counter-clockwise and lifting it out. Invert the pan onto a wire rack to release the bread. If the kneading paddle remains in the bread, use the provided hook to remove it. Allow bread to cool before slicing.
5.2 Program Settings (19 Options)
The MasterChef Bread Maker offers 19 distinct programs for various bread types and other preparations:
- BÁSICO: Para panes blancos y mixtos, utilizando principalmente harina de fuerza.
- FRANCÉS: Para panes ligeros elaborados con harina fina.
- INTEGRAL: Para panes con un alto porcentajetage de harina integral.
- RÁPIDO: For quick bread recipes that do not require a long rise time.
- DULCE: Para panes con alto contenido en azúcar, como el brioche.
- SIN GLUTEN: Para recetas de pan sin gluten.
- PAN DE ARROZ: For breads incorporating rice flour.
- EMPAREDADO: Para un pan de sándwich ligero y esponjoso.
- MILK BREAD: For breads enriched with milk.
- AMASAR: For kneading dough only, without baking.
- MASA: For preparing dough for rolls, pizza, or pastries.
- HORNEAR: Para hornear masa preparada previamente o para tiempo de horneado adicional.
- PASTEL: Para mezclar y hornear pasteles.
- MERMELADA: Para hacer mermeladas caseras.
- YOGUR: For preparing yogurt.
- STICKY RICE: Para preparar arroz glutinoso.
- RICE WINE: Para hacer vino de arroz.
- DESCONGELAR: Para descongelar ingredientes.
- STIR-FRY: For stir-frying ingredients (use with caution and appropriate recipes).
5.3 Función de temporizador de retardo
The delay timer allows you to program the bread maker to start baking at a later time, up to 13 hours in advance. This is useful for having fresh bread ready at a specific time.
- Añade los ingredientes a la bandeja para hornear.
- Select your desired program and crust color.
- Press the "+" or "-" buttons to adjust the delay time. The displayed time includes the baking program duration. For example, if you want bread in 8 hours and the program takes 3 hours, set the delay to 8:00.
- Press "START/STOP" to activate the delay timer. The timer will count down, and the bread maker will start automatically when the set time is reached.
Caution: Do not use the delay timer with recipes containing highly perishable ingredients like milk, eggs, or fresh fruit, as this may lead to spoilage.
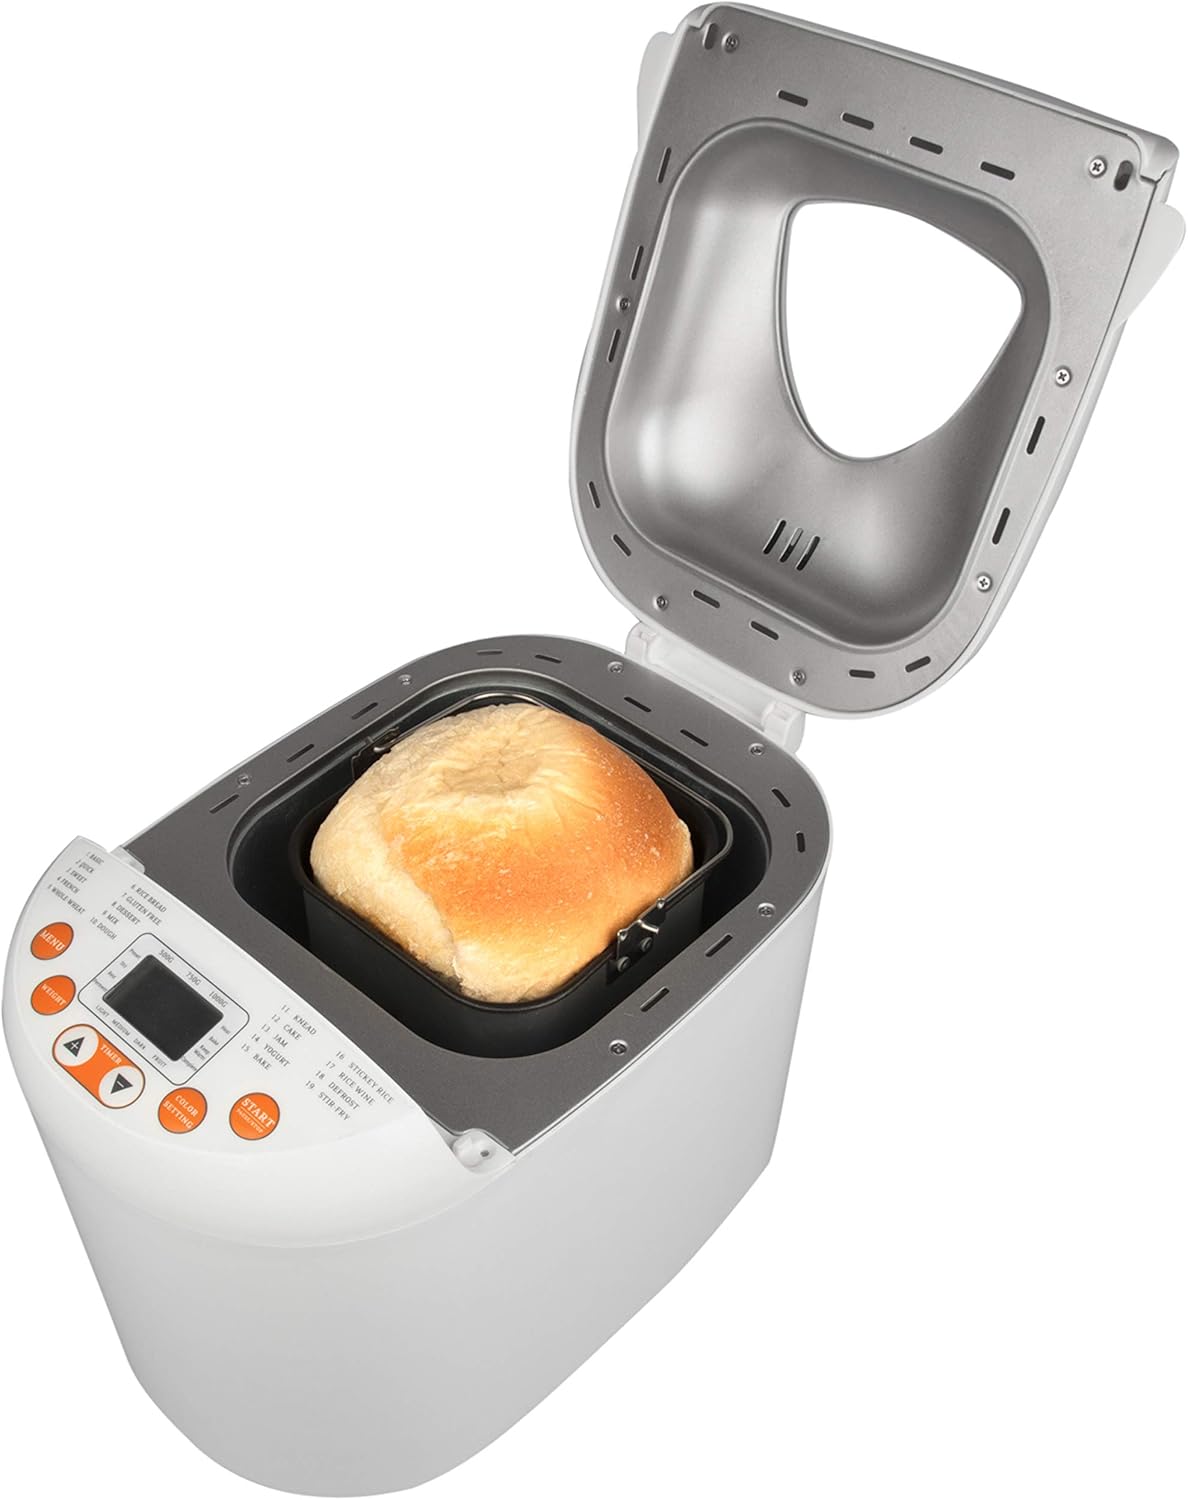
Image 5.1: The MasterChef Bread Maker in operation, with a loaf of bread visible through the viewing window during the baking cycle.
6. Cuidado y mantenimiento
6.1 Limpieza
- Siempre desenchufe el aparato y deje que se enfríe completamente antes de limpiarlo.
- Molde para hornear y paleta para amasar: Lave con agua tibia y jabón usando una esponja suave. No utilice limpiadores abrasivos ni estropajos metálicos, ya que pueden dañar el revestimiento antiadherente. Enjuague bien y seque completamente.
- Unidad principal: Limpie el exterior y el interior con un paño suave yamp Paño. No sumerja la unidad principal en agua ni en ningún otro líquido.
- Tapa: La tapa se puede limpiar con un paño.amp tela. El viewing window can be cleaned with a mild glass cleaner if necessary.
6.2 Almacenamiento
Ensure the bread maker is clean and dry before storing. Store in a cool, dry place. Do not wrap the power cord tightly around the appliance; coil it loosely.
7. Solución de problemas
| Problema | Posible causa | Solución |
|---|---|---|
| El pan no sube. | Expired yeast, incorrect water temperature, too much salt, or incorrect program. | Check yeast expiration date. Use lukewarm water (105-115°F / 40-46°C). Ensure salt and yeast are not in direct contact when adding ingredients. Select appropriate program. |
| El pan es demasiado denso. | Too much flour, too little liquid, or incorrect yeast amount. | Measure ingredients precisely. Ensure correct flour-to-liquid ratio. Verify yeast quantity. |
| El pan se derrumba durante la cocción. | Demasiado líquido, demasiada levadura o mucha humedad. | Reducir ligeramente el líquido. Reducir ligeramente la levadura. Adaptar la receta a ambientes con alta humedad. |
| Paleta de amasar atascada en el pan. | Ocurrencia común. | Utilice la herramienta de gancho proporcionada para retirar con cuidado la paleta después de que el pan se haya enfriado un poco. |
| La pantalla muestra "HHH" o "LLL". | Internal temperature too high or too low. | Unplug the unit and allow it to cool down or warm up to room temperature before restarting. |
8. Especificaciones del producto
| Característica | Detalle |
|---|---|
| Marca | Maestro de cocina |
| Número de modelo | MTF-BRM-764 |
| Capacidad | 2 libras |
| Configuraciones programables | 19 |
| Temporizador de retardo | Hasta 13 horas |
| Ajustes de la corteza | Claro, Medio, Oscuro |
| Volumentage | 127 voltios |
| Material | Acero inoxidable, plástico |
| Dimensiones del producto (L x An x Al) | 24.13 x 26.67 x 30.48 cm (aprox. 9.5 x 10.5 x 12 pulgadas) |
| Peso del artículo | 5 kilogramos (aprox. 11 libras) |
| Instrucciones de cuidado | Limpiar con un paño seco (para exteriores) |

Image 8.1: Visual representation of the MasterChef Bread Maker's dimensions: approximately 12 inches wide, 14 inches high, and 9.5 inches deep.
9. Garantía y soporte
For information regarding warranty coverage, product support, or service inquiries, please refer to the warranty card included with your purchase or contact MasterChef customer service directly. Contact details are typically found on the product packaging or the official MasterChef websitio.


