Introducción
This manual provides essential instructions for the safe and efficient use of your Smart Kingfisher Rechargeable Lithium Battery and USB Charger. Please read this manual thoroughly before use and retain it for future reference.
Información de seguridad
- Advertencia: No intente cargar baterías no recargables.
- Advertencia: Do not charge batteries from other suppliers unless explicitly stated as compatible.
- Keep the charger and batteries away from water and moisture.
- Do not disassemble, crush, or puncture the batteries or charger.
- Evite exponer las baterías a temperaturas extremas o a la luz solar directa.
- Deseche las baterías de forma responsable de acuerdo con las regulaciones locales.
Contenido del paquete
Verifique que todos los artículos estén presentes en su paquete:
- 2 x 425 Rechargeable Lithium Batteries
- 1 x Dual-Port USB Charger
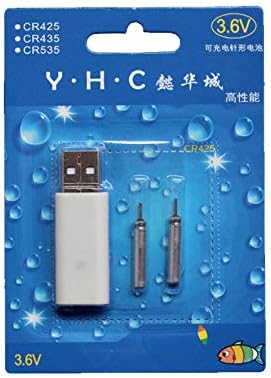
Image: Retail packaging showing the USB charger and two 425 rechargeable batteries.

Image: A pair of Smart Kingfisher 425 rechargeable lithium batteries.
Configuración
The Smart Kingfisher USB charger is designed for ease of use. No complex setup is required.
- Identify the USB charger and the 425 rechargeable batteries.
- Connect the USB charger to a compatible power source (see "Operating Instructions" for options).

Image: The USB charger unit with its two charging pins visible.
Instrucciones de funcionamiento
Cargando las baterías
The charger features two ports, allowing for simultaneous charging of two batteries.
- Insert the 425 rechargeable batteries into the charging ports of the USB charger. Ensure a secure connection.
- Connect the USB charger to a power source. Compatible power sources include:
- USB power adapter (wall charger)
- Banco de energía
- Cargador de coche
- Laptop or PC USB port
- Observe el indicador LED en el cargador:
- A LED verde Indica que las baterías se están cargando actualmente.
- A LED rojo indicates that the batteries are fully charged.
- La carga suele tardar aproximadamente 3 horas para una carga completa.
- Once fully charged, disconnect the charger from the power source and remove the batteries.

Image: Visual guide for charging status: green light for charging, red light for fully charged. Indicates a 3-hour charging time.

Image: Diagram illustrating multiple methods for charging the device, including car chargers, wall adapters, power banks, and laptops.
Mantenimiento
- Clean the charger and batteries with a dry, soft cloth. Do not use liquids or abrasive cleaners.
- Store the batteries and charger in a cool, dry place when not in use.
- Avoid storing fully discharged batteries for extended periods to prolong their lifespan.
Solución de problemas
| Problema | Posible causa | Solución |
|---|---|---|
| Batteries not charging (no LED indication) |
|
|
| Charging takes longer than 3 hours |
|
|
| Red LED does not turn on after extended charging |
|
|
Presupuesto
- Material: Plástico
- Peso del producto: 20 g (total for charger and batteries)
- Tipo de batería: 425 Rechargeable Lithium Battery (compatible with CR425, CR435, CR535)
- Tipo de cargador: Cargador USB de doble puerto
- Aporte: USB (compatible with various USB power sources)
- Indicador de carga: Green LED (charging), Red LED (fully charged)
- Tiempo de carga aproximado: 3 horas
Garantía y soporte
For warranty information or technical support, please refer to the retailer's return policy or contact the manufacturer directly. Keep your purchase receipt as proof of purchase.
Para obtener ayuda adicional, puede visitar el product page on Amazon.com.mx.