Introducción
The Sharp Atomic Clock provides precise timekeeping and temperature monitoring for your home or office. Featuring a large, easy-to-read display, this clock automatically synchronizes with the atomic time signal (WWVB) broadcast from Fort Collins, Colorado, ensuring accuracy without manual adjustments. It also includes a wireless outdoor sensor to display both indoor and outdoor temperatures.
Características del producto
- Atomic Time Accuracy: Automatically synchronizes with the WWVB atomic time signal for precise timekeeping.
- Jumbo 3" Easy-to-Read Numbers: Large digital display for clear visibility of time, date, and temperature.
- Indoor/Outdoor Temperature Display: Monitors both indoor ambient temperature and outdoor temperature via a wireless sensor.
- Sensor inalámbrico para exteriores: Transmits outdoor temperature data to the main unit.
- Funciona con pilas: Operates on batteries for flexible placement (batteries not included).
- Automatic Daylight Saving Time (DST) Adjustment: Se ajusta automáticamente a los cambios de horario de verano.
- Zonas horarias seleccionables: Allows selection of various US time zones.
- Formato de 12/24 horas: Opción para mostrar la hora en formato de 12 o 24 horas.
- Visualización en grados Celsius/Fahrenheit: Cambiar entre unidades de temperatura Celsius y Fahrenheit.
Contenido del paquete
Asegúrese de que todos los elementos estén presentes antes de continuar con la configuración.
- Unidad principal del reloj atómico Sharp
- Sensor de exterior inalámbrico
- Manual de instrucciones
Note: Batteries are not included. The main unit requires 2 AA batteries, and the outdoor sensor requires 2 AA batteries.
Configuración
1. Instalación de la batería
- Abra el compartimiento de la batería en la parte posterior de la unidad del reloj principal.
- Inserte 2 pilas AA, observando la polaridad correcta (+ y -).
- Cierre la tapa del compartimento de la batería.
- Open the battery compartment on the wireless outdoor sensor.
- Insert 2 AA batteries into the outdoor sensor, observing the correct polarity.
- Close the outdoor sensor's battery compartment cover.
2. Sincronización inicial y configuración
After battery installation, the clock will attempt to receive the WWVB atomic time signal and connect to the outdoor sensor. This process may take several minutes or up to 24 hours depending on your location and environmental interference.
- Huso horario: Press the "TIME ZONE" button (often labeled "UP TIME ZONE") on the back of the clock to cycle through available time zones (PST, MST, CST, EST). Select your desired time zone.
- Formato de 12/24 horas: Press the "12/24" button to switch between 12-hour and 24-hour display.
- Celsius / Fahrenheit: Press the "°C/°F" button to toggle between Celsius and Fahrenheit temperature display.
- Outdoor Sensor Pairing: If the outdoor temperature does not appear, press the "CHANNEL" button on the main unit to search for the sensor signal. Ensure the outdoor sensor is within range and not obstructed.
For optimal signal reception, place the clock away from large metal objects, electronic devices, and areas with heavy concrete or brick walls. The outdoor sensor should be placed in a shaded, dry location, protected from direct sunlight and precipitation, for accurate readings.
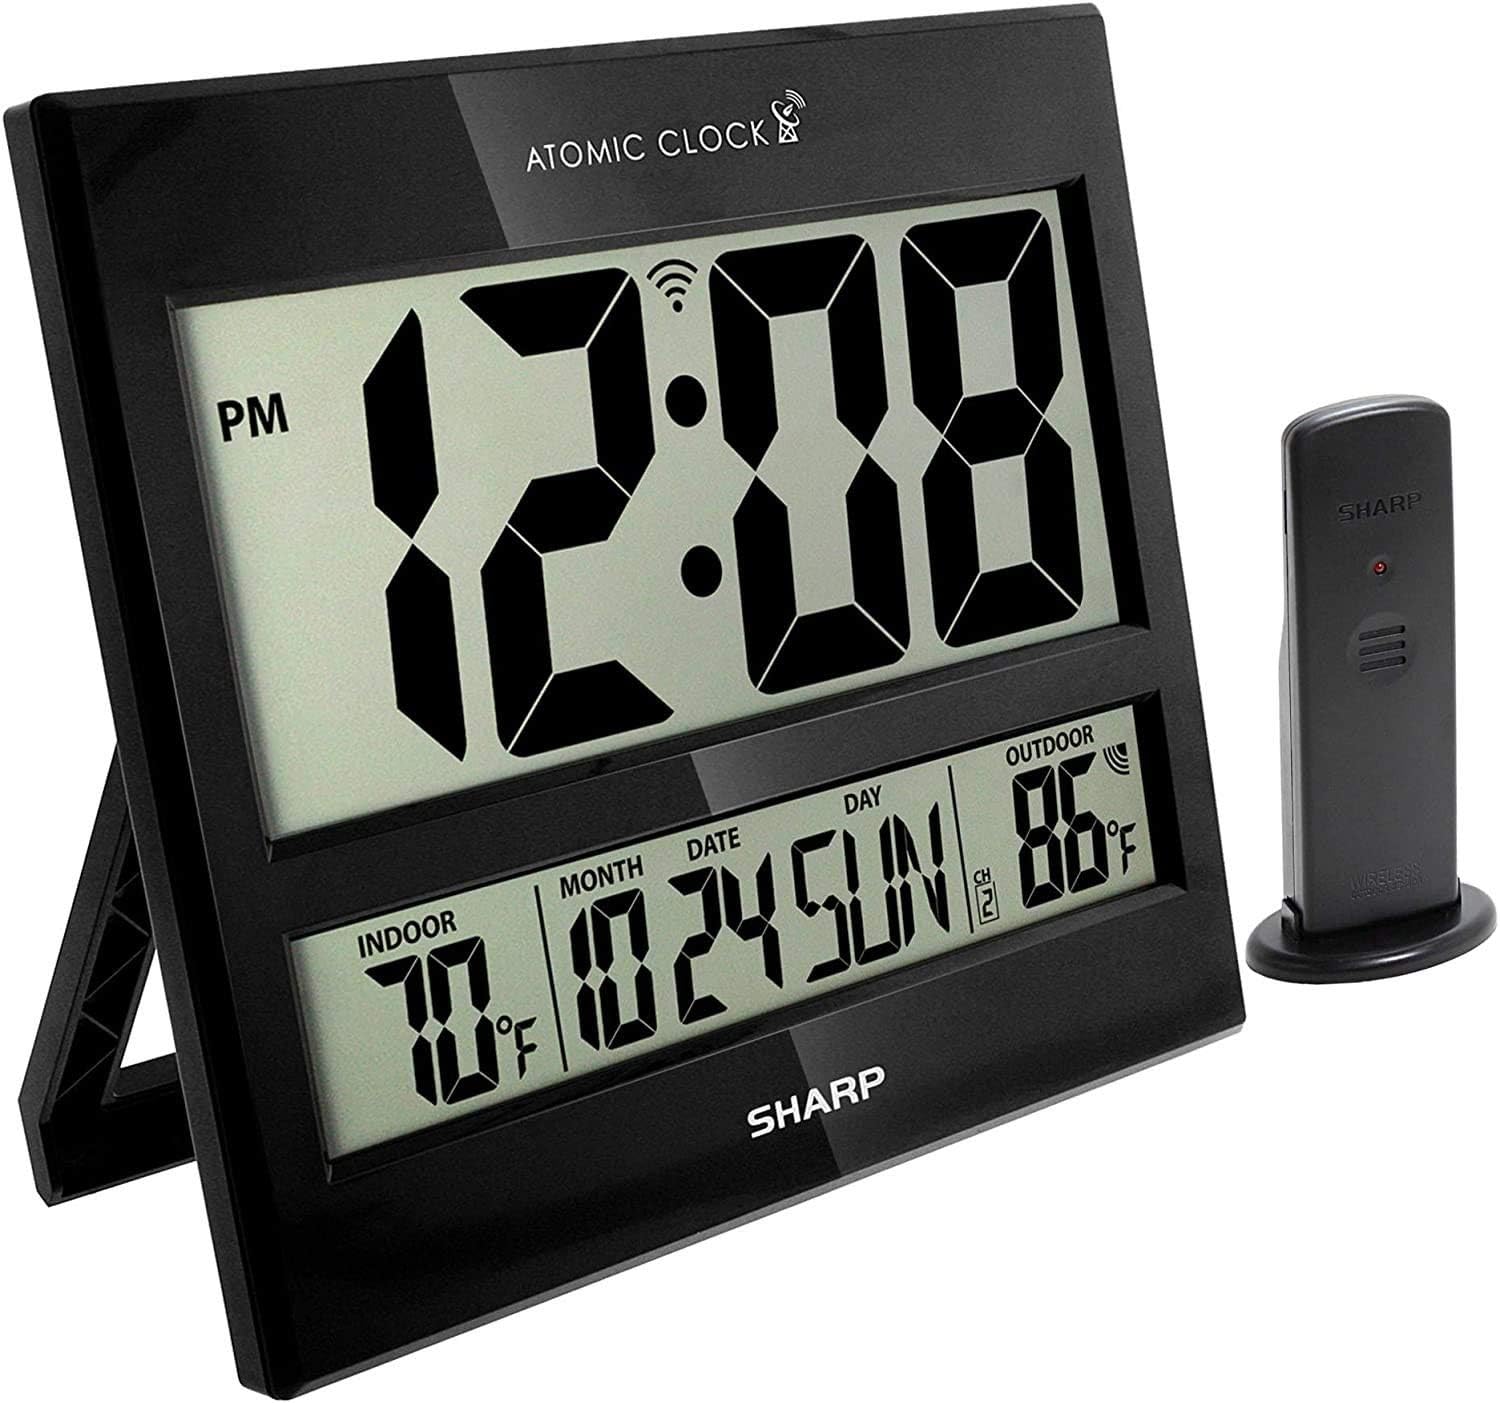
Image: The Sharp Atomic Clock main unit displaying time, indoor temperature, date, and outdoor temperature, alongside its wireless outdoor sensor.
Operación
Información de la pantalla
The clock's large LCD screen displays the following information:
- Tiempo: Current time in selected 12-hour or 24-hour format.
- Indicador PM: Displays "PM" for afternoon hours in 12-hour format.
- Indicador de señal atómica: Shows the status of the WWVB atomic time signal reception.
- Temperatura interior: Temperatura actual medida por la unidad principal.
- Month/Date/Day: Información del calendario actual.
- Temperatura exterior: Current temperature measured by the wireless outdoor sensor.
- Canal del sensor exterior: Indicates the channel the outdoor sensor is transmitting on.
- Indicador de batería baja: An icon will appear when batteries are low and need replacement.
Button Functions (Rear Panel)
| Botón | Función |
|---|---|
| CALENDARIO | Press and hold for 2 seconds to manually set calendar (Year, Month, Date, Language). Use UP/DOWN buttons to change values. |
| TIEMPO | Press and hold for 2 seconds to manually set time (DST ON/OFF, Hour, Minute). Use UP/DOWN buttons to change values. |
| 12/24 | Cambia entre visualización de hora de 12 horas y 24 horas. |
| CANAL | Press to switch between outdoor sensor channels (1, 2, 3). Press and hold for 2 seconds to pair with the outdoor sensor. |
| ° C / ° F | Alterna entre la visualización de temperatura en Celsius y Fahrenheit. |
| OLA | Initiates a manual search for the WWVB atomic time signal. |
| REINICIAR | Resets the clock to factory default settings. Requires a pointed object (e.g., paperclip). |
| UP / TIME ZONE | Increases values during manual setting. Press to cycle through time zones. |
| ABAJO | Decreases values during manual setting. |
Mantenimiento
- Reemplazo de batería: Replace batteries in both the main unit and outdoor sensor when the low battery indicator appears on the display. Always replace all batteries at the same time with new ones.
- Limpieza: Limpie el reloj y el sensor con un paño suave y seco. No utilice limpiadores abrasivos ni disolventes.
- Colocación del sensor al aire libre: Periodically check the outdoor sensor's location to ensure it remains protected from extreme weather conditions, direct sunlight, and moisture.
Solución de problemas
- Clock not syncing with atomic time:
- Ensure the clock is placed away from electronic interference (TVs, computers, microwaves).
- Try placing the clock near a window facing Fort Collins, Colorado (if applicable to your region).
- Press the "WAVE" button to initiate a manual signal search.
- Permita hasta 24 horas para la sincronización inicial.
- Outdoor temperature not displaying or incorrect:
- Check batteries in the outdoor sensor.
- Ensure the outdoor sensor is within the effective transmission range (typically up to 100 feet, line of sight).
- Presione el botón "CANAL" en la unidad principal para restablecer la conexión.
- Verify the outdoor sensor is placed in a location protected from direct sunlight and rain, which can affect readings.
- La pantalla está oscura o en blanco:
- Replace all batteries in the main unit with fresh ones.
- Asegúrese de que las baterías estén insertadas con la polaridad correcta.
- Hora o fecha incorrecta:
- Verifique que esté seleccionada la zona horaria correcta.
- Check if Daylight Saving Time (DST) setting is correct for your region.
- If atomic signal is not received, manually set the time and date using the "TIME" and "CALENDAR" buttons.
Presupuesto
| Característica | Detalle |
|---|---|
| Marca | Afilado |
| Número de modelo | 8541848315 |
| Código Postal | 049353998732 |
| Color | Negro brillante |
| Tipo de pantalla | LCD digital |
| Característica especial | Atomic Time Synchronization (WWVB), Indoor/Outdoor Temperature |
| Dimensiones del producto | 13" de ancho x 1.5" de alto (unidad principal) |
| Fuente de poder | Funciona con pilas |
| Número de baterías necesarias | Main Unit: 2 AA; Outdoor Sensor: 2 AA |
| Material | Plástico |
| Tipo de montaje | Soporte de pared/soporte de sobremesa |
| Uso en interiores y exteriores | Indoor (Main Unit), Outdoor (Sensor) |
Garantía y soporte
Sharp products are manufactured to high-quality standards. For warranty information, technical support, or service inquiries, please refer to the contact information provided with your product packaging or visit the official Sharp webSitio. Conserve su recibo de compra como comprobante para reclamaciones de garantía.