Sage SES878BSS
Manual de instrucciones de la máquina de café expreso Sage Barista Pro
Model: SES878BSS
Introducción
Welcome to the comprehensive instruction manual for your Sage Barista Pro Bean-to-Cup Espresso Machine. This guide provides essential information for setting up, operating, maintaining, and troubleshooting your machine to ensure you consistently achieve barista-quality coffee at home. The Barista Pro features an intuitive LCD interface, a rapid 3-second ThermoJet heating system, an integrated conical burr grinder with dose control, precise PID temperature control, and a powerful steam wand for microfoam milk texturing.
Producto terminadoview

Figura 1: Frente view of the Sage Barista Pro Espresso Machine, showcasing its brushed stainless steel finish, integrated grinder, LCD display, and control buttons.
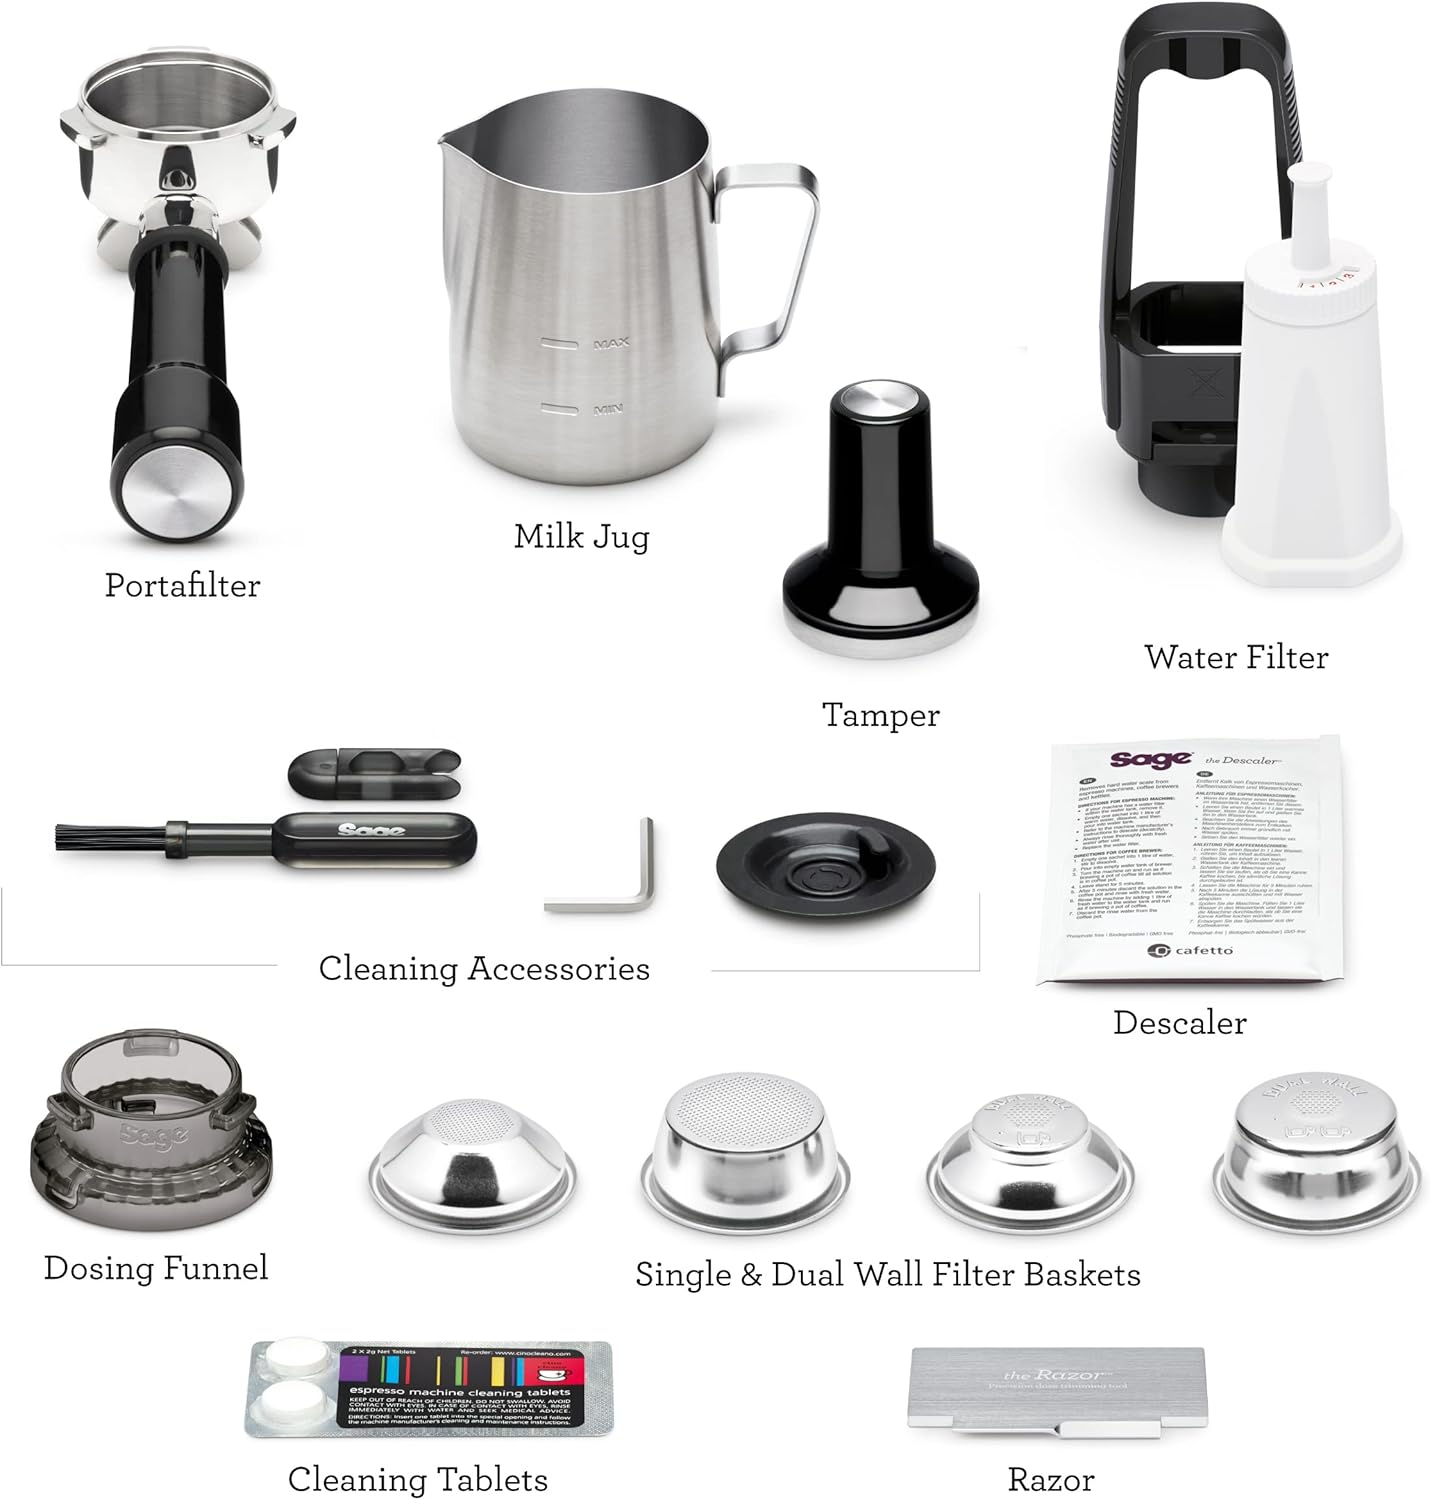
Figura 2: Included accessories: 54mm portafilter, milk jug, tamper, water filter, cleaning accessories, descaler, dosing funnel, single and dual wall filter baskets, cleaning tablets, and The Razor precision dose trimming tool.
Configuración
- Desembalaje: Carefully remove all packaging materials and place the machine on a flat, stable surface. Ensure all accessories listed in Figure 2 are present.
- Instalación del tanque de agua: Fill the 2-liter water tank with fresh, cold water. Insert the Claro Swiss water filter into the tank as per the filter instructions. Place the tank securely at the back of the machine.
- Instalación de la tolva de granos: Place the bean hopper on top of the machine and twist to lock it into position. Fill with fresh whole coffee beans.
- Ciclo de enjuague inicial: Before first use, perform an initial rinse cycle to prime the machine. Refer to the "First Use" section in the operating instructions for detailed steps.
Instrucciones de funcionamiento
1. Molienda y dosificación
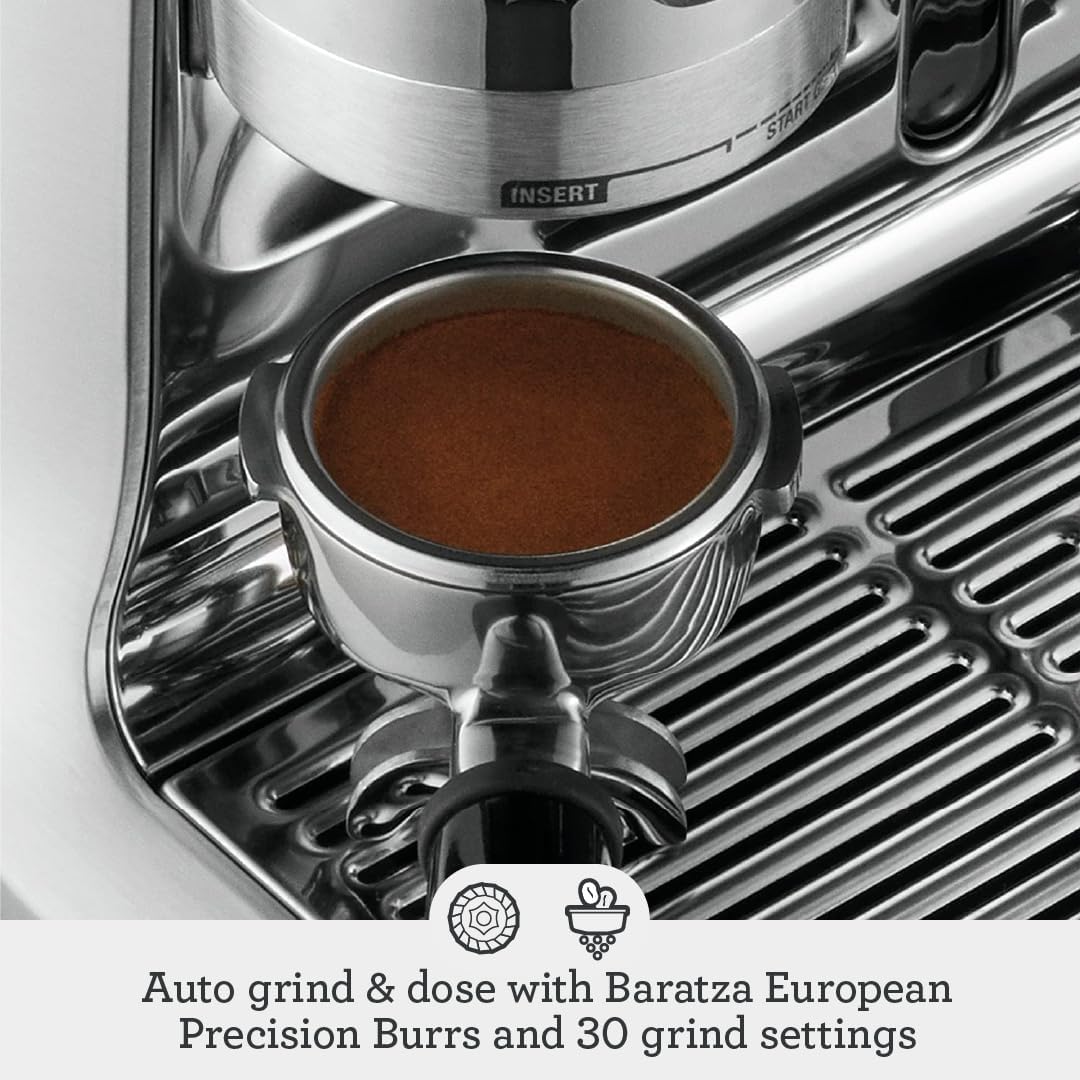
Figura 3: The portafilter filled with freshly ground coffee, ready for tamping. The machine features auto grind and dose with 30 grind settings.
- Seleccionar cesta de filtros: Choose the appropriate single or dual wall filter basket (1-cup or 2-cup) and place it into the portafilter.
- Ajustar el tamaño de la molienda: Use the grind size dial to select your desired grind setting. Finer grinds are typically for espresso, coarser for other methods. The Barista Pro offers 30 grind settings.
- Dose Control: Insert the portafilter into the grinding cradle. The integrated conical burr grinder will automatically dispense the correct amount of coffee. You can adjust the dose if needed via the LCD interface.
- Tampen: After grinding, use the included tamper para presionar los posos de café de manera firme y uniforme en el portafiltro.
- Trimming the Dose: Use The Razor precision dose trimming tool to ensure the correct dose level for optimal extraction.
2. Extracción de café expreso

Figura 4: The Barista Pro heats up in just 3 seconds using the ThermoJet heating system, ready for immediate use.

Figura 5: Precise 9-bar extraction delivered via the 15-bar Italian pump ensures optimal flavor.
- Insertar portafiltro: Bloquee el portafiltro en el cabezal del grupo.
- Precalentamiento: The ThermoJet heating system reaches optimal extraction temperature in 3 seconds.
- Iniciar extracción: Press the 1-cup or 2-cup button to begin extraction. The machine uses low-pressure pre-infusion, gradually increasing pressure to ensure all flavors are drawn out evenly. Digital PID temperature control maintains water temperature within +/- 2°C for optimal espresso extraction.
- Monitorear el flujo: Observe the espresso flow. It should resemble warm honey. Adjust grind size and dose if the flow is too fast or too slow.
3. Texturizado de la leche
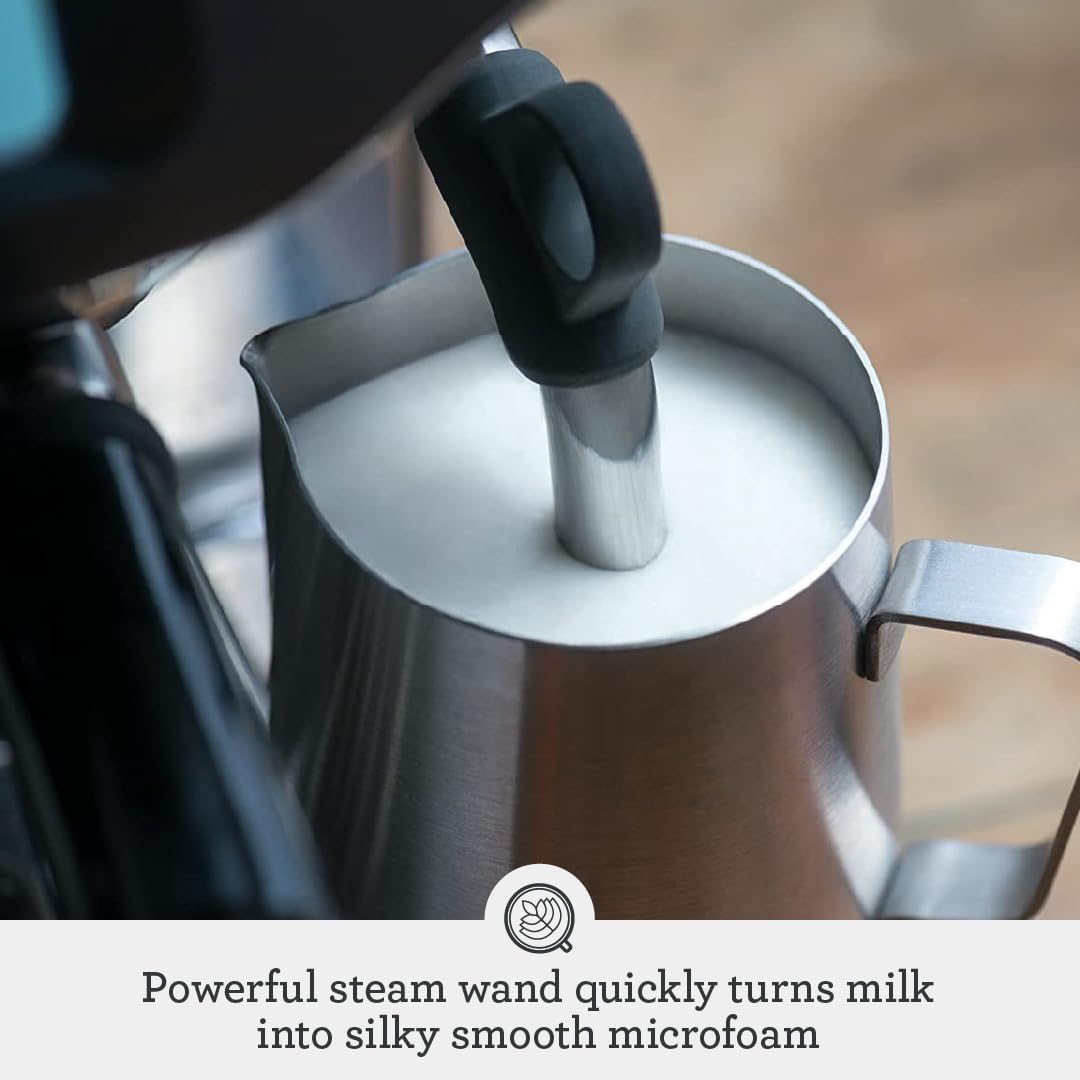
Figura 6: The powerful steam wand quickly transforms milk into silky smooth microfoam, perfect for latte art.
- Preparar leche: Fill the stainless steel milk jug with cold milk.
- Varilla de vapor de purga: Abra brevemente la válvula de vapor para purgar el agua condensada de la varilla.
- Textura de la leche: Insert the steam wand into the milk. Open the steam valve fully. Position the wand to create a vortex, incorporating air to create microfoam. Heat the milk to your desired temperature (typically 60-65°C).
- Varilla de vapor limpia: Inmediatamente después de su uso, limpie la varilla de vapor con un paño húmedo.amp paño y purgue nuevamente para eliminar cualquier residuo de leche.
Mantenimiento
- Limpieza diaria:
- Vacíe y enjuague la bandeja de goteo.
- Limpie el exterior de la máquina con un paño suave.amp paño.
- Limpie la varilla de vapor inmediatamente después de cada uso.
- Remove and clean the portafilter and filter baskets.
- Group Head Cleaning: Periodically clean the group head using the included cleaning brush and backflush disc with a cleaning tablet. Follow the machine's display prompts for the cleaning cycle.
- Descalcificar: The machine will indicate when descaling is required. Use the provided descaler solution and follow the instructions on the descaler packet and the machine's display. Regular descaling prevents mineral buildup and maintains machine performance.
- Reemplazo del filtro de agua: Replace the Claro Swiss water filter every 2-3 months, or as indicated by the machine, to ensure optimal water quality and reduce the need for descaling.
Solución de problemas
| Problema | Posible causa | Solución |
|---|---|---|
| No hay flujo de café o el flujo es muy lento | Grind is too fine; too much coffee in filter basket; clogged filter basket. | Adjust grind size coarser; reduce coffee dose; clean filter basket. |
| Coffee flows too fast or is watery | Grind is too coarse; not enough coffee in filter basket; tampdemasiado a la ligera. | Adjust grind size finer; increase coffee dose; tamp con más firmeza. |
| No sale vapor del tubo de vapor | Steam wand is clogged; machine not at steam temperature. | Clean steam wand with pin tool; wait for machine to reach steam temperature (indicated on LCD). |
| La máquina no calienta | Power issue; machine in standby mode. | Check power connection; press POWER button to wake machine. |
| "EMPTY ME" message on display | La bandeja de goteo está llena. | Retire, vacíe y limpie la bandeja de goteo. |
Presupuesto
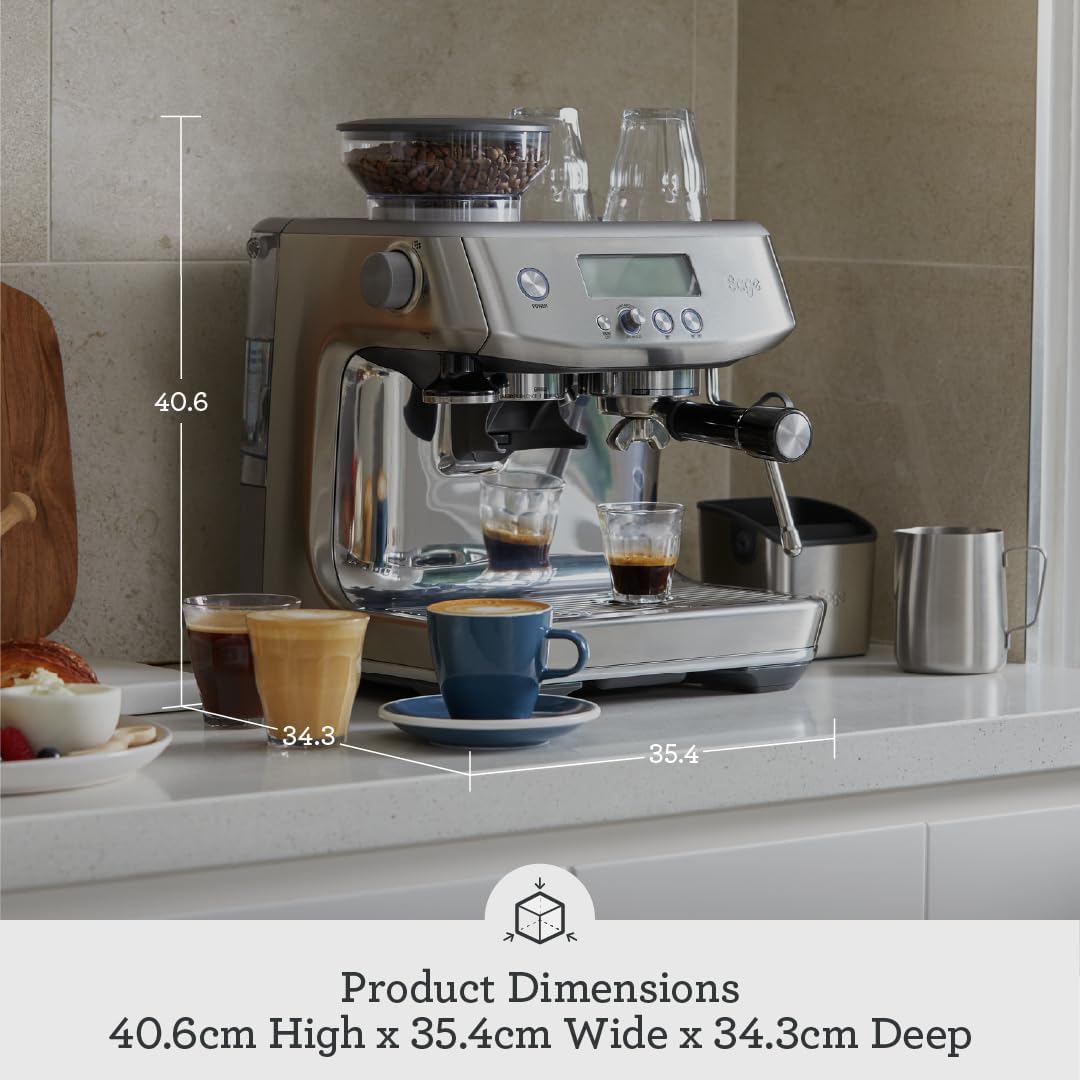
Figura 7: Product dimensions: 40.6cm High x 35.4cm Wide x 34.3cm Deep.
| Característica | Detalle |
|---|---|
| Marca | Sabio |
| Número de modelo | SES878BSS |
| Color | Acero inoxidable cepillado |
| Dimensiones (alto x ancho x profundidad) | 40.6 x 35.4 x 34.3 cm (16 x 13.9 x 13.5 pulgadas) |
| Peso | 9 kilogramos (19.8 libras) |
| Capacidad | 2 litros (tanque de agua) |
| Fuerza | 1680 vatios |
| Volumentage | 220-240 Voltios |
| Material | Acero inoxidable |
| Característica especial | Dishwasher Safe Parts (refer to manual for specific parts) |
| Tipo de cafetera | Máquina de café expreso |
| Molinillo integrado | Conical Burr Grinder with 30 grind settings |
| Sistema de calefacción | ThermoJet (calentamiento en 3 segundos) |
| Control de temperatura | Digital PID Control |
| Presión de la bomba | 15-bar Italian Pump (delivers 9-bar extraction) |
Garantía y soporte
The Sage Barista Pro Espresso Machine comes with a Garantía del producto por 2 años. For warranty claims, technical support, or service inquiries, please contact Sage Appliances customer service. Keep your proof of purchase for warranty validation.
For further assistance, visit the official Sage Appliances websitio o consulte la información de contacto proporcionada en el embalaje de su producto.
Ask a question about this manual
Ask about setup, troubleshooting, compatibility, parts, safety, or missing instructions. Manuals+ will review the question and use this page’s manual context to help answer it.