1. Introducción
Welcome to the JOYTRIP Kids Digital Camera instruction manual. This guide provides essential information for setting up, operating, and maintaining your new digital camera. Designed for young users, this camera allows children to capture 12-megapixel photos and record 1080P videos, fostering creativity and exploration. Please read this manual thoroughly to ensure proper use and to maximize your child's enjoyment of the camera.
2. Contenido del paquete
Antes de comenzar, verifique que todos los elementos enumerados a continuación estén presentes en su paquete:
- JOYTRIP Kids Digital Camera (Pink)
- Tarjeta TF de 16 GB (preinstalada o separada)
- Lector de tarjetas USB
- Pegatinas de dibujos animados
- Acollador
- Cable de carga micro USB

Image: The JOYTRIP Kids Digital Camera in pink, shown with its included USB charging cables.
3. Producto terminadoview
Familiarícese con los componentes y controles de la cámara:
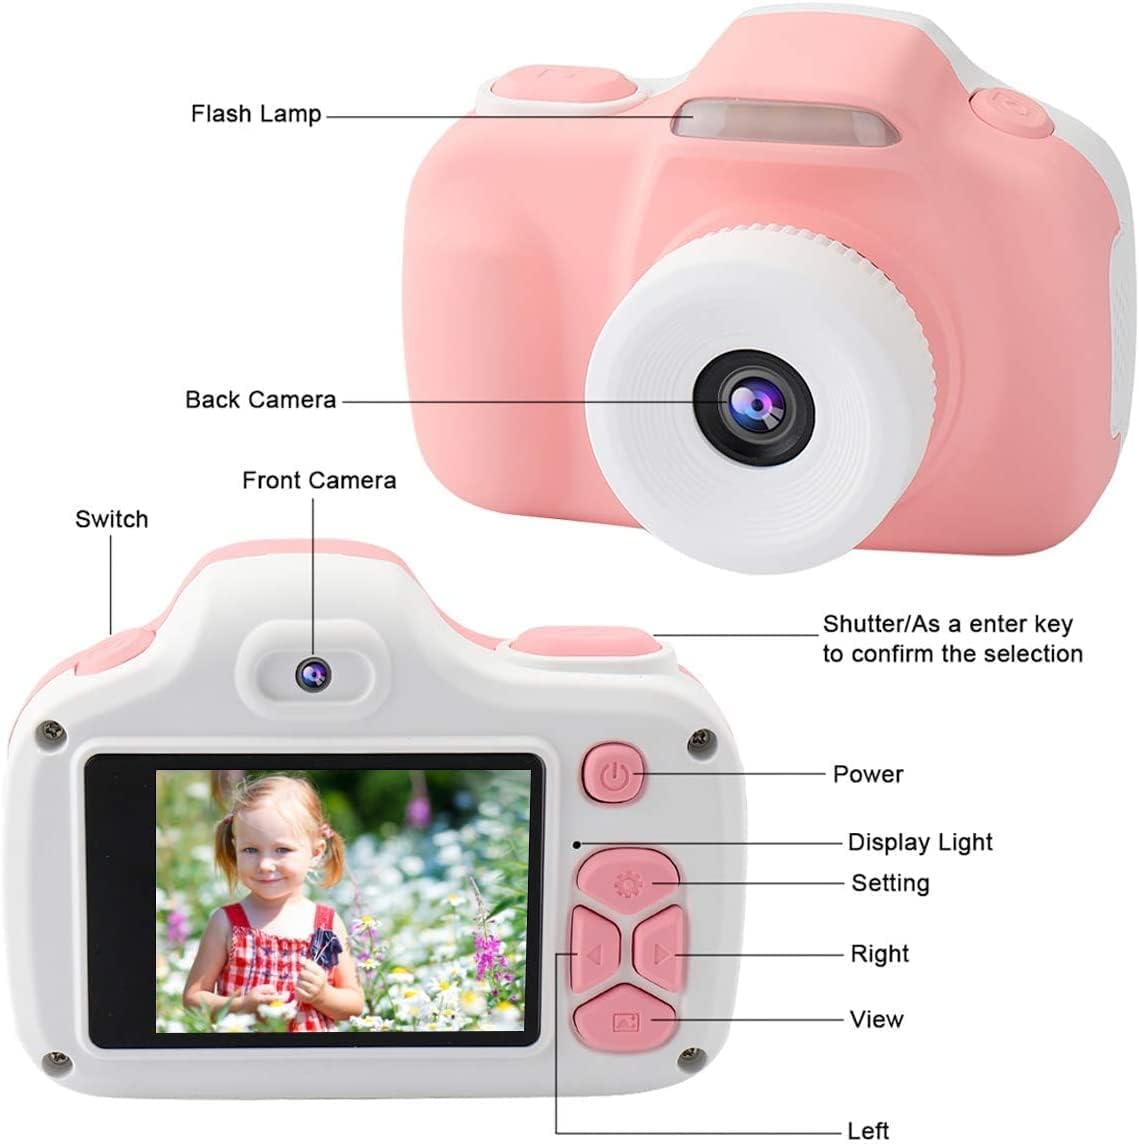
Image: A detailed diagram labeling the flash lamp, back camera, front camera, power button, display light, settings button, navigation buttons (right, left, view), and the shutter/confirm key.
- Destello Lamp: Provides additional light for photos in dim conditions.
- Camara trasera: Main lens for capturing photos and videos.
- Cámara frontal: Used for selfie photos and videos.
- Cambiar: Toggles between front and back cameras.
- Shutter/Confirm Key: Press to take a photo or start/stop video recording. Also confirms selections in menus.
- Botón de encendido: Enciende o apaga la cámara.
- Luz de visualización: Indica el estado de la cámara.
- Botón de configuración: Accesses the camera's menu for various options.
- Right/Left Navigation Buttons: Used to navigate through menus and browse photos/videos.
- View Botón: Entra en modo de reproducción para volver aview medios capturados
4. Primeros pasos
4.1. Carga inicial
Before first use, fully charge the camera's built-in lithium battery. Connect the Micro USB cable to the camera's charging port and the other end to a 5V power adapter (not included) or a computer's USB port. The red indicator light will turn off once charging is complete.
4.2. Inserción de la tarjeta TF
The camera comes with a 16GB TF card for storage. If not pre-installed, locate the TF card slot on the side of the camera. Gently insert the TF card with the metal contacts facing down until it clicks into place. To remove, push the card in slightly until it springs out.
4.3. Colocación del cordón
Thread the included lanyard through the designated loop on the camera body. This helps prevent accidental drops and makes the camera easier for children to carry.
5. Funcionamiento básico
5.1. Encendido y apagado
Mantenga pulsado el Botón de encendido durante unos segundos para encender o apagar la cámara.
5.2. Tomar fotografías
- Encienda la cámara.
- Frame your subject using the display screen.
- Presione el Botón del obturador para capturar una foto.
5.3. Grabación de vídeos
- Encienda la cámara.
- Navigate to video mode using the navigation buttons (if applicable, or it may be a dedicated button).
- Presione el Botón del obturador once to start recording. A timer will appear on the screen.
- Presione el Botón del obturador de nuevo para detener la grabación.
5.4. Uso del Flash
The camera features a built-in flash for low-light conditions. The flash can be activated or set to automatic via the camera's settings menu. When active, the flash will illuminate your subject for clearer photos.

Image: A young child holding the pink camera to their eye, demonstrating the use of the built-in flash for improved lighting in photos.
5.5. Viewing fotos y videos
- Presione el View Botón para entrar en el modo de reproducción.
- Utilice el Right/Left Navigation Buttons to scroll through your captured photos and videos.
- Para salir del modo de reproducción, presione el botón View Botón de nuevo o el Botón de encendido.
6. Funciones avanzadas
Enhance your photos and videos with the camera's creative functions:
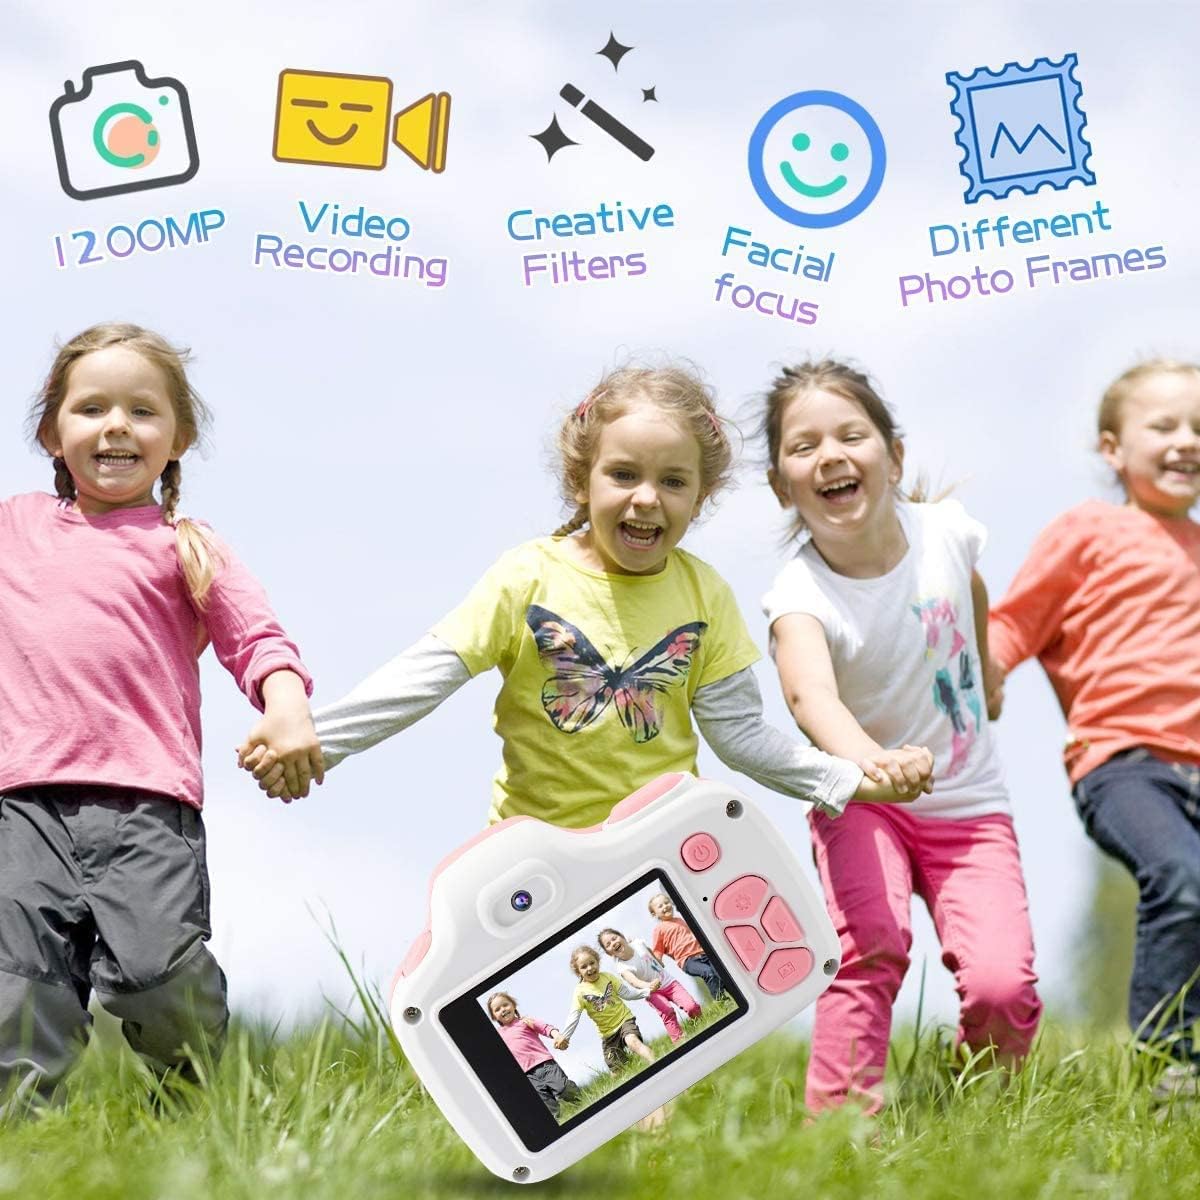
Image: Children playing outdoors with the camera, illustrating its various functions like 12MP photos, video recording, creative filters, facial focus, and different photo frames.
6.1. Photo Frames and Filters
Access the camera's settings menu to select from a variety of fun photo frames and creative filters. These can be applied to your photos to add unique effects and personalize your images.

Imagen: Un collage muestraasing various fun photo frames and color filters that can be applied to images taken with the camera.
6.2. Timer Shooting
The timer shooting function allows for a delay before a photo is taken, giving the user time to pose. This feature can be enabled and configured in the camera's settings.
7. Carga y batería
The camera is equipped with a built-in rechargeable lithium polymer battery. To charge, connect the camera to a 5V power source using the provided Micro USB cable. The charging indicator light will turn off when the battery is fully charged. A full charge provides approximately 320 minutes of recording capacity.
8. Cuidado y mantenimiento
8.1. Limpieza
Utilice un paño suave y seco para limpiar el cuerpo de la cámara. Para la lente, utilice un paño especial para limpiar lentes. Evite usar limpiadores líquidos o materiales abrasivos.
8.2. Almacenamiento
When not in use, store the camera in a cool, dry place away from direct sunlight and extreme temperatures. Ensure the camera is turned off to conserve battery life.
8.3. Durabilidad
The JOYTRIP Kids Digital Camera is constructed from high-quality, environmentally-friendly materials designed to be shockproof and provide effective anti-drop protection, making it suitable for active children.

Image: The camera is shown on a cracked surface, illustrating its durable and shockproof construction.
9. Solución de problemas
- La cámara no se enciende: Asegúrese de que la batería esté cargada. Conecte la cámara a la corriente y vuelva a intentarlo.
- No se pueden tomar fotografías ni vídeos: Check if the TF card is inserted correctly and has sufficient free space. The camera may also require a reset if unresponsive.
- Mala calidad de imagen: Ensure the lens is clean and free from smudges. Check lighting conditions and use the flash if necessary.
- La cámara se congela: Press and hold the power button for an extended period (e.g., 10-15 seconds) to force a shutdown, then restart the camera.
10. Especificaciones
| Característica | Especificación |
|---|---|
| Nombre del modelo | JOYTRIP Kids Camera |
| Número de modelo | 797550710434 |
| Resolución de la fotografía | 12 MP (máximo) |
| Resolución de vídeo | 1080p |
| Tamaño de pantalla | 3.3 pulgadas |
| Almacenamiento | 16 GB TF Card (included), supports up to 2 TB |
| Tipo de batería | Lithium Polymer (18 grams) |
| Conectividad | USB |
| Dimensiones (D x W x H) | 2.08" x 3.38" x 2.48" |
| Peso del artículo | 2.8 onzas |
| Color | Rosa |
11. Garantía y soporte
For warranty information, technical support, or any questions regarding your JOYTRIP Kids Digital Camera, please refer to the contact information provided with your purchase or visit the official JOYTRIP webSitio. Conserve su recibo de compra como comprobante para reclamaciones de garantía.


