Introducción

Figure 1: Amazon Basics Programmable Bread Maker. This image shows the black bread maker from an angled front view, highlighting its compact design, control panel with LCD display, and program settings listed on the top surface.
Gracias por la compraasing the Amazon Basics Programmable Bread Maker. This appliance is designed to simplify the process of making fresh bread, doughs, and jams at home. Please read this instruction manual thoroughly before first use to ensure safe operation and optimal performance. Keep this manual for future reference.
Instrucciones de seguridad importantes
- Lea todas las instrucciones antes de utilizar el aparato.
- No toque superficies calientes. Utilice asas o perillas.
- Para protegerse contra descargas eléctricas, no sumerja el cable, los enchufes ni el aparato en agua ni en ningún otro líquido.
- Es necesaria una estrecha supervisión cuando cualquier aparato sea utilizado por niños o cerca de ellos.
- Desenchufe el aparato del tomacorriente cuando no lo utilice y antes de limpiarlo. Deje que se enfríe antes de colocar o quitar piezas.
- No opere ningún aparato con un cable o enchufe dañado, o después de que el aparato funcione mal o haya sufrido algún daño de cualquier tipo.
- El uso de accesorios no recomendados por el fabricante del aparato puede provocar lesiones.
- No utilizar en exteriores.
- No deje que el cable cuelgue del borde de la mesa o mostrador, ni que toque superficies calientes.
- No lo coloque sobre o cerca de un quemador de gas o eléctrico caliente, ni dentro de un horno caliente.
- Se debe tener mucho cuidado al mover un aparato que contenga aceite caliente u otros líquidos calientes.
- Para desconectar, gire cualquier control a la posición "apagado" y luego retire el enchufe del tomacorriente de pared.
- No utilice el aparato para ningún fin distinto del previsto.
Componentes del producto
Familiarize yourself with the parts of your bread maker before operation.

Figura 2: Accesorios incluidos. This image displays the bread pan with handle, a clear plastic measuring cup, a black kneading blade, a white double-sided measuring spoon (teaspoon/tablespoon), and a metal hook for removing the kneading blade.
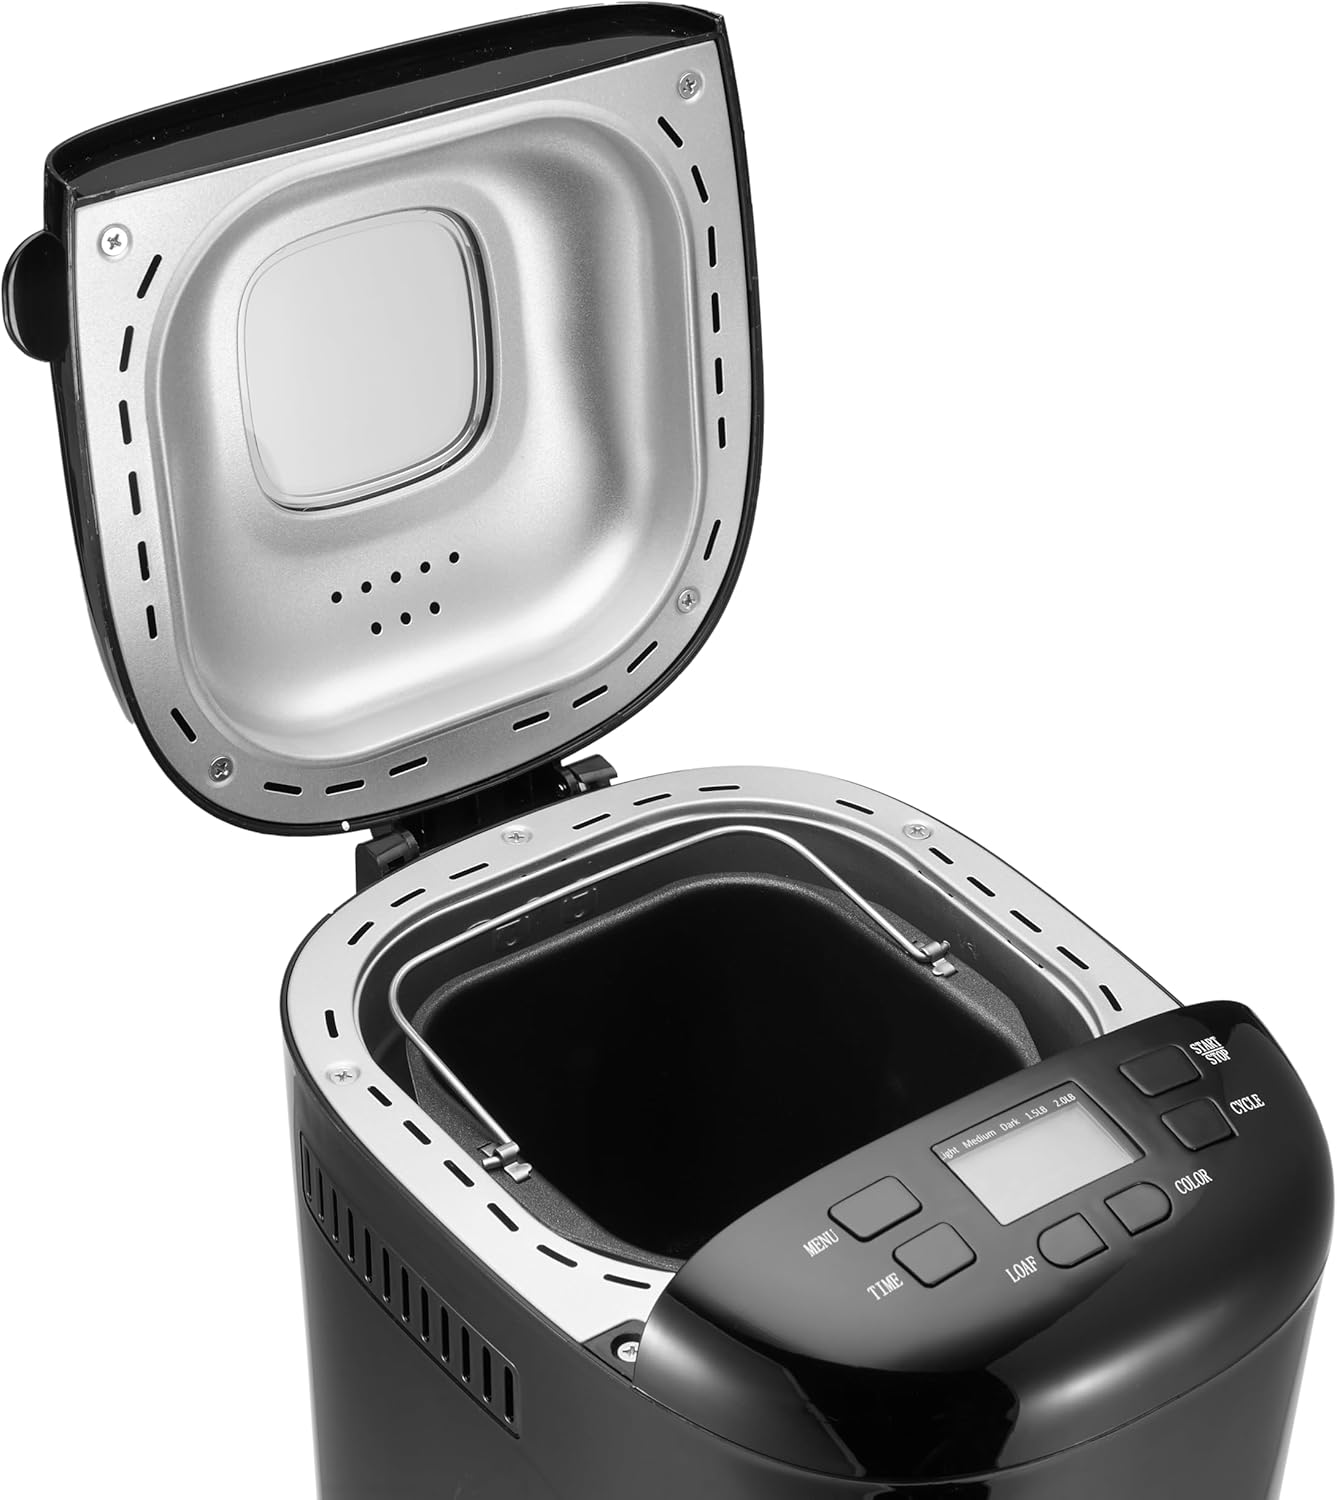
Figure 3: Bread Maker Interior. This image shows the bread maker with its lid open, revealing the heating element and the space where the bread pan is inserted. The control panel with its LCD display and buttons is visible at the front.
- Unidad principal: La carcasa principal de la panificadora.
- Panel de control: Features an LCD display and buttons for program selection, time, loaf size, and crust color.
- Tapa: Cubre la cámara de cocción, a menudo con un viewventana de ing.
- Molde para pan: Non-stick baking pan where ingredients are placed and bread is baked.
- Cuchilla amasadora: Se fija al eje dentro del molde para pan para mezclar y amasar la masa.
- Taza de medir: For liquid and dry ingredients.
- Cuchara medidora: For smaller measurements (teaspoon/tablespoon).
- Gancho: Used to remove the kneading blade from the baked loaf.
Configuración y primer uso
- Desembalaje: Retire con cuidado la panificadora y todos los accesorios del embalaje. Conserve el embalaje para su posterior almacenamiento o transporte.
- Limpieza: Before first use, wash the bread pan and kneading blade with warm, soapy water. Rinse thoroughly and dry completely. Wipe the exterior of the bread maker with a damp paño. No sumerja la unidad principal en agua.
- Quema inicial: It is recommended to run the bread maker empty for approximately 10 minutes on a "Bake" cycle (if available, or a short custom bake cycle) to burn off any manufacturing oils. Some smoke or odor may be present; this is normal. Ensure adequate ventilation. After this, allow the unit to cool completely and clean the interior again.
- Colocación: Coloque la panificadora sobre una superficie estable, plana y resistente al calor, alejada de la luz solar directa y de fuentes de calor. Asegúrese de que haya suficiente ventilación alrededor del aparato.
- Conexión de energía: Conecte el cable de alimentación a una toma de corriente con conexión a tierra. La pantalla se iluminará, indicando que la unidad está lista para usarse.
Instrucciones de funcionamiento
This section guides you through the process of making bread with your appliance.
Panel de control sobreview
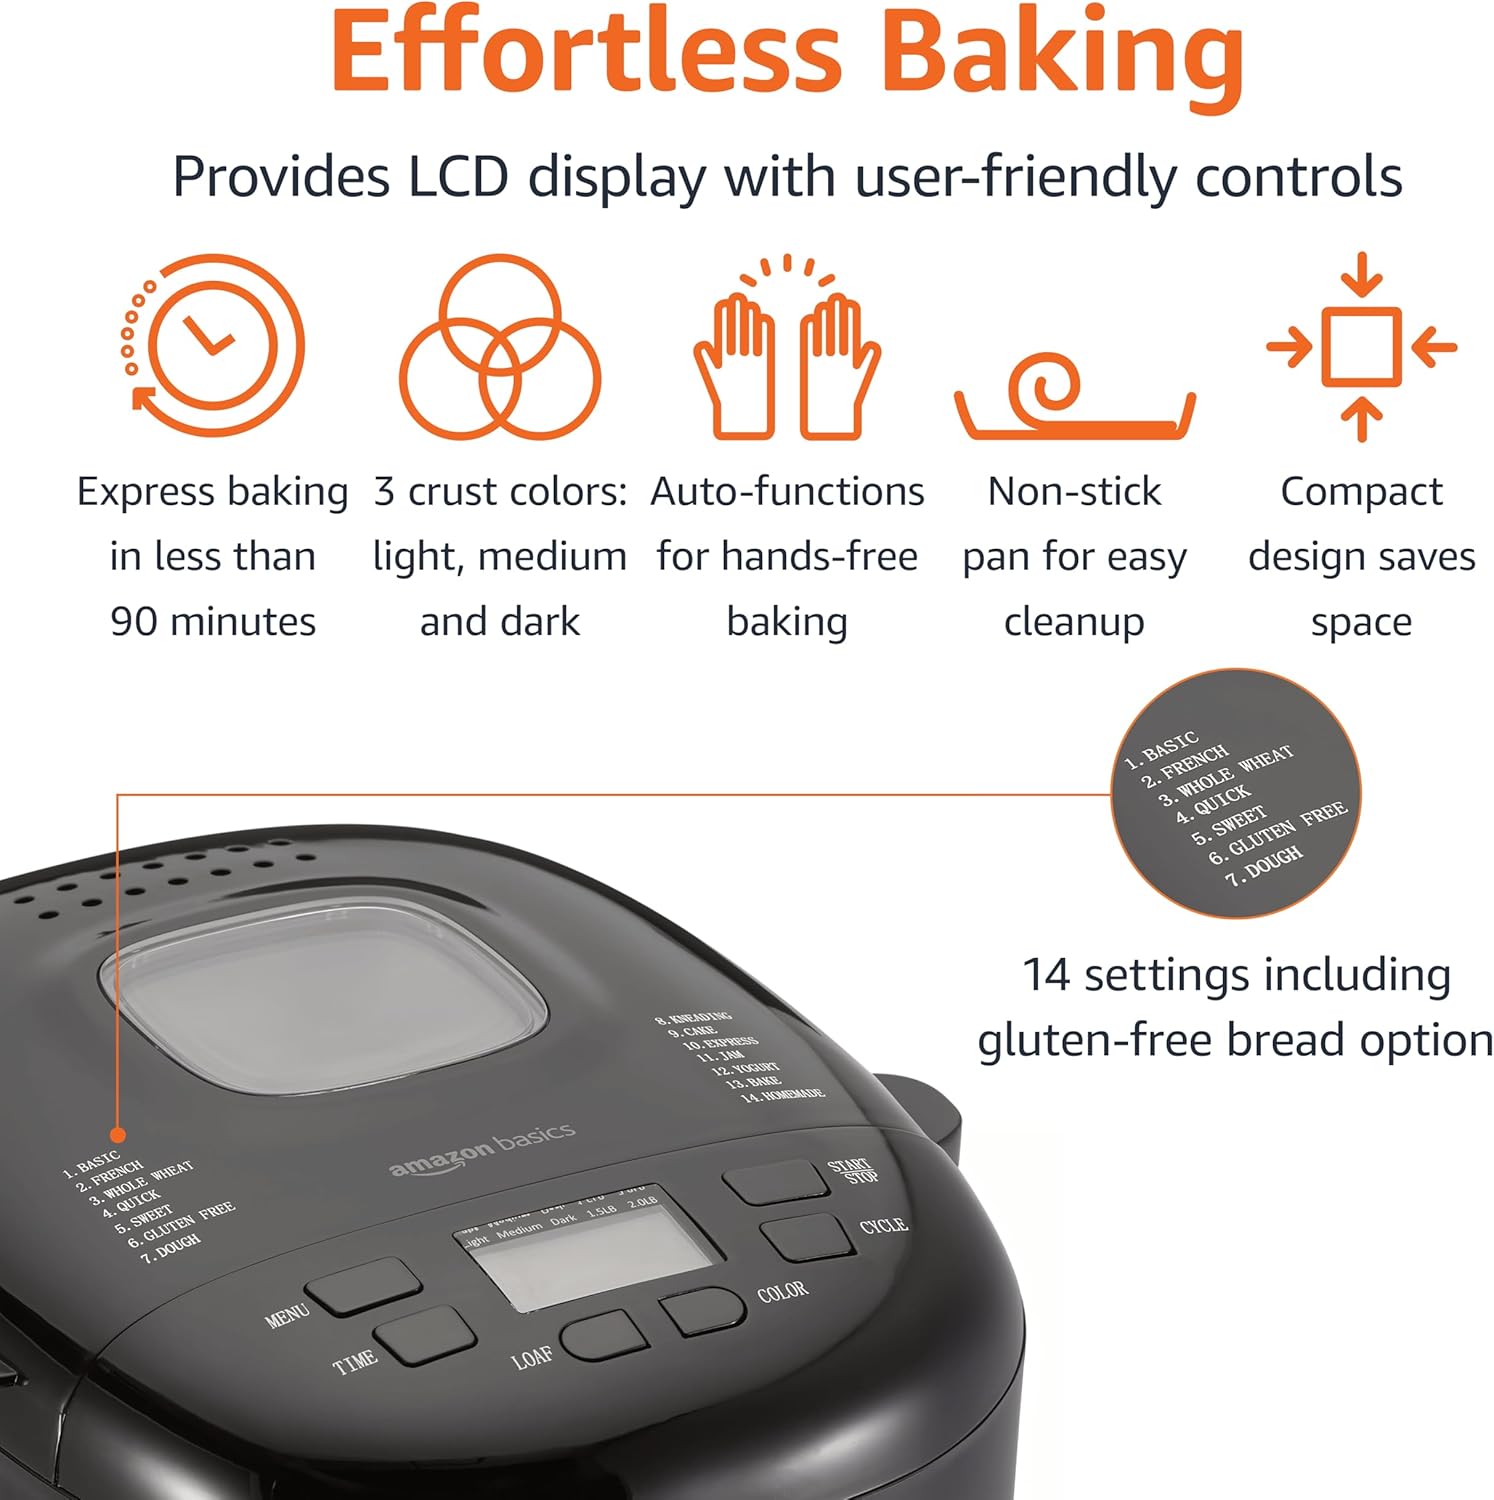
Figura 4: Panel de control. This image highlights the bread maker's control panel, featuring an LCD screen that displays program information. Buttons for 'MENU', 'TIME', 'LOAF', 'COLOR', and 'CYCLE' are clearly visible, along with a list of 14 program settings.
- Botón MENÚ: Selects one of the 14 available programs (e.g., Basic, French, Whole Wheat, Sweet, Gluten Free, Dough, Jam).
- TIME Buttons (+/-): Ajusta el temporizador de retardo para hornear con retraso.
- Botón PAN: Selects the loaf size (e.g., 1.5 lb or 2 lb).
- Botón COLOR: Selects the crust darkness (Light, Medium, Dark).
- CYCLE (Start/Stop) Button: Starts or stops the selected program.
- Pantalla LCD: Shows the selected program, time remaining, loaf size, and crust color.
Pasos básicos para hacer pan
- Insertar cuchilla amasadora: Coloque la cuchilla amasadora sobre el eje dentro del molde para pan.
- Añadir ingredientes: Add ingredients to the bread pan in the order specified by your recipe (typically liquids first, then dry ingredients, with yeast last and separate from liquids/salt). Ensure accurate measurements.
- Coloque el molde para pan: Inserte el molde para pan en la panificadora, asegurándose de que esté bien fijado. Cierre la tapa.
- Seleccionar programa: Presione el MENÚ button to choose the desired program (e.g., "Basic" for white bread).
- Seleccione el tamaño del pan: Presione el PAN button to select the appropriate loaf size (1.5 lb or 2 lb).
- Seleccionar el color de la corteza: Presione el COLOR button to choose your preferred crust darkness (Light, Medium, or Dark).
- Programa de inicio: Presione el CICLO button to start the program. The machine will begin mixing.
- Escucha: During the kneading cycles, you may check the dough consistency by opening the lid briefly. If the dough is too dry, add a small amount of liquid; if too wet, add a small amount of flour.
- Terminación: Once the program is complete, the bread maker will usually beep and switch to a "Keep Warm" cycle. Press the CICLO botón para detener la máquina.
- Quitar el pan: Using oven mitts, carefully remove the hot bread pan from the machine. Invert the pan onto a wire rack to release the bread. If the kneading blade remains in the loaf, use the provided hook to carefully remove it.
- Enfriamiento: Allow the bread to cool on a wire rack for at least 20-30 minutes before slicing. This allows the internal structure to set.
Función de temporizador de retardo
The delay timer allows you to program the bread maker to finish baking at a later time, up to 13 hours. This is useful for having fresh bread ready in the morning.
- After selecting your program, loaf size, and crust color, press the TIEMPO buttons to set the desired delay time. The displayed time includes the baking cycle duration.
- Presione el CICLO button. The timer will count down, and the machine will start automatically when the delay time expires.
- Precaución: No utilice el temporizador de retardo con recetas que contengan ingredientes altamente perecederos como leche, huevos o fruta fresca, ya que pueden echarse a perder antes de comenzar la cocción.
Guía de recetas
The Amazon Basics Bread Maker offers 14 settings for various types of baked goods. For best results, always use recipes specifically designed for bread makers and ensure accurate measurement of ingredients.
- Bread Programs: Basic, French, Whole Wheat, Sweet, Gluten-Free, ExpressBake.
- Programas de masa: For pizza dough, pasta dough, or rolls.
- Specialty Programs: Jam, Cake, Yogurt.
Refer to the recipe book that came with your bread maker or reliable bread machine recipe sources for ingredient quantities and specific instructions for each program.
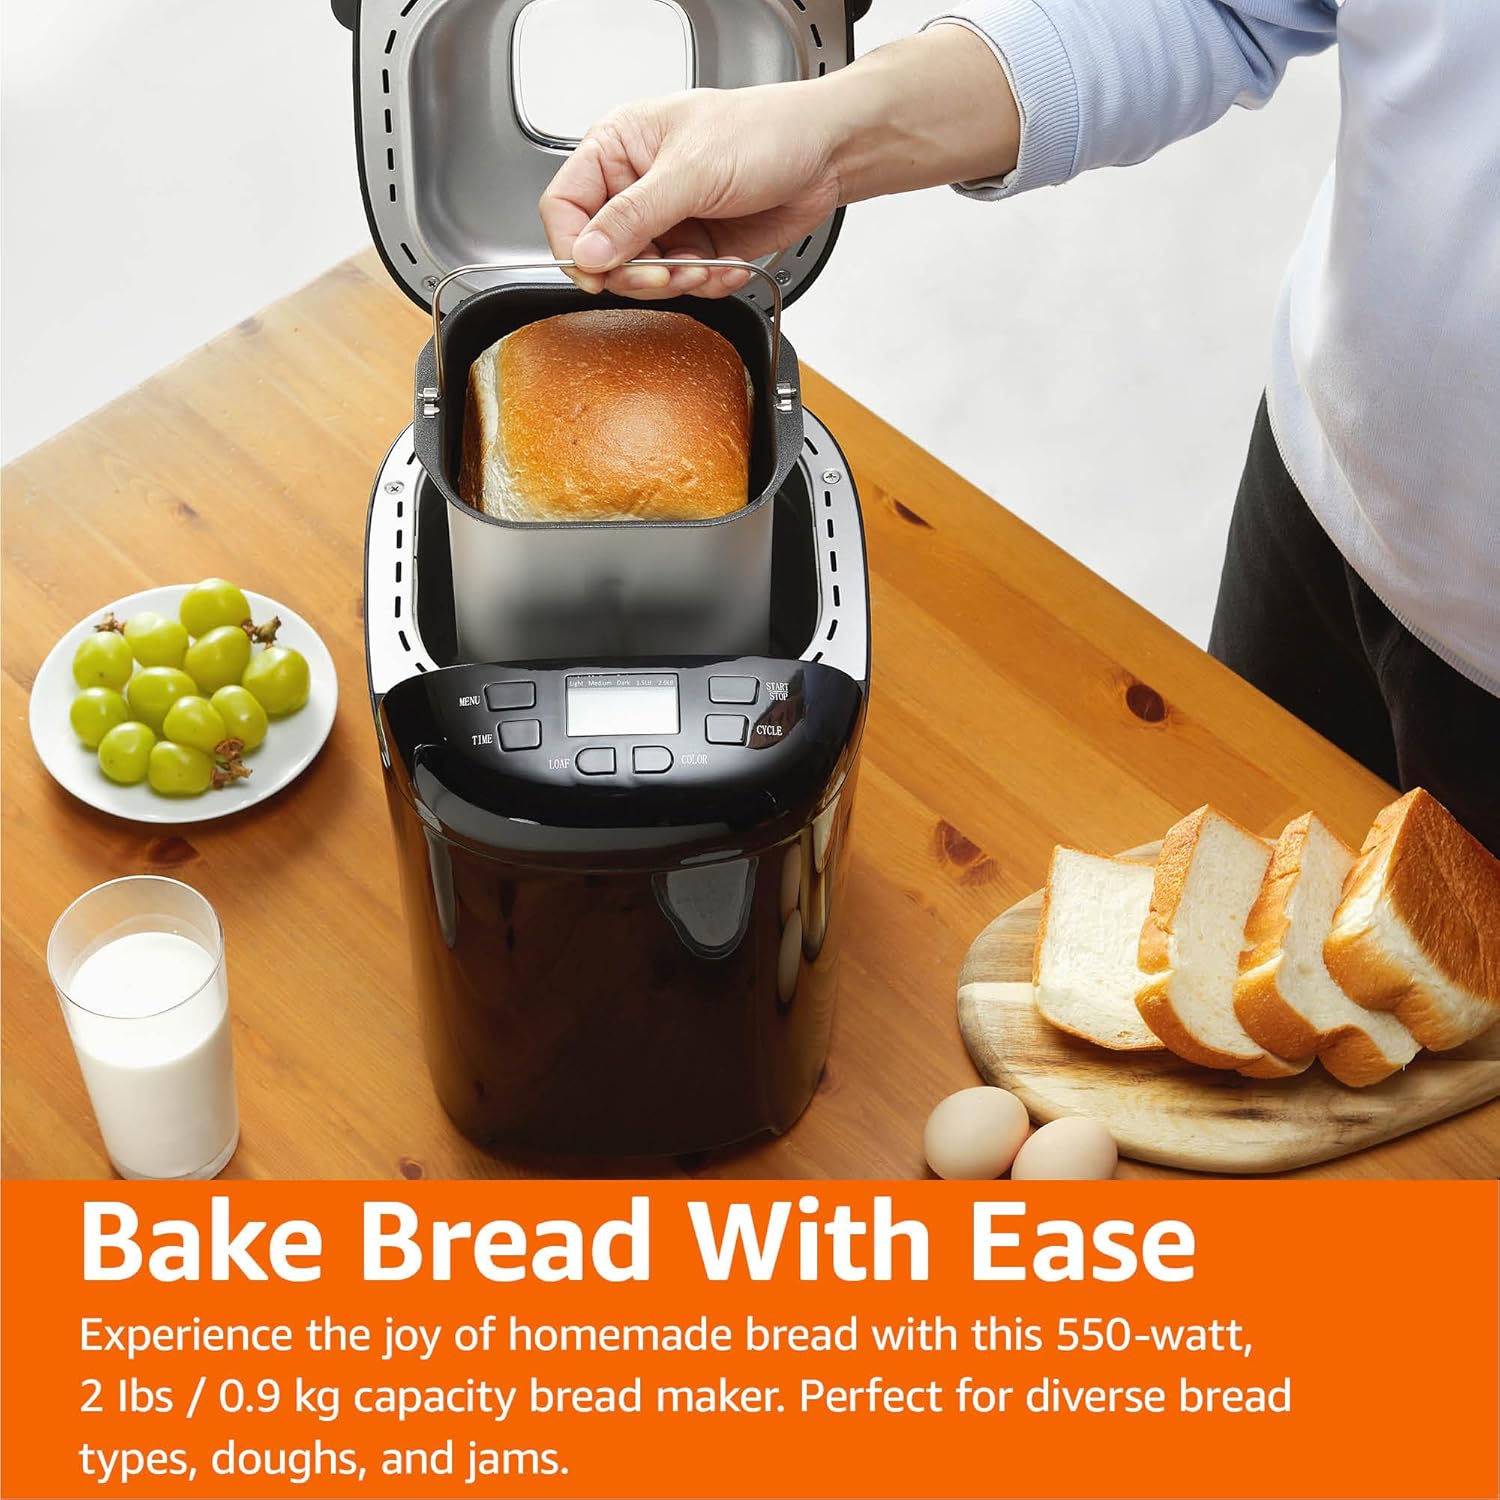
Figure 5: Freshly Baked Bread. This image shows a person carefully lifting the bread pan, containing a golden-brown loaf, out of the bread maker. Surrounding the machine are fresh grapes, a glass of milk, and slices of bread, illustrating the end result of the baking process.
Cuidado y mantenimiento
Una limpieza y un mantenimiento adecuados prolongarán la vida útil de su panificadora.
- Desenchufar: Desenchufe siempre el aparato de la toma de corriente y déjelo enfriar completamente antes de limpiarlo.
- Molde para pan y cuchilla amasadora: Wash the bread pan and kneading blade with warm, soapy water. Do not use abrasive cleaners or metal scouring pads, as this can damage the non-stick coating. Rinse thoroughly and dry completely.
- Exterior: Limpie el exterior de la panificadora con un paño suave y seco.amp paño. No utilice productos químicos agresivos ni limpiadores abrasivos.
- Interior: Limpie el interior de la cámara de cocción con adamp paño. Retire cualquier miga o residuo.
- Almacenamiento: Store the bread maker in a clean, dry place. Ensure the bread pan and kneading blade are clean and dry before storing.
Guía para resolver problemas
If you encounter issues with your bread maker, refer to the following common problems and solutions.
| Problema | Posible causa | Solución |
|---|---|---|
| El pan no sube. | Expired or inactive yeast, incorrect water temperature, too much salt, not enough sugar. | Verifique la fecha de caducidad de la levadura. Use agua tibia (40-46 °C). Asegúrese de medir correctamente los ingredientes. |
| El pan es demasiado denso o pesado. | Too much flour, not enough liquid, incorrect yeast amount, high humidity. | Measure ingredients accurately, especially flour (use a scale if possible). Adjust liquid slightly in humid conditions. |
| El pan se derrumba durante la cocción. | Too much liquid, too much yeast, high altitude, opening lid too often. | Reduce liquid slightly. Ensure correct yeast amount. Avoid opening the lid during baking. |
| Cuchilla amasadora atascada en el pan. | Ocurrencia común. | Use the provided hook to carefully remove the blade after the bread has cooled slightly. |
| La máquina no arranca. | No enchufado, sin energíatage, lid not closed properly, program not selected. | Verifique la conexión eléctrica. Asegúrese de que la tapa esté completamente cerrada. Seleccione un programa y presione INICIO. |
Especificaciones del producto
Technical details for the Amazon Basics Programmable Bread Maker.
- Número de modelo: BM1349-UL-B
- Marca: Conceptos básicos de Amazon
- Color: Negro
- Fuerza: 550 vatios
- Capacidad de pan: Hasta 2 libras
- Número de programas: 14
- Dimensiones del producto: 11.6" de profundidad x 8.8" de ancho x 11.4" de alto
- Peso del artículo: 8 libras
- Fabricante: Amazonas
- Instrucciones de cuidado: Limpiar con un paño seco (para exteriores)
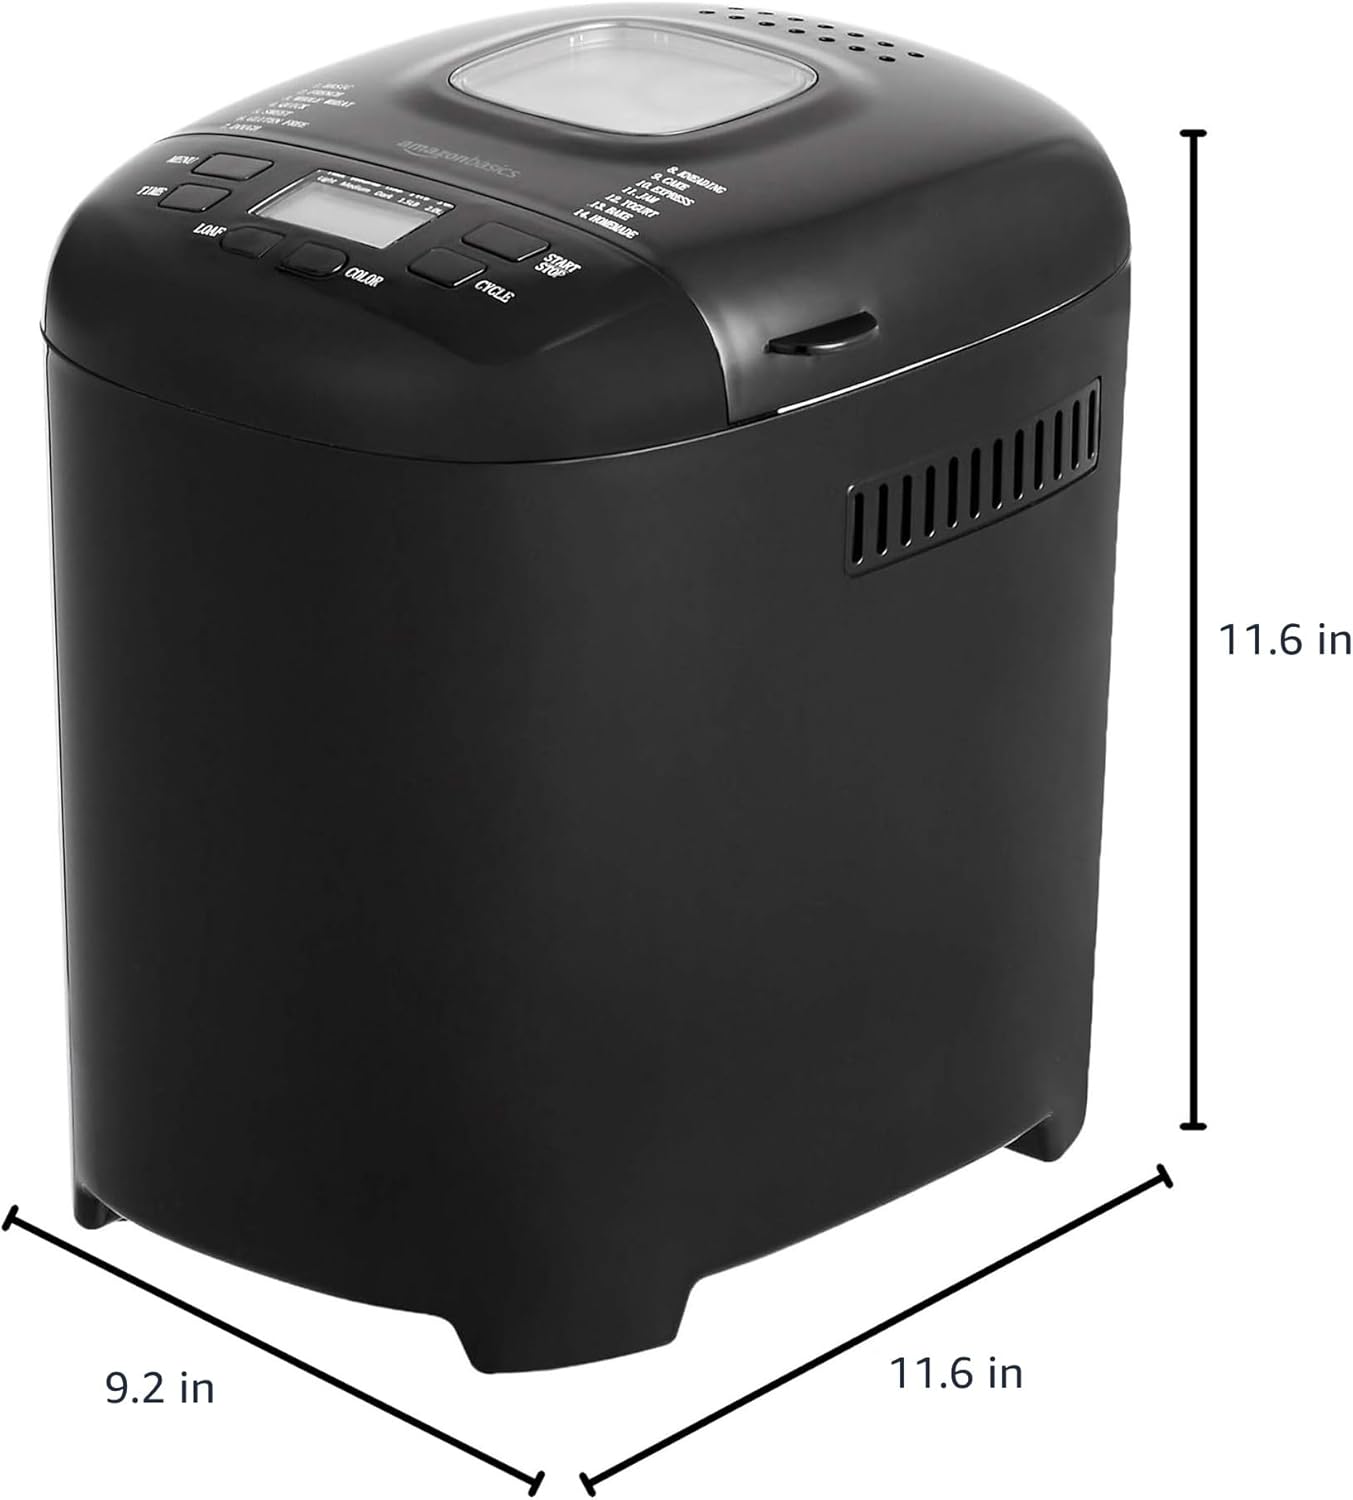
Figura 6: Dimensiones del producto. This image provides a visual representation of the bread maker's dimensions, indicating a depth of 11.6 inches, a width of 9.2 inches, and a height of 11.6 inches.
Información de garantía
For detailed warranty information, please refer to the warranty card included with your product packaging or visit the official Amazon Basics webSitio. La garantía generalmente cubre defectos de materiales y mano de obra en condiciones normales de uso.
Atención al cliente
If you have any questions, require assistance, or need to report an issue with your Amazon Basics Bread Maker, please contact Amazon Basics Customer Service. You can typically find contact information on the Amazon website under the "Help" or "Customer Service" sections, or through your order details.
Para soporte en línea, visite: Servicio de atención al cliente de Amazon