Introducción
This manual provides detailed instructions for the installation, operation, and maintenance of your Fanimation Studio Collection LP8347BLGR Level Ceiling Fan with LED Light Kit. Please read this manual thoroughly before installation and use to ensure safe and efficient operation. Keep this manual for future reference.
The Level ceiling fan is designed to provide comfort and style to your indoor space. This 44-inch hugger fan features three blades, three speed settings, and an 18-watt dimmable LED light kit. Control is managed via an included wall control.
Características principales:
- Matte greige finish with matching blades.
- Integrated 18-watt dimmable LED light kit with frosted glass shade.
- 44-inch fan size, ideal for small rooms.
- Hugger mount design for low-profile instalación.
- Three speed settings for customized airflow up to 4,530-CFM.
- Includes wall control for fan speed and light level adjustment.
- Reverse switch for seasonal direction change.
Instrucciones de seguridad
ADVERTENCIA: Para reducir el riesgo de incendio, descarga eléctrica o lesiones personales, siga siempre estas precauciones básicas:
- Lea todas las instrucciones cuidadosamente antes de instalar y operar el ventilador.
- All wiring must be in accordance with the National Electrical Code (NEC) and local electrical codes. If you are unfamiliar with wiring, consult a qualified electrician.
- Before beginning installation, disconnect power by turning off the circuit breakers to the fan's junction box.
- Asegúrese de que el lugar de instalación permita que las aspas del ventilador giren sin obstrucciones y que las aspas estén al menos a 7 pies (2.1 metros) del piso.
- The outlet box and support structure must be securely mounted and capable of supporting a minimum of 35 lbs (15.9 kg). Use only UL/ETL listed outlet boxes marked "ACCEPTABLE FOR FAN SUPPORT."
- No opere el ventilador con un cable de alimentación o enchufe dañado.
- Evite colocar los dedos u objetos en las aspas del ventilador mientras éste esté funcionando.
- Do not use the fan with any solid-state speed control device other than the provided wall control.
- Always turn off the fan and wait for the blades to stop completely before cleaning or performing maintenance.
Contenido del paquete
Carefully unpack your fan and inspect the contents. You should have the following items:
- Conjunto de motor de ventilador de techo
- Aspas de ventilador (3)
- LED Light Kit with Frosted Glass Shade
- Unidad de control de pared
- Mounting Hardware Kit (screws, washers, wire nuts)
- Manual de instrucciones

Figure 1: Fanimation Level Ceiling Fan with LED Light Kit. This image shows the complete fan assembly, including the motor housing, three blades, and the integrated LED light fixture.
Instalación
This section outlines the general steps for installing your ceiling fan. It is highly recommended to have a qualified electrician perform the installation if you are not experienced with electrical wiring.
Herramientas necesarias:
- Destornillador Phillips
- Destornillador de punta plana
- Pelacables
- Llave ajustable
- Escalera de tijera
- Cinta aisladora
Pasos de instalación:
- Apagar la energía: Antes de comenzar, asegúrese de que la energía esté apagada en el disyuntor o en la caja de fusibles para evitar descargas eléctricas.
- Monte la caja de salida: Securely attach the UL/ETL listed outlet box (not included) to the ceiling joist, ensuring it can support the fan's weight.
- Instale el soporte de montaje: Fije el soporte de montaje del ventilador a la caja de salida utilizando los tornillos y arandelas provistos.
- Conecte el ventilador: Connect the fan's electrical wires to the household wiring according to the wiring diagram provided in the full installation guide (refer to manufacturer's website for detailed diagrams). Ensure all connections are secure with wire nuts.
- Attach Fan Assembly: Carefully lift the fan motor assembly and attach it to the mounting bracket. This is a hugger-style fan, so it mounts directly to the ceiling.
- Instalar las aspas del ventilador: Securely attach the three fan blades to the motor housing using the provided screws. Ensure all screws are tightened.
- Instalar el kit de luz: Connect the wires for the LED light kit and attach the light kit assembly to the bottom of the fan motor. Secure the frosted glass shade.
- Instalar control de pared: Follow the instructions provided with the wall control unit to install it in a standard wall switch box. Ensure proper wiring for fan speed and light control.
- Restaurar energía: Una vez que todas las conexiones estén seguras y el ventilador esté completamente ensamblado, restablezca la energía en el disyuntor.
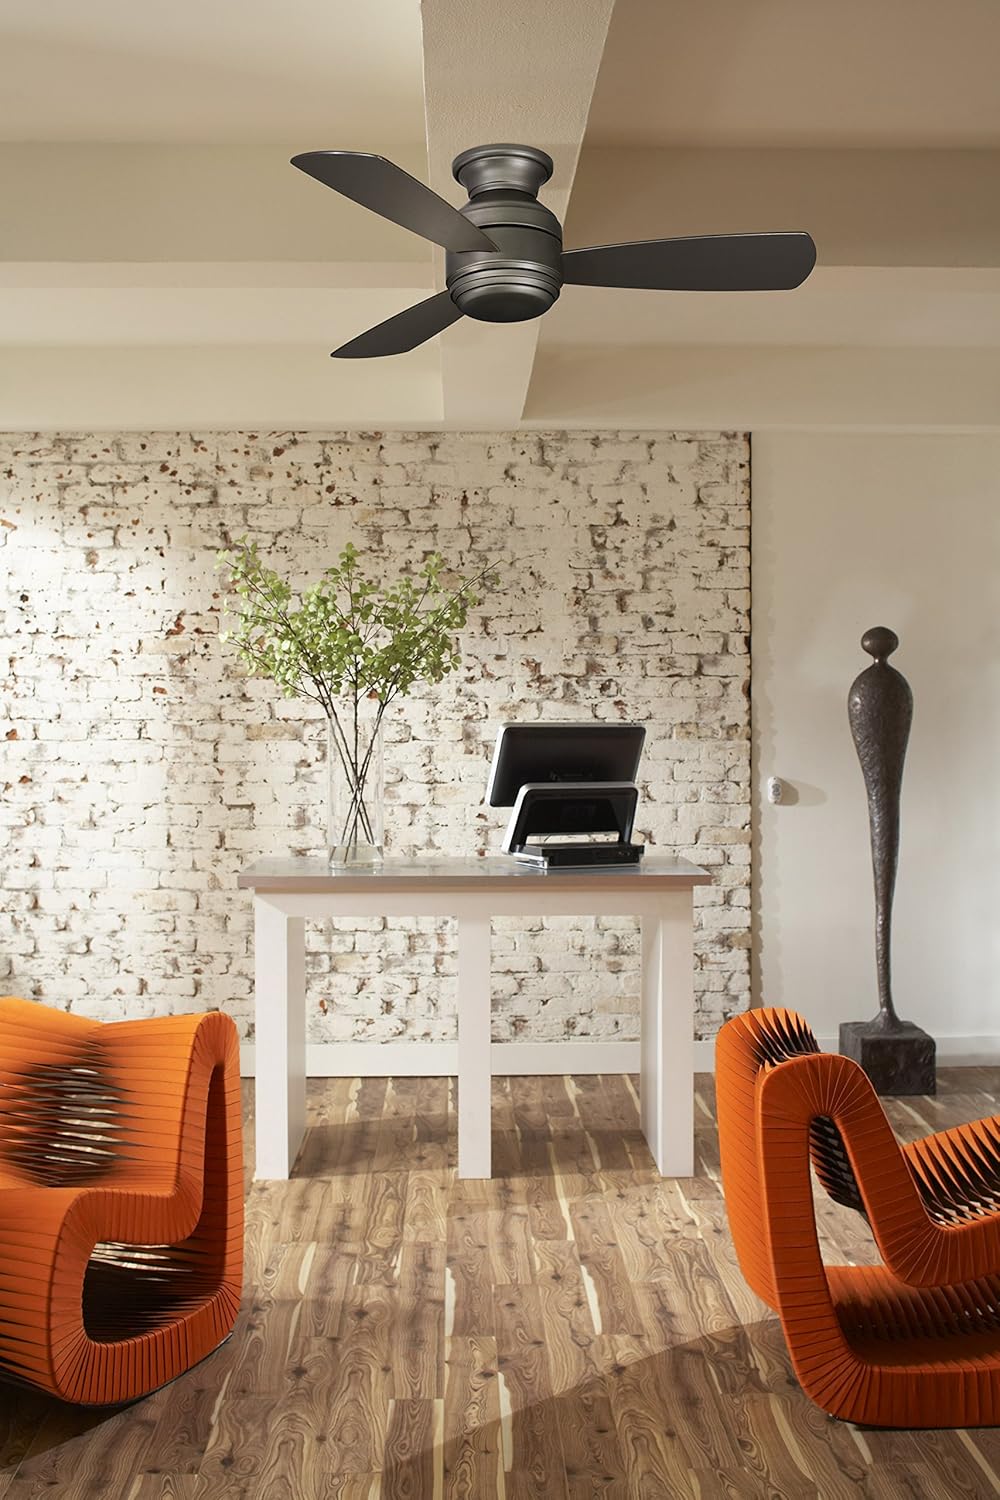
Figure 2: Fanimation Level Ceiling Fan installed in a living space. This image demonstrates the fan's appearance when mounted, showing its compact hugger design and how it integrates into a room's decor.
Operación
Your Fanimation Level Ceiling Fan is controlled by the included wall control unit. Familiarize yourself with its functions for optimal use.
Control de velocidad del ventilador:
- The wall control allows you to select from three fan speeds: Low, Medium, and High.
- Press the fan speed buttons to cycle through the desired airflow level.
Control de luz:
- The integrated LED light kit is dimmable.
- Use the light control button on the wall unit to turn the light on/off and to adjust its brightness. Typically, holding the button will dim or brighten the light.
Función inversa:
The fan features a reverse switch, usually located on the motor housing, which allows you to change the direction of blade rotation. This is useful for seasonal comfort:
- Operación de verano: Las aspas giran en sentido antihorario, empujando el aire hacia abajo para crear una brisa refrescante.
- Operación de invierno: Las aspas giran en el sentido de las agujas del reloj, aspirando el aire hacia arriba para hacer circular el aire caliente atrapado cerca del techo.
- Siempre apague el ventilador y espere a que las aspas se detengan completamente antes de cambiar la dirección de rotación.
Cuidado y mantenimiento
Regular care and maintenance will help prolong the life and maintain the appearance of your ceiling fan.
Limpieza:
- Apague siempre la alimentación al ventilador en el disyuntor antes de limpiarlo.
- Utilice un paño suave y seco.amp cloth to clean the fan blades and motor housing. Do not use abrasive cleaners or solvents, as these may damage the finish.
- Limpie periódicamente las aspas del ventilador para evitar la acumulación de polvo, que puede provocar vibraciones.
Reemplazo de bombilla:
- The fan comes with an integrated LED light kit. LEDs have a long lifespan and typically do not require frequent replacement.
- If the LED light module requires service, contact a qualified electrician or Fanimation customer support. Do not attempt to replace individual LED components.
Mantenimiento general:
- Revise periódicamente todos los tornillos del ventilador y los accesorios de montaje para asegurarse de que estén bien apretados.
- No lubrication is necessary for the fan motor.
Solución de problemas
Antes de contactar con el servicio de atención al cliente, pruebe estos pasos comunes de solución de problemas:
| Problema | Posible causa | Solución |
|---|---|---|
| El ventilador no arranca. | No llega energía al ventilador; conexiones de cables sueltas; control de pared defectuoso. | Check circuit breaker. Ensure all wire connections are secure. Verify wall control is properly installed and functioning. |
| La luz no funciona. | Loose wire connection to light kit; faulty LED module; incorrect wall control setting. | Check light kit wiring. Ensure wall control is set to "on" and brightness is adjusted. If LED module is faulty, contact support. |
| El ventilador se bambolea. | Tornillos de la cuchilla sueltos; cuchillas desequilibradas; soporte de montaje suelto. | Tighten all blade screws. Check for bent blades. Ensure mounting bracket is securely fastened to the ceiling box. Use a balancing kit if necessary. |
| Operación ruidosa. | Loose screws; motor hum; fan not properly seated. | Check and tighten all screws. Allow a 24-hour break-in period for new motors. Ensure fan is securely mounted. |
Presupuesto
| Atributo | Detalle |
|---|---|
| Nombre del modelo | Nivel |
| Número de modelo | LP8347BLGR |
| Marca | Fanimación |
| Color | Matte Greige |
| Tamaño | 44 pulgadas |
| Número de cuchillas | 3 |
| Material de la hoja | Madera |
| Capacidad de flujo de aire | 4,530 CFM (pies cúbicos por minuto) |
| Quétage | 18 watts (LED Light Kit) |
| Volumentage | 120 voltios (CA) |
| Método de control | Control de pared |
| Dimensiones del producto | 44 x 44 x 11.25 pulgadas |
| Peso del artículo | 15.72 libras |
| Uso en interiores y exteriores | Interior |
| Código Postal | 840506087675 |
Información de garantía
The Fanimation Studio Collection LP8347BLGR Level Ceiling Fan comes with a Garantía limitada de por vidaEsta garantía cubre defectos de materiales y mano de obra en condiciones normales de uso y servicio. Conserve su comprobante de compra para reclamaciones de garantía.
For full details regarding warranty coverage, limitations, and how to make a claim, please refer to the official warranty statement included with your product packaging or visit the Fanimation official websitio.
Atención al cliente
If you encounter any issues not covered in the troubleshooting section, or require further assistance with your Fanimation Level Ceiling Fan, please contact Fanimation customer support.
For the most up-to-date contact information, including phone numbers and online support resources, please visit the official Fanimation websitio:
When contacting support, please have your model number (LP8347BLGR) and proof of purchase readily available.


