Introducción
This manual provides essential instructions for the safe operation, installation, and maintenance of your Chicago Pneumatic Digital Timer for Lamps & Appliances. Please read this manual thoroughly before using the product and retain it for future reference. Proper use ensures optimal performance and extends the product's lifespan.
Instrucciones de seguridad
Observe siempre las siguientes precauciones de seguridad para evitar lesiones o daños al producto:
- No sumerja el temporizador en agua ni lo exponga a humedad excesiva.
- Do not exceed the maximum load rating specified for the timer.
- Asegúrese de que el temporizador esté enchufado de forma segura a un tomacorriente con conexión a tierra.
- Do not disassemble or attempt to repair the timer yourself. Contact qualified service personnel.
- Mantener fuera del alcance de los niños.
- Desconecte el temporizador de la toma de corriente antes de limpiarlo.
Contenido del paquete
Verifique que todos los artículos estén presentes en el paquete:
- 1 x Chicago Pneumatic Digital Timer
- 1 x Manual de usuario (este documento)
Producto terminadoview
Familiarize yourself with the components of your digital timer.
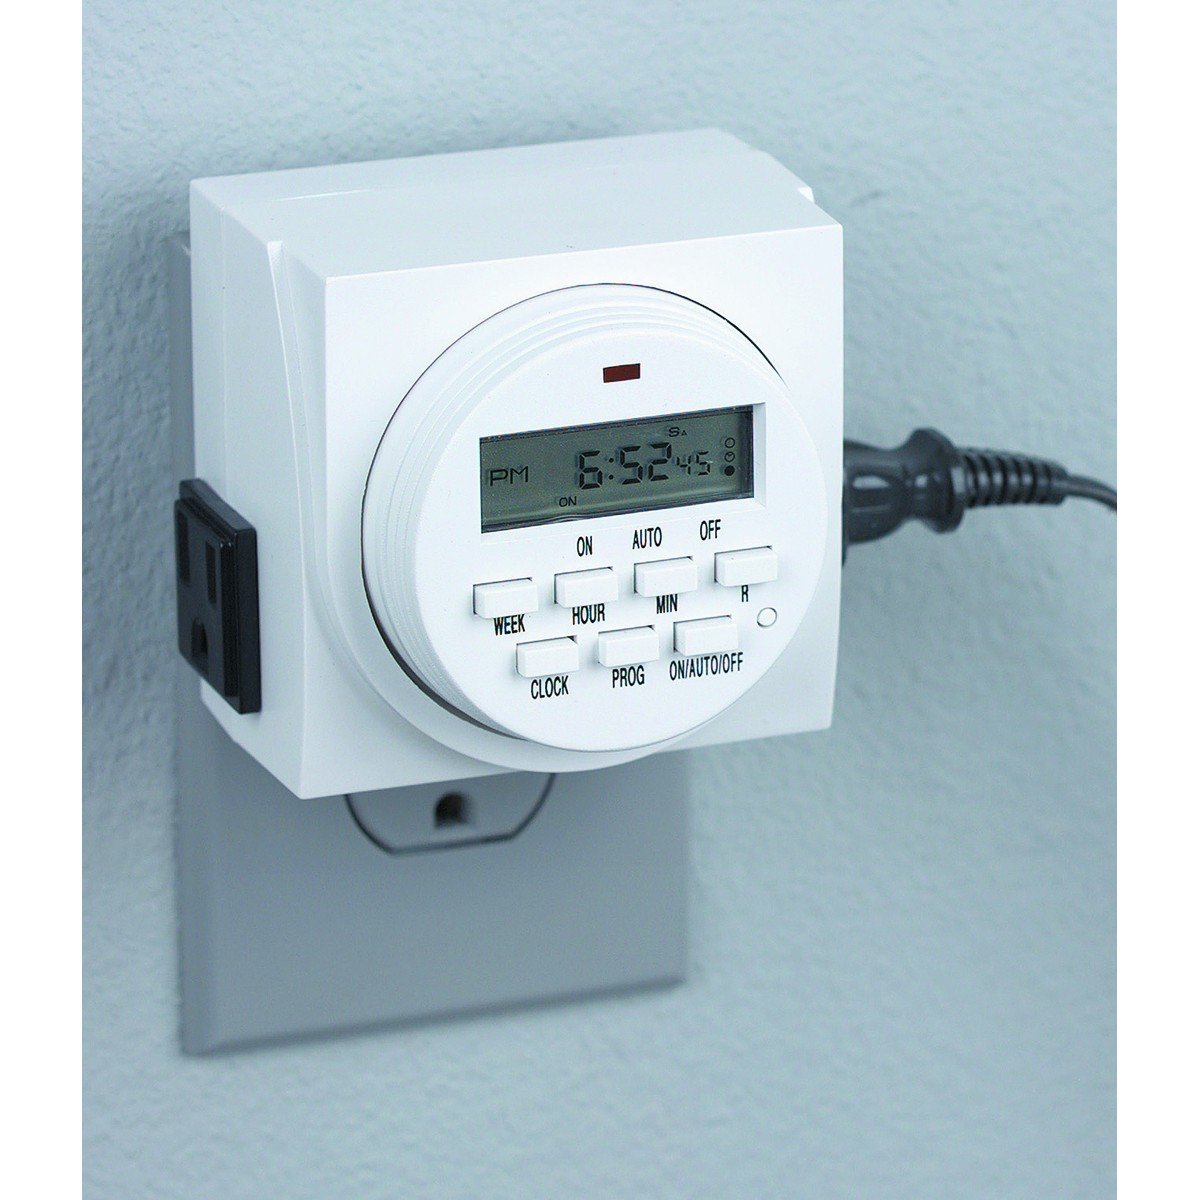
Figura 1: Frente view of the Chicago Pneumatic Digital Timer. This image displays the digital screen, which shows the current time and programming status, along with various control buttons for setting programs, adjusting time, and manual override.
The timer features a clear digital display, multiple programming buttons, and a power outlet for connecting appliances.
Configuración
- Carga inicial: Before first use, plug the timer into a live electrical outlet for at least 30 minutes to charge the internal battery. This battery retains settings during power outages.
- Borrar todas las configuraciones: Press the "RESET" button (often a small recessed button requiring a pen tip) to clear all previous settings and restore factory defaults.
- Establecer hora actual:
- Presione el botón "RELOJ".
- Use the "HOUR" and "MINUTE" buttons to set the current time.
- Use the "WEEK" button to set the current day of the week.
- Press "CLOCK" again to confirm and exit time setting mode.
Instrucciones de funcionamiento
Programación de tiempos de encendido / apagado
El temporizador permite múltiples programas de encendido y apagado. Siga estos pasos para configurar un programa:
- Press the "PROG" button. The display will show "1 ON".
- Use "WEEK" to select the day(s) for this program (e.g., MO, TU, WE, TH, FR, SA, SU, or combinations like MO-FR, SA-SU, MO-SU).
- Use "HOUR" and "MINUTE" to set the desired ON time.
- Pulse "PROG" de nuevo. La pantalla mostrará "1 OFF".
- Use "WEEK", "HOUR", and "MINUTE" to set the desired OFF time for the same program.
- Repeat steps 1-5 for additional programs (e.g., "2 ON", "2 OFF", etc.).
- After setting all programs, press the "CLOCK" button to return to the current time display.
Anulación manual
To manually switch the timer's output ON or OFF, or to cycle through modes:
- Press the "MANUAL" or "ON/AUTO/OFF" button repeatedly.
- The display will cycle through "ON" (always on), "AUTO" (follows programs), and "OFF" (always off). Select "AUTO" for programmed operation.
Connecting an Appliance
Plug the appliance you wish to control into the outlet on the front of the digital timer. Ensure the appliance's power switch is in the ON position if it has one, so the timer can control its power supply.
Mantenimiento
- Limpieza: Disconnect the timer from the power outlet. Wipe the exterior with a soft, dry cloth. Do not use abrasive cleaners or solvents.
- Almacenamiento: Guarde el temporizador en un lugar fresco y seco cuando no esté en uso.
- Batería: The internal battery is designed for long life and typically does not require replacement. If the display becomes dim or settings are frequently lost, ensure the timer is regularly plugged in to charge the battery.
Solución de problemas
| Problema | Posible causa | Solución |
|---|---|---|
| El temporizador no se enciende ni se apaga en los horarios programados. |
|
|
| La pantalla está en blanco o tenue. |
|
|
| Las configuraciones se pierden después de un corte de energíatage. | La batería interna no está suficientemente cargada. | Plug the timer into a live outlet for several hours to fully charge the internal battery. |
Presupuesto
| Modelo | Temporizador digital |
| Marca | Chicago Neumático |
| Material | Plástico |
| Peso del artículo | 8.4 onzas |
| Dimensiones del paquete | 7.68 x 7.44 x 3.86 pulgadas |
| Código Postal | 367877920504 |
| ASIN | B082P3B3TY |
| Potencia nominal | (Consulte la etiqueta del producto para conocer el volumen específico).tage/ampedad) |
Garantía y soporte
Chicago Pneumatic products are manufactured to high-quality standards. For warranty information, please refer to the warranty card included with your purchase or visit the official Chicago Pneumatic webSitio. Conserve su recibo de compra como comprobante de compra.
For technical support, troubleshooting assistance beyond this manual, or to inquire about replacement parts, please contact Chicago Pneumatic customer service. Contact details can typically be found on the product packaging or the official brand websitio.
Recursos en línea: Para obtener asistencia adicional e información sobre el producto, visite el sitio web oficial Chicago Neumático websitio.


