Introducción
Thank you for choosing the Hykolity CVC-5011 5-Light Integrated LED Pendant Light. This modern fixture features premium bubble glass with a polished nickel finish, offering adjustable height and color temperature. Designed for various indoor spaces, it provides efficient and stylish illumination. Please read this manual thoroughly before installation and use to ensure safe and proper operation.
Características principales:
- Rendimiento alto: 5-pendants integrated LED light with premium bubble glass, CRI 90+, 30W (180 watt equivalent), 2250 Lumens.
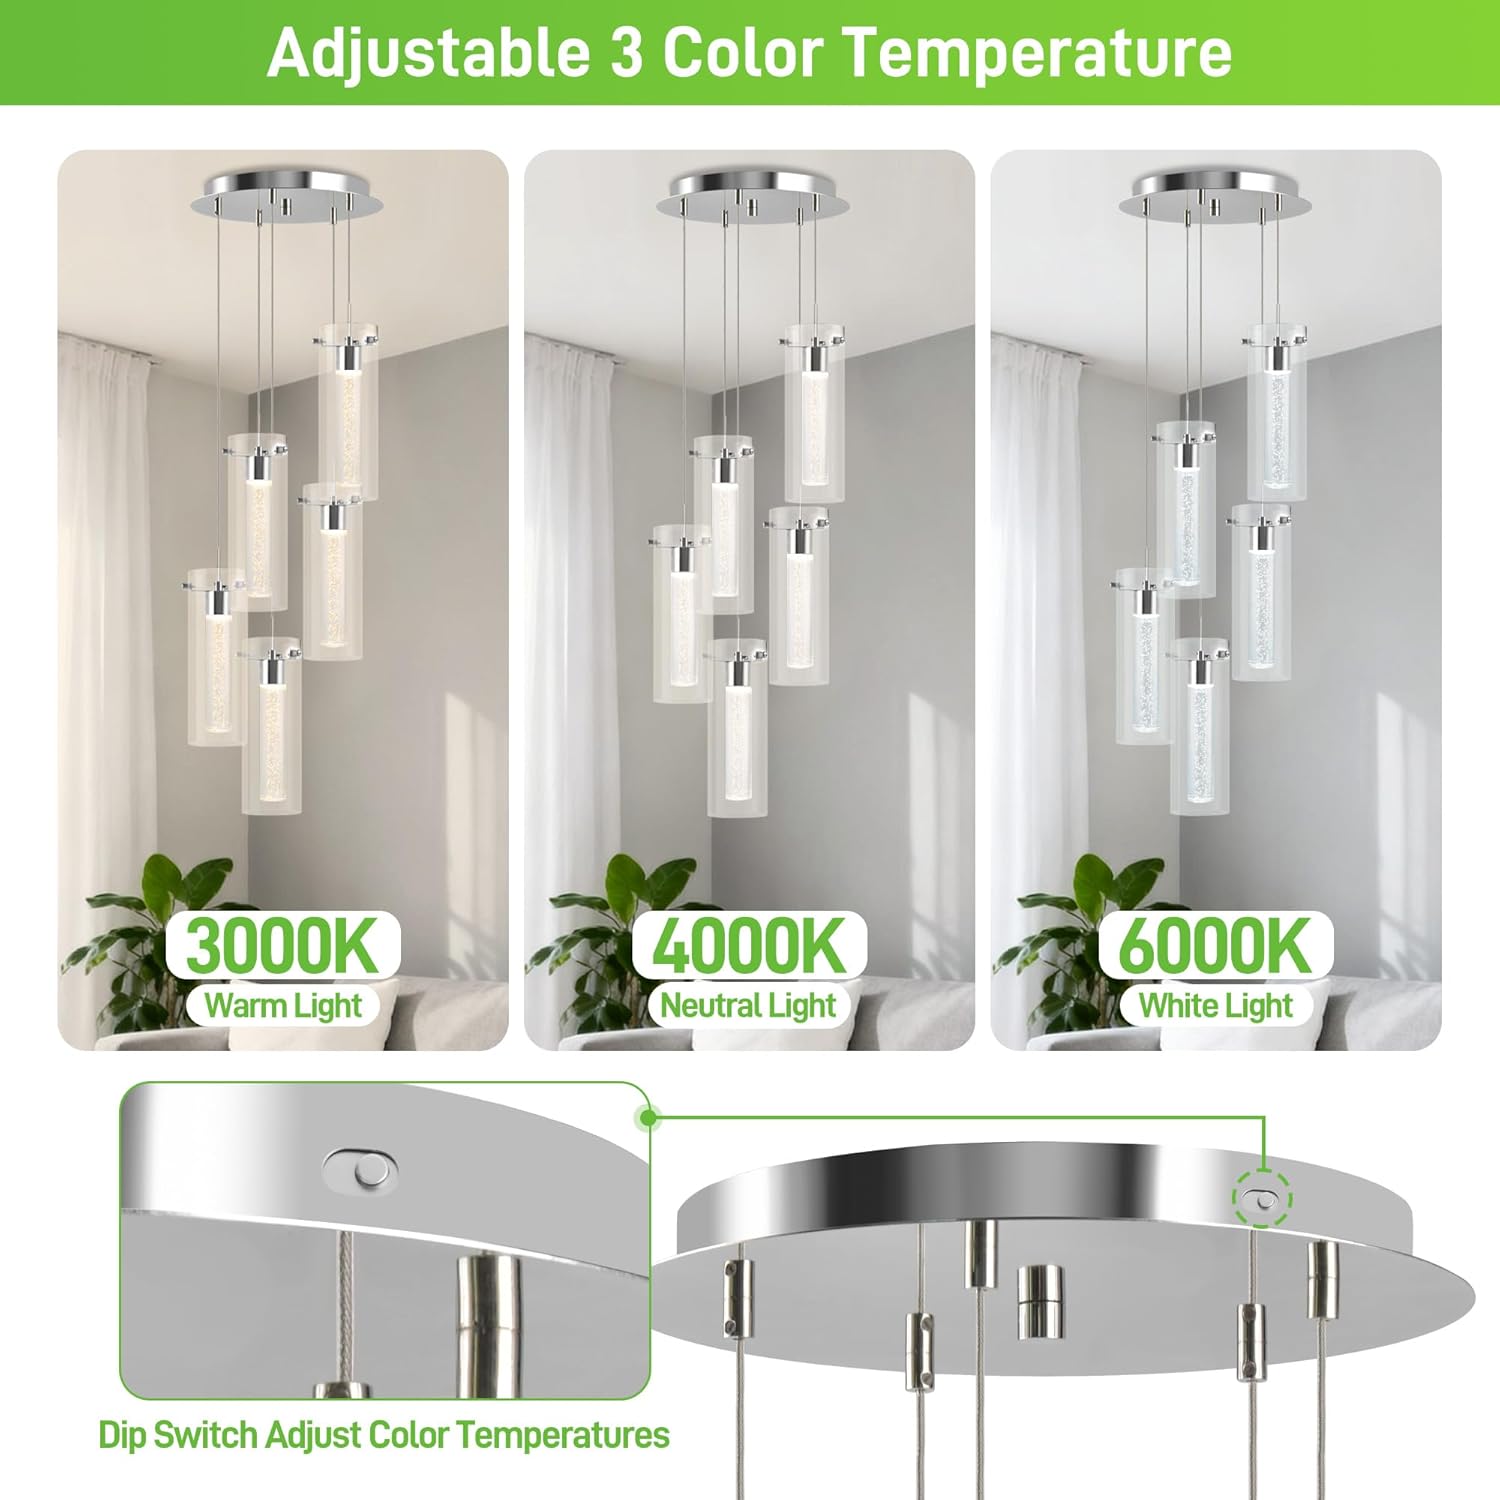
- Temperatura de color ajustable: Features 4000K neutral white LED chips, with options for 3000K Warm Light, 4000K Neutral Light, and 6000K White Light via dip switch.
- Regulable: 5%-100% dimming range, compatible with most household triac LED dimmers for smooth and flicker-free operation (dimmer switch not included).
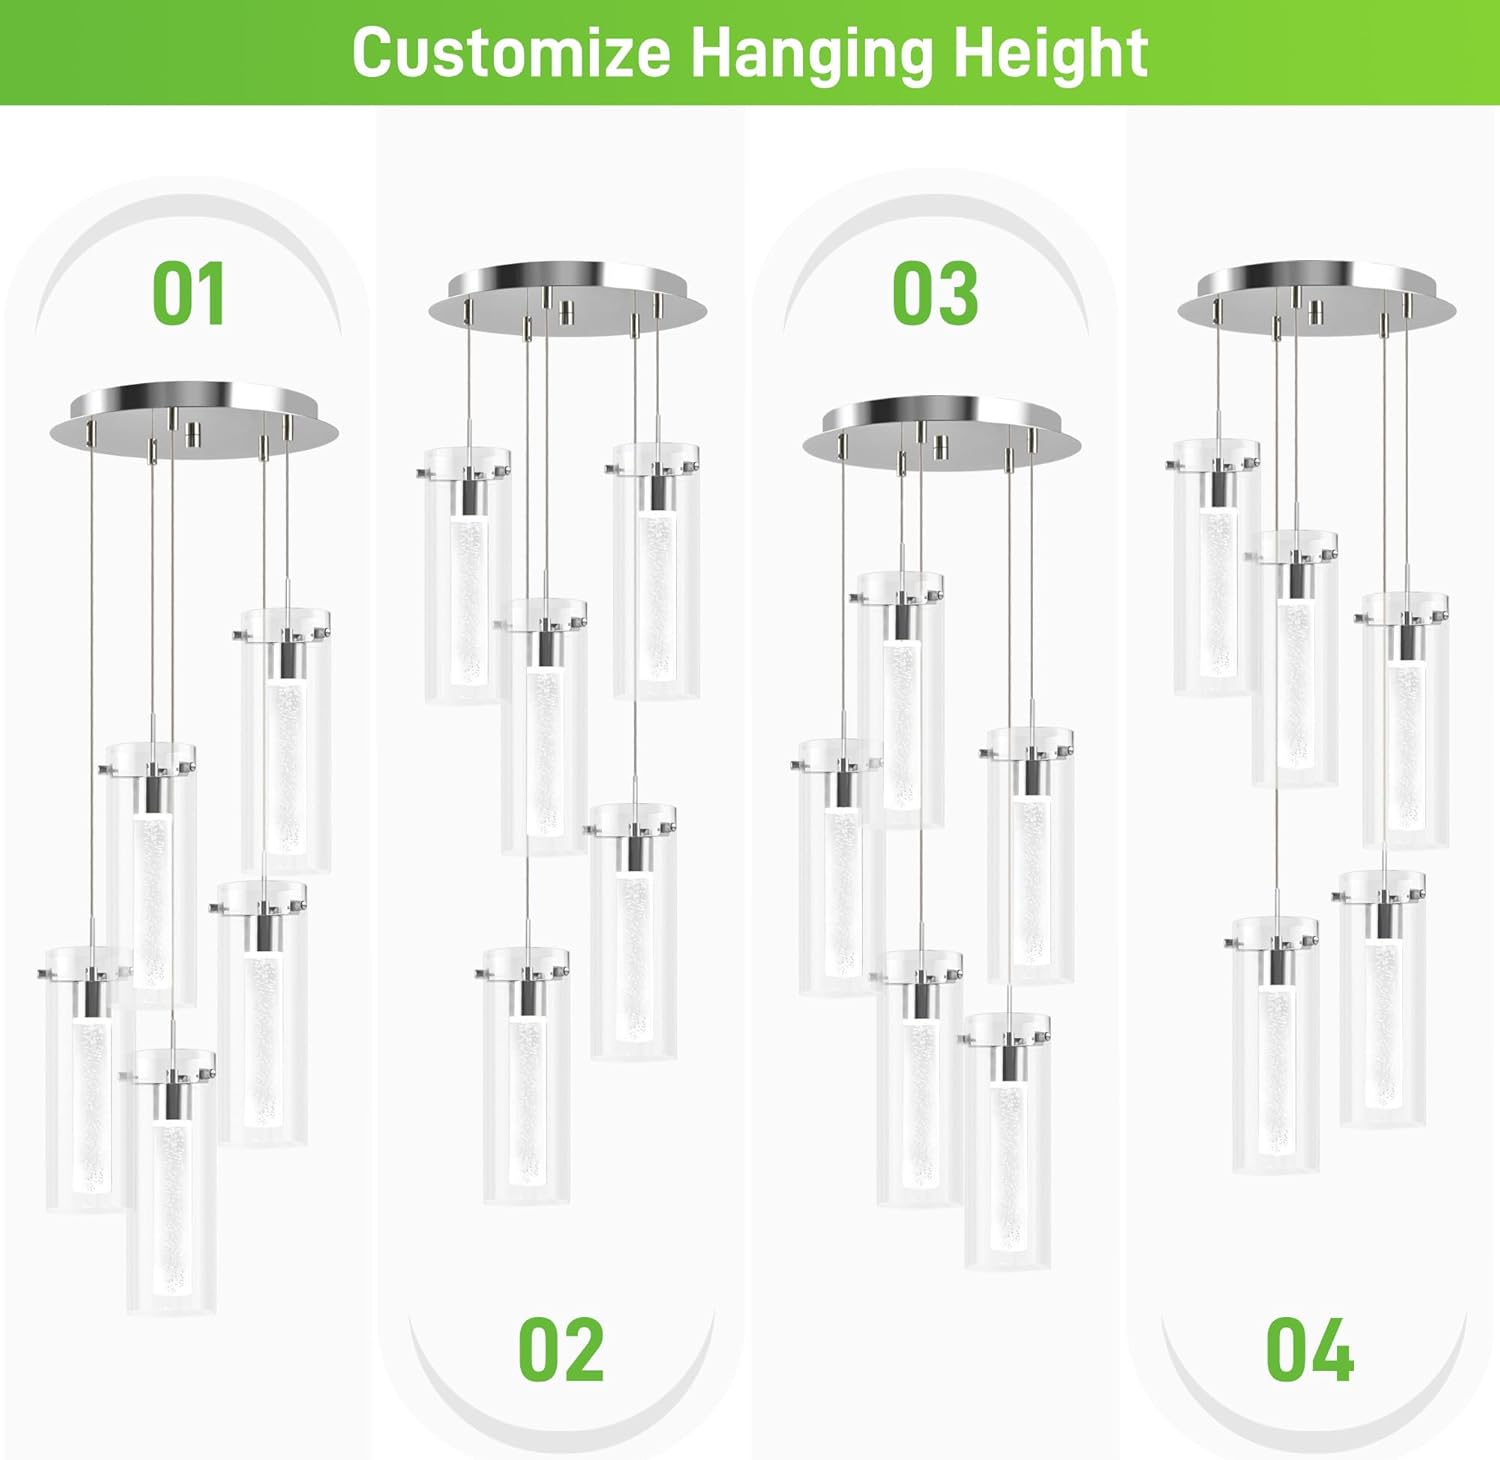
- Altura ajustable: Fully adjustable wire length by pulling on the wire while pressing the valve.
- Amplia aplicación: Ideal for dining rooms, living rooms, kitchen islands, corridors, cafes, bars, clubs, restaurants, hallways, and more.
- Fácil instalación: Comes with all mounting hardware for quick and easy setup.
¿Qué hay en la caja?
Verifique que todos los componentes estén presentes y sin daños antes de comenzar la instalación.
- LED Chips (Integrated)
- Herrajes de montaje
- Manual de instrucciones
- 5 Pendant Lights with Bubble Glass Shades
- Marquesina de techo
Presupuesto
| Marca | Hikolidad |
| Nombre del modelo | CVC-5011 |
| Color | Níquel pulido |
| Material | Metal, vidrio |
| Estilo | Moderno |
| Formulario de lámpara | Colgante |
| Dimensiones del producto | 13.8" de largo x 13.8" de ancho x 59" de alto |
| Fuente de poder | Eléctrico con cable |
| Tipo de instalación | Montaje semiempotrado |
| Tipo de fuente de luz | CONDUJO |
| Número de fuentes de luz | 5 |
| Volumentage | 120 voltios |
| Quétage | 30 watts (LED Included) |
| Brillo | 1400 lúmenes (total) |
| Temperatura de color | 3000K Warm Light / 4000K Neutral Light / 6000K White Light |
| Regulable | Yes (5%-100% with compatible triac LED dimmers) |
| Peso del artículo | 12.8 libras |
| Proceso de dar un título | Listado en ETL |
Instrucciones de instalación
Importante: Before starting installation, ensure the power supply is turned off at the circuit breaker to prevent electrical shock. It is recommended to have two people for installation due to the fixture's weight.
1. Prepárese para la instalación:
- Desembale todos los componentes y colóquelos sobre una superficie limpia y suave para evitar rayones.
- Review the included mounting hardware and ensure all parts are accounted for.
- Apague la energía en el disyuntor principal.
2. Mount the Ceiling Canopy:
Attach the mounting bracket to your ceiling junction box using the provided screws. Ensure the bracket is securely fastened and can support the fixture's weight (approximately 12.8 lbs). A heavier-rated fan box is recommended.

3. Wire the Fixture:
- Connect the fixture's wires to your household electrical wires according to local electrical codes. Typically, this involves connecting:
- Black (Live) wire from fixture to Black (Live) wire from junction box.
- White (Neutral) wire from fixture to White (Neutral) wire from junction box.
- Green or bare copper (Ground) wire from fixture to Green or bare copper (Ground) wire from junction box.
- Asegure todas las conexiones con tuercas para cables y cinta aisladora.
- Introduzca con cuidado los cables en la caja de conexiones.
4. Adjust Pendant Height:
The pendant lights feature fully adjustable cords. To adjust the length of each wire, gently pull the wire while pressing the valve mechanism located at the base of the canopy for each pendant. Once the desired length is achieved, release the valve to lock the wire in place. It is easier to adjust the height before fully securing the canopy to the ceiling.

5. Secure the Canopy:
Once wiring is complete and pendant heights are set, carefully push the canopy up against the ceiling and secure it to the mounting bracket using the provided screws or nuts.
6. Attach Glass Shades:
Attach the bubble glass shades to each pendant light. Ensure they are securely fastened.

Instrucciones de funcionamiento
1. Encendido:
Once installation is complete, restore power at the circuit breaker. The light fixture should illuminate when the wall switch is turned on.
2. Adjust Color Temperature:
This fixture features adjustable color temperature. Locate the dip switch on the canopy (refer to the image below) to select between 3000K (Warm Light), 4000K (Neutral Light), and 6000K (White Light). Adjust this setting before final installation or with power off for safety.
3. Función de atenuación:
The fixture is dimmable from 5% to 100% when used with a compatible household triac LED dimmer switch (not included). Ensure your dimmer switch is specifically designed for LED lighting to avoid flickering or damage.
Mantenimiento
- Limpieza: To clean the fixture, turn off the power and allow it to cool. Wipe with a soft, dry cloth. Do not use abrasive cleaners or solvents, as these may damage the finish or glass.
- Chips LED: The LED chips are integrated into the fixture and are not user-replaceable. Do not attempt to replace them.
- Pantallas de vidrio: Handle glass shades with care. If a shade becomes damaged, contact customer support for assistance.
Solución de problemas
| Problema | Solución |
|---|---|
| El accesorio no se enciende. |
|
| Las luces parpadean o se atenúan de manera inconsistente. |
|
| Pendant light is not hanging straight or at desired height. |
|
| One or more LED lights are not working. |
|
Garantía y soporte
This Hykolity product is backed by a Garantía limitada de 5 años. Our after-sales team is based in the USA and is committed to providing high-quality products and professional support.
For any questions, technical assistance, or warranty claims, please contact Hykolity customer support. Refer to the contact information provided in the packaging or on the official Hykolity websitio.
Vídeos de productos
Integrated LED Kitchen Lighting
This video from Hykolity showcases the Integrated LED Kitchen Lighting fixture, highlighting its design and functionality in a kitchen setting. It provides an overview of the product's features and aesthetic appeal.


