1. Introducción
The Zooz ZEN16 MultiRelay is a Z-Wave Long Range enabled device designed to integrate various dry contact devices into your smart home system. It features three independent dry contact relays, allowing for versatile control of appliances and systems such as garage doors, sprinklers, gas fireplaces, and more. This manual provides essential information for the safe and effective installation, operation, and maintenance of your ZEN16 MultiRelay.
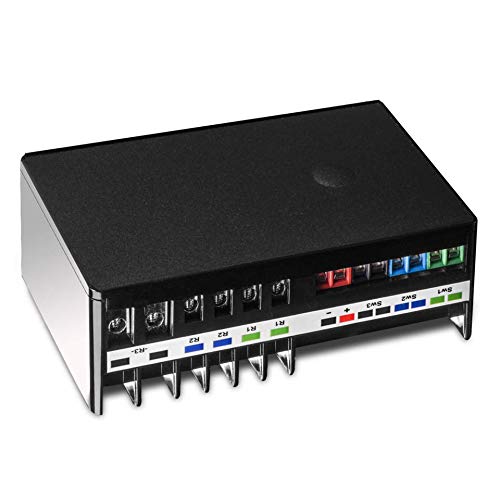
Image 1.1: The Zooz ZEN16 MultiRelay device, showing its compact form factor and terminal block connections.
2. Información de seguridad
Please read and follow all safety instructions carefully to prevent injury or damage to the device. Improper installation or use can be dangerous and void the warranty.
- Seguridad eléctrica: This device operates with low voltage (12-24 V AC/DC or 5V USB C). DO NOT power the device with 110 V AC. Ensure all power sources are disconnected before wiring.
- Dry Contact Only: The relay terminals (R1, R2, R3) and switch input terminals (SW1, SW2, SW3) are for dry contact connections only. NO aplique voltage to the input (switch) terminals.
- Personal calificado: Installation should be performed by a qualified electrician or experienced individual familiar with electrical wiring and safety procedures.
- Uso en interiores: This device is intended for indoor use only. Avoid exposure to moisture, extreme temperatures, or direct sunlight.
- Límites de carga: Do not exceed the specified current ratings for each relay (15A for R1/R2, 20A for R3).
3. Producto terminadoview
The ZEN16 MultiRelay offers advanced control for various applications. Key features include:
- Three Independent Dry Contact Relays: Control up to three separate devices. Relays R1 and R2 support up to 15A, while R3 supports up to 20A.
- Z-Wave Long Range (ZWLR) Ready: Provides extended wireless range and faster communication when paired with a ZWLR compatible hub.
- Opciones de energía flexibles: Can be powered via a standard USB C cable (5V, power supply not included) or 12-24 V AC/DC.
- S2 Security and SmartStart: Enhanced security and simplified pairing process.
- Memoria de estado: Recuerda y restaura el estado de encendido/apagado después de un corte de energía.
- External Switch Inputs: Three dry contact inputs (SW1, SW2, SW3) for connecting momentary or toggle wall switches for local control.

Image 3.1: Visual representation of common applications for the ZEN16 MultiRelay, such as garage door automation, pool pump and light control, sprinkler system automation, and gas fireplace integration.
4. Configuración e instalación
4.1 Encendido del dispositivo
The ZEN16 MultiRelay can be powered in two ways:
- USB C (5V DC): Connect a standard USB C cable to the port on the side of the device and to a 5V power supply (not included). Ensure the power supply provides sufficient current.
- 12-24 V AC/DC: Connect a 12-24 V AC or DC power source to the '+' and '-' terminals on the device. Observe polarity for DC power.
Important: Do not use 110 V AC to power the device. Only use 5V DC via USB C or 12-24 V AC/DC via the screw terminals.
4.2 Cableado ExampLos
The ZEN16 MultiRelay uses dry contact relays, meaning it acts as a switch to complete or break a circuit without providing its own voltage to the controlled device. Always ensure power is disconnected before wiring.
4.2.1 Garage Door Opener Wiring
To automate a garage door, connect the ZEN16's relay terminals to the wall button terminals on your garage door opener. The ZEN16 will simulate a button press.

Image 4.1: Wiring diagram illustrating how to connect the ZEN16 MultiRelay to up to three garage door openers. Power is supplied via USB C or 12-24V AC/DC, and the relay outputs (R1, R2, R3) are connected to the opener's bell wire terminals. Optional external switches (SW1, SW2, SW3) are shown connected to the relay inputs.
4.2.2 Gas Fireplace Millivolt Valve Wiring
For gas fireplaces with a millivolt valve, connect the ZEN16's relay terminals in series with the existing wall switch or directly to the valve's thermostat terminals.

Image 4.2: Wiring diagram demonstrating the connection of the ZEN16 MultiRelay to a gas fireplace millivolt valve. The relay output (R1) is connected to the valve's terminals, and an optional wall switch is connected to the SW1 input for manual control.
4.2.3 Pool Light and Pump Wiring
The ZEN16 can control low-voltage pool lights and pumps by integrating its relays into their control circuits.

Image 4.3: Wiring diagram showing how to connect the ZEN16 MultiRelay to control a pool light and a pool pump. Relay outputs (R1, R2) are used to switch the power source for the light and pump, respectively. Corresponding external switches are connected to SW1 and SW2.
4.3 Inclusión de Z-Wave (emparejamiento)
To integrate the ZEN16 into your Z-Wave network, a Z-Wave hub is required. Follow your hub's instructions for including a new Z-Wave device.
- Power the ZEN16: Ensure the MultiRelay is powered using either USB C or 12-24 V AC/DC.
- Initiate Inclusion Mode: Put your Z-Wave hub into inclusion (pairing) mode.
- Activate ZEN16 Pairing: Press the Z-Wave button on the ZEN16 three times quickly. The LED indicator will flash to confirm inclusion mode.
- Confirmación: Your hub should detect and add the device. The LED will turn solid green if successful.
For SmartStart inclusion, scan the QR code on the device or packaging with your hub's app if supported.
Note: Some hubs (e.g., Wink, Ring, Vivint, ADT Pulse) may offer partial control or require custom device handlers. Refer to the Zooz support page for specific hub compatibility and driver information.
5. Instrucciones de funcionamiento
Once successfully paired with your Z-Wave hub, the ZEN16 MultiRelay can be controlled wirelessly. Each of the three relays will appear as a separate switch in your Z-Wave interface.
- Control inalámbrico: Use your Z-Wave hub's interface or associated smart home app to turn each relay (R1, R2, R3) on or off independently.
- Control manual: If external momentary or toggle switches are connected to SW1, SW2, or SW3, you can manually activate the corresponding relays.
- Automatización: Configure scenes, schedules, and automations within your Z-Wave hub to control the relays based on time, sensor input, or other events.
6. Configuración avanzada
The ZEN16 MultiRelay supports various Z-Wave configuration parameters that allow customization of its behavior. Accessing and modifying these parameters typically requires an advanced Z-Wave hub (e.g., Hubitat, Home Assistant, SmartThings with custom drivers).
Common configurable parameters include:
- Tipo de interruptor: Configure SW1, SW2, SW3 inputs as momentary or toggle switches.
- Temporizador de encendido y apagado automático: Set relays to automatically turn off after a specified duration or turn on for a set time.
- Power State After Power Failure: Define whether relays restore their last state, turn on, or turn off after power is restored.
- Relay Behavior: Adjust how the physical switch inputs control the relays (e.g., direct control, scene activation).
For a complete list of parameters and detailed instructions, please refer to the official Zooz support documentation for the ZEN16 MultiRelay on their websitio.
7. Mantenimiento
The ZEN16 MultiRelay is designed for reliable operation with minimal maintenance.
- Limpieza: Utilice un paño suave y seco para limpiar el dispositivo. No utilice productos químicos agresivos ni limpiadores abrasivos.
- Actualizaciones de firmware: Periodically check the Zooz website for firmware updates. Updates can improve performance, add features, or address issues. Follow the provided instructions for any update procedures.
- Condiciones ambientales: Asegúrese de que el dispositivo permanezca dentro de los rangos de temperatura y humedad de funcionamiento especificados.
8. Solución de problemas
If you encounter issues with your ZEN16 MultiRelay, consult the following common troubleshooting steps:
8.1 Device Not Pairing with Hub
- Comprobación de energía: Ensure the ZEN16 is properly powered. The LED should be solid green or blue.
- Exclusión Primero: Try excluding the device from your Z-Wave network first, even if it was never paired. Put your hub into exclusion mode and press the ZEN16's Z-Wave button three times quickly.
- Distancia: Acerque el ZEN16 a su concentrador Z-Wave durante el proceso de emparejamiento.
- Compatibilidad del concentrador: Verify your hub's compatibility and check if a custom device handler is required.
8.2 Relays Not Responding
- Comprobación del cableado: Double-check all wiring connections, especially to the controlled device and the ZEN16's relay terminals. Ensure no voltage is applied to the switch input terminals.
- Límites de carga: Confirm that the connected load does not exceed the relay's maximum current rating.
- Conectividad Z-Wave: Ensure the ZEN16 is still connected to your Z-Wave network. Try refreshing the device status in your hub's interface.
- Prueba manual: If external switches are connected, test if the relays respond to manual input.
8.3 Conectividad intermitente
- Z-Wave Mesh: Ensure you have a robust Z-Wave mesh network with sufficient Z-Wave repeaters, especially if using standard Z-Wave.
- Obstrucciones: Large metal objects or thick walls can interfere with Z-Wave signals.
- Largo alcance de onda Z: If your hub supports Z-Wave Long Range, ensure the device is paired in ZWLR mode for optimal range and reliability.
For further assistance, please contact Zooz customer support.
9. Especificaciones
| Parámetro | Valor |
|---|---|
| Número de modelo | ZEN16 |
| Frecuencia Z-Wave | 908.42 MHz (US/CA/MX) |
| Fuerza | 5V DC (USB C) or 12-24 V AC/DC |
| Max Load (R1, R2) | 15 Amps |
| Max Load (R3) | 20 Amps |
| Tipo de contacto | Normally Open (Dry Contact) |
| Tipo de montaje | Montaje en pared |
| Temperatura de funcionamiento | 32-104 °F (0-40 °C) |
| Dimensiones | 5.39 x 3.82 x 2.32 pulgadas |
| Certificaciones | Certificación ETL |
10. Garantía y soporte
Zooz products are backed by a manufacturer's warranty. For specific warranty terms and conditions, please refer to the official Zooz websitio o la documentación incluida con su compra.
For technical support, troubleshooting assistance, or any questions regarding your ZEN16 MultiRelay, please visit the Zooz support page on their official website. You can find detailed guides, FAQs, and contact information for their support team.
Soporte en línea: www.support.getzooz.com


