1. Introducción
This manual provides comprehensive instructions for the installation, operation, and maintenance of your ErGear Single Monitor Mount, Model EGSS7. This monitor arm is designed to enhance your workspace ergonomics by providing adjustable positioning for a single monitor. Please read this manual thoroughly before installation and retain it for future reference.

Image 1.1: The ErGear Single Monitor Arm (Model EGSS7) in a typical office setup.
2. Información de seguridad
Tenga en cuenta las siguientes precauciones de seguridad para evitar lesiones o daños a su equipo:
- No exceda la capacidad máxima de peso de 14.3 libras (6.5 kg).
- Ensure your monitor is between 17 and 27 inches in size.
- Verify that your monitor is VESA compatible (75x75mm or 100x100mm).
- Install the mount on a sturdy desk surface that can support the combined weight of the mount and your monitor.
- Follow all installation steps carefully. Improper installation may result in equipment damage or personal injury.
- Mantenga las piezas pequeñas fuera del alcance de los niños.
3. Contenido del paquete
Before proceeding with installation, please ensure all components are present and undamaged. Refer to the included parts list for detailed identification.
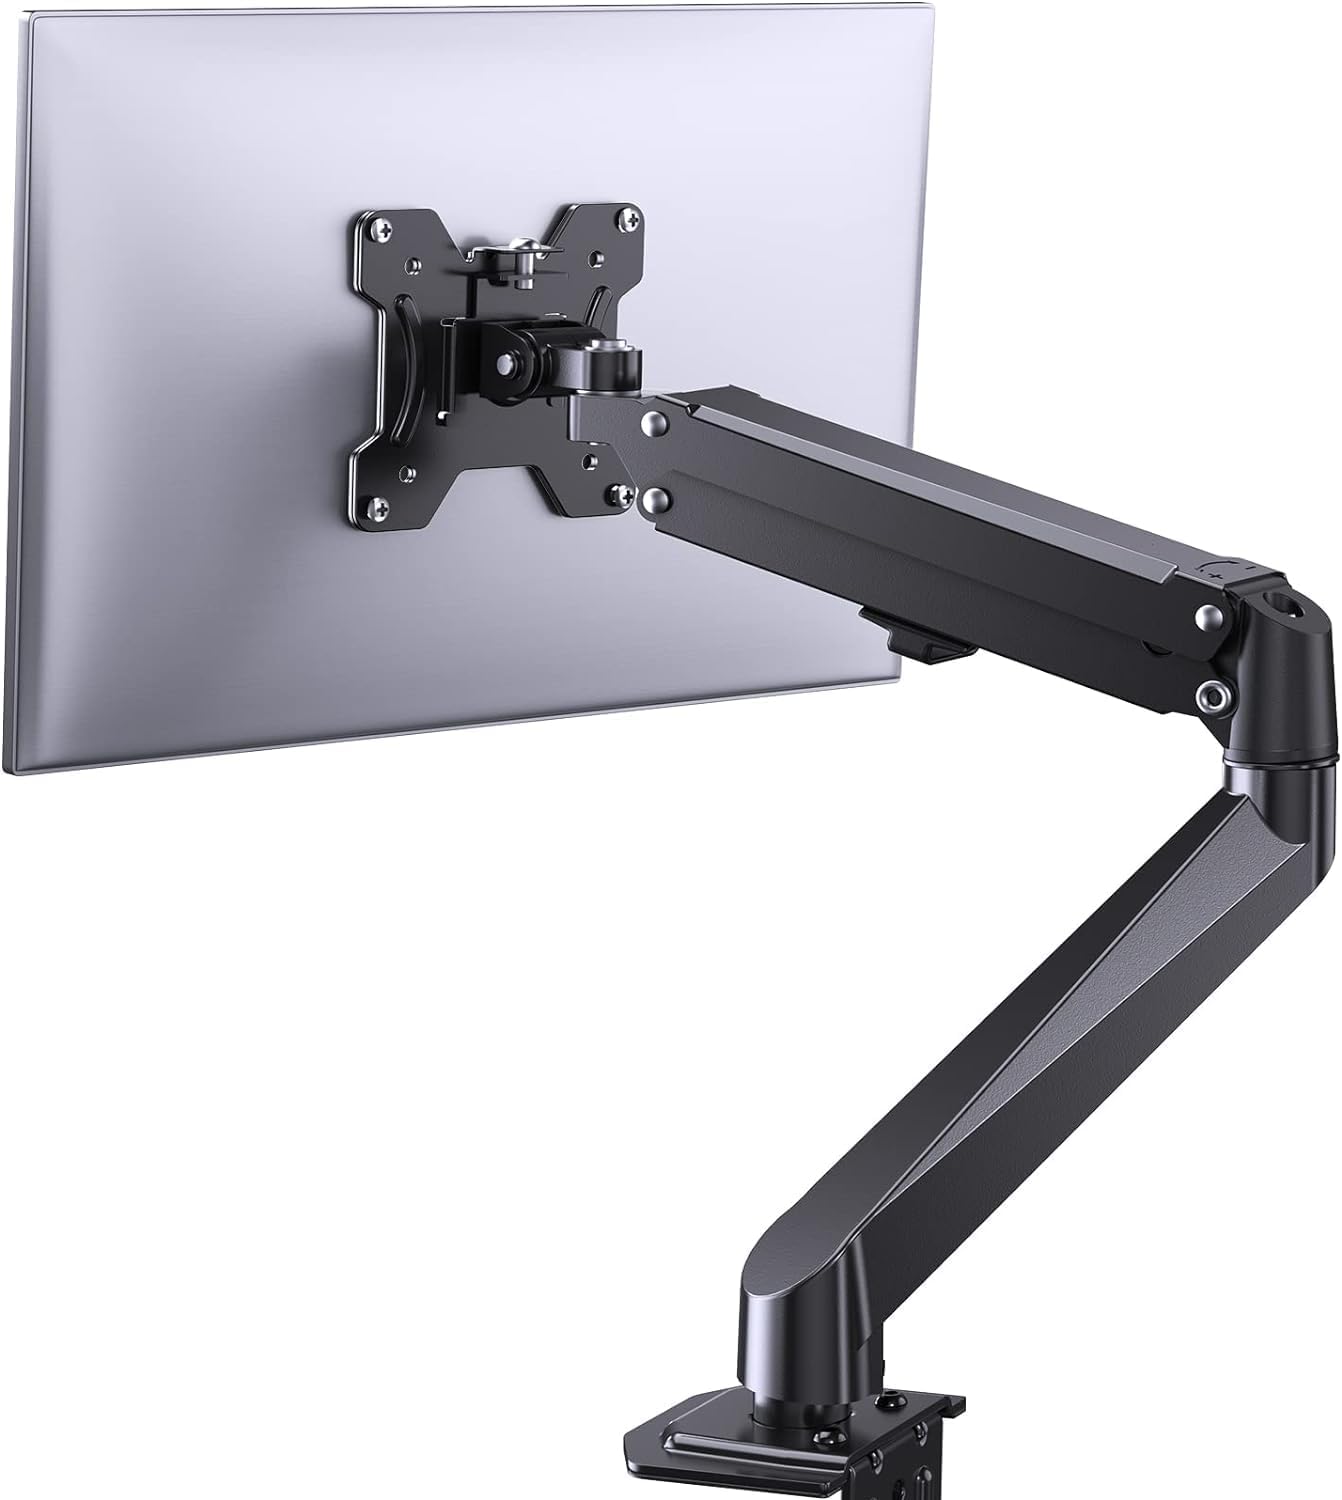
Imagen 3.1: Másview of the ErGear Single Monitor Mount components.
4. Especificaciones
| Característica | Especificación |
|---|---|
| Marca | Ergear |
| Modelo | EGSS7 |
| Tamaño de monitor compatible | 17 - 27 pulgadas |
| Capacidad de peso | Hasta 14.3 libras (6.5 kg) |
| Compatibilidad VESA | 75 x 75 mm, 100 x 100 mm |
| Tipo de montaje | C-clamp o ojal |
| Material | Acero aleado |
| Color | Negro |
| Rango de inclinación | -35° a +50° |
| Rango giratorio | -90° a +90° |
| Rotación | 360° |
| Dimensiones del producto | 41.2 x 30.4 x 10 cm |

Image 4.1: Monitor size and weight capacity details.
5. Instrucciones de configuración
The ErGear Single Monitor Mount offers two installation options: C-clamp or Grommet mounting. Choose the option best suited for your desk.

Image 5.1: C-clamp y opciones de montaje con ojales con rangos de espesor de escritorio.
5.1 Cl Camp Instalación
- Coloque el C-clamp to the base of the monitor arm.
- Posicione el C-clamp on the edge of your desk. Ensure the desk thickness is between 0.4 and 3.3 inches.
- Apriete el clamp securely using the provided knob until the mount is stable.
5.2 Grommet Installation
- If your desk has a grommet hole, insert the grommet bolt through the base of the monitor arm and the desk hole. Ensure the desk thickness is between 0.4 and 3.1 inches.
- Secure the mount from underneath the desk using the provided plate and nut.
5.3 Conexión del monitor
- Carefully attach your VESA-compatible monitor to the VESA plate on the arm using the appropriate screws.
- Ensure the screws are tightened firmly but do not overtighten.
5.4 Ajuste de tensión
The gas spring arm requires tension adjustment to properly support your monitor's weight. Use the included Allen key to adjust the tension screw located on the arm. Turn clockwise to increase tension for heavier monitors, and counter-clockwise to decrease tension for lighter monitors. Adjust until the monitor stays in position when moved.

Imagen 5.2: Interno view of the flexible gas spring arm.
6. Instrucciones de funcionamiento
Once installed, your ErGear monitor mount allows for flexible positioning of your monitor.
6.1 Ajuste de la posición del monitor
- Ajuste de altura: Gently push or pull the monitor to the desired height. The gas spring mechanism will hold it in place.
- Inclinación: El monitor se puede inclinar de -35° a +50° para reducir el deslumbramiento y optimizar viewángulos de ing.
- Girar: Swivel the monitor from -90° to +90° for collaborative work or to view content from different angles.
- Rotación: Gire el monitor 360° para cambiar entre orientación horizontal y vertical.

Image 6.1: Monitor height adjustment.

Image 6.2: Full motion range capabilities of the monitor arm.
6.2 Gestión de cables
The monitor arm features an integrated cable management system to keep your workspace tidy. Route your monitor cables through the designated channels on the arm to conceal them.

Imagen 6.3: Sistema integrado de gestión de cables.
7. Mantenimiento
El mantenimiento regular garantiza la longevidad y el rendimiento óptimo de su soporte para monitor.
- Revise periódicamente todos los tornillos y conexiones para asegurarse de que estén bien apretados.
- Clean the surface of the mount with a soft, damp paño. Evite los limpiadores abrasivos.
- Re-adjust the gas spring tension if your monitor feels too loose or too stiff when moving.
8. Solución de problemas
| Problema | Posible causa | Solución |
|---|---|---|
| El monitor se hunde o no permanece en su posición. | Gas spring tension is too low. | Increase gas spring tension using the Allen key (clockwise). |
| El monitor es difícil de mover. | La tensión del resorte de gas es demasiado alta. | Decrease gas spring tension using the Allen key (counter-clockwise). |
| El monte se siente inestable. | C-clamp or grommet connection is loose. | Apriete el C-clamp knob or grommet nut. |
| El monitor no encaja en la placa VESA. | Patrón VESA incorrecto. | Ensure your monitor has a 75x75mm or 100x100mm VESA pattern. |
9. Garantía y soporte
For warranty information or technical support, please refer to the contact details provided with your purchase or visit the official ErGear website. Please have your model number (EGSS7) and purchase date available when contacting support.


