1. Introducción
This manual provides comprehensive instructions for the Teltonika RUT240, a compact industrial 4G LTE cellular router. The RUT240 is designed for professional Machine-to-Machine (M2M) and Internet of Things (IoT) applications, offering reliable cellular communication in demanding environments. It features 2 Ethernet ports, Wi-Fi connectivity, and operates on the RutOS software platform. This specific model is configured for Verizon networks.
Las características principales incluyen:
- High performance for mission-critical cellular communication.
- WAN failover for automatic switching to an alternative backup connection.
- Wi-Fi functionality supporting both Access Point and Station modes simultaneously.
2. Contenido del paquete
Antes de continuar con la instalación, verifique que todos los elementos estén presentes en su paquete:
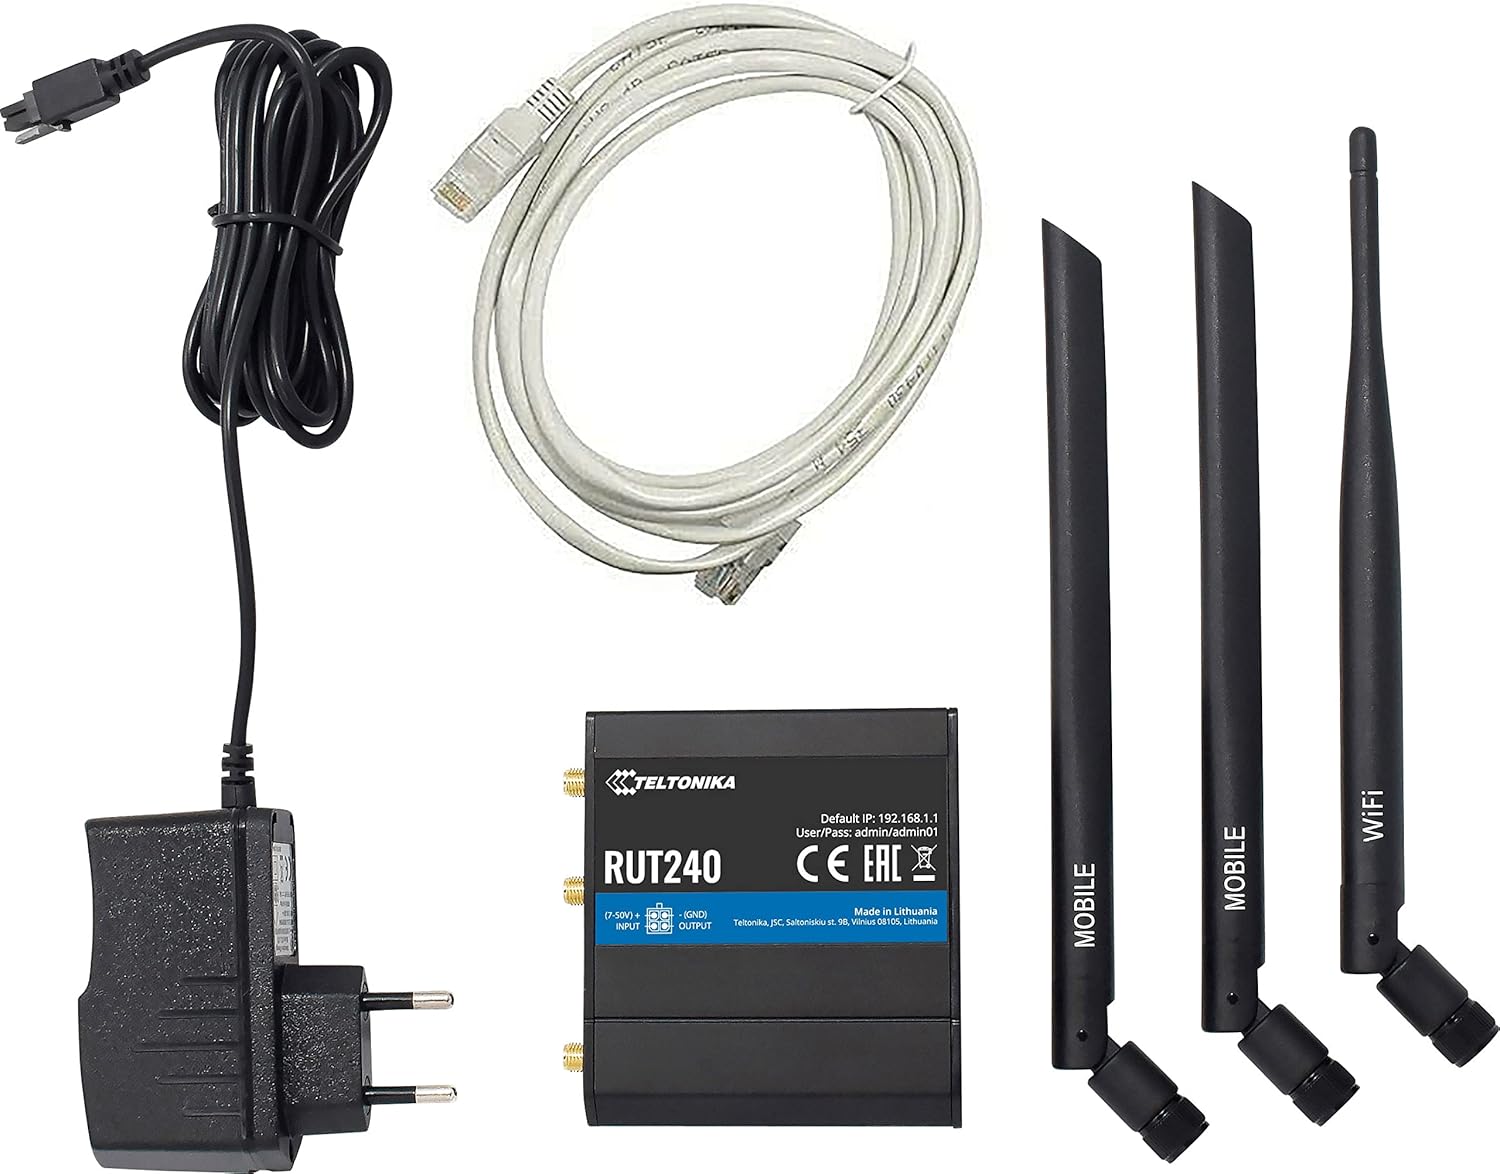
Image: Teltonika RUT240 router, power adapter, Ethernet cable, and three antennas (two mobile, one WiFi).
- Enrutador celular Teltonika RUT240
- Power Adapter (9-30V DC)
- Cable Ethernet
- Two Mobile Antennas
- One WiFi Antenna
3. Producto terminadoview
The Teltonika RUT240 is a compact device designed for easy integration into various setups. Understanding its physical layout is crucial for proper installation and operation.

Imagen: Arriba view of the RUT240 router, highlighting the antenna connectors, power input, and I/O ports.

Imagen: En ángulo view of the RUT240 router, illustrating the Ethernet ports and power input.
Frente View
- Toma de corriente: Para conectar el adaptador de corriente CC.
- Ranuras para tarjetas SIM: For inserting your cellular SIM card.
- LAN Ethernet Port: Para conectar dispositivos de red local.
- Puerto Ethernet WAN: For connecting to an external network (e.g., DSL/Fiber modem).
Atrás View
- Botón de reinicio: Se utiliza para restaurar la configuración predeterminada de fábrica.
- LTE Antenna Connectors: For attaching mobile antennas.
- Conector de antena WiFi: For attaching the WiFi antenna.
4. Guía de configuración
Follow these steps to set up your Teltonika RUT240 router for initial operation.
4.1. Inserción de la tarjeta SIM
- Asegúrese de que el enrutador esté apagado.
- Locate the SIM card slot(s) on the front of the device.
- Insert your activated Verizon SIM card into the slot until it clicks into place.
4.2. Conexión de antena
- Attach the two mobile antennas to the LTE antenna connectors on the back of the router.
- Attach the WiFi antenna to the WiFi antenna connector on the back of the router.
- Ensure all antennas are securely tightened.
4.3. Conexión de alimentación
- Connect the power adapter to the power socket on the front of the router.
- Enchufe el otro extremo del adaptador de corriente a una toma de corriente.
- The router will power on automatically. Wait for the status LEDs to indicate readiness.
4.4. Acceso inicial y configuración
- Connect your computer to the router using an Ethernet cable (to the LAN port) or via Wi-Fi (default SSID and password can be found on the device label).
- Abrir una web navegador y navegue hasta la dirección IP predeterminada: http://192.168.1.1.
- Inicie sesión con el nombre de usuario y la contraseña predeterminados: administración / administrador01. It is highly recommended to change these credentials immediately after the first login for security purposes.
- Siga el asistente de configuración en pantalla para configurar su conexión a Internet y la configuración de Wi-Fi.
5. Instrucciones de funcionamiento
The Teltonika RUT240 operates on RutOS, a Linux-based operating system, providing a robust and flexible platform for network management.
5.1. WAN Failover
The RUT240 supports WAN failover, ensuring continuous connectivity. If the primary internet connection (e.g., cellular) fails, the router will automatically switch to a pre-configured backup connection (e.g., Ethernet WAN). This feature is critical for applications requiring uninterrupted network access.
5.2. Modos Wi-Fi
The router's Wi-Fi module can function simultaneously in two modes:
- Modo de punto de acceso (AP): Allows other Wi-Fi devices to connect to the RUT240, providing them with network access.
- Station (STA) Mode: Enables the RUT240 to connect to an existing Wi-Fi network as a client.
These modes can be configured via the RutOS web interfaz.
6. Mantenimiento
Regular maintenance ensures optimal performance and longevity of your RUT240 router.
- Actualizaciones de firmware: Revise periódicamente las redes Teltonika website for the latest firmware versions. Updating the firmware can provide new features, security enhancements, and bug fixes.
- Limpieza: Mantenga el router limpio y sin polvo. Utilice un paño suave y seco para limpiarlo. No utilice limpiadores líquidos.
- Condiciones ambientales: Ensure the router is operated within its specified temperature and humidity ranges to prevent damage.
- Gestión de contraseñas: Regularly change your router's login credentials and Wi-Fi passwords to maintain network security.
7. Solución de problemas
This section provides solutions to common issues you might encounter with your RUT240 router.
7.1. No hay conexión a Internet
- Comprobar tarjeta SIM: Asegúrese de que la tarjeta SIM esté insertada correctamente y activada con un plan de datos.
- Conexión de antena: Verify that the mobile antennas are securely attached.
- Intensidad de la señal: Check the cellular signal strength via the router's web interface. If the signal is weak, try repositioning the router or using external antennas.
- Configuración APN: Confirme que la configuración del Nombre del punto de acceso (APN) en el enrutador web interface match those provided by your mobile operator (Verizon).
- Conmutación por error de WAN: If using WAN failover, ensure both primary and backup connections are configured correctly.
7.2. No se puede acceder Web Interfaz
- Dirección IP: Asegúrese de estar utilizando la dirección IP predeterminada correcta (http://192.168.1.1).
- Conexión de red: Verifique que su computadora esté conectada al enrutador a través de Ethernet o Wi-Fi.
- Conflicto de dirección IP: Check if your computer's IP address is in the same subnet as the router.
- Cortafuegos: Temporarily disable any firewall on your computer to rule out interference.
7.3. El enrutador no se enciende
- Adaptador de corriente: Ensure the power adapter is correctly connected to both the router and a working power outlet.
- Fuente de energía: Pruebe la toma de corriente con otro dispositivo para confirmar que funciona.
7.4. Restablecimiento de fábrica
If other troubleshooting steps fail, you can perform a factory reset. This will revert all settings to their default values. To perform a factory reset:
- With the router powered on, locate the reset button on the back of the device.
- Utilice un objeto delgado (por ejemplo, un clip) para presionar y mantener presionado el botón de reinicio durante aproximadamente 10 segundos.
- Release the button when the status LEDs indicate a reset (e.g., all LEDs flash).
- The router will restart with factory default settings.
8. Especificaciones
Detailed technical specifications for the Teltonika RUT240 router:
| Categoría | Especificación |
|---|---|
| Nombre del modelo | RUT240 |
| Número de modelo del artículo | RUT24002U000 |
| Marca | Teltonika |
| Fabricante | Teltonika |
| Tecnología de conectividad | Wi-Fi, 4G LTE |
| Estándar de comunicación inalámbrica | 802.11b/g/n |
| Clase de banda de frecuencia | Banda única (2.4 GHz) |
| Sistema operativo | RutOS (sistema operativo Linux basado en OpenWrt) |
| Puertos Ethernet | 2 (1x WAN configurable as LAN, 1x LAN) |
| Tarjeta SIM | 1 x External SIM Holder (2FF) |
| Conectores de antena | 2 x SMA for mobile, 1 x RP-SMA for WiFi |
| Entradas / Salidas | On 4 pin socket: 1 x Digital input, 1 x Digital open collector output |
| Powering Option | 4 pin power socket, 9-30 VDC |
| Dimensiones (An x Al x Pr) | 83 x 25 x 74 mm |
| Peso del artículo | 14.4 onzas (aproximadamente 135 g) |
| Temperatura de funcionamiento | -40 °C a 75 °C |
| Protocolo de seguridad | WPS, WPA2-Enterprise, WPA2-PSK, WPA-PSK, WEP |
| Característica especial | Modo de punto de acceso, WPS |
| Dispositivos compatibles | Ordenador personal |
| Usos recomendados del producto | Escucha |
9. Garantía y soporte
The Teltonika RUT240 is manufactured by Teltonika. For specific warranty information, please refer to the documentation included with your purchase or visit the official Teltonika Networks website. For technical support, firmware downloads, and additional resources, please visit the Teltonika Networks support portal.


