Introducción
Thank you for choosing the VITO High Pressure Washer WR2 130 Bar. This manual provides essential information for the proper assembly, safe operation, maintenance, and troubleshooting of your new pressure washer. Please read this manual thoroughly before first use and keep it for future reference. Adhering to these instructions will ensure optimal performance and extend the lifespan of your device.
Información importante de seguridad
Observe siempre las precauciones básicas de seguridad al utilizar aparatos eléctricos para reducir el riesgo de incendio, descarga eléctrica y lesiones personales. Esto incluye, entre otras:
- Lee todas las instrucciones: Familiarícese con los controles y el uso adecuado de la hidrolavadora.
- Instrucciones de puesta a tierra: Ensure the pressure washer is properly grounded. Do not modify the plug.
- Avoid Spraying People or Pets: The high-pressure stream can cause serious injury.
- Mantenga el área despejada: Ensure the work area is free of obstacles and bystanders.
- Utilice cables de extensión adecuados: If an extension cord is necessary, ensure it is rated for outdoor use and has a sufficient gauge.
- Use equipo de seguridad: Always wear appropriate eye protection, hearing protection, and protective clothing.
- Desconectar la energía: Desconecte siempre la fuente de alimentación antes de realizar cualquier mantenimiento o limpieza.
- Comprobar si hay daños: Inspect the pressure washer, hose, and power cord for any damage before each use. Do not operate if damaged.
- Temperatura del agua: Do not use hot water with the pressure washer unless specifically designed for it.
Contenido del paquete
Your VITO High Pressure Washer WR2 130 Bar package should include the following components:
- High Pressure Washer Unit
- Manguera de alta presión (5 metros)
- Pistola rociadora
- Boquilla ajustable
- Tanque de detergente
- Conector de entrada de agua
- Manual de usuario

Imagen: Frente view of the VITO High Pressure Washer WR2 130 Bar, showing the main unit, handle, and wheels.
Producto terminadoview
The VITO High Pressure Washer WR2 130 Bar is designed for efficient cleaning tasks around your home and garden. Its compact design and integrated features make it easy to use and store.
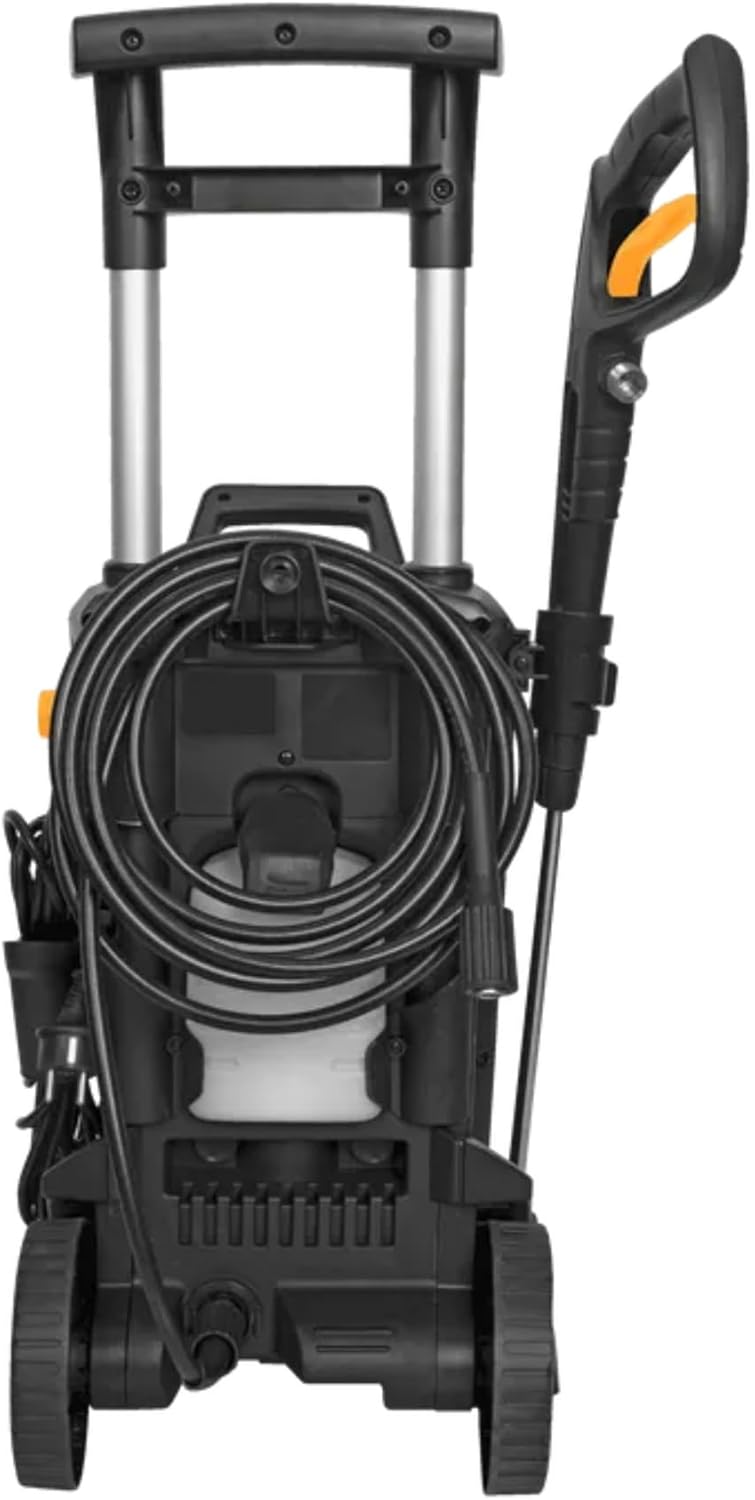
Imagen: Trasera view of the pressure washer, highlighting the integrated hose storage and power cord management.

Image: Close-up of the integrated detergent tank, designed for easy filling and use with cleaning solutions.
Configuración y montaje
1. Montaje
- Adjuntar ruedas: Securely attach the wheels to the base of the unit if not pre-assembled.
- Instalar manija: Slide the handle into its designated slots until it clicks into place.
- Conecte la manguera de alta presión: Screw the high-pressure hose firmly to the outlet on the pressure washer unit and to the spray gun. Ensure connections are tight to prevent leaks.
- Adjuntar boquilla: Insert the desired nozzle into the end of the spray gun lance.
2. Connecting to Water and Power
- Suministro de agua: Connect a standard garden hose (minimum 1/2 inch diameter) to the water inlet connector on the pressure washer. Ensure the water supply is clean and free of debris.
- Fuente de alimentación: Conecte el cable de alimentación a una toma de corriente con conexión a tierra. Asegúrese de que la toma coincida con el voltaje.tagLos requisitos de la hidrolavadora.
- Purga de aire: Before turning on the power, turn on the water supply fully and squeeze the spray gun trigger to allow water to flow through the system and purge any air. Continue until a steady stream of water emerges from the nozzle.
Instrucciones de funcionamiento
1. Funcionamiento general
- Asegúrese de que el suministro de agua esté abierto y que el aire esté purgado del sistema.
- Turn on the pressure washer by flipping the ON/OFF switch. The motor will start.
- Apunte la pistola pulverizadora hacia la superficie a limpiar, manteniendo una distancia segura.
- Squeeze the trigger to begin spraying. Release the trigger to stop the flow.
- Adjust the nozzle for different spray patterns as needed (e.g., narrow for stubborn dirt, wide for general cleaning).
2. Using Detergent
- Fill the integrated detergent tank with a pressure washer safe cleaning solution.
- Ensure the pressure washer is set to the low-pressure/detergent application mode (if applicable, usually by using a specific nozzle or setting).
- Apply detergent to the surface. Allow it to soak for a few minutes (refer to detergent instructions), but do not let it dry.
- Switch back to high-pressure mode and rinse the surface thoroughly.

Image: A person using the VITO High Pressure Washer to clean a car, demonstrating effective cleaning of vehicles.
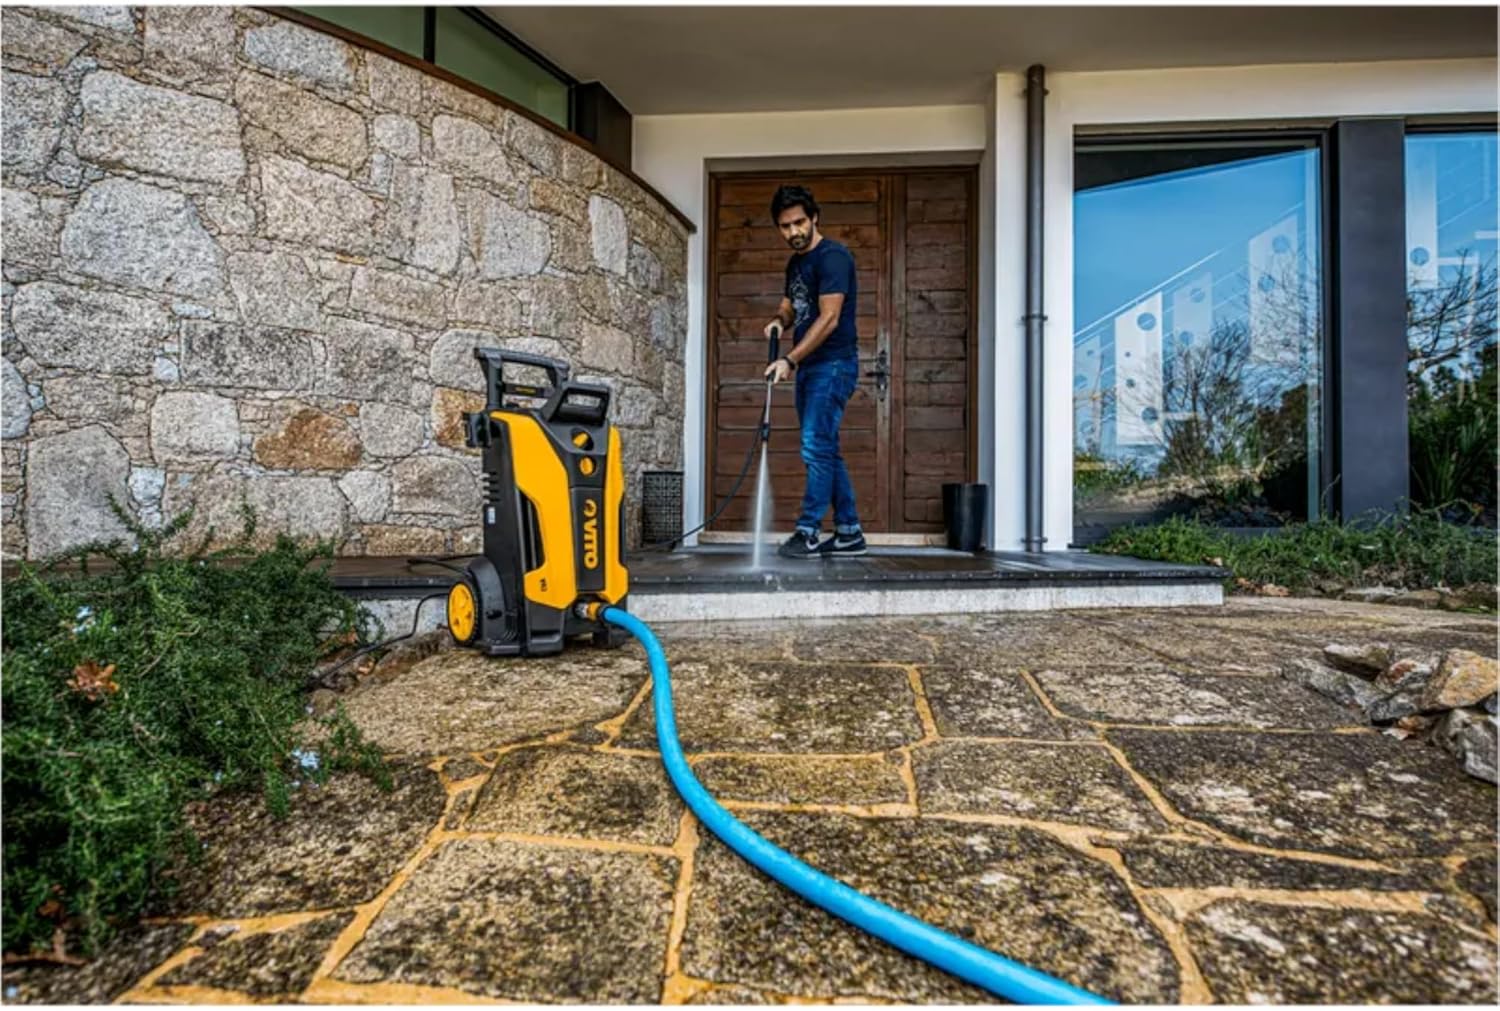
Image: A person cleaning a stone patio with the VITO High Pressure Washer, illustrating its use for hard outdoor surfaces.
Mantenimiento
El mantenimiento regular garantiza la longevidad y el funcionamiento eficiente de su hidrolavadora.
1. Limpiar la boquilla
If the nozzle becomes clogged, it can cause the pump pressure to fluctuate. Use the provided nozzle cleaning tool (or a thin wire) to clear any obstructions from the nozzle opening.
2 Mantenimiento del filtro de agua
The water inlet filter should be checked and cleaned regularly to prevent debris from entering the pump. Remove the filter, rinse it under running water, and reinsert it.
3. Almacenamiento
- Drenar el agua: Before storing, ensure all water is drained from the pump, hose, and spray gun to prevent freezing damage. Run the unit for a few seconds with the water supply off and trigger depressed until no more water comes out.
- Almacene en un lugar seco: Guarde la hidrolimpiadora en un ambiente seco y libre de heladas.
- Mangueras y cables en espiral: Neatly coil the high-pressure hose and power cord for organized storage.
Solución de problemas
Consulte la siguiente tabla para conocer los problemas más comunes y sus soluciones.
| Problema | Posible causa | Solución |
|---|---|---|
| El motor no arranca | No hay suministro de energía; disyuntor disparado; interruptor defectuoso. | Verifique la conexión eléctrica; reinicie el disyuntor; comuníquese con el servicio técnico. |
| Baja presión | Insufficient water supply; clogged nozzle; air in pump; leaky hose. | Ensure full water flow; clean nozzle; purge air; check connections. |
| El motor funciona continuamente | Aire en la bomba; fuga interna; problema en la válvula de descarga. | Purge air; check for leaks; contact service. |
| Fugas de agua | Conexiones sueltas; juntas tóricas dañadas; carcasa agrietada. | Tighten connections; replace O-rings; contact service for housing damage. |
Especificaciones técnicas
| Característica | Especificación |
|---|---|
| Marca | VITO |
| Número de modelo | VIML130WR2 |
| Presión máxima | 130 barra |
| Longitud de la manguera | 5 metros |
| Volumen del tanque de detergente | 1 litros |
| Peso del artículo | 17.8 kilogramos |
| Color | Negro/Amarillo |
| Fuente de poder | Electric (hand_powered refers to manual operation of the trigger, not the power source) |
Garantía y soporte
Your VITO High Pressure Washer WR2 130 Bar is covered by a manufacturer's warranty. Please refer to the warranty card included with your purchase for specific terms and conditions, including the warranty period and coverage details. For technical support, spare parts, or warranty claims, please contact VITO customer service through their official websitio o el minorista al que le compró el producto.
Nota sobre los vídeos: No official seller videos were found in the provided product information to embed in this manual.


