1. Introducción
Thank you for choosing the Rebel RB-0005 Weather Station. This device provides accurate indoor and outdoor temperature readings, indoor humidity, and features a clock, calendar, and alarm function. This manual will guide you through the setup, operation, and maintenance of your new weather station to ensure optimal performance.
2. Información de seguridad
- No exponga el dispositivo a temperaturas extremas, luz solar directa o humedad alta.
- Evite dejar caer o someter el dispositivo a impactos fuertes.
- Mantenga el dispositivo alejado del agua y otros líquidos.
- Deseche las baterías usadas de manera responsable de acuerdo con las regulaciones locales.
- No intente desmontar ni reparar el dispositivo usted mismo. Contacte con personal cualificado para obtener servicio técnico.
- The outdoor sensor cable should be handled with care to prevent damage.
3. Contenido del paquete
Por favor, compruebe el contenido del paquete al desembalarlo:
- 1x Rebel RB-0005 Weather Station Main Unit
- 1x Wired Outdoor Temperature Sensor
- 1x Manual de usuario (este documento)
Note: 1x AAA battery is required for operation and is not included in the package.
4. Características del producto
- Indoor and Outdoor Temperature Measurement
- Indoor Humidity Measurement
- Función de calendario
- Función de alarma
- Pantalla de reloj de 12/24 horas
- Memory Function for Highest and Lowest Temperature Readings
- Clear and Easy-to-Read LCD Display
- Funciona con pilas para mayor portabilidad
5. Producto terminadoview
Familiarize yourself with the main components of your Rebel RB-0005 Weather Station.
5.1 Pantalla frontal
La gran pantalla LCD muestra diversa información simultáneamente:
- IN Temperature: Temperatura interior actual.
- OUT Temperature: Current outdoor temperature from the wired sensor.
- Tiempo: Current time in 12-hour (AM/PM) or 24-hour format.
- RH%: Current indoor relative humidity.
- Calendario: Date display (day, month).
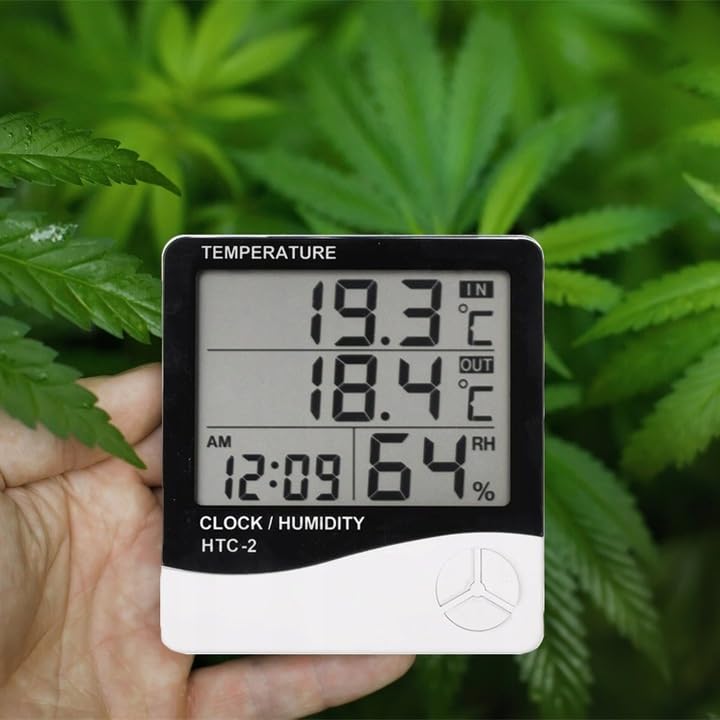
Figure 1: Front display of the weather station showing temperature, time, and humidity readings.

Figura 2: detallada view de los botones de visualización y control.
5.2 botones de control
The device features three control buttons located on the front, below the display:
- MODO: Used to switch between display modes (e.g., time, alarm, calendar) and to enter/exit setting modes.
- ADJ (Ajustar): Used to adjust values (e.g., hours, minutes, date) when in setting mode.
- MEMORIA: Solía hacerlo view the highest and lowest recorded temperature and humidity values.
5.3 Trasero View y sensor
The back of the unit houses the battery compartment, a foldable stand, and the input for the wired outdoor temperature sensor.

Figura 3: Posterior view of the weather station with battery compartment and wired sensor.
6. Configuración
6.1 Instalación de la batería
- Abra la tapa del compartimiento de la batería en la parte posterior de la unidad principal.
- Insert one (1) AAA battery, ensuring the correct polarity (+/-).
- Close the battery compartment cover securely. The device should power on automatically.
6.2 Ubicación del sensor exterior
- Connect the wired outdoor temperature sensor to the designated port on the back of the main unit.
- Carefully route the sensor cable to the desired outdoor location. Ensure the cable is not pinched or damaged.
- Place the sensor in a shaded area, protected from direct sunlight and precipitation, to ensure accurate readings. Avoid placing it near heat sources or vents.

Figura 4: Example placement of the weather station for indoor temperature monitoring.
7. Instrucciones de funcionamiento
7.1 Configuración de hora y fecha
- Mantenga pulsado el MODO Botón durante aproximadamente 3 segundos hasta que la pantalla de la hora comience a parpadear.
- Utilice el ADJ Botón para ajustar el valor intermitente (por ejemplo, horas, minutos).
- Presione el MODO button again to confirm the setting and move to the next value (e.g., minutes, 12/24 hour format, year, month, day).
- Repeat step 2 and 3 until all time and date settings are configured.
- Prensa MODO una última vez para salir del modo de configuración.
7.2 Configuración de la alarma
- Desde la visualización de la hora normal, presione el botón MODO button once to enter alarm display mode (usually indicated by an alarm icon).
- Mantenga pulsado el MODO button for approximately 3 seconds until the alarm time starts flashing.
- Utilice el ADJ Botón para configurar la hora de alarma deseada.
- Presione el MODO button to confirm the hour and move to set the minutes.
- Utilice el ADJ para configurar los minutos de alarma deseados.
- Presione el MODO Botón para confirmar y salir del modo de configuración de alarma.
- Para activar/desactivar la alarma, presione el botón ADJ button once while in alarm display mode. An alarm icon will appear/disappear on the display.
7.3 Viewing Min/Max Temperature and Humidity
- Desde la pantalla normal, presione el botón MEMORIA button once to show the maximum recorded indoor/outdoor temperature and indoor humidity.
- Presione el MEMORIA button again to show the minimum recorded indoor/outdoor temperature and indoor humidity.
- Presione el MEMORIA button a third time to return to the current readings.
- To clear the min/max memory, press and hold the MEMORIA botón durante aproximadamente 3 segundos mientras viewing the min/max values.
7.4 Cambio de unidades de temperatura (°C/°F)
While in normal display mode, press the ADJ Presione el botón una vez para alternar entre las unidades de temperatura Celsius (°C) y Fahrenheit (°F).
8. Mantenimiento
- Limpieza: Limpie el dispositivo con un paño suave y seco. No utilice limpiadores abrasivos ni disolventes.
- Reemplazo de batería: Replace the AAA battery when the display becomes dim or the device stops functioning. Follow the battery installation steps in Section 6.1.
- Cuidado del sensor: Ensure the outdoor sensor cable is not damaged. Periodically check the sensor's placement to ensure it remains protected from elements for accurate readings.
9. Solución de problemas
| Problema | Posible causa | Solución |
|---|---|---|
| Sin pantalla o pantalla tenue. | Low or depleted battery. Incorrect battery polarity. | Replace the AAA battery with a new one, ensuring correct polarity. |
| Outdoor temperature reading is incorrect or "---". | Outdoor sensor cable is disconnected or damaged. Sensor is exposed to direct sunlight or heat source. | Check if the sensor cable is securely connected. Ensure the sensor is placed in a shaded, protected area. Inspect the cable for damage. |
| La hora/fecha es incorrecta. | Time/Date not set correctly after battery installation. | Refer to Section 7.1 "Setting Time and Date" to adjust. |
| La alarma no suena. | Alarm is not activated. Alarm volume is too low (if adjustable, though this model likely isn't). | Ensure the alarm icon is displayed, indicating it is active (refer to Section 7.2). |
10. Especificaciones
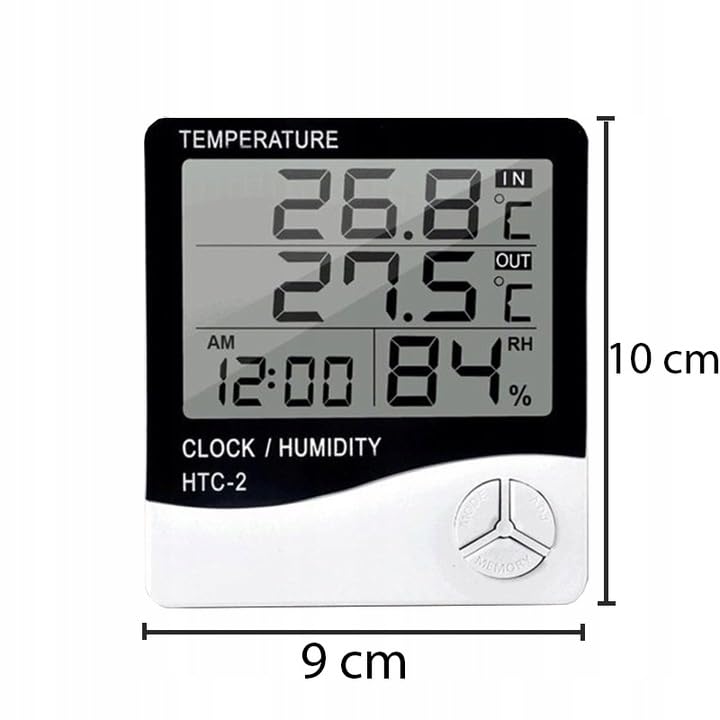
Figure 5: Approximate dimensions of the weather station.
- Modelo: RB-0005
- Marca: Rebelde
- Fuente de energía: 1 pilas AAA (no incluidas)
- Material: Plástico
- Características especiales: Alarm, Calendar, Min/Max Memory
- Dimensiones del paquete: 18 x 12 x 10 cm
- Dimensiones del producto (aprox.): 9 cm (ancho) x 10 cm (alto)
- Primera fecha disponible: 23 de noviembre de 2020
11. Garantía y soporte
Este producto está cubierto por una garantía estándar del fabricante. Para conocer los términos y condiciones específicos de la garantía, consulte la documentación proporcionada al momento de la compra o comuníquese con su distribuidor.
For technical support or inquiries, please contact the Rebel customer service department through their official websitio o la información de contacto proporcionada por su minorista.


