1. Instrucciones de seguridad importantes
Lea atentamente todas las instrucciones antes de utilizar el aparato. Conserve este manual para futuras consultas.
- Seguridad eléctrica: Asegúrese del volumentage indicated on the appliance matches your local power supply before connecting. Do not operate with a damaged cord or plug.
- Colocación: Place the dehumidifier on a stable, level surface. Maintain adequate clearance around the unit for proper airflow (at least 20 cm from walls or furniture). Do not block air inlets or outlets.
- Manejo de agua: Always empty the water tank before moving the unit. Do not drink the collected water.
- Refrigerant Gas (R290): This appliance contains R290 refrigerant gas. R290 is a flammable gas. Handle with care and ensure the appliance is not damaged during transport or installation. Do not attempt to service the unit yourself if you suspect a refrigerant leak.
- Niños y mascotas: Mantenga el aparato fuera del alcance de los niños y las mascotas. Supervise a los niños para asegurarse de que no jueguen con él.
- Limpieza: Desconecte la fuente de alimentación antes de limpiar o realizar cualquier mantenimiento.
2. Producto terminadoview
2.1 Componentes
- Panel de control
- Entrada de aire (trasera)
- Air Outlet (top/front)
- Water Collection Tank (front/bottom)
- Removable Air Filter (side/rear)
- Ruedas para facilitar el movimiento.
2.2 Panel de control

Imagen: Arriba view del panel de control.
El panel de control cuenta con una pantalla digital y botones sensibles al tacto para diversas funciones:
- Botón de encendido: Enciende o apaga la unidad.
- Pantalla de humedad: Shows the current ambient humidity level and the set target humidity.
- Botones de ajuste de humedad: Ajuste el nivel de humedad deseado.
- Botón de velocidad del ventilador: Selects fan speed (if available).
- Botón del temporizador: Establece el temporizador de 24 horas para el funcionamiento automático.
- Indicador de agua llena: Se ilumina cuando el tanque de agua está lleno, lo que activa el apagado automático.
3. Configuración
3.1 Desembalaje
Carefully remove the dehumidifier from its packaging. Retain the packaging materials for future storage or transport. Check for any signs of damage. If the unit appears damaged, do not operate it and contact customer support.
3.2 Colocación
For optimal performance, place the dehumidifier in a central location within the room. Ensure the room size does not exceed 25 square meters for effective dehumidification.
- Place the unit on a firm, level surface to prevent vibrations and ensure proper water collection.
- Allow at least 20 cm of space around the air inlet and outlet to ensure unrestricted airflow.
- Evite colocar la unidad cerca de fuentes de calor o bajo la luz solar directa.
3.3 Conexión de alimentación
Plug the power cord into a grounded electrical outlet. Ensure the outlet meets the power requirements of the dehumidifier (210W, 240V).
4. Instrucciones de funcionamiento
4.1 Encendido y apagado
Press the Power button on the control panel to turn the dehumidifier on or off. The unit will start operating in its default mode or resume previous settings.
4.2 Configuración del nivel de humedad deseado
The dehumidifier features a humidity sensor that detects the ambient humidity. Use the humidity setting buttons to adjust your desired humidity level. The unit will operate until this level is reached, then cycle on and off to maintain it. Recommended humidity levels are typically between 40% and 60%.
4.3 Uso de la función de temporizador
Press the Timer button to set the 24-hour timer. This allows you to program the unit to turn on or off automatically after a set number of hours, providing flexible operation.
4.4 Gestión del tanque de agua
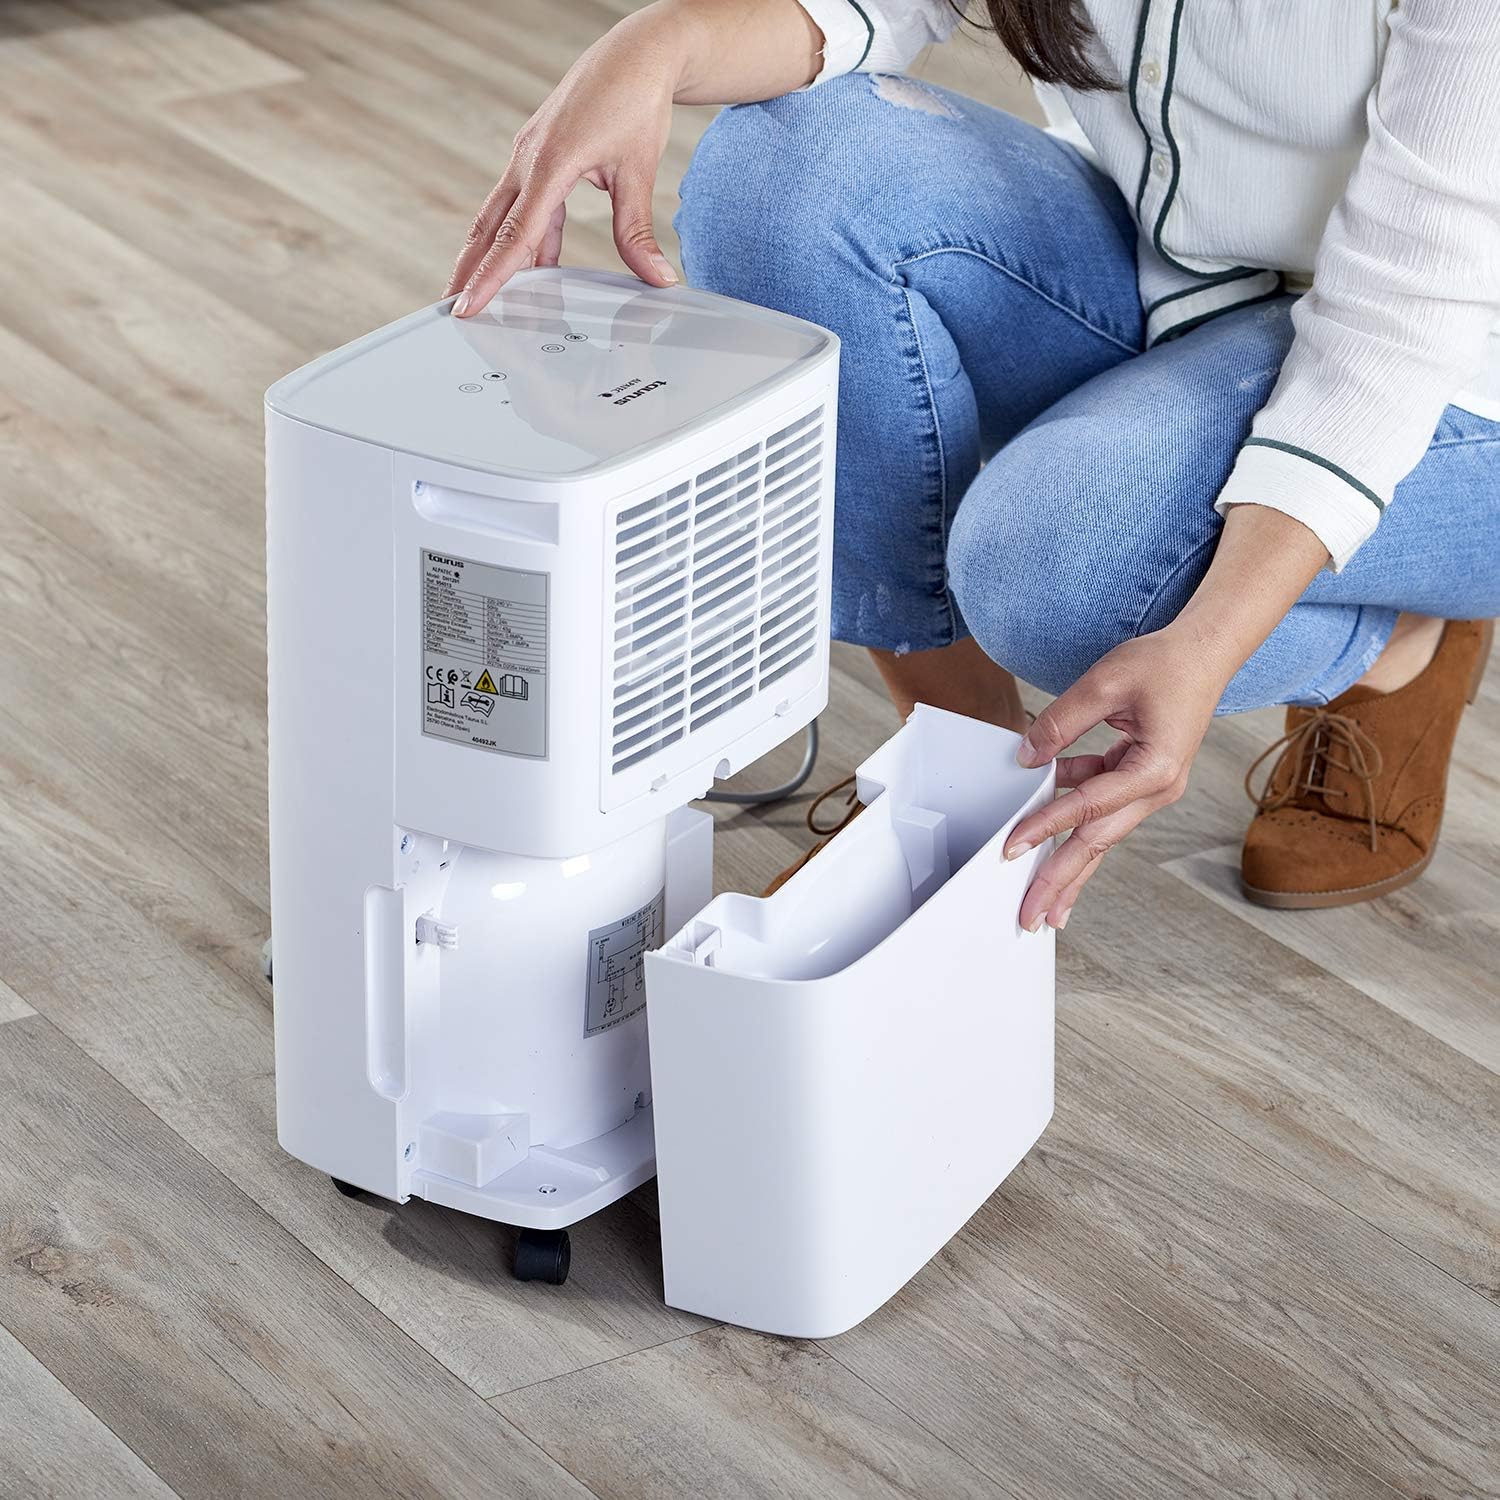
Image: Removing the water collection tank.
- Indicador de agua llena: The dehumidifier has a 2.5-liter water tank. When the tank is full, the Water Full Indicator light will illuminate, and the unit will automatically shut off to prevent overflow.
- Vaciado del tanque: Carefully pull out the water tank from the front of the unit. Dispose of the collected water. Reinsert the empty tank firmly until it clicks into place. The unit will resume operation.
- Drenaje continuo: For continuous operation without needing to empty the tank, connect a drainage hose (not included) to the continuous drainage outlet (usually located at the back or side of the unit). Ensure the hose is sloped downwards to allow gravity drainage into a suitable receptacle.
5. Mantenimiento
5.1 Limpieza del filtro de aire

Image: Removing the air filter for cleaning.
La limpieza regular del filtro de aire es esencial para un funcionamiento eficiente.
- Apague el deshumidificador y desconéctelo de la toma de corriente.
- Locate the air filter cover (typically on the side or rear of the unit) and remove it.
- Extraiga con cuidado el filtro de aire.
- Lave el filtro con agua tibia y jabón o aspírelo para eliminar el polvo y los residuos.
- Enjuague bien y deje que el filtro se seque al aire por completo antes de volver a insertarlo.
- Place the dry filter back into its slot and secure the cover.
5.2 Limpieza del exterior de la unidad
Limpie el exterior del deshumidificador con un paño suave yamp paño. No utilice limpiadores abrasivos, disolventes ni productos químicos fuertes, ya que pueden dañar la superficie.
5.3 Automatic Defrost Control
The dehumidifier is equipped with an automatic defrost function. If frost builds up on the evaporator coils, the unit will temporarily stop dehumidifying and run the fan to melt the frost. This is a normal operation and ensures efficient performance in cooler environments.
6. Solución de problemas
Antes de ponerse en contacto con el servicio de atención al cliente, vuelva aview Los siguientes problemas comunes y soluciones:
| Problema | Posible causa | Solución |
|---|---|---|
| La unidad no se enciende | No power supply; Power cord not plugged in; Water tank full or not correctly inserted. | Verifique la conexión eléctrica; vacíe y vuelva a insertar el tanque de agua correctamente. |
| Sin deshumidificación o baja eficiencia | Air filter clogged; Room temperature too low; Air inlet/outlet blocked; Desired humidity level already reached. | Clean the air filter; Ensure room temperature is above 5°C; Clear obstructions; Lower the desired humidity setting. |
| Water Full Indicator is on, but tank is not full | Water tank not correctly positioned; Float switch malfunction. | Remove and reinsert the water tank firmly; If problem persists, contact support. |
| Ruido inusual durante el funcionamiento. | La unidad no está sobre una superficie nivelada; problema con el componente interno. | Ensure unit is on a flat, stable surface; If noise is excessive or persistent, discontinue use and contact support. |
7. Especificaciones
7.1 Datos técnicos
| Característica | Detalle |
|---|---|
| Marca | Tauro |
| Número de modelo | 954513000 (PLEASANT) |
| Color | Blanco |
| Dimensiones (L x An x Al) | 34.5 x 20 x 10 cm |
| Peso | 9.5 kilogramos |
| Capacidad del tanque de agua | 2.5 litros |
| Capacidad de deshumidificación | Up to 12 liters/24 hours |
| Fuerza | 210 vatios |
| Volumentage | 240 V |
| Material | Plástico |
| Clase de energía | De la A a la G |
| Área de piso recomendada | Hasta 25 metros cuadrados |
| Características especiales | Humidity level detector, 24h timer, R290 refrigerant gas, Easy maintenance, Washable filters, Automatic defrost |
8. Garantía y soporte
This product is covered by a manufacturer's warranty. Please refer to the warranty card included with your purchase or contact your retailer for specific warranty terms and conditions. For technical support, spare parts, or service inquiries, please contact the Taurus customer service department or your local distributor. Information regarding spare parts availability is not provided in this manual.


