Introducción
Gracias por la compraasing the Hinkley Atlantis Extra Large Wall Mount Outdoor Lantern. This manual provides essential information for the safe installation, operation, and maintenance of your new lighting fixture. Please read all instructions carefully before beginning installation and retain this manual for future reference.
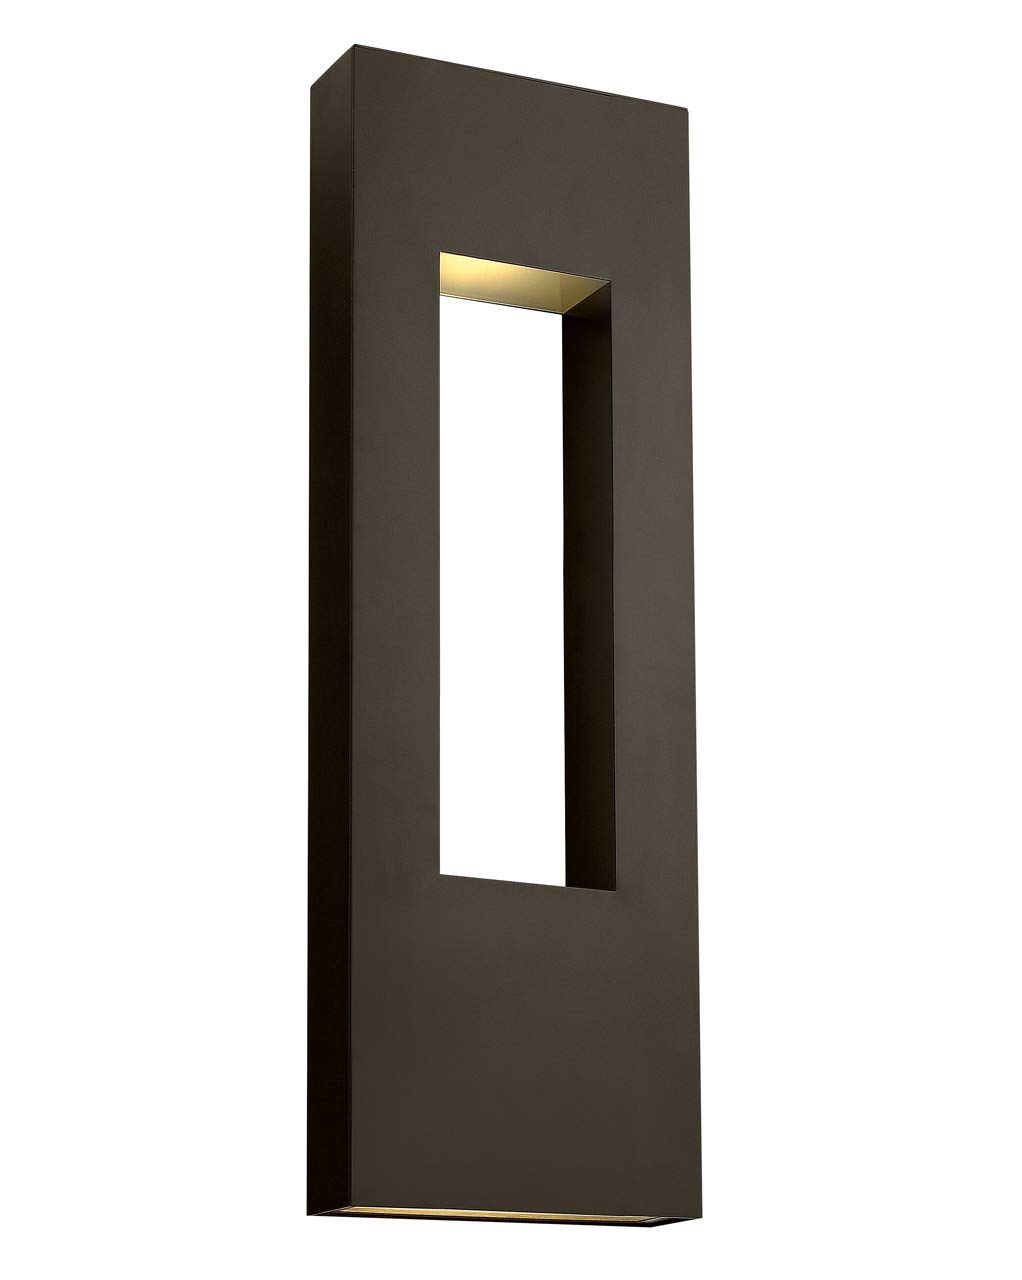
Image: Hinkley Atlantis Extra Large Wall Mount Outdoor Lantern (Model 1639BZ-LL).
Información de seguridad
- ADVERTENCIA: Riesgo de descarga eléctrica. Desconecte la alimentación en la caja de fusibles o el disyuntor antes de realizar cualquier instalación o mantenimiento.
- All electrical connections must be in accordance with local codes, ordinances, or the National Electric Code (NEC) and Canadian Electrical Code (CEC). Consult a qualified electrician if you are unfamiliar with proper electrical wiring.
- This fixture is suitable for wet locations. Ensure all connections are properly sealed to prevent water intrusion.
- Do not install any fixture assembly closer than 6 inches from any combustible material.
- Utilice siempre gafas de seguridad y equipo de protección adecuado durante la instalación.
- Handle the fixture and glass components with care to avoid breakage.
Contenido del paquete
Verifique que todos los componentes estén presentes antes de comenzar la instalación:
- Hinkley Atlantis Extra Large Wall Mount Outdoor Lantern Fixture
- Mounting Hardware Kit (crossbar, mounting screws, wire nuts)
- (3) GU10 LED Bulbs
- Manual de instrucciones (este documento)
Configuración e instalación
Se recomienda la instalación profesional. Asegúrese de que el disyuntor esté desconectado antes de continuar.
- Prepare la superficie de montaje: Ensure the electrical box is securely mounted and capable of supporting the fixture's weight (16 lbs).
- Fijar la barra transversal de montaje: Secure the mounting crossbar to the electrical box using the provided screws.
- Realice conexiones eléctricas:
- Conecte el accesorio negro cable al circuito de alimentación negro alambre (caliente).
- Conecte el accesorio blanco cable al circuito de alimentación blanco (neutral) wire.
- Conecte el accesorio suelo cable (cobre desnudo o verde) al circuito de alimentación suelo wire and to the mounting crossbar.
- Asegure todas las conexiones con tuercas para cables aprobadas y envuélvalas con cinta aisladora para mayor seguridad.
- Monte el accesorio: Carefully align the fixture with the mounting screws on the crossbar. Secure the fixture to the mounting surface using the provided cap nuts or screws.
- Instalar bombillas: Insert the three (3) GU10 LED bulbs into their respective sockets. Ensure they are fully seated.
- Restaurar energía: Una vez completada la instalación y todas las conexiones estén seguras, restablezca la energía en el disyuntor.

Imagen: Dimensiones del producto para la planificación de la instalación.


Images: Details of the light openings and etched glass lenses.
Instrucciones de funcionamiento
This fixture is designed for standard wall switch operation. It is also dimmable when used with compatible dimming switches (sold separately).
- Encender/Apagar: Utilice el interruptor de pared conectado al artefacto para encender o apagar la luz.
- Función de atenuación: If a compatible dimmer switch is installed, adjust the dimmer to control the light intensity. Ensure the GU10 LED bulbs used are dimmable.
Mantenimiento
El mantenimiento regular ayudará a preservar la apariencia y funcionalidad de su dispositivo.
- Limpieza: Limpie el accesorio con un paño suave y seco.amp cloth. Do not use abrasive cleaners or solvents, as these may damage the finish or etched glass.
- Reemplazo de bombilla:
- Disconnect power to the fixture at the circuit breaker.
- Deje que los bulbos se enfríen completamente antes de manipularlos.
- Carefully remove the old GU10 LED bulb by twisting it counter-clockwise.
- Insert a new 6.5W GU10 LED bulb by aligning the pins and twisting clockwise until secure.
- Restaure la energía al dispositivo.
- Inspección: Inspeccione periódicamente el cableado y las conexiones para detectar cualquier signo de desgaste o daños.
Solución de problemas
| Problema | Posible causa | Solución |
|---|---|---|
| La luz no se enciende. |
|
|
| La luz parpadea. |
|
|
| Agua dentro del artefacto. |
|
|
Presupuesto
| Número de modelo | 1639BZ-LL |
| Marca | Hinkley |
| Dimensiones (L x An x Al) | 4" x 12" x 36" |
| Peso | 16 libras |
| Material | Aluminio |
| Finalizar | Bronce |
| Fuente de luz | (3) GU10 LED Bulbs (included) |
| Quétage (Total) | 22.5 vatios (3 x 6.5 W) |
| Volumentage | 120 voltios |
| Brillo | 1500 lúmenes |
| Uso interior/exterior | Exterior (clasificado para lugares húmedos) |
| Características especiales | Regulable, cableado, resistente al agua |
| Certificaciones | UL & CSA Product Safety Standards |
Vídeo oficial del producto
Vídeo: Un overview of Hinkley outdoor lighting, showcasing thoughtful design and quality craftsmanship. This video provides a general look at the brand's outdoor lighting philosophy.
Garantía y soporte
Hinkley products are manufactured to the highest standards and are backed by a limited warranty. For specific warranty details, please refer to the warranty card included with your purchase or visit the official Hinkley websitio.
If you require technical assistance, replacement parts, or have questions regarding your Hinkley Atlantis fixture, please contact Hinkley Customer Support:
- Websitio: www.hinkley.es
- Teléfono: Consulte Hinkley webSitio para números de contacto actuales.
- Correo electrónico: Consulte Hinkley webSitio para correo electrónico de contacto actual.
Please have your model number (1639BZ-LL) and purchase date available when contacting support.


