1. Introducción
Thank you for choosing the ETA Delicca 2 Bread Maker. This appliance is designed to simplify your baking process, allowing you to effortlessly prepare a variety of breads, doughs, jams, and even yogurts. With its 12 pre-defined programs and user-friendly interface, you can enjoy fresh, homemade goods with minimal effort. Please read this manual carefully before first use to ensure safe and optimal operation of your new bread maker.
2. Instrucciones de seguridad
- Asegúrese siempre de que el aparato esté colocado sobre una superficie estable, plana y resistente al calor, lejos del agua y de fuentes de calor.
- Do not immerse the bread maker's main unit, cord, or plug in water or any other liquid.
- Mantenga a los niños y a las mascotas alejados del aparato durante su funcionamiento, ya que las superficies pueden calentarse mucho.
- Unplug the bread maker from the power outlet when not in use, before cleaning, or before adding/removing parts.
- Do not operate the appliance with a damaged cord or plug, or if it has malfunctioned or been damaged in any way.
- Utilice únicamente accesorios recomendados por el fabricante.
- Nunca introduzca las manos ni utensilios en la panificadora durante su funcionamiento.
- Asegúrese de que haya una ventilación adecuada alrededor del aparato durante su uso.
3. Producto terminadoview
Familiarize yourself with the components of your ETA Delicca 2 Bread Maker:

Figura 3.1: The ETA Delicca 2 Bread Maker with its removable bread pan. The control panel is visible on the left, and the main unit features a sleek stainless steel finish.
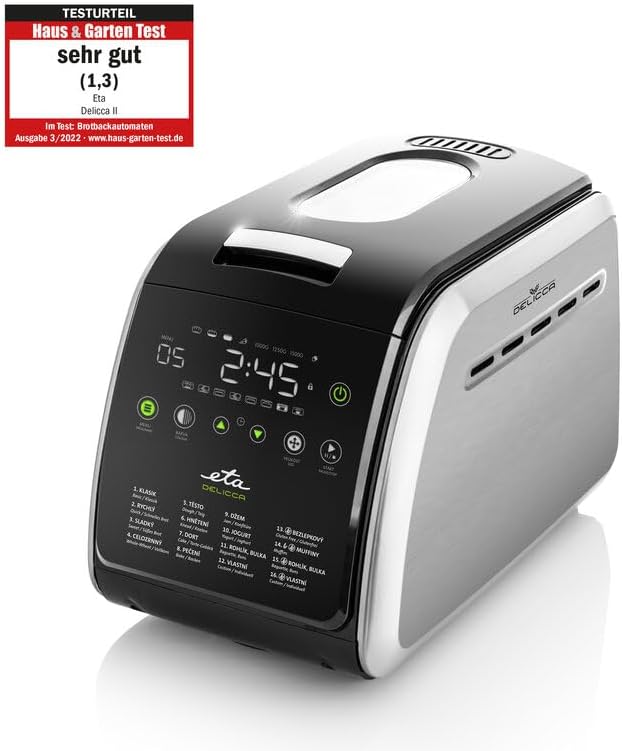
Figura 3.2: The bread maker shown with its essential accessories: two kneading paddles, a measuring cup, and a measuring spoon. These tools are crucial for accurate ingredient measurement and proper dough preparation.

Figura 3.3: Una sobrecarga view of the bread maker with its lid open, revealing the interior cavity where the bread pan is placed. The heating elements and the mechanism for the kneading paddles are visible at the bottom.
Componentes:
- Unidad principal: Alberga el motor, el elemento calefactor y el panel de control.
- Molde para pan: Sartén antiadherente desmontable para hornear.
- Paletas de amasado: Two paddles for mixing and kneading ingredients.
- Taza de medir: Para ingredientes líquidos.
- Cuchara medidora: For smaller quantities of ingredients (e.g., yeast, salt).
- Tapa: Con un viewVentana para monitorear el proceso de horneado.
4. Configuración
Estreno:
- Unpack the bread maker and all its accessories. Remove any packaging materials.
- Wash the bread pan and kneading paddles with warm, soapy water. Rinse thoroughly and dry completely.
- Limpie el exterior de la unidad principal con adamp Paño. No utilice limpiadores abrasivos.
- Before first use, it is recommended to run the 'Bake' program (Program 12) for about 10 minutes without any ingredients to burn off any manufacturing residues. Ensure good ventilation during this process. Allow the unit to cool down completely afterwards.
Colocación:
Place the bread maker on a stable, level, and heat-resistant surface. Ensure there is adequate space around the appliance for ventilation, especially at the back and sides. Do not place it near curtains or flammable materials.
5. Instrucciones de funcionamiento
Pasos básicos para hacer pan:
- Insertar paletas de amasado: Place the kneading paddles onto the shafts at the bottom of the bread pan.
- Añadir ingredientes: Add ingredients to the bread pan in the order specified by your recipe (typically liquids first, then dry ingredients, with yeast last and separate from liquids/salt). Ensure accurate measurements using the provided cup and spoon.
- Coloque el molde para pan: Insert the bread pan into the main unit, pressing down firmly until it clicks into place. Close the lid.
- Conectar: Conecte el cable de alimentación a una toma de corriente adecuada. La pantalla se iluminará.
- Seleccionar programa: Use the 'Menu' button to cycle through the 12 pre-defined programs until you reach your desired program.
- Seleccione el tamaño del pan y el color de la corteza: Use the 'Loaf Size' and 'Crust Color' buttons to adjust settings according to your recipe and preference.
- Comenzar: Press the 'Start/Stop' button to begin the program. The bread maker will automatically mix, knead, rise, and bake.
- Quitar el pan: Once the program is complete, the bread maker will beep. Unplug the appliance. Using oven mitts, carefully remove the bread pan from the unit. Invert the pan to release the bread onto a wire rack to cool. Remove the kneading paddles from the bread if they remain embedded.
Funciones especiales:
- Temporizador de retardo: Allows you to delay the start of the baking process for up to 13 hours. Add ingredients, set program, then use the '+' and '-' buttons to set the delay time, and press 'Start/Stop'.
- Mantener caliente: After baking, the bread maker automatically enters a 60-minute 'Keep Warm' cycle to maintain bread temperature.
- Add Ingredients Signal: For some programs, the bread maker will beep during the kneading cycle to indicate when to add additional ingredients like fruits, nuts, or seeds.

Figura 5.1: The ETA Delicca 2 Bread Maker positioned in a modern kitchen, surrounded by a variety of freshly baked goods, including loaves of bread, cake, and jam, demonstrating its versatility.
6. Guía del programa
The ETA Delicca 2 offers 12 pre-set programs to cater to various baking needs:
| Programa No. | Nombre del programa | Descripción |
|---|---|---|
| 1 | Básico | Para panes blancos y mixtos, compuestos principalmente de harina de pan básica. |
| 2 | Francés | For light breads made from fine flour. Typically results in a crispier crust. |
| 3 | Trigo integral | For breads containing whole wheat flour, which requires a longer kneading and rising time. |
| 4 | Dulce | Para panes con alto contenido de azúcar, grasas y proteínas. |
| 5 | Sin gluten | For gluten-free recipes. These breads often require different kneading and rising conditions. |
| 6 | Rapid Bake | For quick baking of basic bread. Note: May result in a denser texture. |
| 7 | Masa | For preparing doughs for pizza, rolls, or pastries without baking. |
| 8 | Amasar | Solo para amasar masa, sin levar ni hornear. |
| 9 | Pastel | For mixing and baking cakes and quick breads. |
| 10 | Atasco | Para elaborar mermeladas y confituras caseras. |
| 11 | Yogur | Para preparar yogur casero. |
| 12 | Hornear | For baking only, without kneading or rising. Useful for additional baking time or pre-made dough. |
7. Mantenimiento y limpieza
La limpieza regular garantiza la longevidad y el rendimiento óptimo de su panificadora.
Pasos de limpieza:
- Desenchufar y enfriar: Desenchufe siempre la panificadora y déjela enfriar completamente antes de limpiarla.
- Bread Pan and Paddles: Remove the bread pan and kneading paddles. Fill the pan with warm, soapy water and let it soak for 10-15 minutes to loosen any stuck-on dough. Use a soft sponge or cloth to clean. Do not use metal scouring pads or abrasive cleaners, as they can damage the non-stick coating. Rinse thoroughly and dry completely.
- Interior: Limpie el interior de la cámara de cocción con adamp cloth to remove any crumbs or residue. Do not use excessive water.
- Exterior: Clean the exterior of the bread maker with a soft, damp Paño. Para manchas difíciles, se puede usar un detergente suave. Seque bien.
- Almacenamiento: Store the bread maker in a clean, dry place once completely dry.
Nota: The bread pan and kneading paddles are not dishwasher safe, as this can damage the non-stick coating.
8. Solución de problemas
Si tiene problemas con su panificadora, consulte los siguientes problemas y soluciones comunes:
| Problema | Posible causa | Solución |
|---|---|---|
| El pan no sube | Expired or inactive yeast; incorrect water temperature; too much salt/sugar. | Check yeast expiry; use lukewarm water (38-43°C); ensure correct ingredient measurements. |
| El pan es demasiado denso/pesado | Demasiada harina; no suficiente líquido; amasado insuficiente. | Measure ingredients precisely; ensure proper program selection for dough type. |
| El pan se derrumba durante la cocción | Demasiado líquido; demasiada levadura; alta humedad. | Reduce liquid slightly; ensure correct yeast amount; adjust recipe for humidity. |
| Paletas de amasar atrapadas en el pan | Ocurrencia común. | Carefully remove with a non-metallic utensil after bread cools. |
| La pantalla muestra el código de error | Overheating; motor overload; sensor issue. | Unplug and let cool for 20-30 minutes. If problem persists, contact customer support. |
9. Especificaciones
| Característica | Detalle |
|---|---|
| Marca | Hora estimada de llegada (ETA) |
| Número de modelo | ETA714990030 |
| Color | Acero inoxidable |
| Dimensiones (L x An x Al) | 30 x 12.5 x 20 cm |
| Capacidad | Hasta 3 libras (aprox. 1.5 kg) |
| Fuerza | 850 vatios |
| Volumentage | 230 voltios |
| Material | Acero inoxidable |
| Peso | 7 kilogramos |
| Número de programas | 12 |
10. Garantía y soporte
Para obtener información sobre la garantía, consulte la documentación proporcionada al momento de la compra. Conserve el comprobante de compra para cualquier reclamación de garantía.
If you require technical assistance, have questions about your product, or need to order spare parts, please contact ETA customer support. Contact details can typically be found on the manufacturer's websitio o en su documentación de compra.
Note: Information regarding the availability of spare parts for this model is currently unavailable.


