1. Introducción
Gracias por la compraasing the ORIA WA77 Indoor/Outdoor Wireless Digital Thermometer. This device is designed to provide accurate temperature readings for both your indoor environment and an outdoor location via a remote wireless sensor. Please read this manual carefully before use to ensure proper operation and to maximize the lifespan of your product.
2. Producto terminadoview
The ORIA WA77 thermometer system consists of a main display unit and a wireless remote sensor.
Unidad de visualización principal
The main unit features a large LCD screen with an orange backlight for easy readability in various lighting conditions. It displays both indoor and outdoor temperatures, along with time and other indicators.
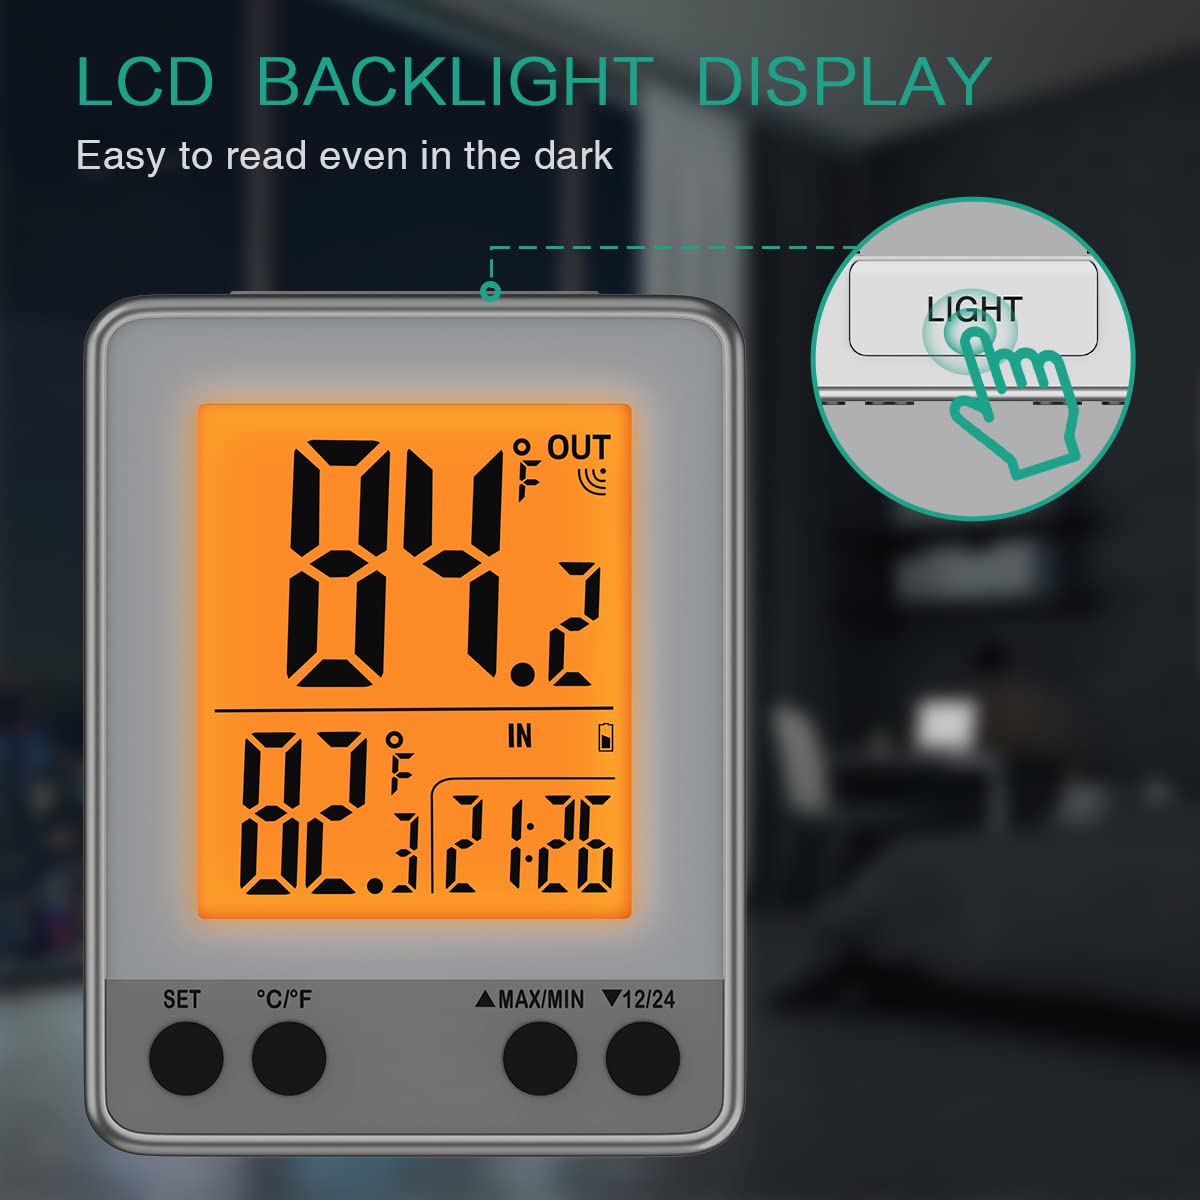
Imagen 2.1: The main display unit showing the LCD screen with its orange backlight, making it easy to read temperature and time even in low light conditions.
Sensor remoto inalámbrico
The remote sensor transmits outdoor temperature data wirelessly to the main unit. It is designed for outdoor placement and has a maximum transmission range of 100 meters (328 feet) in open areas.

Imagen 2.2: The wireless remote sensor (bottom) and the main display unit (top). The remote sensor is designed to be placed outdoors to measure external temperature and transmit it to the main unit.
Componentes y controles
- Unidad de visualización principal: LCD screen, 'SET' button, '°C/°F' button, 'MAX/MIN' button, '12/24' button, backlight button, battery compartment, stand, magnets, hang hole.
- Sensor remoto: Temperature sensor, channel switch, battery compartment, stand, hang hole, sucker.

Imagen 2.3: Trasero view of the main unit and remote sensor, highlighting features such as the stand, magnets, hang hole, channel switch, and battery compartments for 2xAAA batteries (not included).
3. Configuración
3.1 Instalación de la batería
- Unidad principal: Open the battery compartment cover on the back of the main unit. Insert 2 AAA batteries (not included) according to the polarity markings (+/-). Close the cover.
- Sensor remoto: Open the battery compartment cover on the back of the remote sensor. Insert 2 AAA batteries (not included) according to the polarity markings (+/-). Close the cover.
Nota: Ensure batteries are inserted correctly. Replace batteries when the low battery indicator appears on the display.
3.2 Emparejamiento de sensores
After installing batteries in both units, the main unit will automatically search for the remote sensor. The outdoor temperature should appear on the main unit's display within a few minutes. If the outdoor temperature does not display, press and hold the '12/24' button on the main unit for 3 seconds to manually re-establish the connection.
3.3 Colocación de sensores
For accurate outdoor temperature readings and to prolong the sensor's life, place the remote sensor in a shaded area, away from direct sunlight and precipitation. The sensor should always be placed with its ventilation holes facing upwards to prevent rain from entering. Ensure it is within the 100-meter (328 feet) transmission range of the main unit, minimizing obstacles like thick walls or metal structures.
4. Instrucciones de funcionamiento
4.1 Selección de la unidad de temperatura (°C/°F)
Press the '°C/°F' button on the main unit to switch between Celsius and Fahrenheit temperature displays.
4.2 Ajuste de la hora
Press and hold the 'SET' button for 3 seconds to enter time setting mode. Use the 'MAX/MIN' or '12/24' buttons to adjust the hour and minute values. Press 'SET' again to confirm each setting and move to the next. Press 'SET' once more to exit time setting mode.
4.3 formato de 12/24 horas
Press the '12/24' button to switch between 12-hour and 24-hour time formats.
4.4 Max/Min Temperature Records
Presione el botón 'MAX/MIN' para view the maximum and minimum recorded indoor and outdoor temperatures. Press it again to cycle through current, maximum, and minimum readings. The records are typically reset every 24 hours or upon battery replacement.

Imagen 4.1: The display showing maximum and minimum temperature records, allowing users to review temperature fluctuations over time.
4.5 Activación de la luz de fondo
Press the 'LIGHT' button (usually located on the top edge of the main unit) to activate the orange backlight for a few seconds, improving visibility in dark environments.
5. Características
- Provides accurate indoor and outdoor temperature readings simultaneously.
- 3-inch LCD display with orange backlight for easy readability day or night.
- Switchable temperature units: Celsius (°C) or Fahrenheit (°F).
- Adjustable time display: 12-hour or 24-hour format.
- Indicador de batería baja para reemplazo oportuno de la batería.
- Records and displays maximum and minimum temperature values.
- Wireless transmission range of up to 100 meters (328 feet) in open areas.
- Multiple mounting options for the main unit: desktop stand, magnetic attachment, or wall mount.
- Multiple mounting options for the remote sensor: desktop stand, hang, or sucker.

Imagen 5.1: Various mounting options for the main unit (stand, wall mount, magnet) and the remote sensor (stand, hang, sucker), offering flexibility for placement.

Imagen 5.2: Examples of where the ORIA WA77 thermometer can be used, including refrigerators, baby rooms, bedrooms, warehouses, and greenhouses.
6. Mantenimiento
6.1 Reemplazo de batería
When the low battery indicator appears on the display, replace the batteries in both the main unit and the remote sensor with new AAA batteries. Ensure correct polarity.
6.2 Limpieza
Limpie las unidades con un paño suave y seco.amp paño. No utilice limpiadores abrasivos ni disolventes, ya que pueden dañar la pantalla oasing.
6.3 Consideraciones ambientales
Avoid exposing the units to extremely high or low temperatures, as this can damage electronic components and plastics. Do not immerse the units in water.
7. Solución de problemas
- Blank LCD Display: If the LCD screen goes blank, replace the batteries in the main unit.
- No hay lectura de temperatura exterior:
- Check if the remote sensor batteries are installed correctly and are not depleted.
- Ensure the remote sensor is within the transmission range (100m/328ft) of the main unit and there are no significant obstructions.
- Press and hold the '12/24' button on the main unit for 3 seconds to manually re-establish the connection with the remote sensor.
- Lecturas inexactas: Ensure both units are placed away from direct heat sources, cold drafts, or direct sunlight. The remote sensor should be in a shaded, protected area outdoors.
8. Especificaciones
| Número de modelo | WA77 |
| Energía (Unidad principal) | 2 pilas AAA (no incluidas) |
| Power (Wireless Sensor) | 2 pilas AAA (no incluidas) |
| Rango de transmisión | 100 meters / 328 feet (open area) |
| Tipo de pantalla | Digital LCD with orange backlight |
| Mounting Options (Main Unit) | Desktop stand, Magnetic, Wall mount |
| Mounting Options (Sensor) | Desktop stand, Hang, Sucker |
| Peso del producto | 168 gramos |
| Dimensiones del paquete | 11.5 x 9.1 x 6.4 cm |
9. Información de seguridad
- No mezcle pilas viejas y nuevas.
- No mezcle pilas alcalinas, estándar (carbono-zinc) o recargables (níquel-cadmio).
- Retire las baterías si el dispositivo no se utilizará durante un período prolongado.
- Mantener fuera del alcance de los niños.
- No intente desmontar ni reparar la unidad usted mismo. Contacte con atención al cliente para obtener ayuda.
10. Garantía y soporte
ORIA products are designed to provide reliable performance. For any questions, troubleshooting assistance, or warranty claims, please contact ORIA customer support through your purchase platform or the official ORIA website. Please have your model number (WA77) and purchase details available when contacting support.


