Introducción
This manual provides essential instructions for the safe operation, maintenance, and troubleshooting of your Ingco RH150068 Hammer Drill. Please read this manual thoroughly before using the tool to ensure proper and safe usage. Keep this manual for future reference.
Instrucciones generales de seguridad
Siga siempre las precauciones de seguridad básicas para reducir el riesgo de incendio, descarga eléctrica y lesiones personales.
- Seguridad en el área de trabajo: Mantenga su área de trabajo limpia y bien iluminada. Las áreas desordenadas u oscuras pueden provocar accidentes. No opere herramientas eléctricas en atmósferas explosivas, como en presencia de líquidos, gases o polvo inflamables.
- Seguridad eléctrica: Los enchufes de las herramientas eléctricas deben ser compatibles con la toma de corriente. Nunca modifique el enchufe de ninguna manera. Evite el contacto del cuerpo con superficies conectadas a tierra, como tuberías, radiadores, cocinas y refrigeradores.
- Seguridad personal: Always wear eye protection. Use hearing protection when operating the hammer drill. Dress properly; do not wear loose clothing or jewelry. Keep hair, clothing, and gloves away from moving parts.
- Uso y cuidado de herramientas: No fuerce la herramienta eléctrica. Utilice la herramienta eléctrica correcta para su aplicación. Desconecte el enchufe de la fuente de alimentación antes de realizar cualquier ajuste, cambiar accesorios o guardar la herramienta eléctrica.
- Servicio: Haga que un técnico calificado realice el mantenimiento de su herramienta eléctrica y utilice únicamente piezas de repuesto idénticas. Esto garantizará que se mantenga la seguridad de la herramienta eléctrica.
Producto terminadoview
The Ingco RH150068 is a robust corded electric hammer drill designed for demanding drilling tasks. It features a 1500-watt motor and a 32mm drilling capacity.
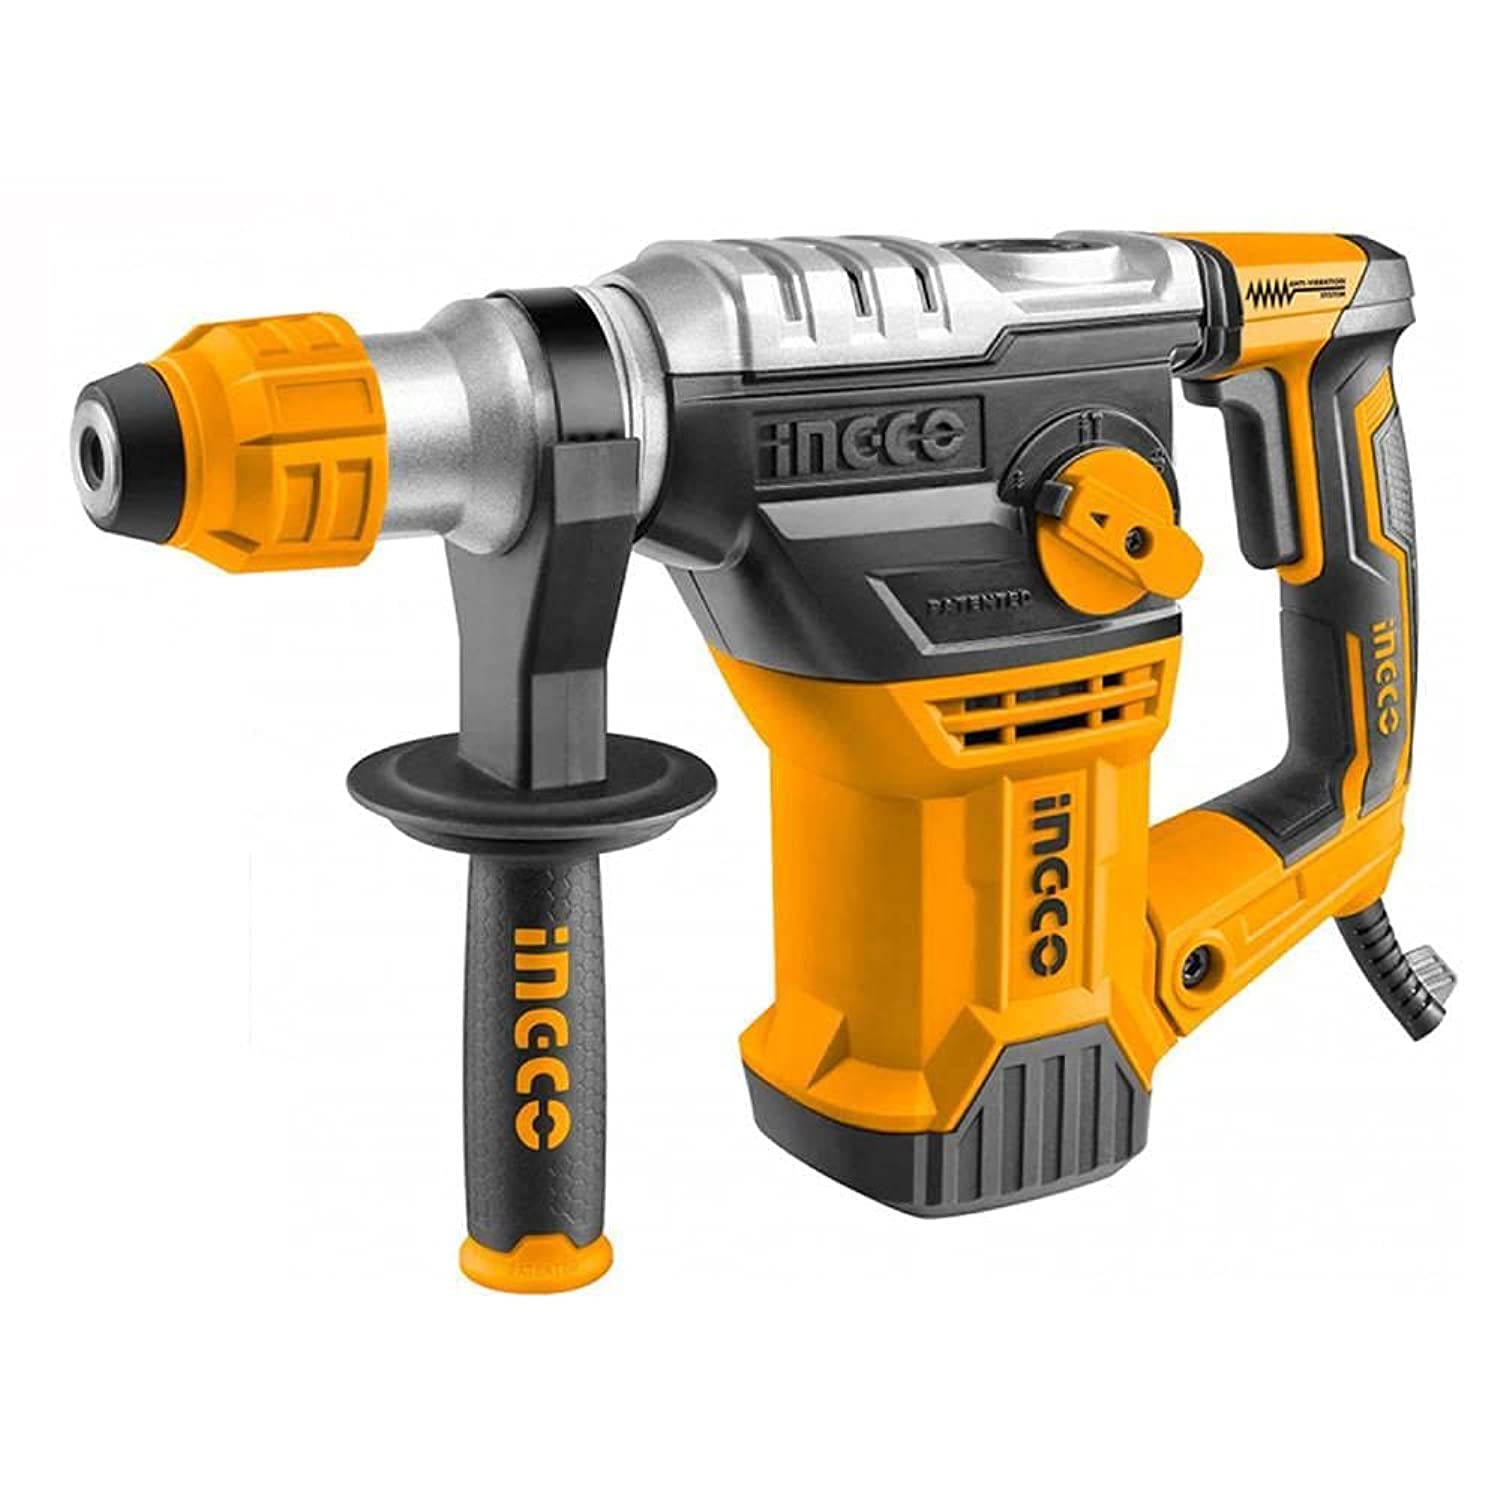
Figure 1: Ingco RH150068 Hammer Drill. This image displays the main unit of the corded electric hammer drill, typically featuring its multi-color housing, ergonomic handle, and the keyless chuck mechanism.
Componentes incluidos:
- Ingco RH150068 Hammer Drill Unit
- Llave de mandril
- Estuche de transporte
Configuración
1. Desembalaje
Carefully remove the hammer drill and all accessories from the carry case. Inspect the tool for any signs of damage that may have occurred during shipping. Do not use the tool if it appears damaged.
2. Colocación de accesorios
The RH150068 features a keyless chuck. To insert a drill bit:
- Rotate the chuck collar counter-clockwise until the jaws are open wide enough to accept the drill bit.
- Inserte la broca completamente en el mandril.
- Rotate the chuck collar clockwise to tighten the jaws securely around the drill bit. Ensure the bit is centered and firmly held.
Note: Although the product description mentions "Chuck Key" as an included component, the specification states "Keyless Chuck". For this manual, we will assume the "Keyless Chuck" specification is correct for operation, and the "Chuck Key" might be for another accessory or a general listing error. If it were a keyed chuck, the key would be used to tighten.
3. Conexión de alimentación
Ensure the power switch is in the "OFF" position before plugging the tool into a power outlet. Connect the corded electric hammer drill to a standard 220V power supply. Use an appropriate extension cord if necessary, ensuring it is rated for the tool's power requirements (1500 Watts).
Instrucciones de funcionamiento
1. Arranque y parada
- Para poner en marcha la herramienta, presione el gatillo.
- Para detener la herramienta, suelte el interruptor de gatillo.
- Para un funcionamiento continuo, presione el gatillo y luego el botón de bloqueo (si está disponible). Para soltarlo, vuelva a presionar el gatillo.
2. Drilling Modes
The Ingco RH150068 features hammer functionality for drilling into masonry and concrete, and a rotation-only mode for drilling into wood, metal, or plastics.
- Perforación con martillo: Select the hammer icon on the mode selector switch for drilling into hard materials. This mode combines rotation with a hammering action.
- Perforación rotatoria: Select the drill bit icon on the mode selector switch for standard drilling without hammering.
3. Rotación inversa
The tool is equipped with a reverse rotation feature, useful for removing jammed drill bits or driving/removing screws (though screw functionality is listed as 'No' in product description, the reverse function is present). The direction of rotation is controlled by a switch, usually located near the trigger.
- Empuje el interruptor hacia la izquierda para girar hacia adelante (en el sentido de las agujas del reloj).
- Empuje el interruptor hacia la derecha para girar en sentido inverso (en sentido antihorario).
Caution: Always ensure the tool has come to a complete stop before changing the direction of rotation.
Mantenimiento
El mantenimiento regular garantiza la longevidad y el rendimiento óptimo de su taladro percutor.
1. Limpieza
- After each use, clean the tool with a soft cloth to remove dust and debris.
- Do not use water or chemical cleaning agents, as these can damage the tool's electrical components.
- Limpie periódicamente las aberturas de ventilación para evitar el sobrecalentamiento.
2. Almacenamiento
- Store the hammer drill in its original carry case in a dry, secure location, out of reach of children.
- Proteja el cable de alimentación contra daños durante el almacenamiento.
3. Lubricación
This tool is designed for maintenance-free operation regarding internal lubrication. Do not attempt to lubricate internal components unless specified by a qualified service technician.
Solución de problemas
| Problema | Posible causa | Solución |
|---|---|---|
| La herramienta no arranca | No power supply; Faulty power cord/plug; Trigger switch fault | Check power outlet and connection; Inspect cord for damage; Contact service center |
| Pérdida de potencia durante el funcionamiento | Overload; Loose connection; Motor overheating | Reduce pressure on tool; Check power connections; Allow tool to cool down |
| Vibración o ruido excesivo | Damaged drill bit; Loose chuck; Internal component issue | Replace drill bit; Re-tighten chuck; Contact service center |
| La broca se atasca | Incorrect drilling technique; Material too hard; Overload | Use appropriate pressure and speed; Ensure correct drill bit for material; Use reverse function to extract |
If you encounter problems not listed here or if the suggested solutions do not resolve the issue, please contact Ingco customer support or an authorized service center.
Presupuesto
| Característica | Detalle |
|---|---|
| Número de modelo | RH150068 (Internal: CRHLI1601) |
| Fuente de poder | Eléctrico con cable |
| Volumentage | 220 voltios |
| Máxima potencia | 1500 vatios |
| Tipo de mandril | Sin claves |
| Size (Drilling Capacity) | 32 milímetros |
| Velocidad | 850 RPM |
| Funcionalidad del martillo | Sí |
| Función inversa | Sí |
| Velocidad ajustable | No |
| Peso del artículo | 0.21 kilogramos (209 g) |
| Dimensiones del producto | 10 x 20 x 37 cm |
Garantía y soporte
Los productos Ingco se fabrican con altos estándares de calidad. Para obtener información sobre la cobertura de la garantía, el servicio o el soporte técnico, consulte la tarjeta de garantía incluida con su producto o visite el sitio web oficial de Ingco. webSitio. Conserve su recibo de compra como comprobante de compra para cualquier reclamación de garantía.
For further assistance, please contact Ingco customer service.


