1. Introducción
Thank you for choosing the PS-TECH 24-Hour Mechanical Outdoor Timer. This analog plug-in timer is designed for outdoor use, featuring IP44 protection against splashing water and solid objects larger than 1mm. It allows for daily programming with a minimum interval of 30 minutes, making it ideal for controlling lights, pumps, and other electrical appliances. This manual provides detailed instructions for safe operation, setup, programming, and maintenance.
2. Información de seguridad
- Lea atentamente todas las instrucciones antes de usar.
- This timer is designed for outdoor use with IP44 protection. Ensure the protective cover for the socket is securely closed when not in use or during operation in wet conditions.
- No sumerja el temporizador en agua ni lo exponga a chorros de agua directos.
- Ensure the total load of connected devices does not exceed the maximum rating of 3680W (16A resistive load).
- Conecte siempre el temporizador a una toma de corriente con conexión a tierra.
- Do not open or attempt to repair the timer. Refer all servicing to qualified personnel.
- Mantener fuera del alcance de los niños.
- Unplug the timer from the power outlet before cleaning or when not in use for extended periods.
3. Producto terminadoview
The PS-TECH outdoor timer features a robust design suitable for various environments. Key components include:
- Esfera de 24 horas: Used for setting the current time and programming on/off cycles.
- Programming Segments (Pins): 48 push-down segments around the dial, each representing 30 minutes.
- Interruptor de anulación manual: Allows selection between ON, OFF, and AUTO modes.
- European Schuko Plug: For connecting the timer to a power outlet.
- Schuko Socket with Protective Cover: For connecting your appliance, protected by an IP44 rated cover.

Figura 3.1: Frente view of the PS-TECH 24-Hour Mechanical Outdoor Timer, showing the 24-hour dial and the protective top cover.
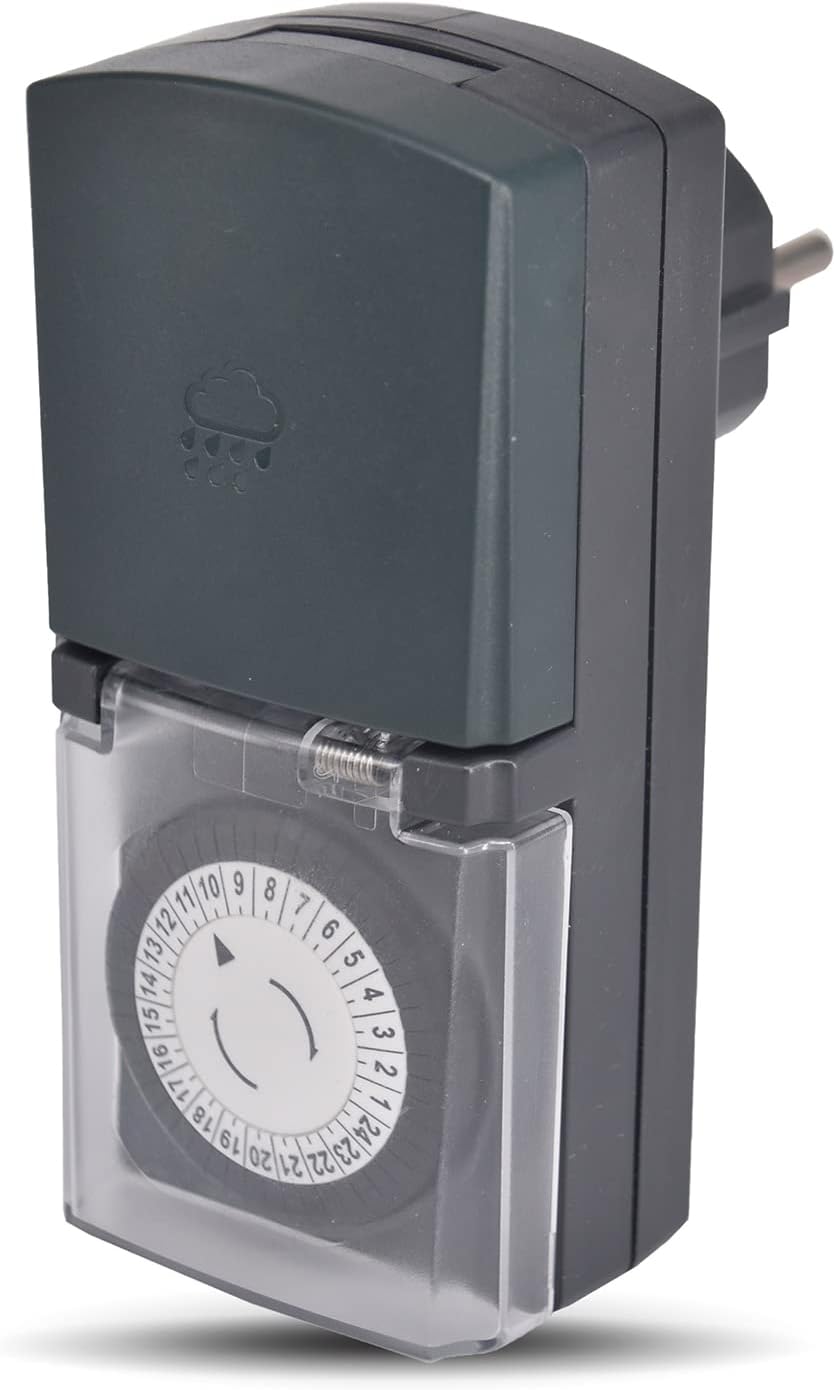
Figura 3.2: Angulado view of the timer, highlighting its compact design and the IP44 rated top cover.
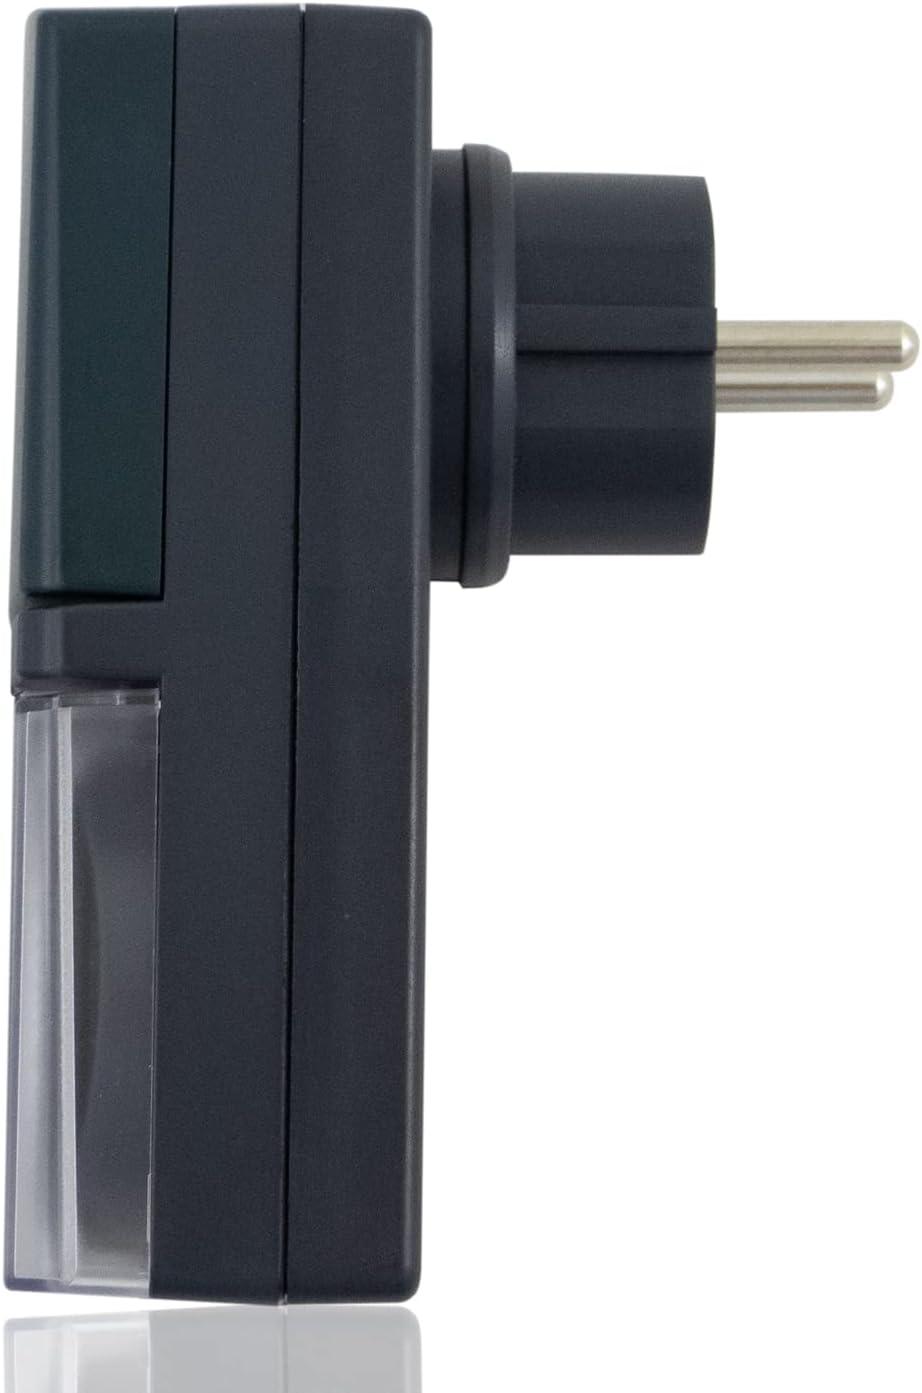
Figura 3.3: Lado view of the timer, showing the European Schuko plug for power connection.

Figure 3.4: The timer with its protective socket cover open, revealing the internal Schuko socket for appliance connection.
4. Configuración
Siga estos pasos para la configuración inicial:
- Deshacer: Retire con cuidado el temporizador de su embalaje.
- Establecer hora actual: Rotate the 24-hour dial clockwise until the arrow on the inner ring points to the current time. The dial is marked from 1 to 24 hours.
- Program On/Off Cycles: Push down the segments (pins) corresponding to the times you want the connected appliance to be ON. Each segment represents 30 minutes. If a segment is pushed down, the appliance will be ON during that 30-minute interval. If it's up, the appliance will be OFF.
- Establecer el interruptor de anulación manual: Locate the switch on the side of the timer. Set it to 'AUTO' for programmed operation. You can temporarily switch to 'ON' for continuous power or 'OFF' to cut power, overriding the program.
- Conectar: Insert the timer's plug into a suitable outdoor-rated, grounded power outlet.
- Conecte el aparato: Open the protective cover of the timer's socket and plug in the appliance you wish to control. Ensure the appliance's power consumption does not exceed the timer's maximum rating. Close the protective cover securely.
5. Instrucciones de funcionamiento
5.1 Configuración de la hora
The timer's dial continuously rotates. To set the current time, simply turn the entire dial clockwise until the current hour aligns with the arrow indicator. For example, if it's 3 PM, align the '15' mark with the arrow.
5.2 Programación de ciclos de encendido y apagado
The outer ring of the dial has 48 segments. Each segment represents a 30-minute interval. To program the timer:
- Encender: Push down the segments corresponding to the time periods when you want the connected appliance to be active.
- Apagar: Leave the segments in the 'up' position for the time periods when you want the connected appliance to be inactive.
The timer will activate the connected appliance when the dial rotates to a 'pushed down' segment and deactivate it when it rotates to an 'up' segment.
5.3 Manual Override Switch (ON/OFF/AUTO)
The manual override switch provides flexibility:
- EN: The connected appliance will remain continuously ON, overriding any set program.
- OFF: The connected appliance will remain continuously OFF, overriding any set program.
- COCHE: The timer will operate according to the programmed ON/OFF cycles set on the dial. This is the standard operating mode for automated control.
6. Mantenimiento
- Limpieza: Disconnect the timer from the power outlet before cleaning. Wipe the timer with a soft, damp Paño. No utilice limpiadores abrasivos ni disolventes.
- Almacenamiento: When not in use, store the timer in a dry, cool place, away from direct sunlight and extreme temperatures.
- Inspección: Inspeccione periódicamente el temporizador y su cable para detectar cualquier daño. No lo utilice si está dañado.
7. Solución de problemas
| Problema | Posible causa | Solución |
|---|---|---|
| El aparato no se enciende ni se apaga según lo programado. |
|
|
| El dial del temporizador no gira. |
|
|
| Appliance remains continuously ON or OFF. | Manual override switch is not in AUTO mode. | Coloque el interruptor de anulación manual en 'AUTO'. |
8. Especificaciones
| Característica | Detalle |
|---|---|
| Marca | PS-TECH |
| Modelo | Mechanical 24-Hour Outdoor Timer |
| Color | Negro |
| Material | Plástico |
| Fuente de alimentación | 230 VCA, 50 Hz |
| Max. Power / Resistive Load | 3680W / 16A |
| Intervalo de programación | 30 minutes (48 segments) |
| Clasificación de protección | IP44 (Splash-proof, protected against solid objects > 1mm) |
| Peso del producto | 10 gramos |
| Dimensiones del paquete | 16.1 x 8.6 x 5.8 cm |
| ASIN | B09FLS1SJC |
9. Garantía y soporte
PS-TECH products are manufactured to high-quality standards. For warranty information or technical support, please refer to the contact details provided with your purchase or visit the official PS-TECH website. Do not attempt to open or repair the device yourself, as this may void the warranty and pose a safety risk.


