1. Introducción
This manual provides essential information for the safe and efficient operation of your Reloop RP-7000 MK2 Direct Drive High Torque Turntable. Please read these instructions thoroughly before using the product to ensure proper setup, optimal performance, and longevity of your equipment. Keep this manual for future reference.
2. Instrucciones de seguridad
- Fuente de alimentación: Conecte la unidad únicamente a una toma de CA del volumen especificado.tage. Asegúrese de que el cable de alimentación no esté dañado ni pellizcado.
- Humedad: Do not expose the unit to rain, moisture, or excessive humidity. Avoid placing liquid-filled objects on the turntable.
- Ventilación: Asegúrese de que haya una ventilación adecuada alrededor de la unidad. No bloquee las aberturas de ventilación.
- Colocación: Place the turntable on a stable, level surface away from direct sunlight, heat sources, and strong magnetic fields.
- Limpieza: Desconecte la alimentación antes de limpiar. Utilice un paño suave y seco. Evite limpiadores líquidos o disolventes.
- Servicio: No intente reparar la unidad usted mismo. Encargue cualquier reparación a personal cualificado.
3. Contenido del paquete
Verifique que todos los artículos enumerados a continuación estén incluidos en su paquete. Si falta algún artículo o está dañado, comuníquese con su distribuidor de inmediato.
- Reloop RP-7000 MK2 Direct Drive High Torque Turntable (x2)
- Funda antipolvo (x2)
- Digital Turntable Stylus Scale
- Record Care Solution
- Cable de alimentación
- Cable RCA
- Cable de tierra
- Alfombrilla
- Contrapeso
- Headshell with Cartridge (pre-mounted or separate, depending on region/bundle)

Figura 1: Encimaview of the Reloop RP-7000 MK2 turntable bundle components.
4. Configuración
4.1 Desembalaje y colocación
- Retire con cuidado todos los componentes del embalaje. Conserve el embalaje para su posterior transporte.
- Place the turntable on a flat, stable, and vibration-free surface. Ensure there is enough space for the dust cover to open fully.
- Attach the dust cover by aligning its hinges with the slots on the turntable's rear.

Figura 2: Turntable with the dust cover in place.
4.2 Platter and Slipmat Installation
- Coloque con cuidado el plato sobre el eje central. Asegúrese de que quede a ras.
- Coloque la alfombrilla sobre el plato.
4.3 Configuración del brazo y del cartucho
- If not pre-mounted, attach the headshell with the cartridge to the tonearm. Secure it by turning the locking ring.
- Screw the counterweight onto the rear of the tonearm.
- Equilibrar el brazo: Suelte el brazo clamp. Adjust the counterweight until the tonearm is perfectly balanced and floats horizontally.
- Establecer fuerza de seguimiento: Return the tonearm to its rest and clamp it. Rotate the numbered ring on the counterweight to '0' without moving the counterweight itself. Then, rotate the entire counterweight to the recommended tracking force for your cartridge (typically 2-4 grams for DJ cartridges).
- Conjunto Anti-Skate: Ajuste el dial anti-patinaje para que coincida con la configuración de fuerza de seguimiento.
4.4 Using the Digital Stylus Scale
The included digital stylus scale allows for precise measurement of your cartridge's tracking force, ensuring optimal sound quality and minimizing record wear.
- Place the stylus scale on the platter.
- Encienda la báscula utilizando el botón de encendido.
- Carefully lower the stylus onto the designated measuring point on the scale.
- Read the tracking force displayed. Adjust the tonearm's counterweight as needed until the desired force is achieved.

Figura 3: Digital Stylus Scale for precise tracking force measurement.
4.5 Conexiones
- Salida de audio: Connect the RCA cables from the turntable's audio output to the PHONO input of your mixer or amplifier. If your mixer/amplifier does not have a PHONO input, you will need an external phono preampmás duradero.
- Cable a tierra: Conecte el cable de tierra del tocadiscos a la terminal de tierra de su mezclador o ampLificador para reducir el zumbido.
- Fuerza: Connect the power cable to the turntable and then to a suitable AC power outlet.
5. Instrucciones de funcionamiento
5.1 Reproducción básica
- Coloque un disco sobre la alfombrilla.
- Select the appropriate speed (33, 45, or 78 RPM) using the speed selector buttons.
- Presione el INICIAR/DETENER Botón para iniciar la rotación del plato.
- Levante con cuidado el brazo utilizando la palanca de señalización y coloque la aguja sobre el surco deseado en el disco.
- Baje la palanca de señalización para colocar con cuidado la aguja sobre el disco.
- To stop playback, lift the tonearm using the cueing lever, return it to the tonearm rest, and press the INICIAR/DETENER botón.
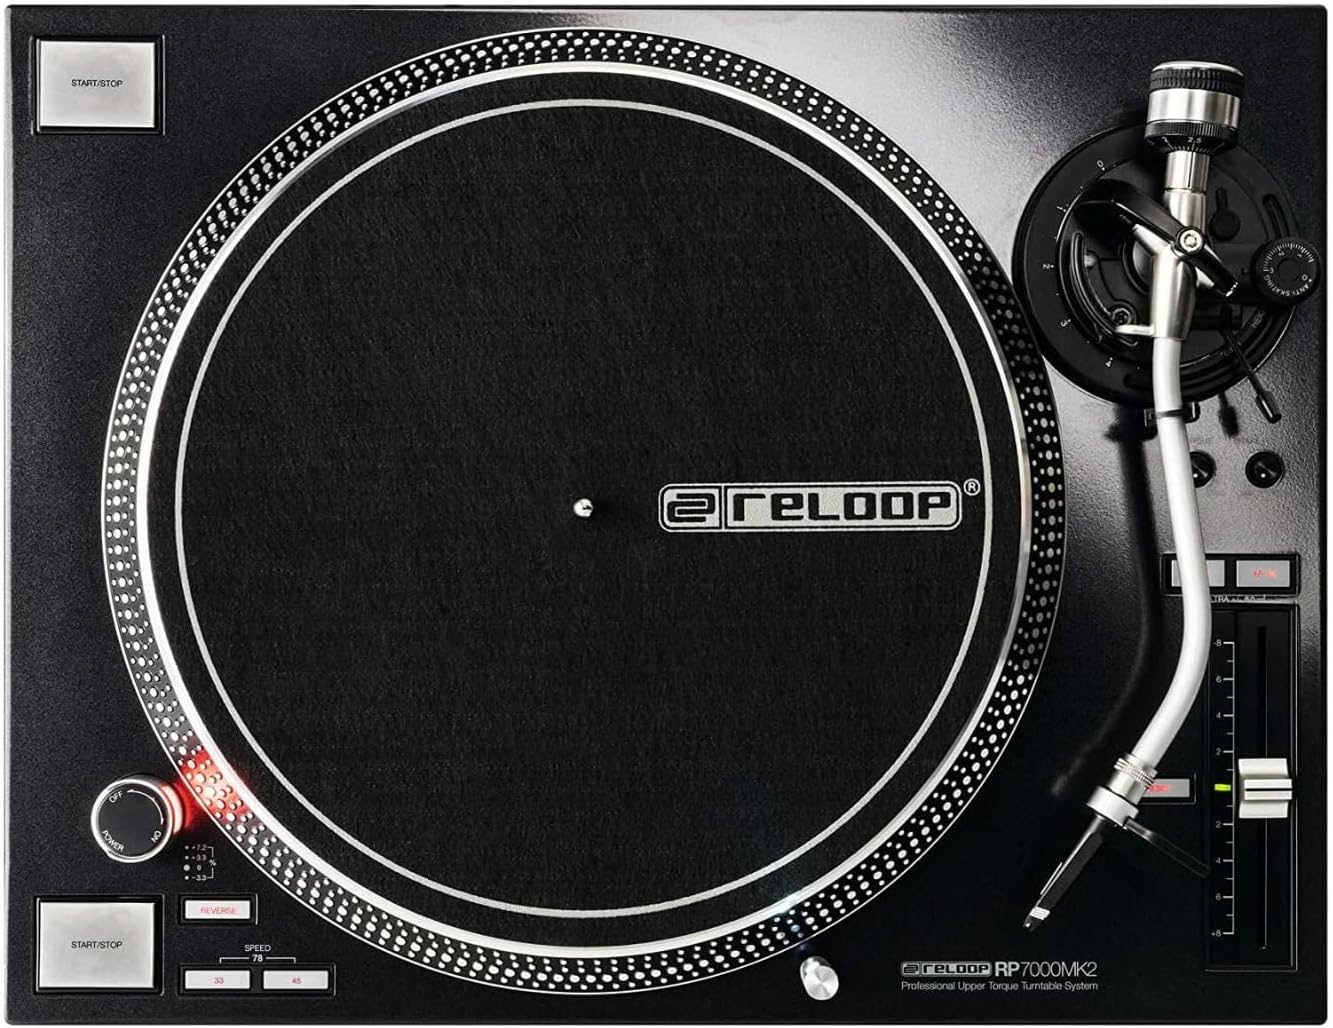
Figura 4: Turntable platter and control layout.
5.2 Control de tono
The pitch fader allows you to adjust the playback speed (BPM) of the record. Move the fader up or down to increase or decrease the pitch. The pitch range can be selected using the range buttons (e.g., +/- 8%, 16%, 50%).
5.3 Función inversa
The RP-7000 MK2 features a reverse playback function. Press the CONTRARRESTAR button to change the direction of platter rotation. Press it again to return to normal playback.
6. Mantenimiento
6.1 Limpieza del plato giratorio
- Desconecte siempre la alimentación antes de limpiar.
- Use a soft, dry, lint-free cloth to wipe the surface of the turntable and dust cover.
- Evite utilizar limpiadores abrasivos, solventes o aerosoles químicos, ya que pueden dañar el acabado.
6.2 Cuidado del lápiz
- Gently brush the stylus from back to front using a soft stylus brush to remove dust and debris.
- Evite tocar el lápiz con los dedos.
6.3 Cuidado de registros
The included record care solution helps maintain the quality of your vinyl records and prolong their lifespan.
- Apply a small amount of record care solution to a clean, soft, lint-free cloth or a dedicated record cleaning brush.
- Gently wipe the record surface in a circular motion, following the grooves.
- Allow the record to dry completely before playing.
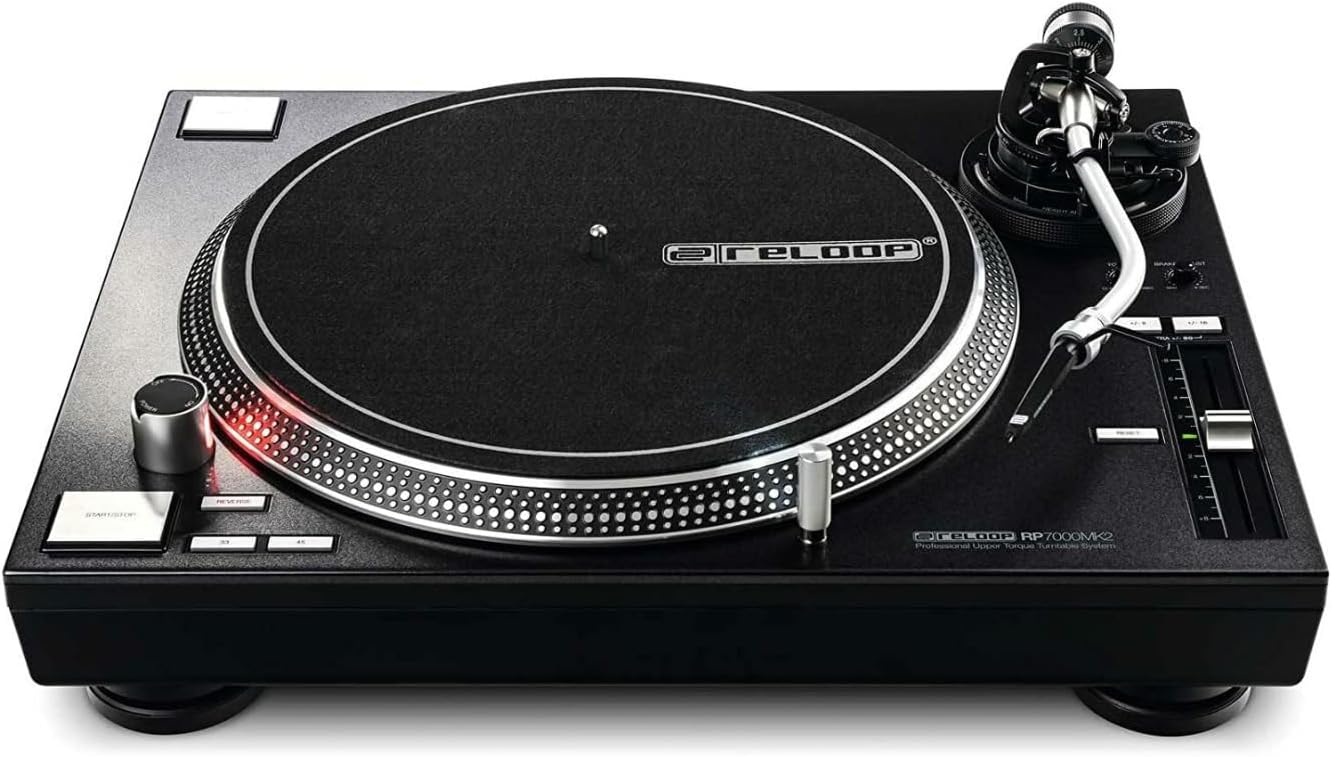
Figura 5: Record Care Solution for maintaining vinyl quality.
7. Solución de problemas
| Problema | Posible causa | Solución |
|---|---|---|
| Sin poder | Cable de alimentación no conectado; toma de corriente no activa | Verifique la conexión del cable de alimentación; pruebe la toma de corriente con otro dispositivo |
| Sin sonido o volumen bajo | RCA cables incorrect; no PHONO input; amplifier/mixer settings | Ensure RCA cables are connected to PHONO input; check amplifier/mixer input selection and volume |
| Ruido de zumbido | Cable de tierra no conectado; interferencia | Connect ground wire; move turntable away from other electronic devices |
| Sonido saltado o distorsionado | Incorrect tracking force; dirty stylus/record; damaged stylus | Adjust tracking force using stylus scale; clean stylus and record; replace stylus if damaged |
| El plato no gira | START/STOP button not pressed; motor issue | Press START/STOP; if problem persists, contact support |
8. Especificaciones
| Característica | Detalle |
|---|---|
| Nombre del modelo | RP-7000MK2 |
| Marca | Rehacer bucle |
| Tipo de motor | Direct Drive DC Motor |
| Característica especial | Alto par |
| Dimensiones del producto | 27.9 x 20 x 18.6 pulgadas |
| Material | Metal |
| Color | Negro |
| Dispositivos compatibles | Speaker, Headphone, Personal Computer, MP3 Player, Laptop |
| Formato de señal | Digital |
9. Garantía y soporte
Reloop products are designed for reliability and performance. For warranty information, please refer to the warranty card included with your product or visit the official Reloop website. For technical support or service inquiries, please contact your authorized Reloop dealer or distributor.
Fabricante: Rehacer bucle
Fecha de primera disponibilidad: 8 de julio de 2022


