1. Introducción
This manual provides essential information for the safe and efficient use of your Philips 329P1H 32-inch 4K UHD LCD Monitor. This monitor features a 32-inch 4K UHD (3840 x 2160) display, an integrated USB-C docking station with power delivery, a pop-up webcam with Windows Hello™ facial recognition, and various eye-care technologies. Please read this manual thoroughly before operating the device.
2. Información de seguridad
Observe the following safety precautions to prevent damage to the monitor or injury to yourself:
- No exponga el monitor a la lluvia ni a la humedad.
- No abra el monitor casing. Deje todo servicio a personal cualificado.
- Asegúrese de que haya una ventilación adecuada alrededor del monitor.
- Utilice únicamente el adaptador de corriente suministrado con el monitor.
- Evite colocar el monitor bajo la luz solar directa o cerca de fuentes de calor.
- Limpie la pantalla con un paño suave que no deje pelusa. No utilice limpiadores líquidos directamente sobre la pantalla.
3. Contenido del paquete
Information regarding the exact contents of the product package is not available. Typically, a monitor package includes:
- Philips 329P1H Monitor
- Cable de alimentación
- Cable USB-C
- Cable HDMI (puede variar según la región)
- Guía de inicio rápido
4. Configuración
4.1 Configuración física
Carefully remove the monitor and its components from the packaging. Assemble the stand according to the instructions provided in the Quick Start Guide. Place the monitor on a stable, level surface.
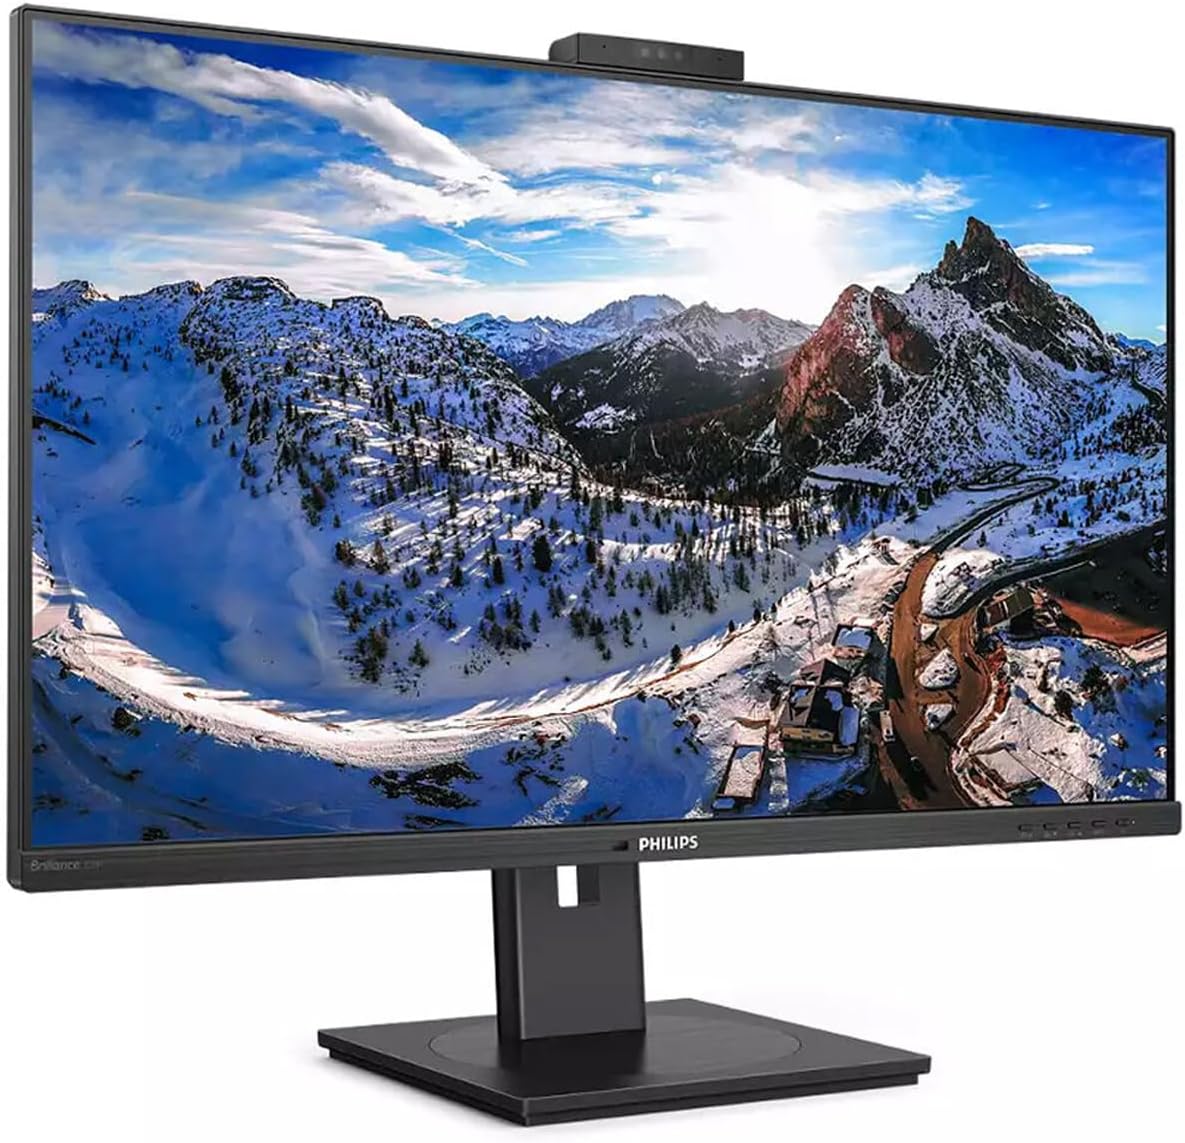
Figura 4.1: Frente view of the Philips 329P1H Monitor.
4.2 Cables de conexión
- Conexión de energía: Conecte el cable de alimentación a la entrada de alimentación del monitor y luego a una toma de corriente.
- Conexión de vídeo: Connect a video cable (e.g., HDMI, DisplayPort, or USB-C) from your computer to the corresponding input on the monitor. For 4K UHD resolution, ensure your graphics card and cable support the required bandwidth.
- Acoplamiento USB-C: If your laptop supports USB-C with power delivery, connect the supplied USB-C cable from your laptop to the monitor's USB-C port. This single cable can provide video, data, and power charging to your laptop.
- Periféricos USB: Connect your keyboard, mouse, or other USB devices to the USB ports on the monitor.
- Conexión Ethernet: Connect an RJ-45 Ethernet cable from your network router/modem to the monitor's RJ-45 port for network access through the USB-C connection.
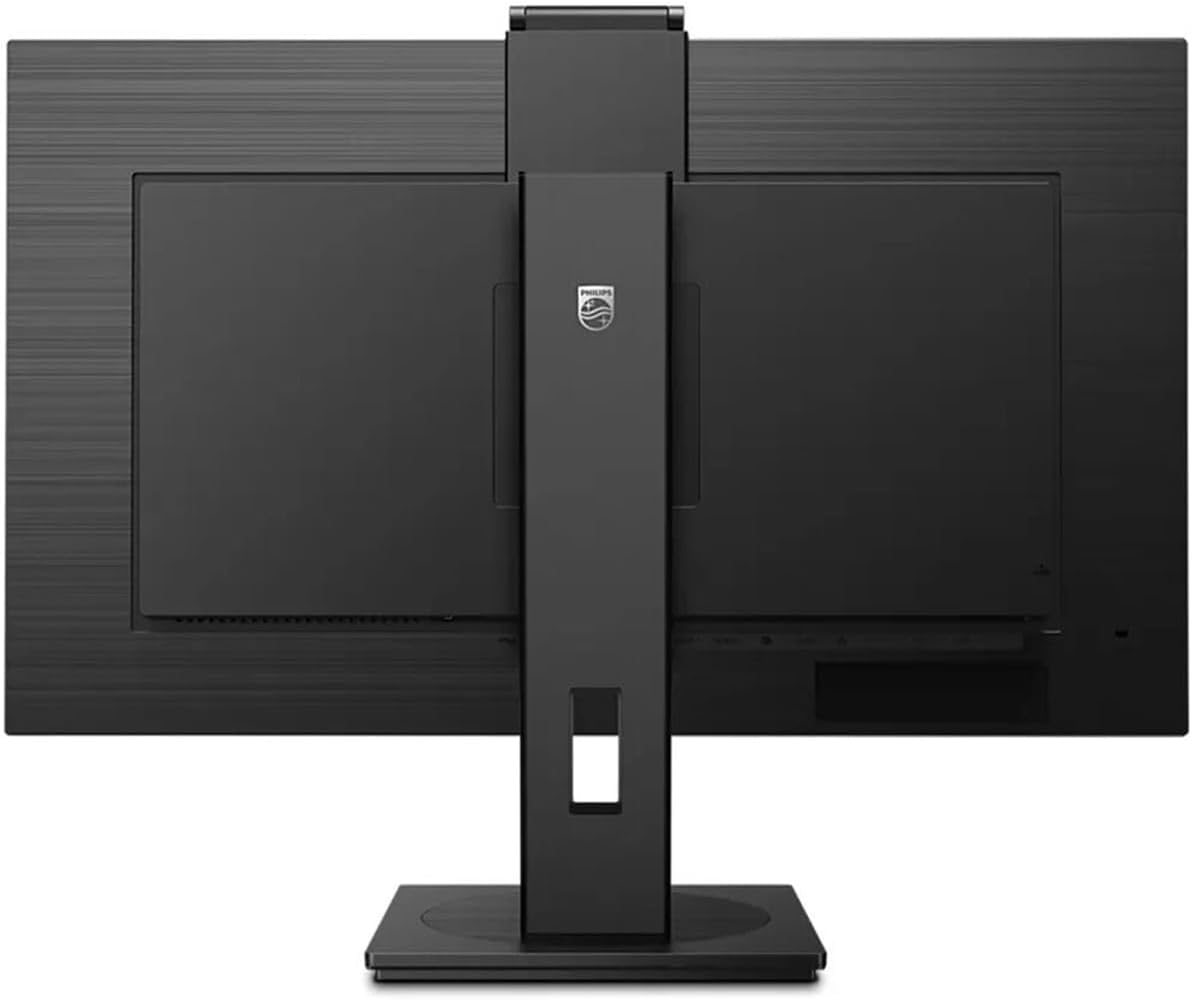
Figura 4.2: Posterior view del monitor con puertos de entrada.
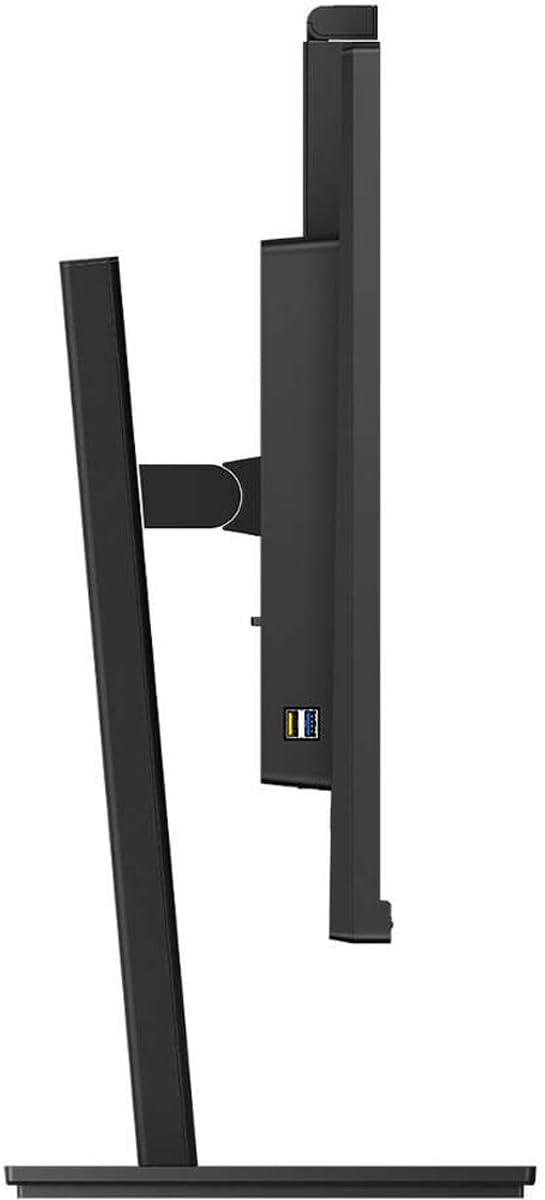
Figura 4.3: Lado view mostrando puertos USB.
4.3 Configuración inicial
After connecting all necessary cables, power on the monitor and your computer. The monitor should automatically detect the input signal. If not, use the monitor's On-Screen Display (OSD) menu to select the correct input source.
5. Instrucciones de funcionamiento
5.1 Encendido y apagado
Presione el botón de encendido del monitor para encenderlo o apagarlo. El indicador de encendido se iluminará cuando el monitor esté activo.
5.2 Funcionalidad de acoplamiento USB-C
The integrated USB-C docking station allows for a single-cable solution for video, data transfer, and laptop power charging (up to 90W). Connect your compatible laptop via the USB-C port on the monitor to utilize this feature. Peripherals connected to the monitor's USB ports and the RJ-45 Ethernet port will also be accessible to your laptop.
5.3 Ventana emergente Webcámara con Windows Hello ™
The monitor features an innovative pop-up webcam. When needed, the webcam extends from the top of the monitor. It is equipped with advanced sensors for Windows Hello™ facial recognition, enabling secure and fast login to Windows devices. When not in use, the webcam can be securely tucked back into the monitor for privacy.
5.4 Tecnologías de visualización
- UltraClear 4K UHD (3840 x 2160): Provides highly detailed and crisp images for professional applications.
- Tecnología IPS: Ofertas amplias viewing angles (178/178 degrees) and consistent color accuracy, suitable for graphic design and professional use.
- Tecnología sin parpadeo: Regulates brightness to reduce screen flicker, minimizing eye fatigue during extended use.
- Modo azul bajo: A software solution that reduces harmful shortwave blue light emissions, promoting eye comfort.
- Sensor de potencia: Detects user presence and automatically reduces monitor brightness when the user steps away, saving up to 80% energy.
- LightSensor: Adjusts picture brightness based on ambient room lighting conditions for optimal viewing and minimal power consumption.
6. Mantenimiento
6.1 Limpieza del monitor
Para limpiar la pantalla del monitor, límpiela suavemente con un paño suave que no deje pelusa. Para manchas difíciles, frote ligeramenteampen the cloth with water or a mild, non-abrasive screen cleaner. Do not spray liquids directly onto the screen. For the monitor casing, utilice un paño suave y seco.
6.2 Almacenamiento
If storing the monitor for an extended period, ensure it is powered off and disconnected from the power source. Store it in a cool, dry place, ideally in its original packaging to protect it from dust and physical damage.
7. Solución de problemas
Si tiene problemas con su monitor, consulte las siguientes soluciones comunes:
| Problema | Posible causa | Solución |
|---|---|---|
| No hay imagen en la pantalla | Cable de alimentación desconectado; Cable de vídeo desconectado o suelto; Fuente de entrada incorrecta seleccionada. | Verifique las conexiones de los cables de alimentación y video. Asegúrese de que la fuente de entrada esté seleccionada correctamente en el menú OSD. |
| La imagen está borrosa o distorsionada. | Resolución incorrecta; cable de vídeo defectuoso. | Set the display resolution to 3840 x 2160. Try a different video cable. |
| Webla cámara no funciona | USB-C cable not connected or faulty; Webcam privacy setting enabled; Operating system driver issue. | Ensure the USB-C cable is securely connected and supports data transfer. Check privacy settings in your operating system. For Mac Mini users, if the camera disconnects after sleep mode, try restarting the monitor or ensuring the USB-C cable is fully functional. Update USB drivers if necessary. |
| No hay sonido en los altavoces del monitor | Volumen demasiado bajo; salida de audio incorrecta seleccionada en la computadora. | Ajuste el volumen del monitor mediante el menú OSD. Seleccione el monitor como dispositivo de salida de audio predeterminado en la configuración de sonido de su computadora. |
8. Especificaciones
The following table outlines the key technical specifications for the Philips 329P1H monitor:
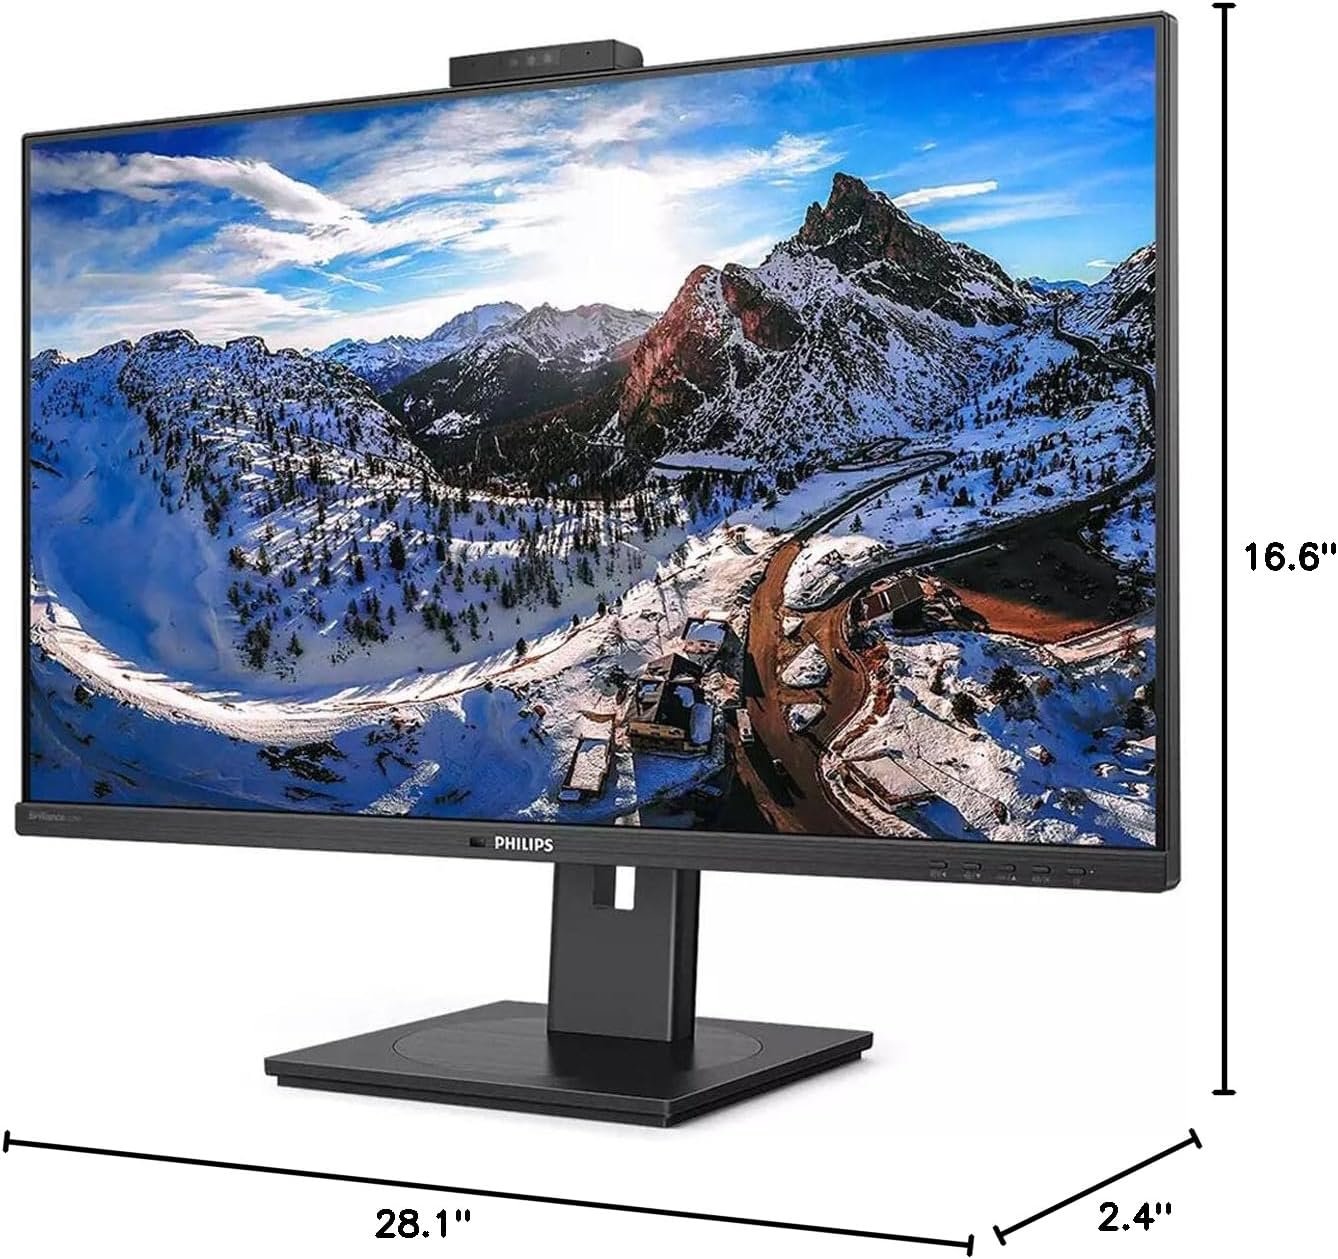
Figura 8.1: Dimensiones del monitor.
| Característica | Especificación |
|---|---|
| Número de modelo | 329P1H |
| Tamaño de pantalla | 31.5 pulgadas (viewcapaz) |
| Resolución máxima de pantalla | 3840 x 2160 (4K UHD) |
| Relación de aspecto | 16:9 |
| Tiempo de respuesta | 4 ms de tiempo de respuesta |
| Brillo | 350 nits |
| Frecuencia de actualización | 75 Hz |
| Tipo de panel | IPS |
| Tecnología de retroiluminación | LED blanco |
| Conectividad | USB Type-C (with Power Delivery), HDMI, DisplayPort, RJ-45 Ethernet |
| Webleva | Pop-up with Windows Hello™ |
| Peso del artículo | 18.06 libras |
| Dimensiones del producto (LxAnxAl) | 2.4 x 28.1 x 16.6 pulgadas |
| Color | Negro texturizado |
9. Garantía y soporte
Para obtener información sobre la garantía y asistencia técnica, consulte la tarjeta de garantía incluida con el producto o visite el sitio de soporte técnico oficial de Philips. webSitio. Conserve su recibo de compra como comprobante para reclamaciones de garantía.