1. Introducción
Thank you for choosing the Vacmaster VK1638SWC Industrial Wet and Dry Vacuum Cleaner. This manual provides essential information for the safe assembly, operation, maintenance, and troubleshooting of your new appliance. Please read these instructions thoroughly before use and retain them for future reference.

Image: The Vacmaster VK1638SWC vacuum cleaner actively cleaning a workshop floor, demonstrating its industrial application.
2. Información de seguridad
Siga siempre las precauciones básicas de seguridad al utilizar este aparato para reducir el riesgo de incendio, descarga eléctrica o lesiones.
- Lea todas las instrucciones antes de utilizar la aspiradora.
- No deje el aparato desatendido cuando esté enchufado. Desenchúfelo del tomacorriente cuando no esté en uso y antes de darle servicio.
- Do not pick up hot ashes, coals, or flammable/combustible liquids.
- No lo use cerca de líquidos o vapores explosivos.
- Ensure all filters are correctly installed for the intended operation (wet or dry).
- Mantenga el cabello, la ropa suelta, los dedos y todas las partes del cuerpo lejos de las aberturas y las partes móviles.
- Úselo únicamente como se describe en este manual. Utilice únicamente los accesorios recomendados por el fabricante.
- No lo use con un cable o enchufe dañado. Si el aparato no funciona como debería, se ha caído, dañado, dejado al aire libre o se ha caído al agua, devuélvalo a un centro de servicio.
- No tire del cable ni lo transporte, no lo use como manija, no cierre una puerta sobre el cable ni lo tire por bordes o esquinas filosos. No pase el aparato por encima del cable. Mantenga el cable alejado de superficies calientes.
- No desenchufe el aparato tirando del cable. Para desenchufarlo, sujete el enchufe, no el cable.
- No manipule el enchufe ni el aparato con las manos mojadas.
- Apague todos los controles antes de desenchufar.
- Tenga especial cuidado al limpiar escaleras.
- No lo utilice para recoger líquidos inflamables o combustibles, como gasolina, ni lo utilice en áreas donde pueda haberlos.
- No recoja nada que esté ardiendo o humeando, como cigarrillos, fósforos o cenizas calientes.
- No lo utilice sin filtros colocados.
- Este aparato no está diseñado para ser utilizado por personas (incluidos niños) con capacidades físicas, sensoriales o mentales reducidas, o con falta de experiencia y conocimientos, a menos que hayan recibido supervisión o instrucciones sobre el uso del aparato por parte de una persona responsable de su seguridad.
- Se debe supervisar a los niños para garantizar que no jueguen con el aparato.
3. Contenido del paquete
Carefully unpack the box and ensure all items are present and undamaged. If any parts are missing or damaged, contact Vacmaster customer support.
- 1 x Dust Extractor Unit
- 1 x HEPA 13 Cartridge Filter
- 1 x HEPA Exhaust Filter
- 1 x Pre-filter (washable)
- 1 filtro de espuma.
- 2 tubos de extensión.
- 1 x Handle with Air Flow Control
- 1 x Universal Floor Head
- 1 x Dual Mode Floor Head
- 1 x Anti-crush Hose
- 1 x Round Dusting Tool
- 1 x Extra-large Crevice Tool
- 1 x Universal Power Tool Adaptor
- 1 x Accessory Pouch
- 1 x 38L Hygiene Seal Dust Bag

Image: The Vacmaster VK1638SWC unit displayed with its full range of included accessories.
4. Configuración
4.1 Montaje del aspirador
- Coloque las ruedas: Insert the casters into the designated slots on the base of the vacuum until they click securely into place.
- Coloque la manija: Secure the handle to the top of the unit using the provided hardware.
- Conecte la manguera: Insert the anti-crush hose into the suction inlet on the front of the tank. Ensure it is firmly seated.
- Instalar filtros: Refer to section 4.2 for specific filter installation based on your intended use (wet or dry).

Imagen: Un primer plano view of the yellow latch, indicating how to secure or release the motor head from the tank.
4.2 Instalación del filtro
The VK1638SWC uses different filters for wet and dry applications. Always ensure the correct filter is installed before operation.
- Para aspirar en seco: Install the HEPA 13 Cartridge Filter and the washable Pre-filter. Ensure the HEPA Exhaust Filter is also in place. The 38L hygiene seal dust bag can be used for improved dust collection and disposal.
- Para aspirar en húmedo: Remove the HEPA 13 Cartridge Filter and Pre-filter. Install the Foam Filter over the filter cage. Do NOT use the dust bag for wet vacuuming.

Image: A person demonstrating the process of accessing and handling the filter inside the vacuum cleaner's tank.
5. Instrucciones de funcionamiento
5.1 Aspiración en seco
- Ensure the HEPA 13 Cartridge Filter and Pre-filter are correctly installed.
- Connect the desired extension tubes and floor head (universal or dual mode) or other accessory to the hose.
- Conecte el cable de alimentación a una toma eléctrica adecuada (240 voltios).
- Encienda la aspiradora usando el interruptor de encendido.
- Comience a aspirar los residuos secos.
- Cuando termine, apague la aspiradora y desenchúfela.
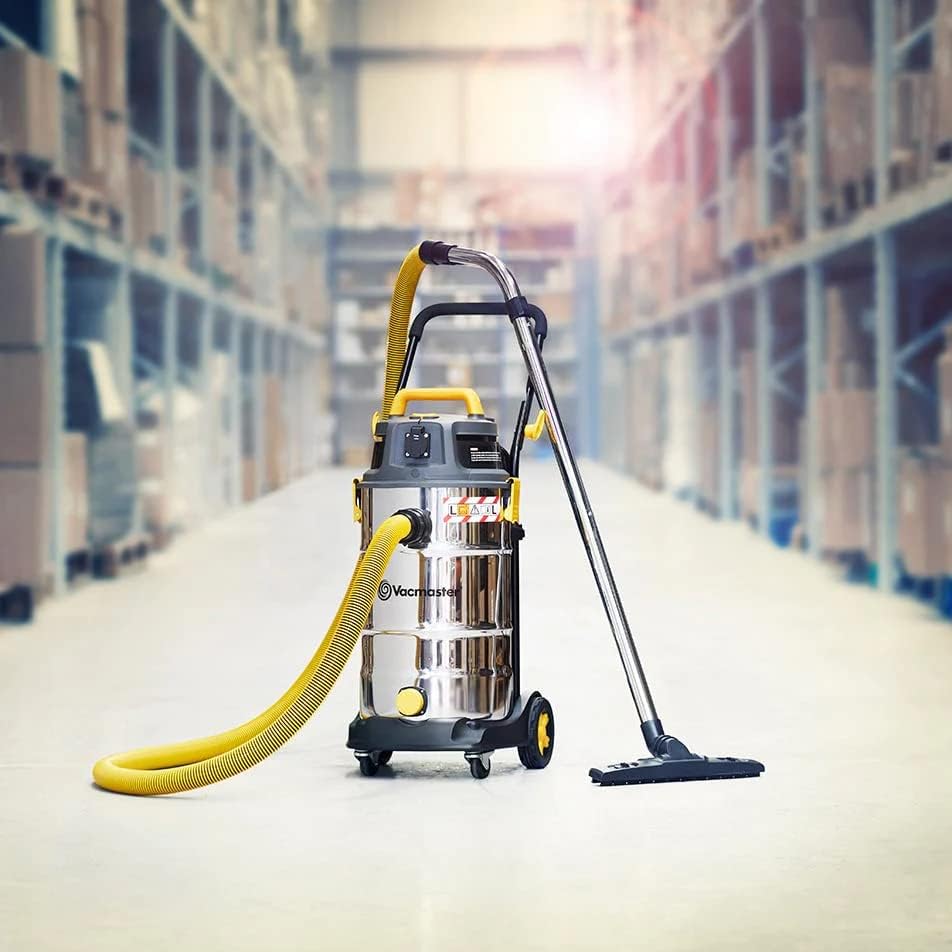
Image: The Vacmaster VK1638SWC vacuum cleaner fully assembled with its hose, extension tubes, and floor head.
5.2 Aspiración de líquidos
- Ensure the Foam Filter is correctly installed and the HEPA 13 Cartridge Filter and Pre-filter are removed.
- Connect the desired floor head or accessory suitable for wet pickup to the hose.
- Conecte el cable de alimentación a una toma eléctrica adecuada.
- Encienda la aspiradora.
- Begin vacuuming liquids. The vacuum has an automatic shut-off feature that will stop suction when the tank is full.
- When finished or when the tank is full, turn the vacuum OFF and unplug it. Empty the tank as described in the Maintenance section.

Image: The Vacmaster VK1638SWC vacuum cleaner demonstrating its liquid draining capability from the tank's outlet.
5.3 Función del soplador
The VK1638SWC can also function as a powerful blower.
- Ensure the tank is empty and clean, and the appropriate filter is installed (HEPA for dry blowing, no filter or foam filter for wet blowing).
- Retire la manguera de la entrada de succión.
- Inserte la manguera en el puerto del soplador ubicado en el cabezal del motor.
- Plug in and turn ON the vacuum to use the blower function.
5.4 Power Tool Connection
The included universal power tool adaptor allows for direct dust extraction when working with power tools.
- Ensure the vacuum is set up for dry vacuuming with the HEPA 13 filter.
- Connect the universal power tool adaptor to the end of the vacuum hose.
- Attach the other end of the adaptor to the dust extraction port on your power tool.
- Plug the power tool into the integrated power socket on the vacuum cleaner (if available and compatible). This allows the vacuum to start automatically when the power tool is activated.
- Turn on the vacuum cleaner and then your power tool to begin dust extraction.

Image: The Vacmaster VK1638SWC vacuum cleaner connected to a sanding machine, demonstrating its dust extraction capability.
5.5 Using the Wheel Brake
To secure the vacuum cleaner in place, engage the wheel brake by pressing down on the lever located on one of the casters. To release, lift the lever.

Image: A person's foot pressing down on the yellow lever to engage the wheel brake on the vacuum cleaner.
6. Mantenimiento
El mantenimiento regular garantiza un rendimiento óptimo y prolonga la vida útil de su aspiradora. Desenchufe siempre la unidad antes de realizar cualquier mantenimiento.
6.1 Limpieza y reemplazo del filtro
- HEPA 13 Cartridge Filter & Pre-filter: For dry use, these filters should be cleaned regularly by tapping them gently to dislodge dust or by using a soft brush. The pre-filter is washable; rinse with water and allow to air dry completely before reinstallation. Replace the HEPA cartridge filter when suction power significantly decreases or if it becomes damaged.
- Filtro de espuma: For wet use, the foam filter should be rinsed with water after each use and allowed to air dry completely before storage or next use.
- Filtro de escape HEPA: Check periodically and replace if visibly dirty or if air quality issues are noted.
6.2 Limpieza y vaciado del tanque
- Escombros secos: Unlatch the motor head and carefully lift it off. Remove the dust bag (if used) and dispose of contents. Empty any remaining debris from the stainless steel tank.
- Líquidos: For liquid disposal, the tank can be emptied by tilting the unit or by using the drain plug located at the bottom of the tank. After emptying, rinse the tank with water and wipe dry to prevent odors and corrosion.
6.3 Almacenamiento de accesorios
The VK1638SWC features integrated storage for its accessories, keeping them organized and readily accessible.

Image: The Vacmaster VK1638SWC vacuum cleaner showcasing its onboard storage for hose, power cord, and various attachments.
7. Solución de problemas
Antes de contactar con el servicio de atención al cliente, consulte la siguiente tabla para conocer los problemas comunes y sus soluciones.
| Problema | Posible causa | Solución |
|---|---|---|
| El vacío no se enciende. | Sin suministro de energía; Cable/enchufe dañado; Interruptor defectuoso. | Check power outlet and plug. Inspect cord for damage. Contact service if switch is faulty. |
| Pérdida de succión. | Clogged hose/attachments; Full tank; Dirty/incorrect filter; Air leak. | Clear obstructions. Empty tank. Clean/replace filters. Check all connections for leaks. |
| El motor se sobrecalienta/se apaga. | Blocked airflow; Full tank (wet use); Prolonged heavy use. | Check for blockages. Empty tank. Allow motor to cool down before restarting. |
| Fugas de agua de la unidad. | Foam filter not installed correctly for wet use; Tank overfilled; Damaged tank seal. | Ensure foam filter is properly seated. Do not overfill tank. Inspect tank seal for damage. |
8. Especificaciones
| Característica | Detalle |
|---|---|
| Número de modelo | VK1638SWC |
| Fuerza | Motor de 1600 W |
| Vatios de aire | 260 vatios de aire |
| Flujo de aire | 52 L/s (max) |
| Presión de vacío | 27 kPa |
| Capacidad del tanque | 38 litros |
| Filtración | Dual HEPA 13 (Cartridge & Exhaust), Washable Pre-filter, Foam Filter |
| Material | Tanque de acero inoxidable |
| Dimensiones (L x An x Al) | 49 x 41 x 79 cm |
| Peso | 17 kilogramos |
| Volumentage | 240 voltios |
| Característica especial | Funcionalidad húmedo/seco |
9. Garantía y soporte
9.1 Información de garantía
The Vacmaster VK1638SWC Industrial Wet and Dry Vacuum Cleaner comes with a 2 año de garantía from the date of purchase. This warranty covers defects in materials and workmanship under normal use. It does not cover damage resulting from misuse, abuse, accident, unauthorized repairs, or lack of maintenance.
9.2 Atención al cliente
For technical assistance, warranty claims, or to order replacement parts, please contact Vacmaster customer support. Refer to the contact information provided with your purchase documentation or visit the official Vacmaster websitio.


