1. Introducción
Thank you for choosing the DDPAI Z40 Dash Cam. This manual provides detailed instructions for the installation, setup, operation, and maintenance of your device. Please read this manual thoroughly before using the product to ensure proper function and safety.
The DDPAI Z40 is a high-resolution dash camera system designed to record driving footage, offering both front and rear camera views. It features 1944P resolution for the front camera, a Sony IMX335 sensor, built-in GPS, Wi-Fi connectivity, and a parking monitoring function.
2. Contenido del paquete
Por favor, revise el contenido del paquete al abrirlo. Si falta algún artículo o está dañado, contacte con su vendedor.
- DDPAI Z40 Front Dash Cam Unit
- Cámara trasera
- Power Cable (USB to Car Charger)
- Cargador de coche
- Soporte de montaje
- Almohadillas Adhesivas
- Herramienta de palanca
- Manual de usuario
- Memory Card (Included with some packages)
3. Producto terminadoview
Familiarize yourself with the components of your DDPAI Z40 Dash Cam system.

This image displays the main DDPAI Z40 dash cam unit with labels pointing to its key components: the mounting bracket, the 2-inch LCD screen, the 6-lens Sony IMX335 camera, and the physical control buttons.
Unidad de cámara frontal
- Lente de la cámara: Registros al frente view (1944P resolution, 140° wide angle).
- Pantalla LCD: Pantalla de 2.4 pulgadas para transmisión en vivo view, reproducción y configuración.
- Botones de control: Navigate menus and control functions.
- Altavoz/Micrófono: Para grabación y reproducción de audio.
- Puerto de alimentación USB: Se conecta al cargador del coche.
- Puerto de cámara trasera: Conecta la cámara trasera.
- Ranura para tarjeta microSD: Insert memory card for storage.
- Ranura de montaje: Attaches to the adhesive bracket.
Unidad de cámara trasera
- Lente de la cámara: Récords traseros view (1080P resolution, 125° wide angle).
- Cable de conexión: Connects to the front camera unit.
4. Instalación
Proper installation is crucial for optimal performance and safety. Ensure the dash cam does not obstruct your view o interferir con los controles del vehículo.
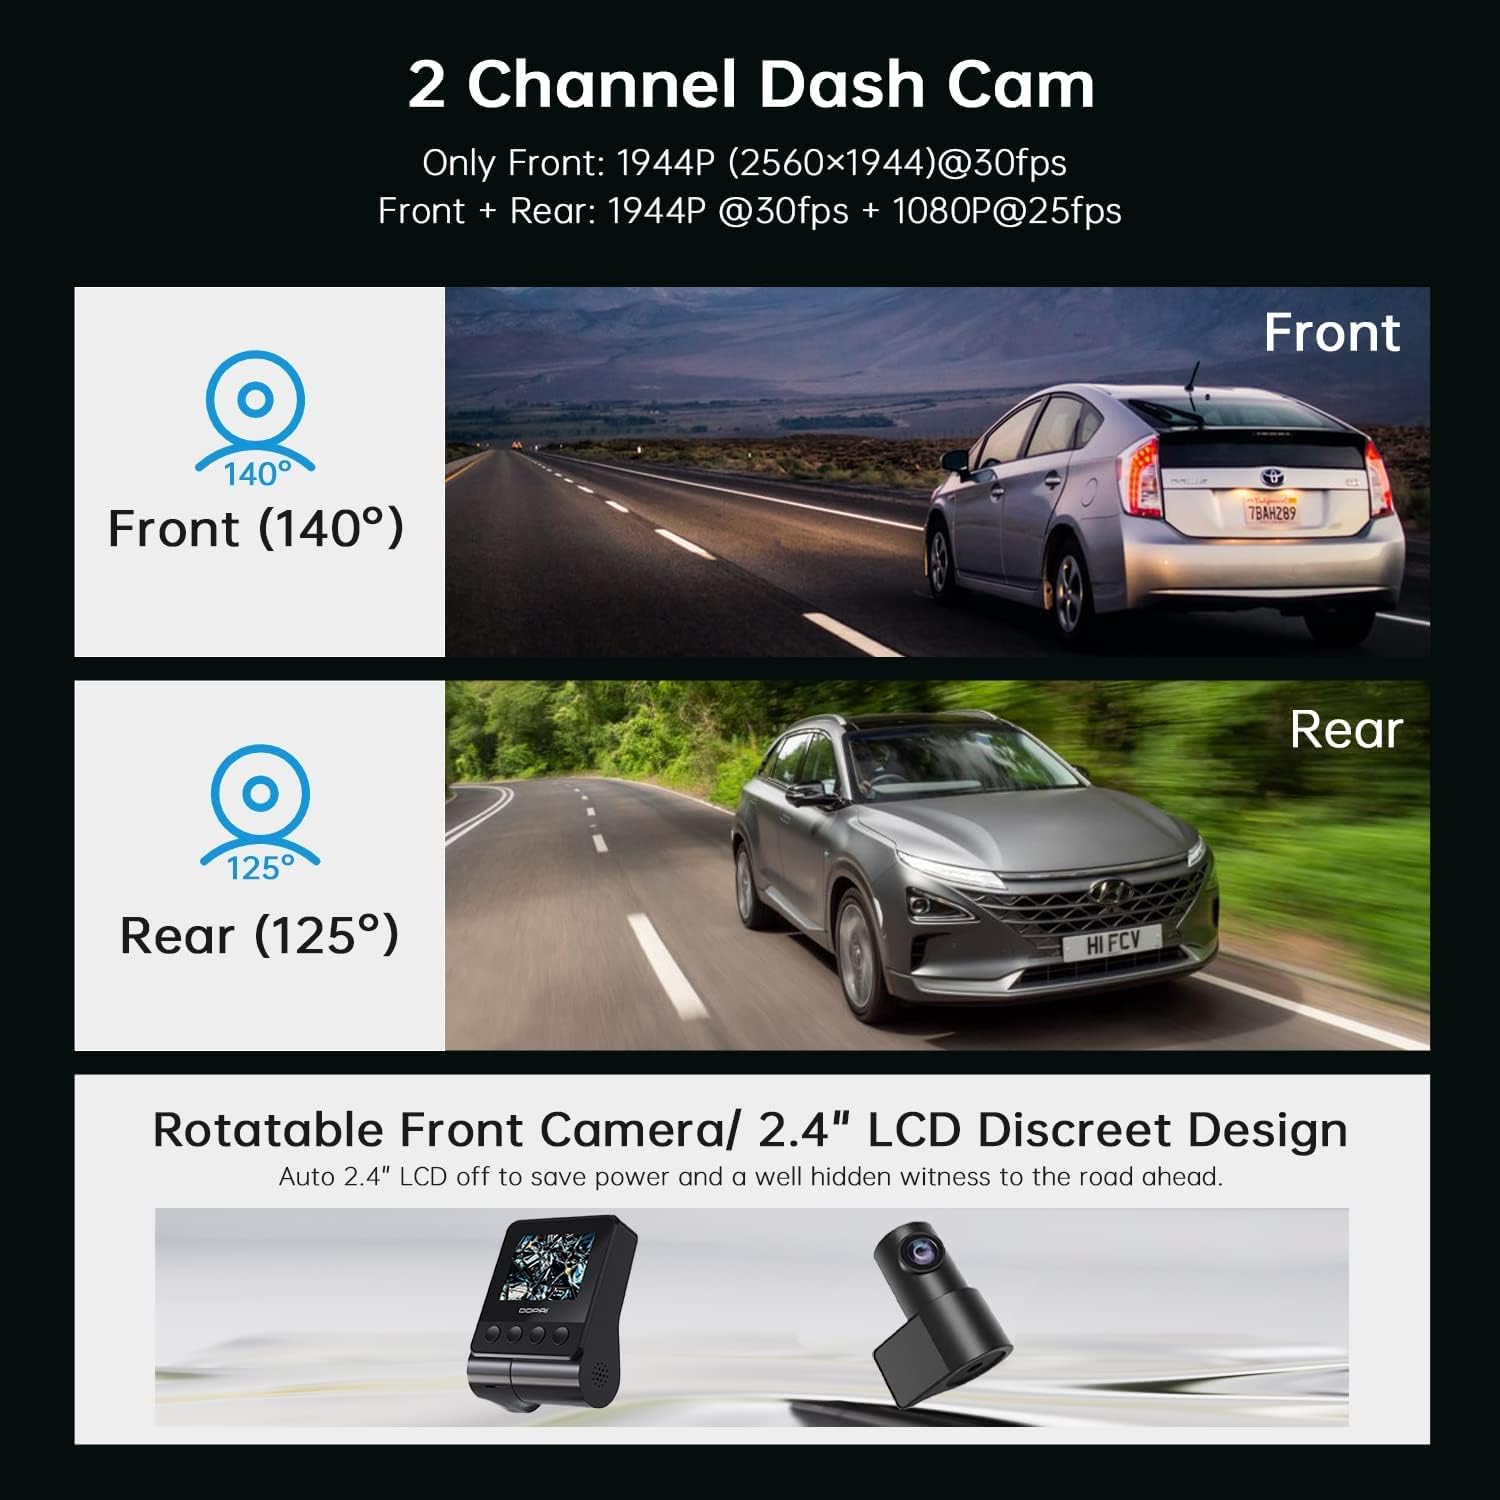
This image illustrates the dual-channel dash cam setup, showing the 140-degree front camera view and the 125-degree rear camera view, con example vehicles in each perspective.
4.1 Inserción de la tarjeta de memoria
- Asegúrese de que la cámara del tablero esté apagada.
- Localice la ranura para tarjeta MicroSD en el costado de la unidad de la cámara frontal.
- Inserte una tarjeta MicroSD Clase 10 o superior (se recomienda hasta 128 GB) en la ranura hasta que encaje en su lugar.
- Para quitarla, empuje suavemente la tarjeta hasta que salga.
4.2 Instalación de la cámara frontal
- Limpie la zona del parabrisas donde vaya a montar la cámara de tablero. Asegúrese de que esté seca y sin polvo.
- Attach the adhesive pad to the mounting bracket.
- Peel off the protective film from the adhesive pad and firmly press the bracket onto the windshield, ideally behind the rearview mirror, ensuring the lens has a clear view del camino.
- Slide the front camera unit onto the bracket until it locks securely.
- Ajuste el ángulo de la cámara para asegurarse de que el camino que tiene delante esté centrado en el marco.
4.3 Instalación de la cámara trasera
- Identifique una ubicación adecuada en el parabrisas trasero, generalmente en la parte superior central, asegurándose de que haya una vista clara. view.
- Limpie bien el área.
- Attach the rear camera with its adhesive pad to the chosen location.
- Connect the rear camera cable to the designated port on the front camera unit.
4.4 Power Connection and Cable Routing
- Connect the USB power cable to the front camera unit.
- Conecte el cargador del automóvil a la toma del encendedor de su vehículo.
- Carefully route the power cable and the rear camera cable along the edges of your windshield and interior trim using the provided crowbar tool to tuck them neatly away. This prevents obstruction and ensures a clean installation.
5. Configuración
After installation, configure your dash cam settings for optimal performance.
5.1 Encendido inicial
Once connected to power, the dash cam will automatically power on and begin recording when your vehicle starts. The LCD screen will display the live view from the front camera (and rear camera if connected).
5.2 DDPAI App Connection

This image shows the DDPAI mobile application interface for viewing, downloading, and sharing videos, along with a laptop screen displaying a map, illustrating the built-in GPS logger feature that records time, date, location, and speed information.
- Descargar el Aplicación DDPAI desde la tienda de aplicaciones de tu teléfono inteligente (iOS o Android).
- Enciende la cámara del tablero.
- Open the DDPAI App and tap 'Add Device'.
- Select your DDPAI Z40 from the list of available Wi-Fi networks. The default Wi-Fi name usually starts with 'DDPAI_' followed by the model name or serial number. The default password is '1234567890'.
- Una vez conectado, puede view vivir footage, access recorded videos, and adjust settings via the app.
5.3 Basic Settings Configuration (via App or Device)
- Resolución de vídeo: Set to 1944P for front and 1080P for rear for optimal clarity.
- Grabación en bucle: Ensure this is enabled. Videos are recorded in segments (e.g., 1, 3, or 5 minutes). When the memory card is full, the oldest unlocked files se sobrescribirá.
- Sensibilidad del sensor G: Adjust the sensitivity for emergency recording. A higher sensitivity will trigger recordings more easily during sudden impacts or braking.
- Monitor de estacionamiento: Enable this feature for 24-hour surveillance. Requires a hardwire kit (sold separately) for continuous power.
- Fecha/Hora: Ensure the correct date and time are set. GPS will automatically synchronize this.
- Grabación de audio: Habilitar o deshabilitar la grabación del micrófono.
6. Operación
Understand the various recording modes and features of your dash cam.
6.1 Driving Recording (Loop Recording)

This image highlights three key operational features: Emergency Recording, which locks video upon G-sensor activation; Parking Monitor, providing 24-hour surveillance; and Seamless Loop Recording, which overwrites old files cuando la tarjeta de memoria está llena.
The dash cam automatically starts recording when the vehicle's ignition is turned on. Footage is saved in short segments (e.g., 1, 3, or 5 minutes) to the MicroSD card. When the card is full, the oldest unlocked files are overwritten by new recordings, ensuring continuous recording.
6.2 Grabación de emergencia (sensor G)
In the event of a sudden impact, collision, or hard braking, the built-in G-sensor will detect the event and automatically lock the current video segment, preventing it from being overwritten by loop recording. These files are typically stored in a separate 'Event' folder on the memory card.
6.3 Monitor de estacionamiento
When enabled and properly powered (e.g., via a hardwire kit), the dash cam can monitor your vehicle while parked. If an impact or motion is detected, it will automatically record a short video segment. This feature provides surveillance even when the vehicle is off.
6.4 Registro GPS
The built-in GPS module records your vehicle's speed, location, and route data. This information is embedded in the video files y puede ser viewed during playback using the DDPAI App or compatible PC software.
6.5 Viewing y descarga Footage
- Via DDPAI App: Connect your smartphone to the dash cam's Wi-Fi. Open the app, navigate to the 'Album' or 'Playback' section to view recorded videos. You can download desired clips directly to your phone.
- Por computadora: Remove the MicroSD card from the dash cam and insert it into a card reader connected to your computer. You can then access and copy the video files.
7. Mantenimiento
El mantenimiento regular garantiza la longevidad y el rendimiento óptimo de su cámara de tablero.
7.1 Formateo de la tarjeta de memoria
It is recommended to format the MicroSD card every 2-4 weeks to prevent data corruption and ensure smooth recording. This can be done through the DDPAI App or the dash cam's settings menu. Formatting will erase all data on the card, so back up any important files primero.
7.2 Limpieza de las lentes
Periodically clean the front and rear camera lenses with a soft, lint-free cloth to ensure clear video quality. Avoid using abrasive cleaners.
7.3 actualizaciones de firmware
Check the DDPAI App regularly for firmware updates. Updates can improve performance, add new features, or fix bugs. Follow the in-app instructions carefully when performing an update.
8. Solución de problemas
If you encounter issues with your DDPAI Z40, refer to the following common problems and solutions.
- La cámara del tablero no se enciende:
- Check the power cable connection to the dash cam and the car charger.
- Ensure the car charger is securely plugged into the cigarette lighter socket.
- Verify that the vehicle's cigarette lighter socket is receiving power. - La cámara del tablero no graba:
- Ensure a MicroSD card is inserted correctly.
- Format the MicroSD card (back up data first).
- Check if the memory card is full or corrupted. Replace if necessary.
- Verify loop recording is enabled in settings. - Mala calidad de vídeo:
- Limpiar las lentes de la cámara.
- Asegúrese de que se haya retirado la película protectora de las lentes.
- Check video resolution settings in the app.
- Ensure the windshield is clean where the camera is mounted. - Problemas de conexión Wi-Fi:
- Ensure the dash cam is powered on.
- Reinicie tanto la cámara del tablero como su teléfono inteligente.
- Try forgetting the Wi-Fi network on your phone and reconnecting.
- Ensure you are within close proximity to the dash cam. - Sensor G demasiado sensible/no lo suficientemente sensible:
- Adjust the G-sensor sensitivity setting in the DDPAI App. - El monitor de estacionamiento no funciona:
- Ensure the parking monitor feature is enabled in settings.
- Verify that the dash cam is receiving continuous power (requires a hardwire kit).
If the problem persists, contact DDPAI customer support for further assistance.
9. Especificaciones
Key technical specifications for the DDPAI Z40 Dash Cam.
| Característica | Especificación |
|---|---|
| Marca | DDPAI |
| Nombre del modelo | Z40 |
| Resolución de la cámara frontal | 1944P (2592 x 1944) @ 30fps |
| Resolución de la cámara trasera | 1080P a 25 fps |
| Fabricante de chipsets | HISILICON |
| Sensor | Sony IMX335 |
| Lente | 6-lens |
| Frente View Ángulo | 140° |
| Trasero View Ángulo | 125° |
| Mostrar | LCD de 2.4 pulgadas |
| Conectividad | Wifi |
| Características especiales | Built-In GPS, Night Vision, Parking Monitor, G-Sensor, Loop Recording |
| Almacenamiento | Tarjeta MicroSD (Clase 10 o superior, hasta 128 GB) |
| Fuente de poder | Supercapacitor |
| Método de control | Aplicación, botones físicos |
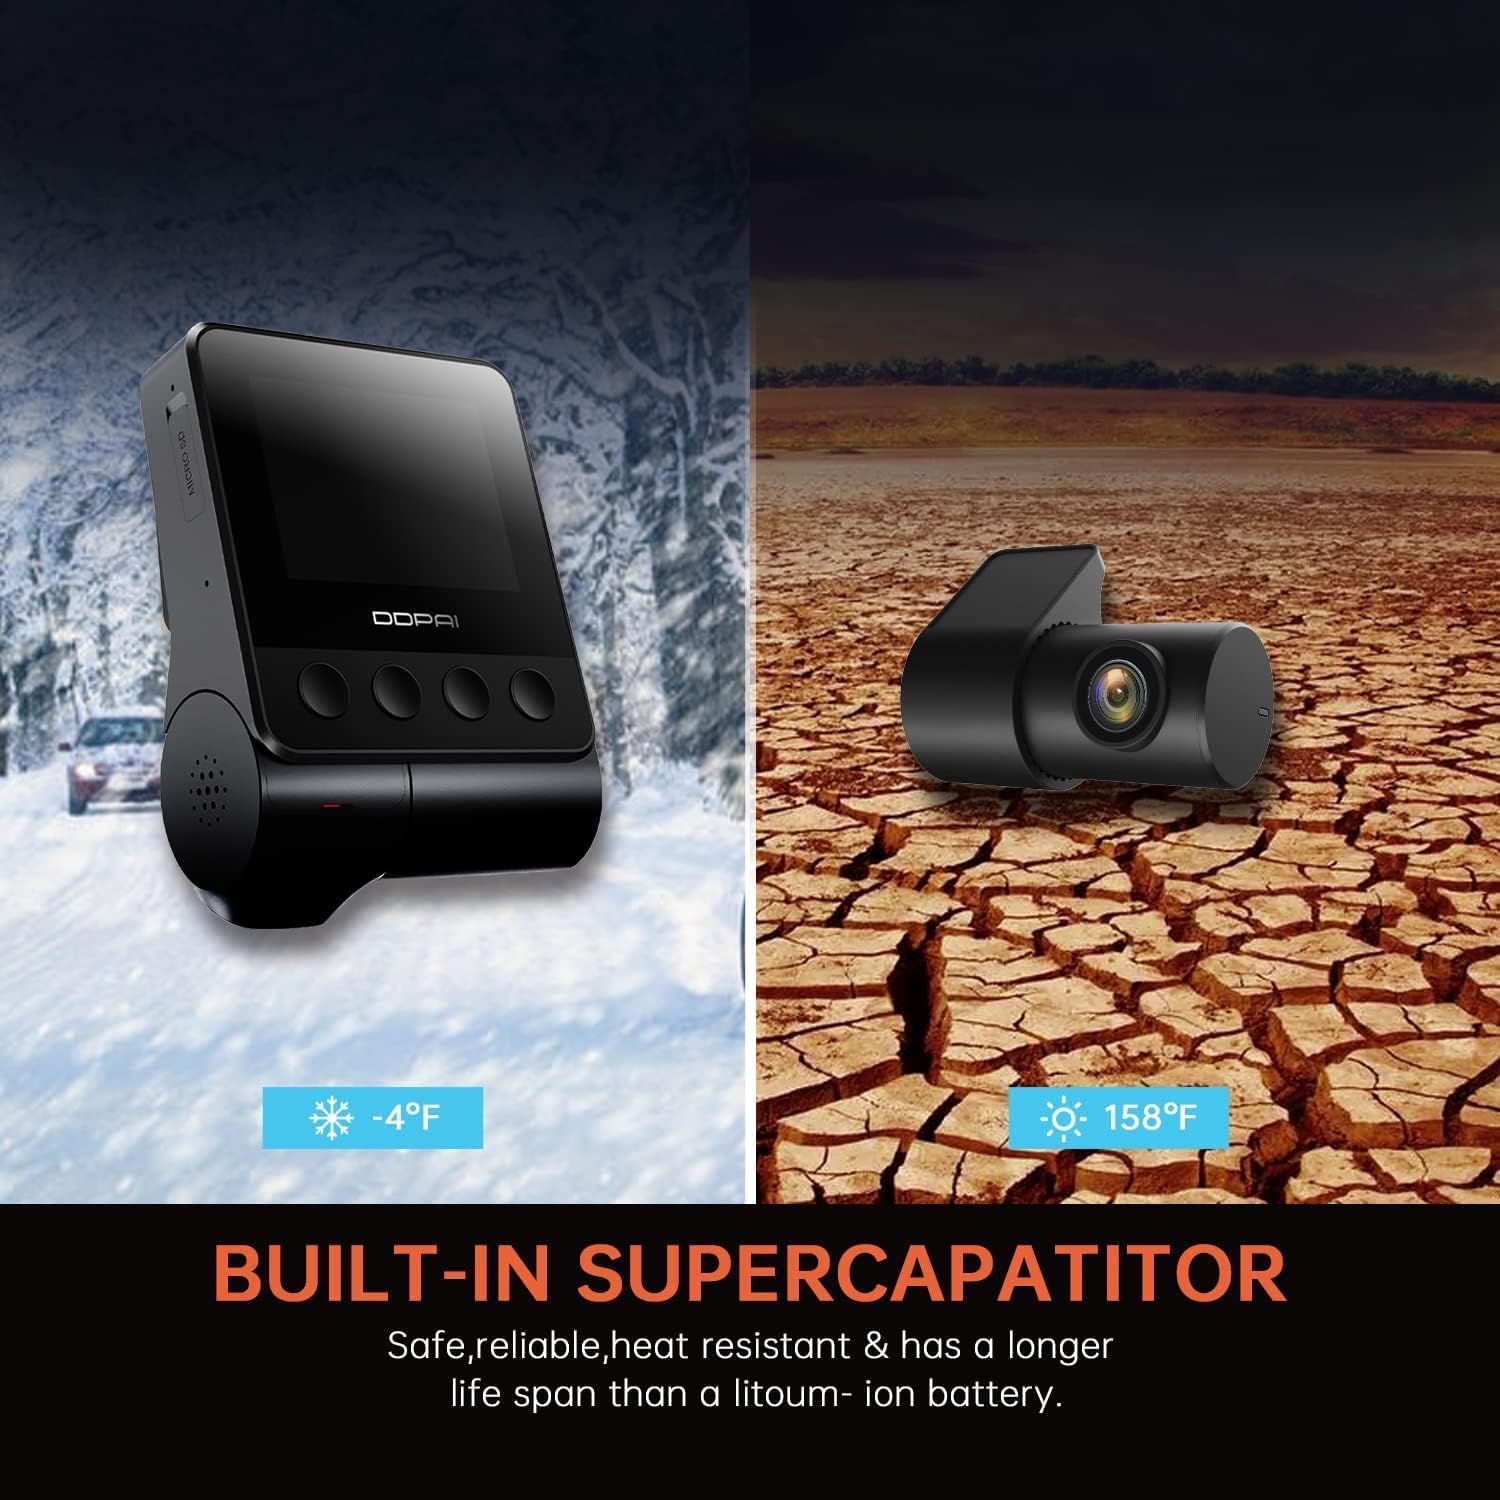
This image highlights the built-in supercapacitor, emphasizing its safety, reliability, heat resistance, and longer lifespan compared to lithium-ion batteries, with visual representations of extreme cold (-4°F) and hot (158°F) environments.
10. Garantía y soporte
For warranty information, please refer to the warranty card included in your product packaging or visit the official DDPAI website. For technical support, troubleshooting assistance, or inquiries about replacement parts, please contact DDPAI customer service through their official channels.


