1. Introducción
This manual provides detailed instructions for the setup, operation, and maintenance of your KOORUI 27E6QCA 27-inch Curved QHD 180Hz Gaming Monitor. Please read this manual thoroughly before using the product to ensure proper functionality and to prevent damage.
2. Contenido del paquete
Verifique que todos los elementos enumerados a continuación estén presentes en el paquete de su producto:
- 1 x KOORUI 27E6QCA Monitor
- 1 x cable de alimentación
- 1 cable DisplayPort (DP)
- 1 x Manual de usuario
- 1 x adaptador de corriente
- 1 x soporte para monitor
- 1 base para monitor.

Imagen: Frente view of the KOORUI 27E6QCA Curved Gaming Monitor, showcasing its 27-inch curved display and sleek design.
3. Producto terminadoview
The KOORUI 27E6QCA is a 27-inch curved gaming monitor designed for an immersive visual experience. Key features include:
- Mostrar: 27-inch VA Panel with 1500R curvature.
- Resolución: QHD (2560x1440) for clear and detailed images.
- Frecuencia de actualización: 180Hz for smooth motion.
- Tiempo de respuesta: 1ms (MPRT) to minimize motion blur.
- Gama de colores: 85% DCI-P3 for rich and accurate colors.
- Sincronización adaptativa: Compatible with Adaptive Sync technology to reduce screen tearing and stuttering.
- Protección ocular: Features like blue light filter and flicker-free technology for reduced eye strain.
- Conectividad: Multiple HDMI and DisplayPort inputs.
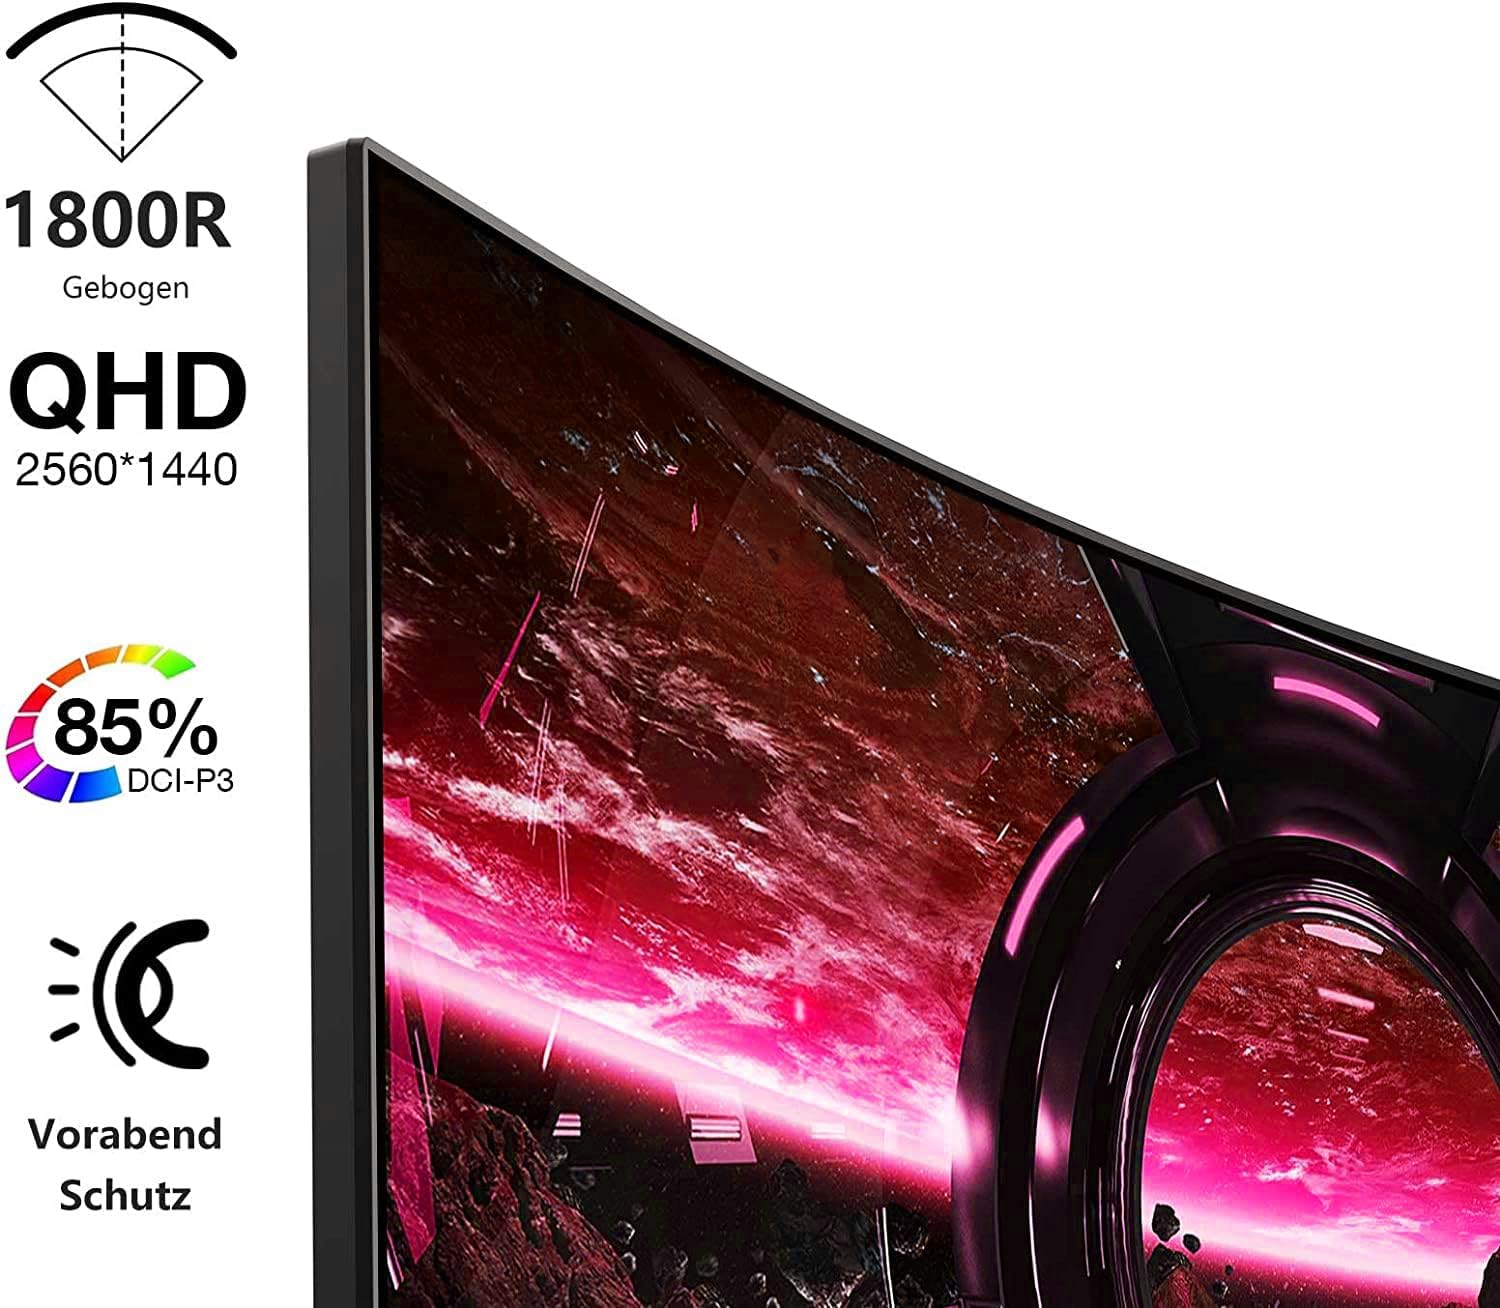
Image: Visual representation of the monitor's key features, including its 1500R curvature, QHD resolution (2560x1440), 85% DCI-P3 color coverage, and eye protection technology.
4. Instrucciones de configuración
4.1 Montaje del soporte
- Carefully remove the monitor, stand, and base from the packaging.
- Attach the stand to the base, ensuring it clicks securely into place or is fastened with the provided screw.
- Attach the assembled stand to the back of the monitor. Ensure the connection is firm.

Imagen: Trasera view of the KOORUI 27E6QCA monitor, showing the attachment point for the stand and the overall back panel design.
4.2 Conexión a un dispositivo
The monitor supports HDMI and DisplayPort connections. Use the appropriate cable for your device.
- DisplayPort (DP): Connect one end of the DP cable to the DisplayPort output on your computer's graphics card and the other end to the DisplayPort input on the monitor. This connection is recommended for achieving the full 180Hz refresh rate and QHD resolution.
- HDMI: Connect one end of an HDMI cable (version 1.4 or higher recommended) to the HDMI output on your device and the other end to one of the HDMI inputs on the monitor.
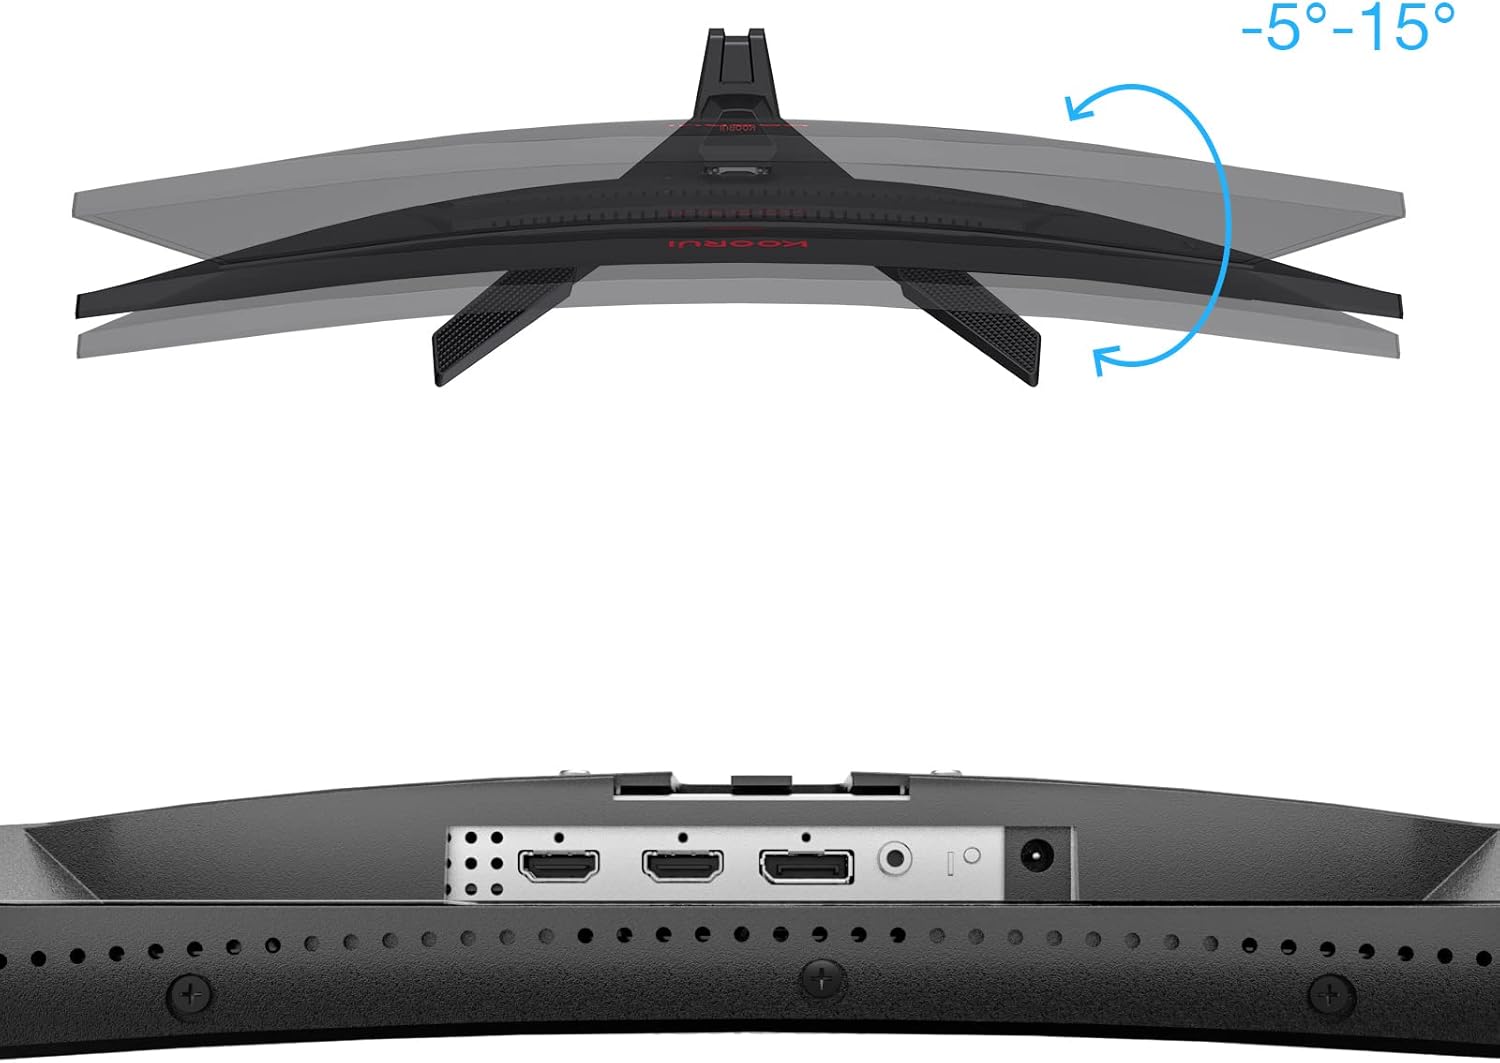
Imagen: Primer plano view of the monitor's rear ports, including HDMI and DisplayPort inputs, along with an illustration of the monitor's tilt adjustment range (-5° to 15°).

Image: Diagram illustrating the monitor's compatibility with various devices such as PS5, Xbox, Laptops, and Nintendo Switch via its multiple connection interfaces.
4.3 Conexión de alimentación
- Conecte el adaptador de corriente a la entrada de alimentación del monitor.
- Plug the power cable into the power adapter, then plug the other end of the power cable into a wall outlet.
5. Instrucciones de funcionamiento
5.1 Encendido y apagado
- Encendido: Short press the multi-function joystick button located on the back of the monitor.
- Apagado: Long press the multi-function joystick button for a few seconds.
5.2 Navegación por menús
The monitor features a single multi-function joystick button for navigating the On-Screen Display (OSD) menu.
- Acceso OSD: Short press the joystick button when the monitor is on.
- Navegar por: Push the joystick left/right/up/down to move through menu options.
- Confirmar: Presione el botón del joystick para confirmar una selección.
- Devolver: Push the joystick up to go back to the previous menu or exit the OSD.

Image: Diagram illustrating the functions of the multi-function joystick button on the rear of the monitor: long press for power off, short press for power on, push left for minus, push right for plus, push up for return, and press for confirm.
5.3 Configuración de pantalla
Ajuste varias configuraciones de pantalla a través del menú OSD:
- Brillo/Contraste: Ajustar la luminancia y distinción de la imagen.
- Configuración de color: Modificar la temperatura del color, la gamma y la saturación.
- Modo de imagen: Seleccione entre los modos preestablecidos (por ejemplo, Estándar, Juego, Película, Texto).
- Configuración del juego:
- Sincronización adaptativa: Enable this feature to synchronize the monitor's refresh rate with your graphics card, reducing screen tearing and stuttering. Ensure your graphics card supports Adaptive Sync.
- Tiempo de respuesta (Overdrive): Adjust for faster pixel response, reducing ghosting.
- Modos de juego: Specific modes like RTS, FPS, Reticle, and Timer are available to optimize visuals for different game genres.
- Fuente de entrada: Seleccione manualmente entre las entradas HDMI y DisplayPort.
For optimal gaming performance, ensure your operating system's display settings are configured to the monitor's native resolution (2560x1440) and highest refresh rate (180Hz).
6. Mantenimiento
Un mantenimiento adecuado garantiza la longevidad y el rendimiento de su monitor.
- Limpieza de la pantalla:
- Siempre apague el monitor y desenchufe el cable de alimentación antes de limpiarlo.
- Utilice un paño suave y sin pelusa ligeramente seco.ampLimpiar con agua o un limpiador de pantallas especializado.
- No rocíe el limpiador directamente sobre la pantalla.
- Evite utilizar limpiadores abrasivos, alcohol o soluciones a base de amoníaco.
- Limpieza de la Casing: Utilice un paño suave y seco para limpiar el monitor.asing.
- Ventilación: Asegúrese de que las aberturas de ventilación del monitor no estén bloqueadas para evitar el sobrecalentamiento.
7. Solución de problemas
Si tiene problemas con su monitor, consulte los siguientes pasos de solución de problemas comunes:
7.1 Sin energía
- Asegúrese de que el cable de alimentación esté conectado de forma segura al monitor y a la toma de corriente.
- Verifique que la toma de corriente funcione enchufando otro dispositivo.
- Compruebe si el adaptador de corriente está conectado correctamente.
7.2 Sin señal/pantalla en blanco
- Confirm that the video cable (DP or HDMI) is securely connected to both the monitor and your computer/device.
- Asegúrese de que la fuente de entrada correcta esté seleccionada en el menú OSD del monitor.
- Check if your computer/device is powered on and not in sleep mode.
- Pruebe con un cable de vídeo o puerto diferente si está disponible.
7.3 Image Flickering or Tearing
- Enable Adaptive Sync in the monitor's OSD menu and ensure it is enabled in your graphics card settings.
- Verifique que sus controladores gráficos estén actualizados.
- Check the refresh rate setting in your operating system's display settings. It should be set to 180Hz.
7.4 Ghosting or Motion Blur
- Adjust the "Response Time" or "Overdrive" setting in the OSD menu. Experiment with different levels to find the optimal balance.
- Ensure Adaptive Sync is enabled.
7.5 Resolución o frecuencia de actualización incorrecta
- Go to your operating system's display settings and set the resolution to 2560x1440 and the refresh rate to 180Hz.
- Ensure you are using a DisplayPort cable or an HDMI cable that supports these specifications.
8. Especificaciones
| Característica | Especificación |
|---|---|
| Marca | KOORUI |
| Número de modelo | 27E6QCA |
| Tamaño de pantalla | 27 pulgadas |
| Tipo de panel | VA |
| Curvatura | 1500R |
| Resolución | QHD (2560 x 1440 píxeles) |
| Relación de aspecto | 16:9 |
| Frecuencia de actualización | 180 Hz |
| Tiempo de respuesta | 1 millisecond (MPRT) |
| Gama de colores | 85% DCI-P3 |
| Relación de contraste | 2000:1 |
| Conectividad | HDMI (x1), DisplayPort (x1) |
| Ajuste de inclinación | -5° a 15° |
| Consumo de energía | 78 vatios |
| Dimensiones (L x An x Al) | 61.2 x 45.2 x 18.5 cm |
| Peso | 5.1 kilogramos |
| Características especiales | Blue Light Filter, Curved, Flicker-Free, Adaptive Sync |

Image: Diagram showing the approximate dimensions of the KOORUI 27E6QCA monitor, including height (40cm), width (50cm), and depth (30cm).
9. Garantía y soporte
For warranty information and technical support, please refer to the warranty card included in your product package or visit the official KOORUI webSitio. Conserve su recibo de compra como comprobante para reclamaciones de garantía.