Introducción
This manual provides comprehensive instructions for the assembly, operation, and maintenance of your VEVOR 75 mm (3 inch) Button Maker Machine. Please read this manual thoroughly before use to ensure safe and efficient operation.
Lista de embalaje
Your VEVOR Button Maker Machine kit includes the following components:
- 1 x Pin Machine
- 1 x 75 mm Button Molds
- 1 x Circle Paper Cutter
- 250 x 75 mm Iron Bottom Parts
- 250 x 75 mm Plastic Bottom Parts
- 500 x 75 mm Tin Up Covers
- 50 x 75 mm Blank Papers
- 500 x 75 mm Transparent Films
- 2 x Hexagon Wrenches
- 2 x Arandelas
- 1 x Manual de usuario
- 1 x Mr. Panda Magic Book (with panda patterns)
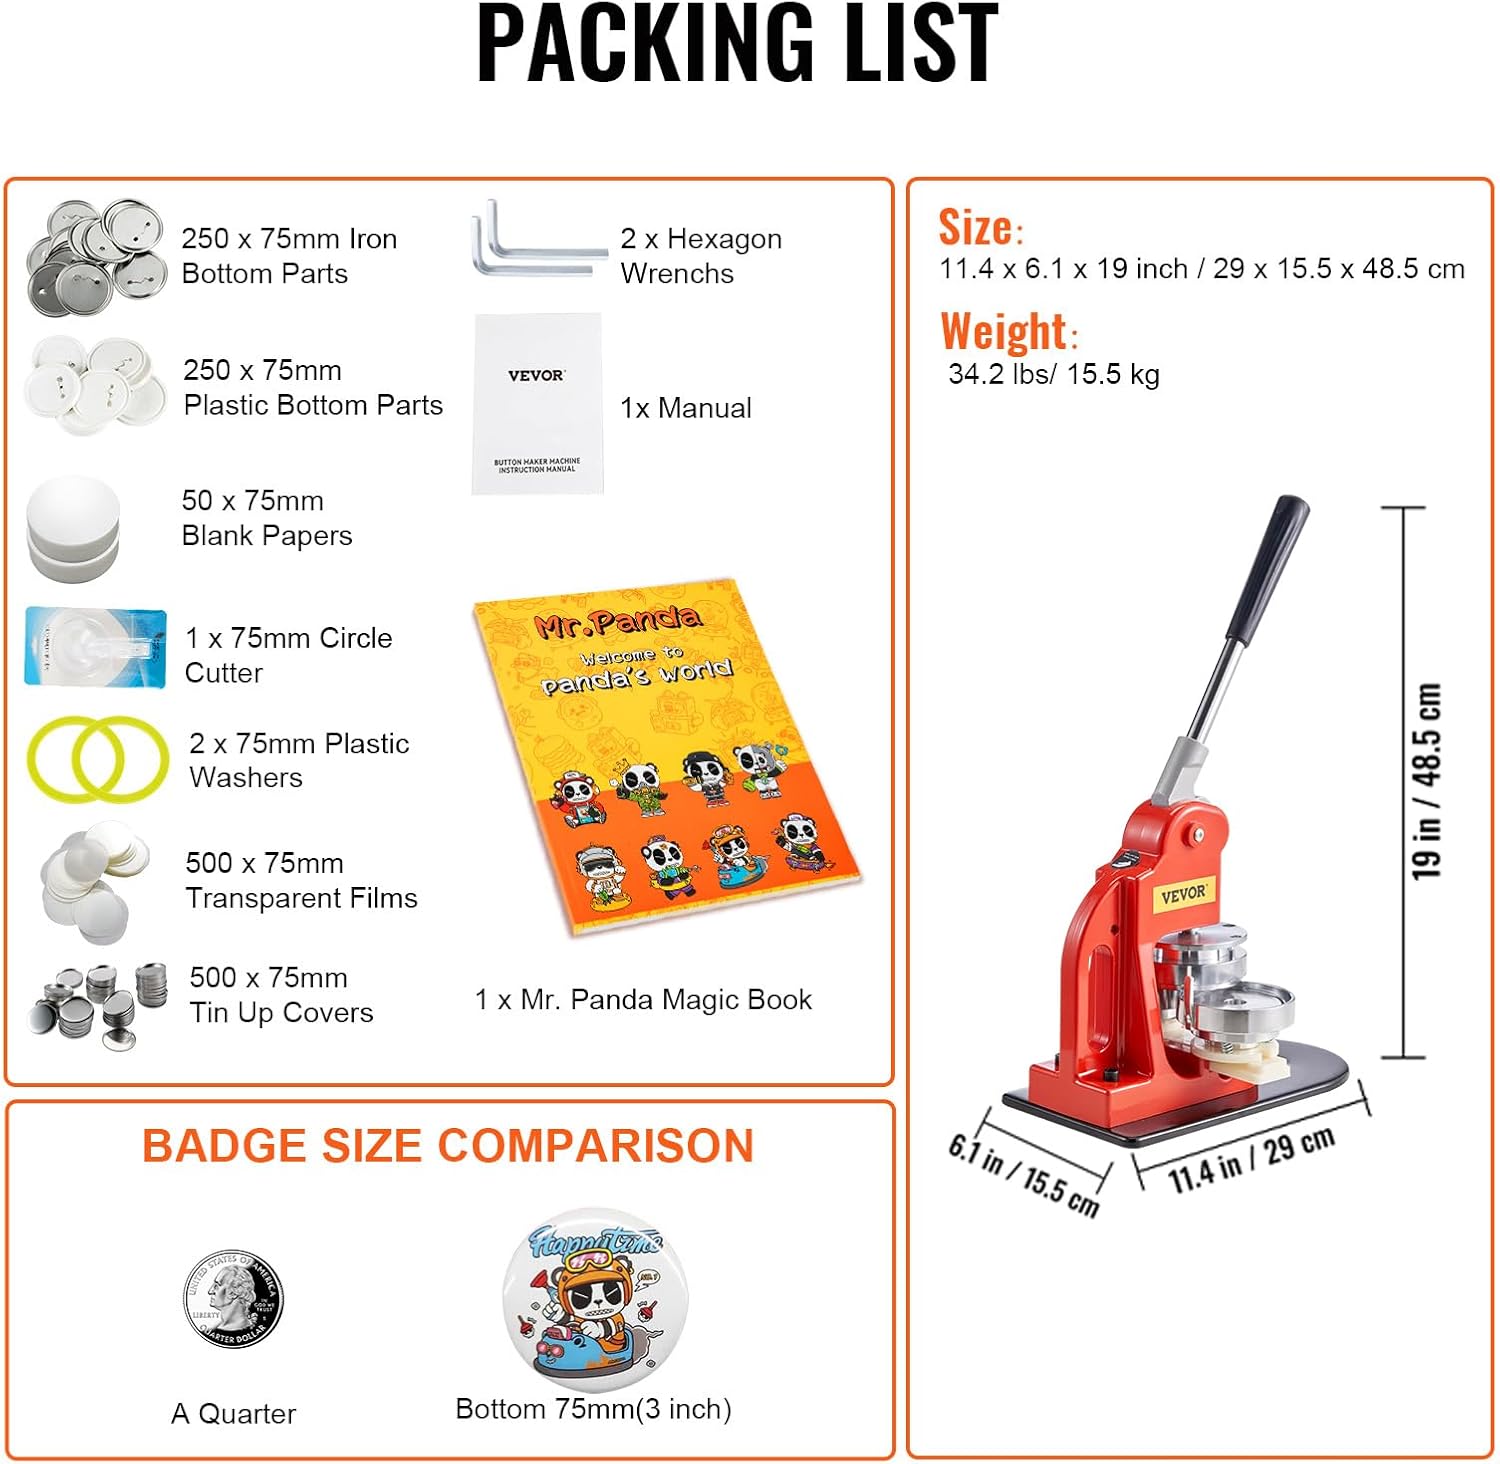
Imagen: Detallada view of all components included in the VEVOR Button Maker Machine kit, along with dimensions and weight.
Instrucciones de instalación
Follow these steps to assemble your button maker machine:
- Connect the Body and Base: Align the holes in the machine's body with the holes in the base plate. Secure them using the provided screws and washers.
- Coloque el mango: Insert the handle into the designated slot on the machine's body and secure it.
- Align the Upper Mold: Ensure the upper mold is correctly positioned and secured.
- Slide in the Lower Mold: Carefully slide the lower mold into its groove on the base.
- Adjust Positioning Screw: Twist the positioning screw to the suitable depth to ensure proper alignment and pressure during operation.
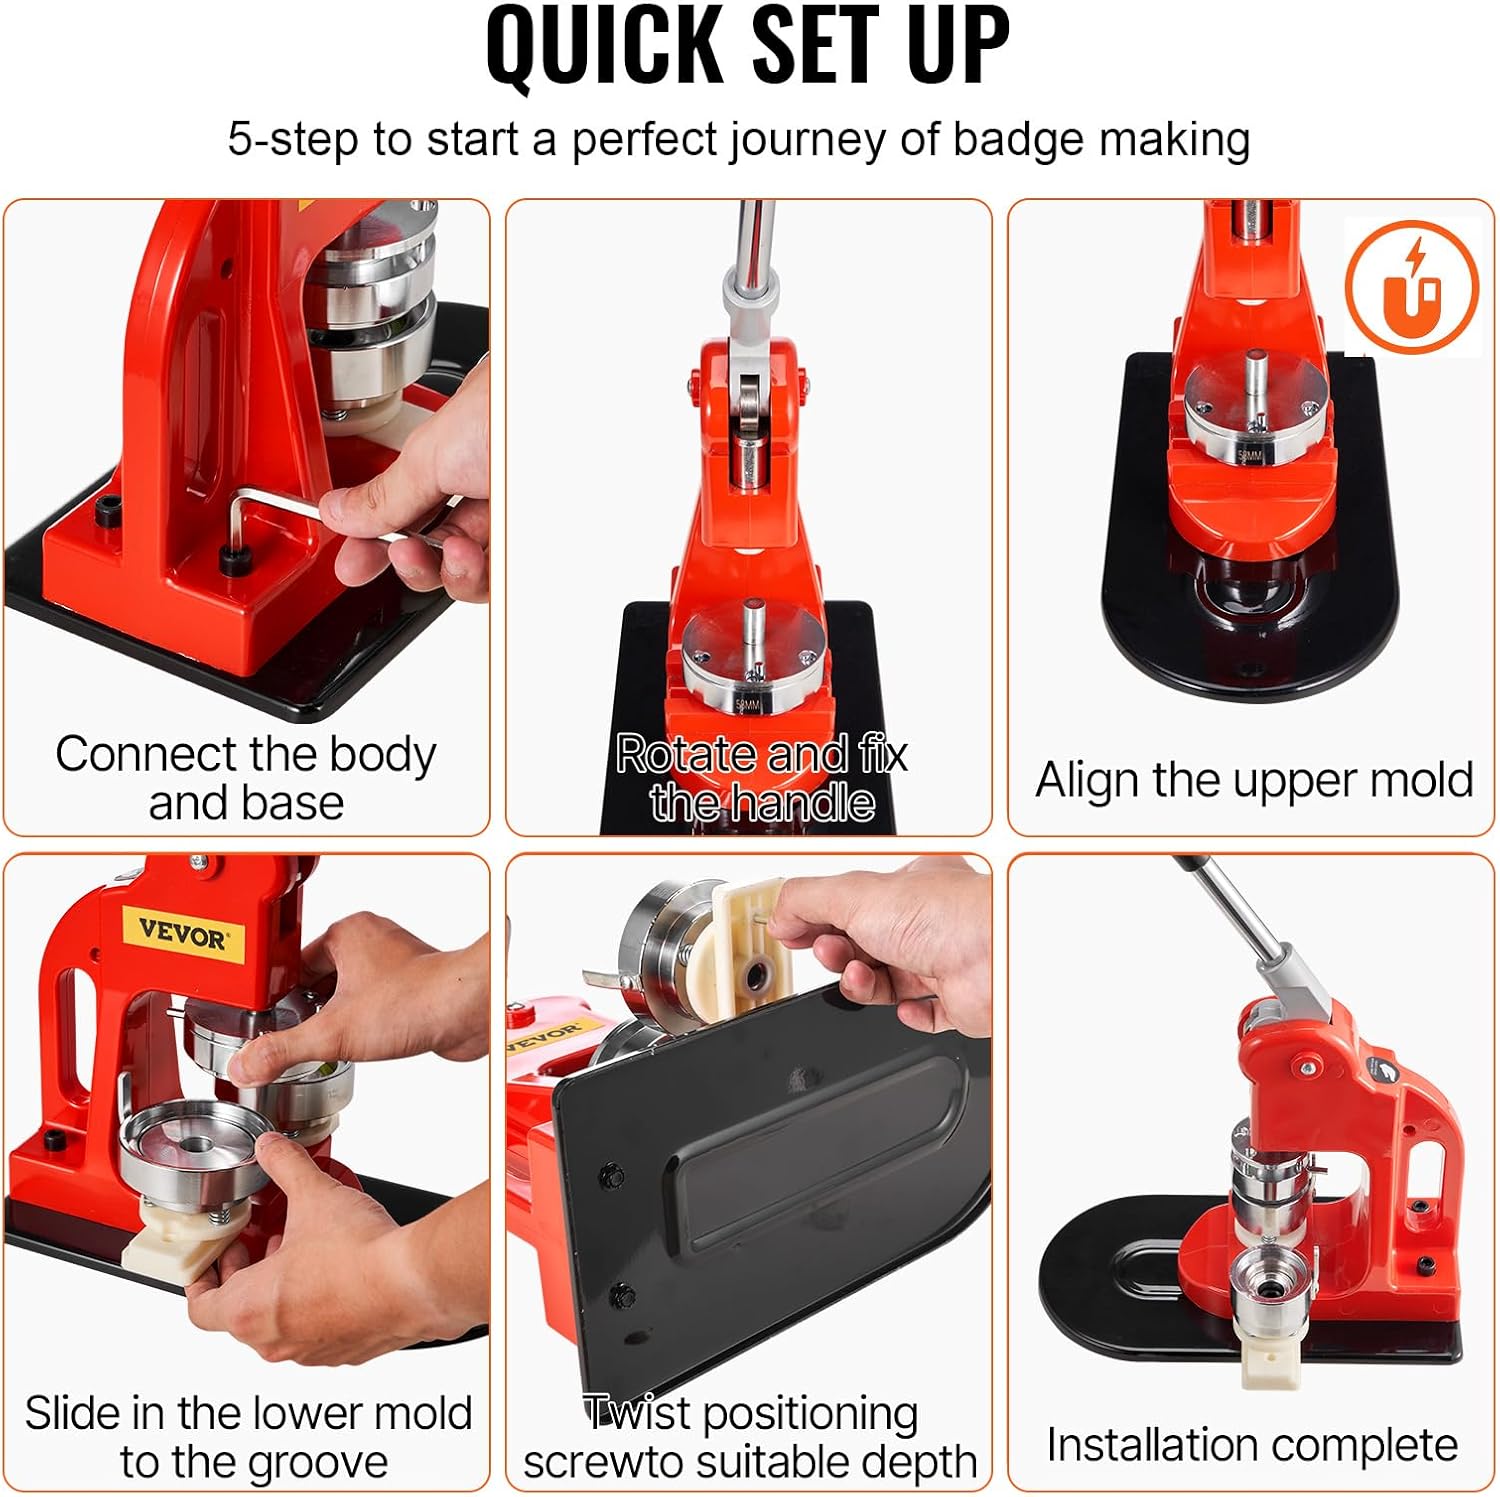
Image: Visual guide showing the 6 quick setup steps for the button maker machine, including connecting the body and base, fixing the handle, aligning molds, and adjusting the positioning screw.
Video: A seller-provided tutorial demonstrating the assembly process of the button maker machine.
Operating Instructions: Making a Button
Follow these steps to create a button:
- Preparar materiales: Ensure you have your tin up cover, printed paper design, and transparent film ready.
- Load First Mold (Left Side): Place a tin up cover into the left mold. Then, center your printed paper design on top of the tin up cover. Finally, place a transparent film over the paper.
- Press First Stage: Push the lower die from left to right to align it under the upper mold. Press the handle down firmly to crimp the tin up cover, paper, and film together.
- Load Second Mold (Right Side): Push the lower die back to the left. Place a plastic back part into the right mold, ensuring the pin is correctly oriented (facing upwards).
- Press Second Stage: Push the lower die from left to right again to align the right mold under the upper mold. Press the handle down firmly to merge the front and back parts, completing the button.

Image: A step-by-step visual guide illustrating the process of making a button pin, from preparing materials to the final press.
Video: A seller-provided tutorial demonstrating how to make a button badge using the machine.
Changing Molds
To change the button molds for different sizes, follow these steps:
- Quitar pines: Locate the pins on one end of the slide that secure the molds. Remove these pins.
- Remove Upper Mold: Lift the upper mold by hand until the three support sheaths pass through their respective holes.
- Remove Lower Mold: Once the upper mold is clear, remove the lower mold from its slot.
- Insert New Molds: Take the desired size molds. Insert the new lower mold into the chute.
- Install New Upper Mold: Lift the upper mold by hand so that the three support sheaths pass through the holes, allowing the lower mold to pass unimpeded.
- Insert Pins: Re-insert the pins to secure the new molds in place.
Video: A seller-provided tutorial demonstrating how to change the molds on the button maker machine.
Mantenimiento
To ensure the longevity and smooth operation of your VEVOR Button Maker Machine, regular maintenance is recommended:
- Limpieza: Keep the machine and molds clean from dust and debris. Use a soft, dry cloth for cleaning.
- Lubricación: If the machine's moving parts feel stiff or make unusual noises, apply a small amount of lubricating oil to the joints and sliding mechanisms.
- Almacenamiento: Store the machine in a dry, cool place away from direct sunlight and moisture when not in use.
Video: A seller-provided tutorial demonstrating troubleshooting and maintenance tips for the button maker machine.
Solución de problemas
If you encounter issues with your button maker, refer to the following common problems and solutions:
- Buttons not forming correctly or edges distorted:
- Ensure all components (tin cover, paper, film, plastic back) are correctly aligned and centered in the molds.
- Apply firm and consistent pressure when pressing the handle.
- Check if the molds are securely fastened. Loose screws can affect the pressing quality. Refer to the maintenance section for tightening screws.
- Verify that the correct size of materials is being used for the specific mold.
- Molds not sliding smoothly:
- Check for any debris or obstructions in the sliding tracks.
- Apply a small amount of lubricating oil to the sliding parts to improve movement.
- Handle is stiff or difficult to press:
- Lubricate the pivot points and moving parts of the handle mechanism.
- Ensure no foreign objects are obstructing the handle's movement.
Video: A seller-provided tutorial demonstrating troubleshooting and maintenance tips for the button maker machine.
Presupuesto
| Atributo | Detalle |
|---|---|
| Marca | VEVOR |
| Número de modelo | 3 inch Button Badge Maker |
| Tamaño del botón | 75 mm (3 pulgadas) |
| Material | Acrylonitrile Butadiene Styrene, Iron |
| Dimensiones del producto | 11.4 x 6.1 x 19 pulgadas (29 x 15.5 x 48.5 cm) |
| Peso del artículo | 33 libras (15 kg) |
Garantía y soporte
For warranty information, technical support, or any product-related inquiries, please contact VEVOR customer service through the official VEVOR website or your purchase platform. Please have your model number and purchase details ready.


