1. Introducción
Thank you for choosing the WOLTU Set of 2 Dining Room Chairs, model BH360gr-2. This instruction manual provides essential information for the safe assembly, proper use, and effective maintenance of your new chairs. Please read this manual thoroughly before assembly and retain it for future reference.
2. Instrucciones de seguridad
- Monte siempre las sillas sobre una superficie suave y limpia para evitar rayones.
- Asegúrese de que todos los tornillos y fijaciones estén bien apretados antes de usar. Revíselos periódicamente y ajústelos según sea necesario.
- Do not exceed the maximum load capacity of 120 kg (264 lbs) per chair.
- Mantenga las piezas pequeñas y los materiales de embalaje fuera del alcance de los niños para evitar peligro de asfixia.
- Evite pararse en la silla o usarla como taburete.
- Do not expose the chairs to direct sunlight or extreme temperatures for prolonged periods, as this may damage the material.
- Utilice únicamente el hardware proporcionado para el montaje.
3. Contenido del paquete
Antes de comenzar el montaje, verifique que todos los componentes estén presentes y sin daños. Si alguna pieza falta o está dañada, contacte con atención al cliente.
- Chair Seat (with backrest) x 2
- Chair Leg Frame x 2
- Assembly Hardware Kit (screws, washers, Allen key) x 1
- Manual de instrucciones x 1
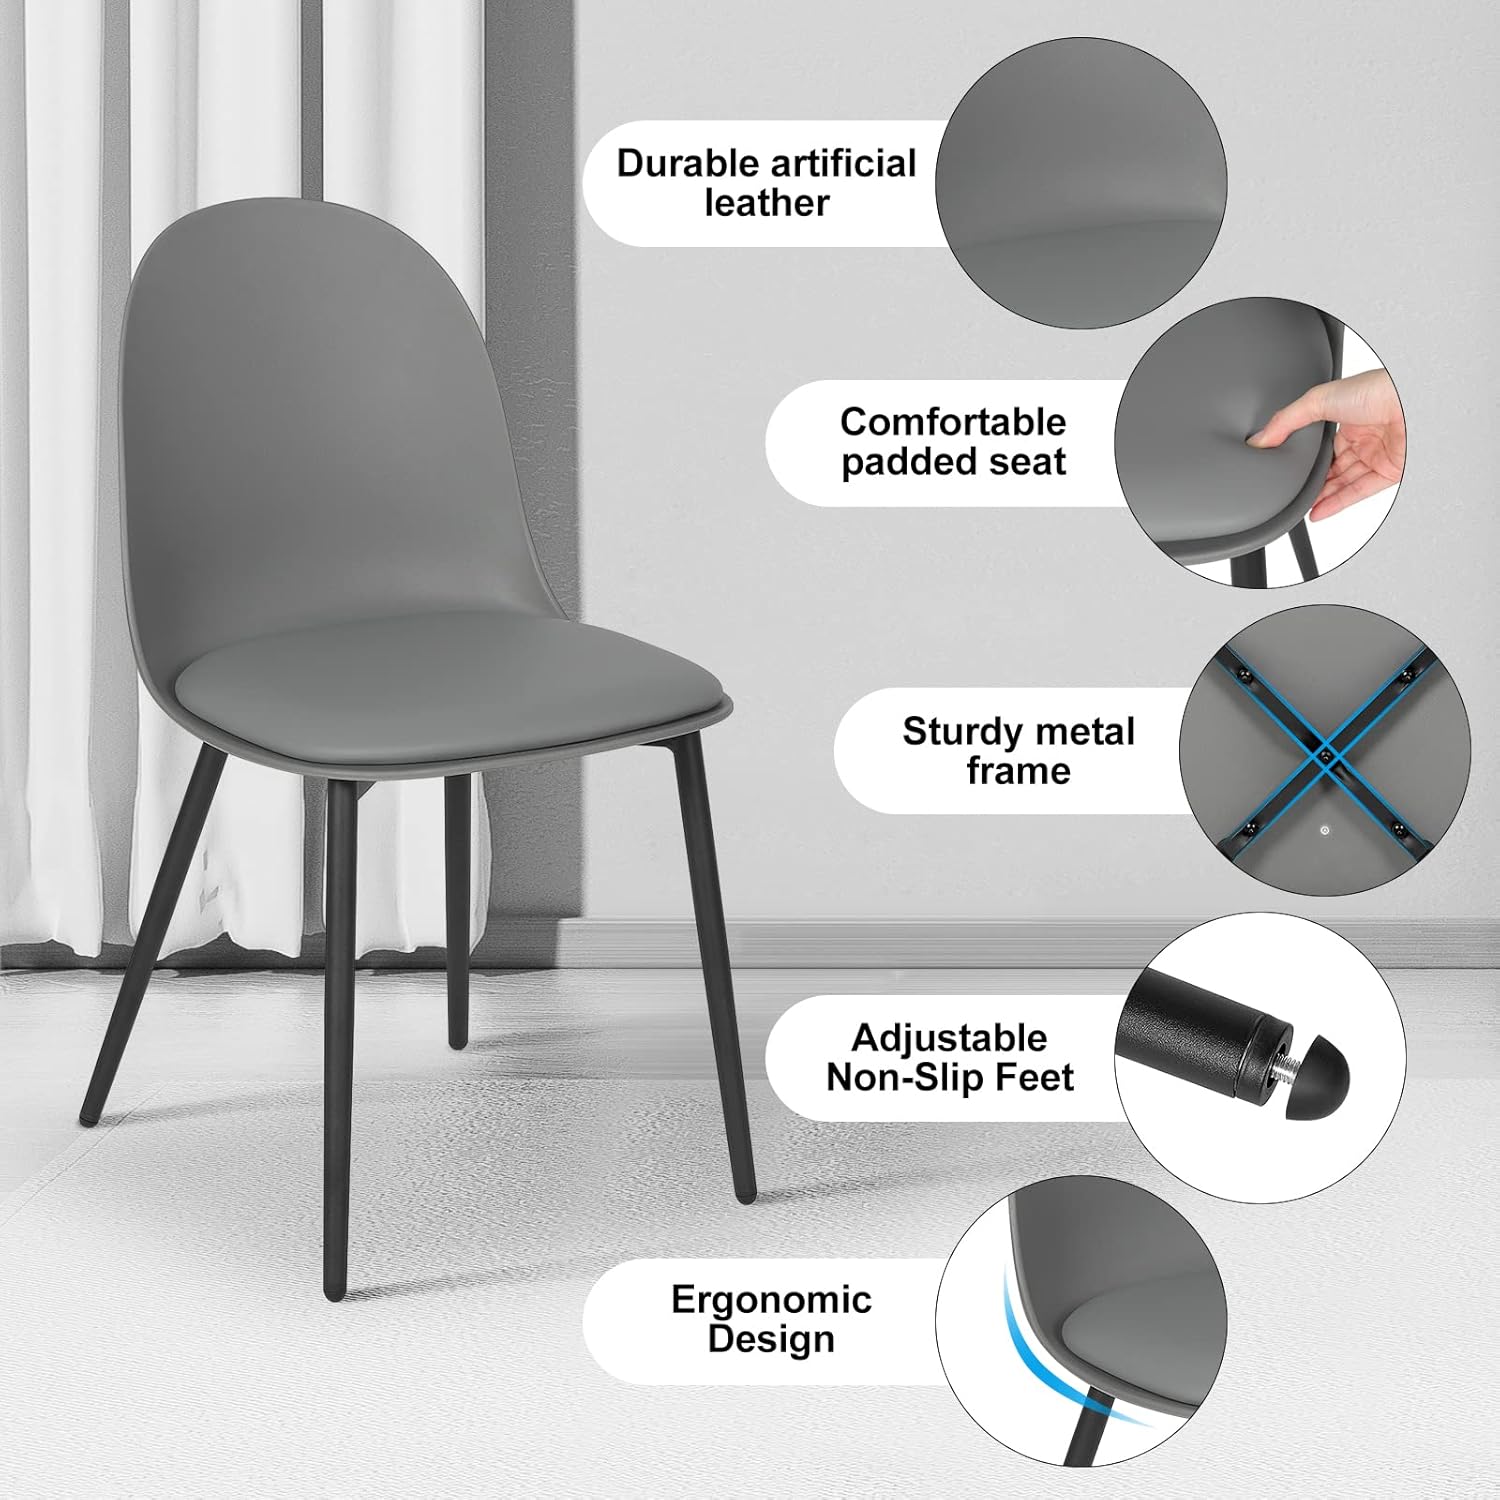
Figura 3.1: Sobreview of chair components and key features.
4. Configuración y montaje
Assembly is straightforward and requires minimal tools. It is recommended to have two people for easier assembly, though one person can manage.
- Desempaquetar componentes: Retire con cuidado todas las piezas del embalaje. Colóquelas sobre una superficie suave y plana para evitar daños.
- Fije el marco de las patas al asiento: Align the pre-drilled holes on the chair seat with the corresponding holes on the leg frame. Insert the screws (from the hardware kit) and loosely tighten them with the provided Allen key. Do not fully tighten yet.
- Asegure todos los tornillos: Once all screws are in place and loosely fastened, gradually tighten them in a crisscross pattern until secure. Ensure the chair is stable and level.
- Comprobar estabilidad: Gently rock the chair to ensure it is stable and all connections are firm. Adjust the non-slip feet if necessary to eliminate any wobbling.

Figure 4.1: Chair dimensions, useful for assembly reference.

Figure 4.2: Illustration of the sturdy steel frame and maximum load capacity.
5. Uso
The WOLTU dining chairs are designed for comfortable seating in various settings, including dining rooms, kitchens, offices, and living rooms.
- Asientos cómodos: The chairs feature a foam-padded seat (43x38 cm) and an ergonomically curved backrest (39 cm high) for enhanced comfort during prolonged use.
- Estabilidad: The black painted metal legs are designed for stability, supporting a maximum load of 120 kg.
- Protección del suelo: Each leg is equipped with an adjustable non-slip floor protector to prevent scratches and reduce noise when moving the chair.

Figure 5.1: Ergonomic design for back support.
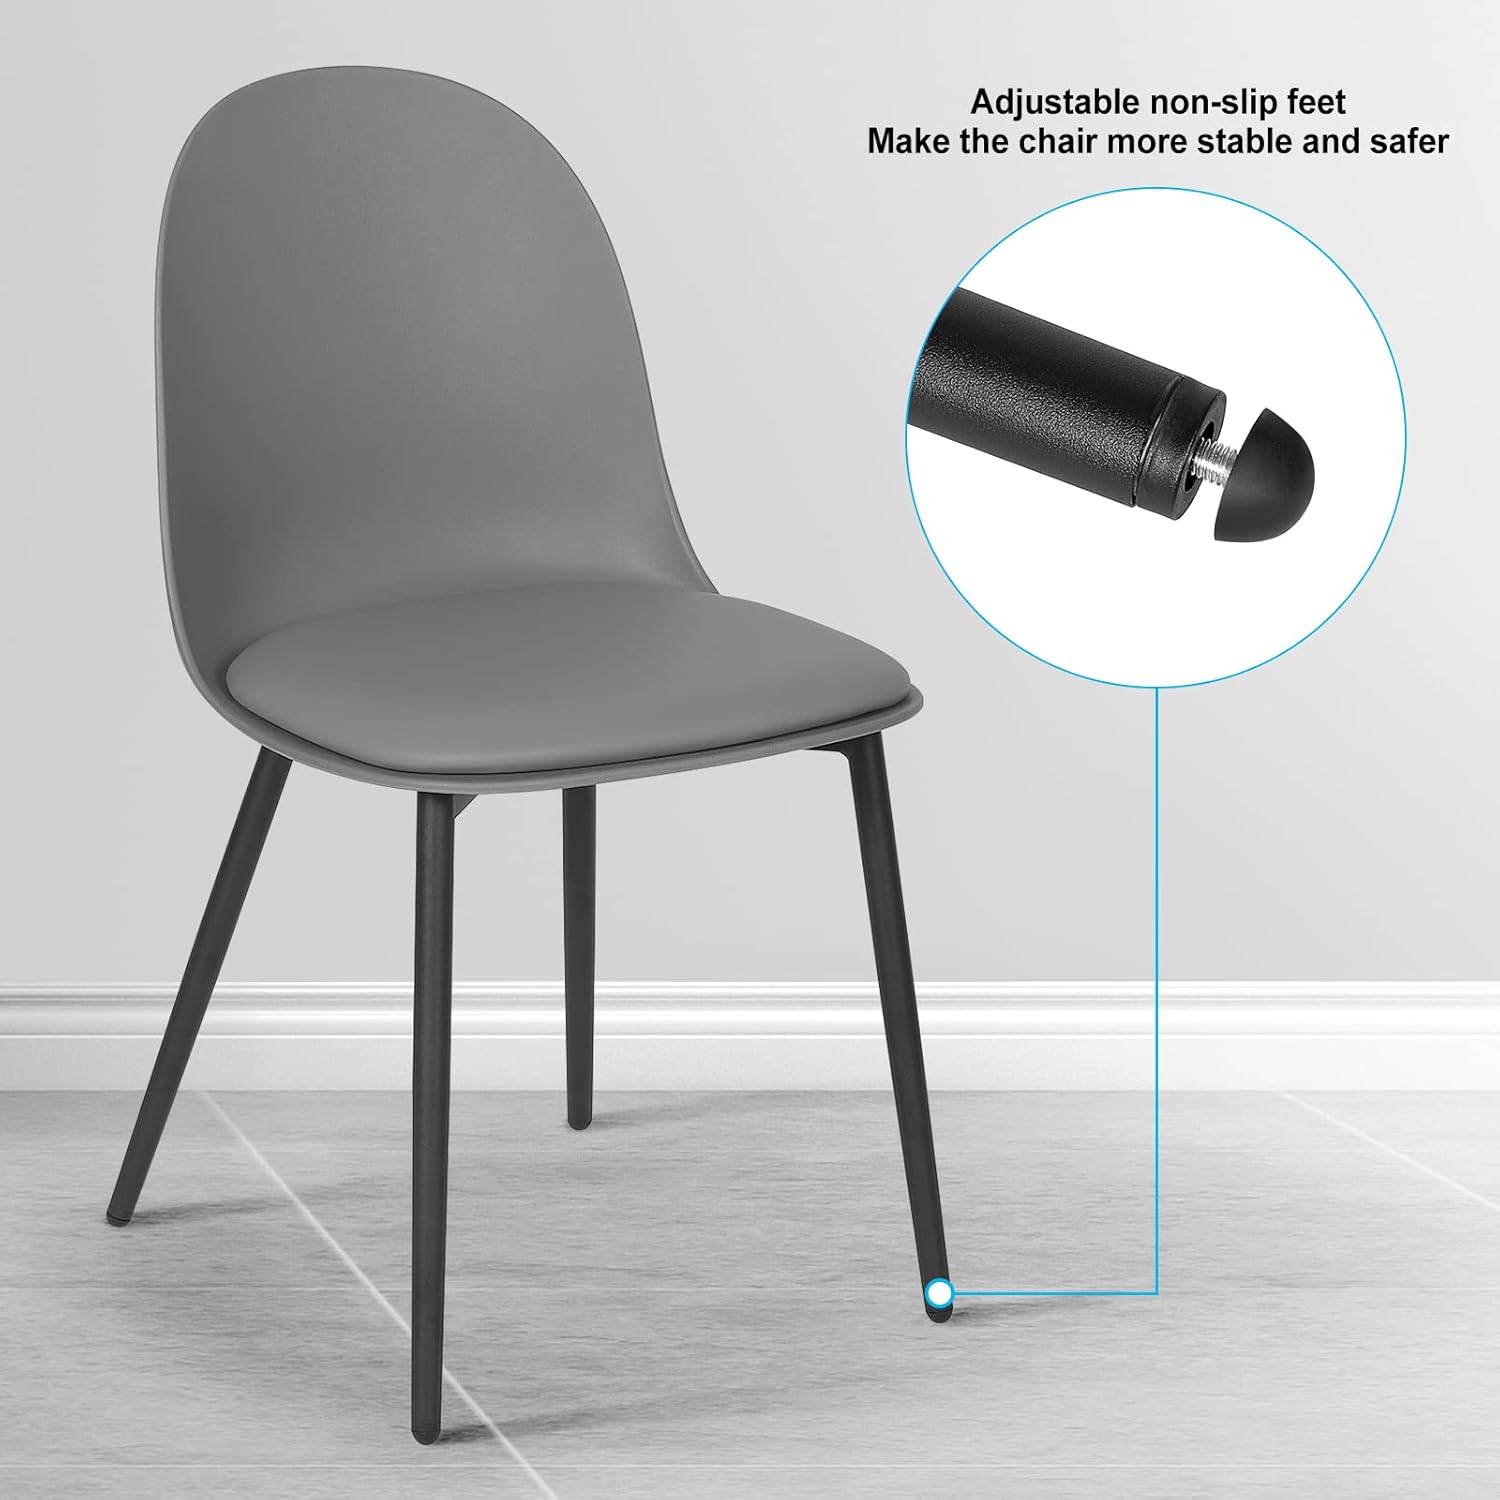
Figure 5.2: Adjustable non-slip feet detail.
6. Mantenimiento
Regular maintenance will help prolong the life and appearance of your WOLTU chairs.
- Limpieza del cuero sintético: The PU coating is tear-resistant and easy to clean. Wipe spills immediately with a soft, damp cloth. For general cleaning, use a mild soap solution and wipe dry with a clean cloth. Avoid abrasive cleaners or harsh chemicals.
- Comprobación de los sujetadores: Periodically (e.g., every 3-6 months), check all screws and connections to ensure they remain tight. Re-tighten any loose fasteners to maintain stability and safety.
- Evite la sobrecarga: Do not place excessive weight on the chairs beyond the specified load capacity.
- Cuidado del Medio Ambiente: Keep chairs away from direct heat sources and prolonged direct sunlight to prevent material degradation.

Figure 6.1: Artificial leather and high-density sponge for easy cleaning and comfort.
7. Solución de problemas
This section addresses common issues you might encounter with your chairs.
| Problema | Posible causa | Solución |
|---|---|---|
| La silla se tambalea o es inestable. | Screws are loose; uneven floor; non-slip feet not adjusted. |
|
| Screws become loose frequently. | Regular use causes minor loosening; screws not tightened sufficiently during assembly. |
|
| Scratches on floor when moving chair. | Non-slip feet are missing or damaged. |
|
8. Especificaciones
| Característica | Detalle |
|---|---|
| Modelo | BH360gr-2 |
| Material | Faux Leather (PU), Metal, Plastic, Foam |
| Color | Gris |
| Altura total | 81 cm (31.89 pulgadas) |
| Tamaño del asiento (largo x ancho) | 43 x 38 cm (16.93 x 14.96 pulgadas) |
| Altura del asiento | 48 centímetros |
| Altura de la espalda | 39 centímetros |
| Peso del artículo (por silla) | 5.3 kg (11.66 libras) |
| Capacidad de carga máxima | 120 kg (264 libras) |
9. Garantía y soporte
For warranty information or technical support, please refer to the purchase documentation or contact WOLTU customer service. Keep your proof of purchase for any warranty claims.
WOLTU Customer Service: Please visit the official WOLTU website or refer to your purchase platform for contact details.


