1. Introducción
This manual provides essential instructions for the safe and efficient operation of your Grizzl-E Smart Level 2 Electric Vehicle (EV) Charger. This 240V / 40A charging station is UL Tested and Certified, Energy Star rated, and designed for both indoor and outdoor use. It features Wi-Fi connectivity for smart charging management via the Grizzl-E Connect app.
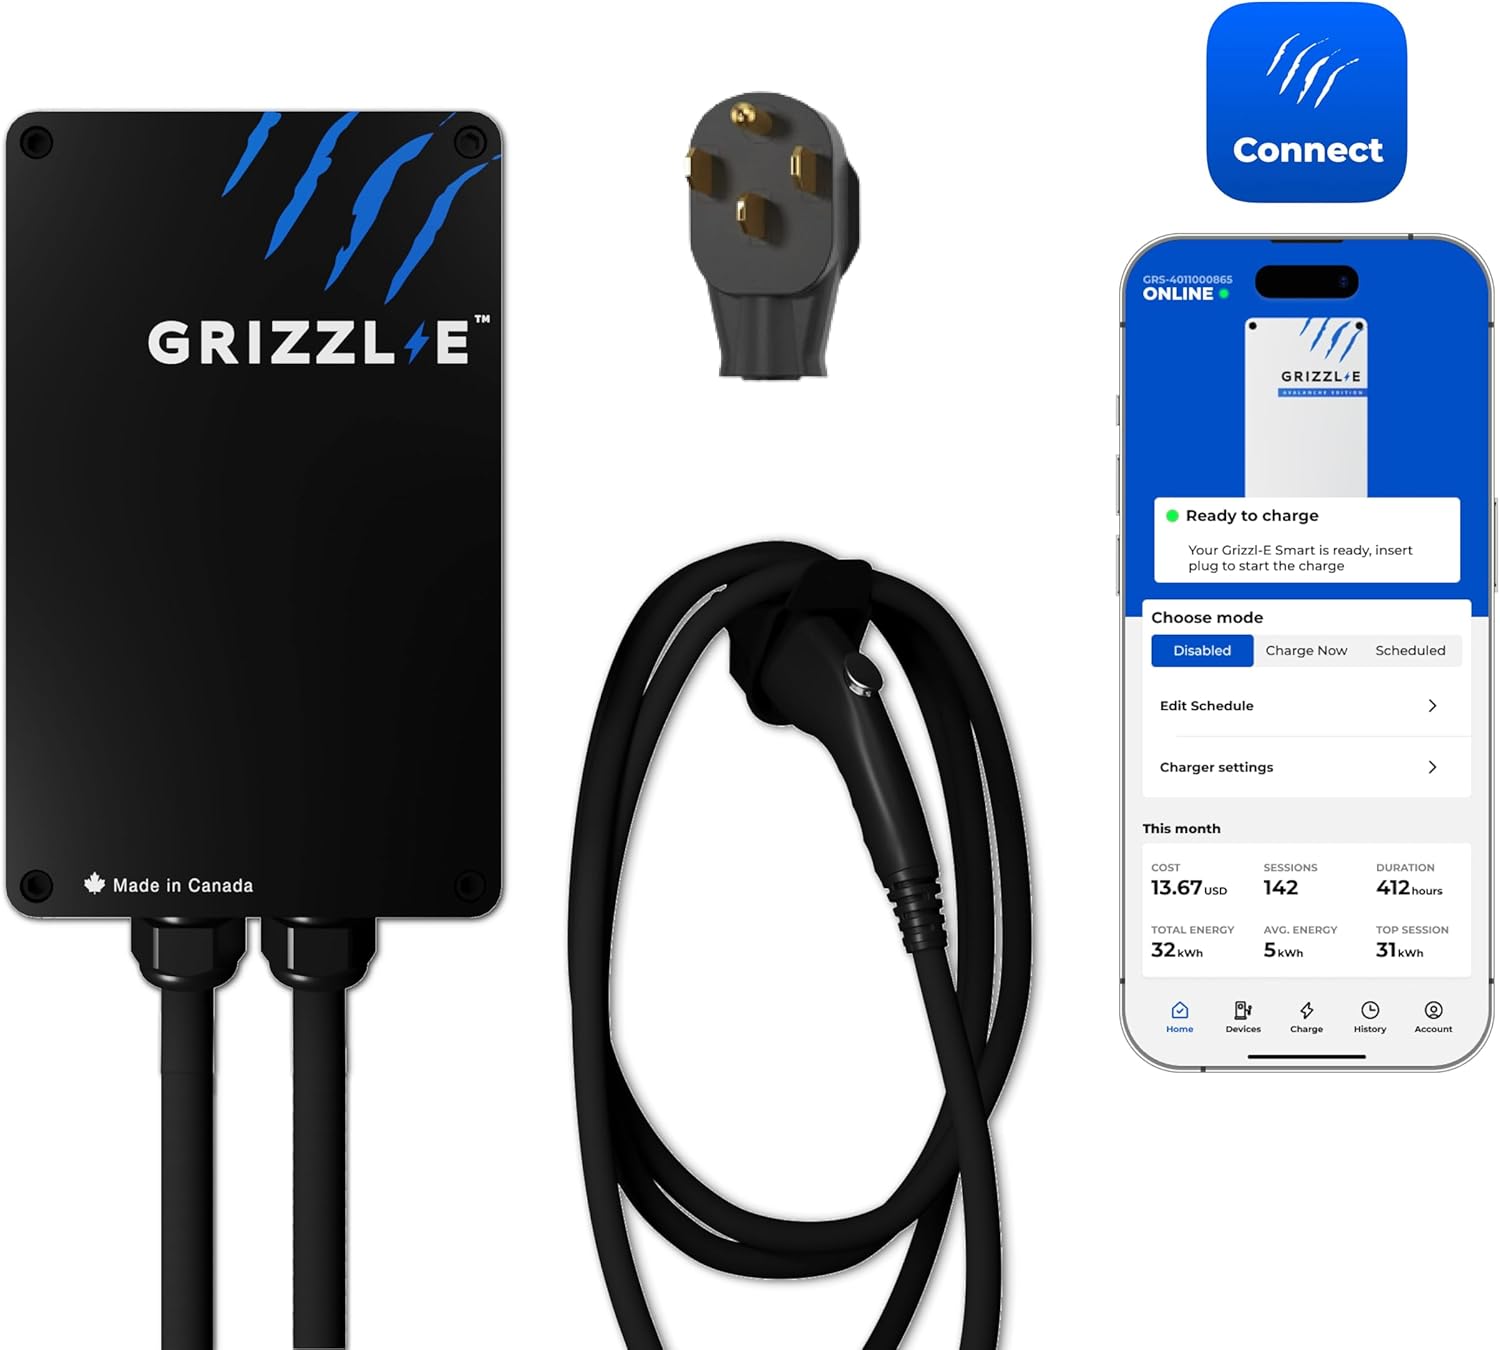
Figure 1: Grizzl-E Smart Level 2 EV Charger with NEMA 14-50 plug and accompanying mobile app interface.
2. Información de seguridad
Always adhere to local electrical codes and safety regulations during installation and operation. Professional installation is recommended for hardwired setups. Ensure the charger is connected to a properly grounded circuit.
- Seguridad eléctrica: The charger is equipped with Over Current, Over Voltage, bajo Voltage, Missing Diode, Ground Fault, and Over Temperature Protections. It includes a built-in GFCI.
- Protección ambiental: The NEMA 4X metal enclosure is water-resistant and fire-resistant, suitable for various indoor and outdoor conditions.
- Manejo de cables: Avoid driving over the charging cable or exposing it to sharp objects. Ensure the cable is properly stored when not in use.
3. Contenido del paquete
Verify that all items are present in your Grizzl-E Smart Level 2 EV Charger package:
- Grizzl-E Smart Electric Vehicle Charging Station
- 24 Feet Charging Cable with J1772 Connector
- NEMA 14-50 Plug (pre-attached)
- Heavy Duty EasyEvPlug Holster + screws
- Mounting Bracket + screws
- Backplate Cradle + screws
- Pin for securing the charger to the backplate
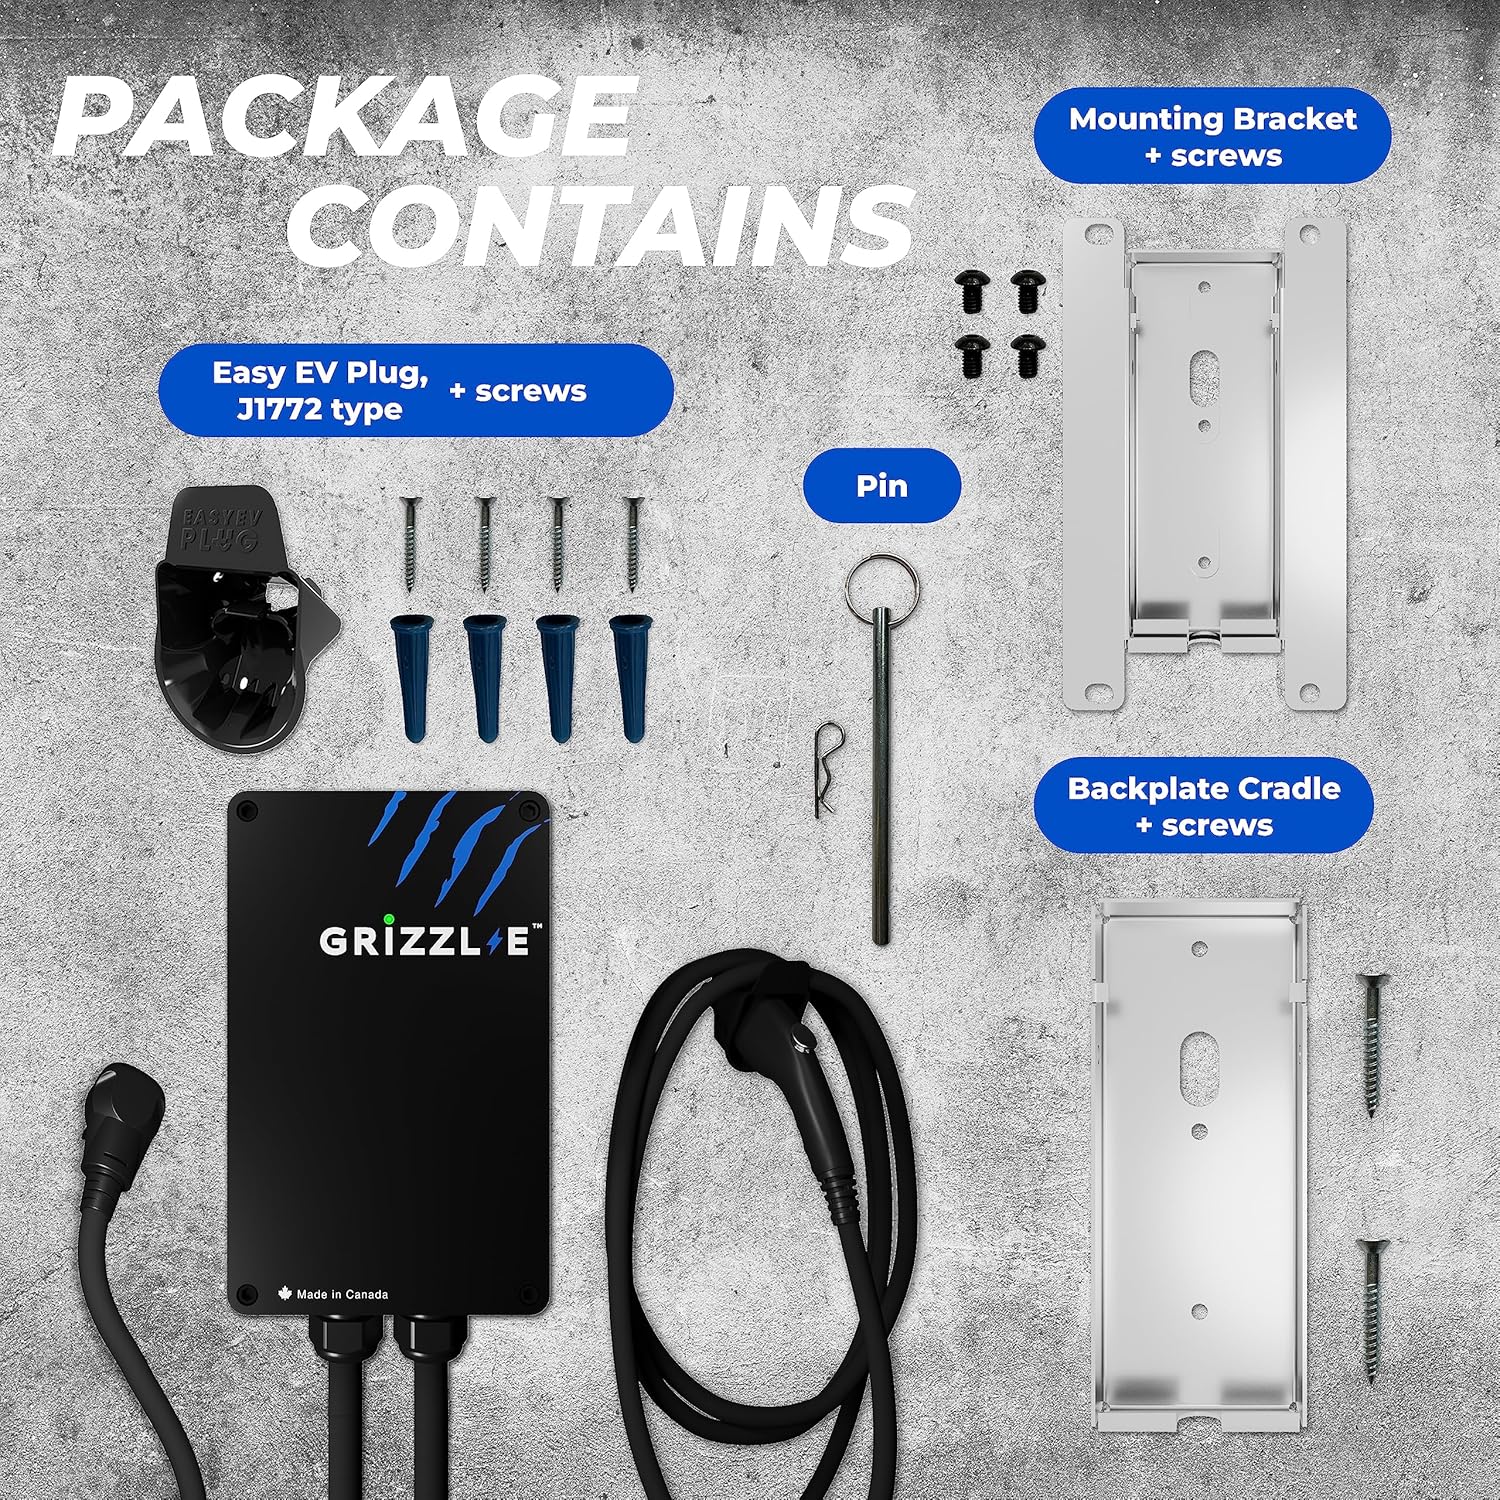
Figure 2: Included components: charger unit, NEMA 14-50 plug, charging cable, holster, mounting bracket, backplate cradle, and pin.
4. Configuración e instalación
4.1 Montaje del cargador
The Grizzl-E charger is designed for easy installation and relocation. Follow these steps to mount the unit:
- Attach the Backplate Cradle to the desired wall surface using the provided screws.
- Attach the Mounting Bracket to the back of the charger unit.
- Join the charger (with mounting bracket) to the wall-mounted backplate cradle and secure it with the provided pin.

Figure 3: Step-by-step guide for mounting the Grizzl-E charger.
4.2 Conexión eléctrica
The NEMA 14-50 version of the Grizzl-E Smart Charger is designed for plug-and-play operation with a compatible 240V NEMA 14-50 outlet. Ensure your outlet is properly installed and rated for the desired ampedad
Opción de cableado: While hardwiring is possible, it is more complex and requires specific lugs. Consult a qualified electrician for hardwired installations.
4.3 Ajuste Amperage (DIP Switches)
The Grizzl-E charger allows you to adjust the maximum charging amperage to match your home's electrical capacity. This is done via internal DIP switches. Ensure the charger is disconnected from power before opening the unit.
- Carefully remove the front panel of the charger by unscrewing the four screws.
- Locate the DIP switches on the circuit board.
- Adjust the switches according to the manual's guidelines for your desired amperage (16A, 24A, 32A, or 40A). Match this to your circuit breaker size.
- Securely reattach the front panel.
Video 1: This video demonstrates the process of opening the charger and adjusting the internal DIP switches for amperage settings. (Relevant section: 03:28 - 04:10)
4.4 Conexión Wi-Fi y configuración de la aplicación
The Grizzl-E Smart Charger connects to your home Wi-Fi network for smart features via the Grizzl-E Connect app. The app is available for download on your mobile device.
- Download the Grizzl-E Connect app from your device's app store or by scanning the QR code provided in the product images.
- Follow the in-app instructions to connect your charger to your 2.4 GHz Wi-Fi network.
- Consejo para la solución de problemas: If you encounter difficulty connecting with one device, try using a different smartphone, tablet, or computer for the initial setup.
Access the Grizzl-E Connect App Portal

Figure 4: Screenshots of the Grizzl-E Connect app, displaying the home page with charging summary and the charging schedule interface.
5. Instrucciones de funcionamiento
5.1 Carga básica
To begin charging your electric vehicle:
- Ensure the Grizzl-E charger is powered on and connected to your vehicle's charging port.
- The charger will automatically begin charging if no schedule is set, or according to your configured schedule.
- To stop charging, simply disconnect the charging connector from your vehicle.
Video 2: Demonstration of plugging the Grizzl-E charger into an electric vehicle's charging port.
5.2 Uso de la aplicación Grizzl-E Connect
La aplicación ofrece funciones integrales de control y monitoreo:
- Monitoreo en tiempo real: View actual amperage, energy consumption (kWh), charging duration, and estimated cost.
- Modos de carga: Choose between 'Charge Now', 'Stop', or 'Scheduled' charging.
- Horarios de carga: Set specific start and end times for charging on weekdays and weekends to take advantage de tarifas eléctricas fuera de horas punta.
- Historial de carga: Access detailed records of past charging sessions, including duration and energy consumed.
- Configuración del cargador: Adjust the price per kWh to accurately track charging costs and set the timezone.
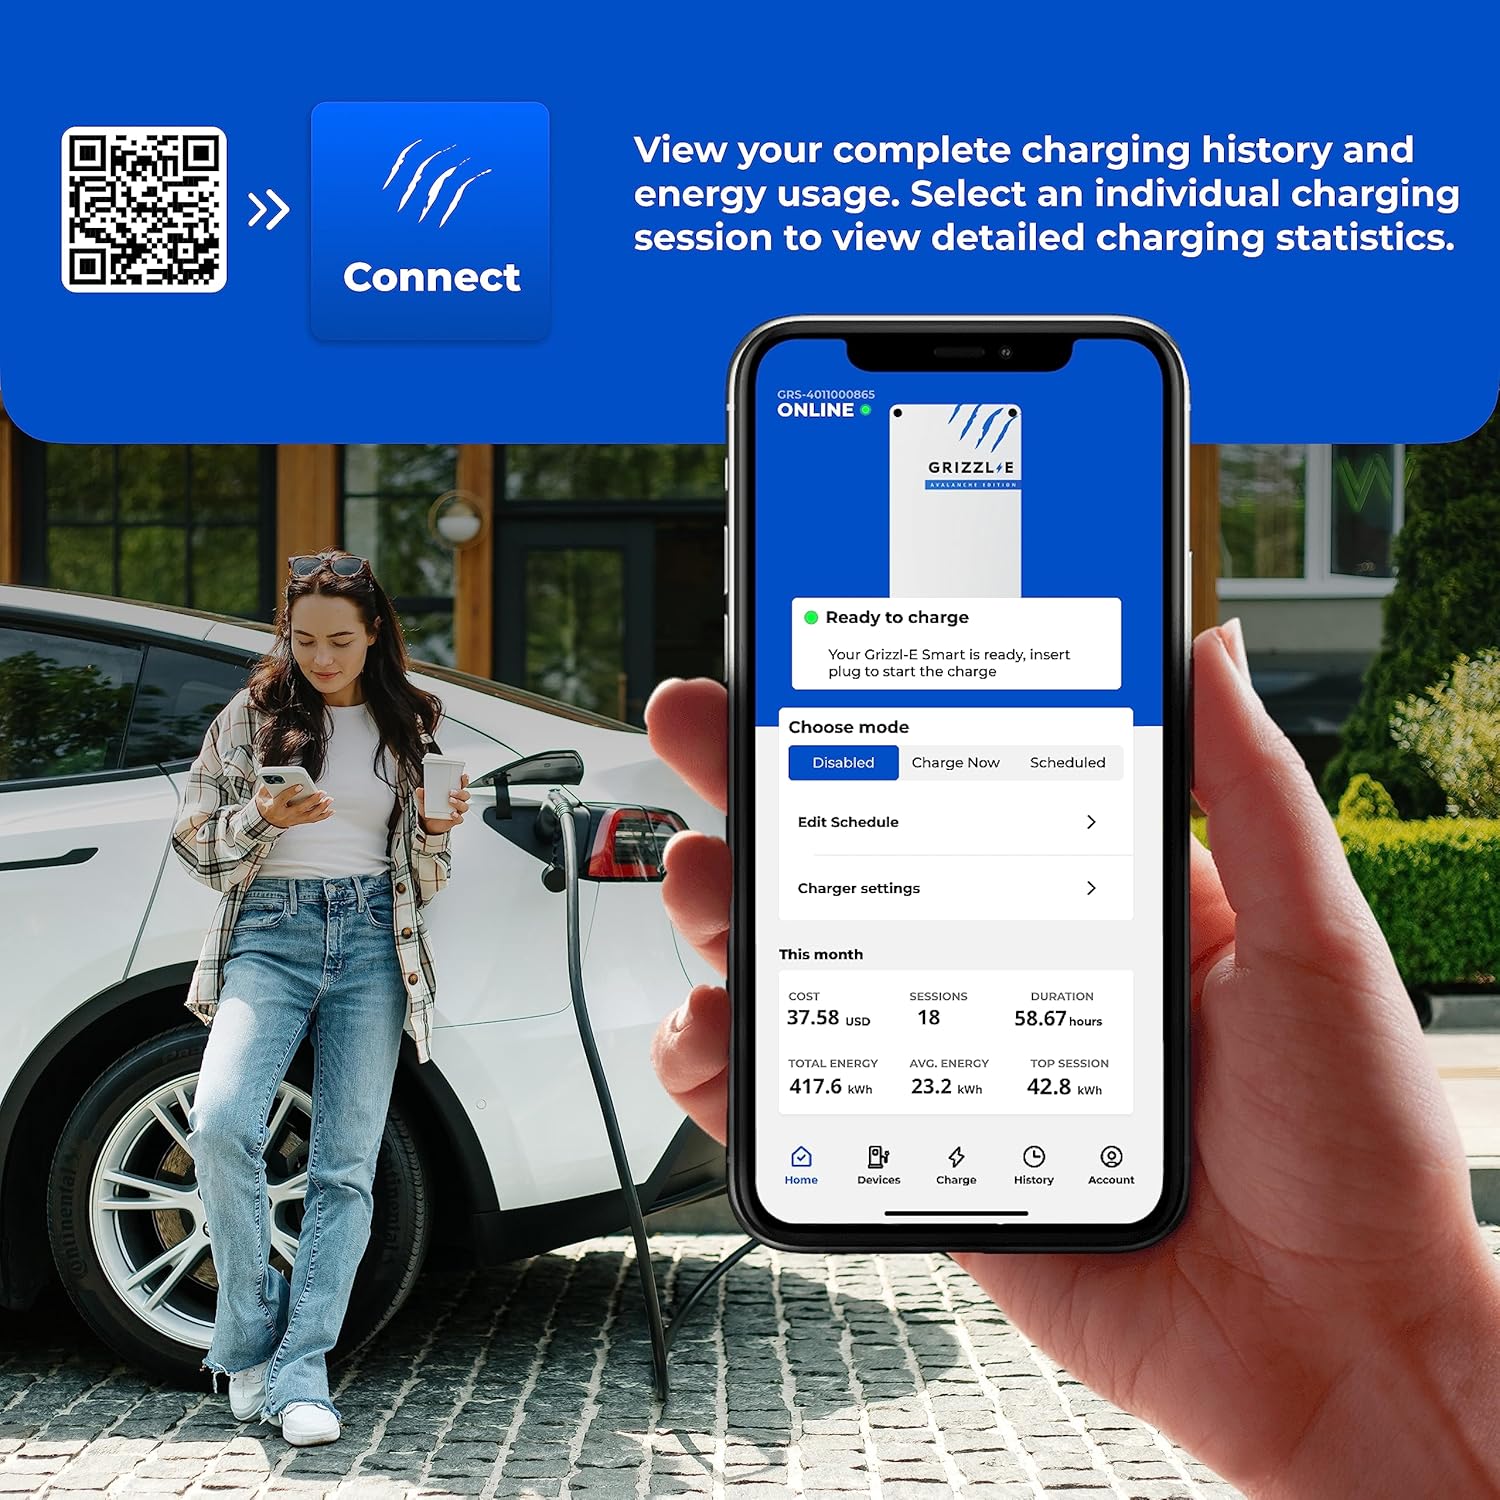
Figure 5: A user interacting with the Grizzl-E Connect app to monitor charging status and history.
6. Mantenimiento
The Grizzl-E charger is designed for durability and minimal maintenance. Regular checks ensure optimal performance:
- Limpieza: Keep the charger unit and cables clean and free from debris. Use a soft, damp Paño para limpieza. No utilice productos químicos agresivos ni materiales abrasivos.
- Inspección de cables: Periodically inspect the charging cable and connector for any signs of wear, damage, or fraying. If damage is found, discontinue use and contact customer support.
- Holster Use: Always store the charging connector in its holster when not in use to protect it from environmental elements and physical damage.
7. Solución de problemas
If you encounter issues with your Grizzl-E Smart Charger, refer to the following common solutions:
- El cargador no se enciende: Ensure the NEMA 14-50 plug is fully inserted into the outlet and the circuit breaker is not tripped.
- Problemas de conectividad Wi-Fi:
- Confirm your Wi-Fi network is 2.4 GHz. The charger does not support 5 GHz networks.
- Try connecting using a different mobile device or computer for the initial setup.
- Ensure the charger is within range of your Wi-Fi router or consider a Wi-Fi extender.
- La carga no se inicia: Check the Grizzl-E Connect app for any active schedules that might be preventing immediate charging. Ensure the vehicle's charging port is clean and the connector is fully inserted.
- Velocidad de carga reducida: Verify the DIP switch settings inside the charger match your circuit breaker's capacity.
The charger features self-monitoring and recovery functions for minor issues. If problems persist, contact Grizzl-E customer support.
8. Especificaciones
| Número de modelo | GRS-14-24-PB |
| Ampanhelo | Ajustable: 16A, 24A, 32A, 40A |
| Volumentage | 240 voltios |
| Quétage | Up to 10 KW (at 40A) |
| Tipo de conector | NEMA 14-50 Plug (Input), J1772 (Output) |
| Longitud del cable | 24 Feet (Output), 1.75 Feet (Input) |
| Dimensions (Charger Unit) | 10.25 x 6.25 x 3.54 pulgadas |
| Peso del artículo | 17.03 libras |
| Clasificación del recinto | NEMA 4X (Water-resistant, Fire-resistant) |
| Certificaciones | UL Tested and Certified, Energy Star Certified |
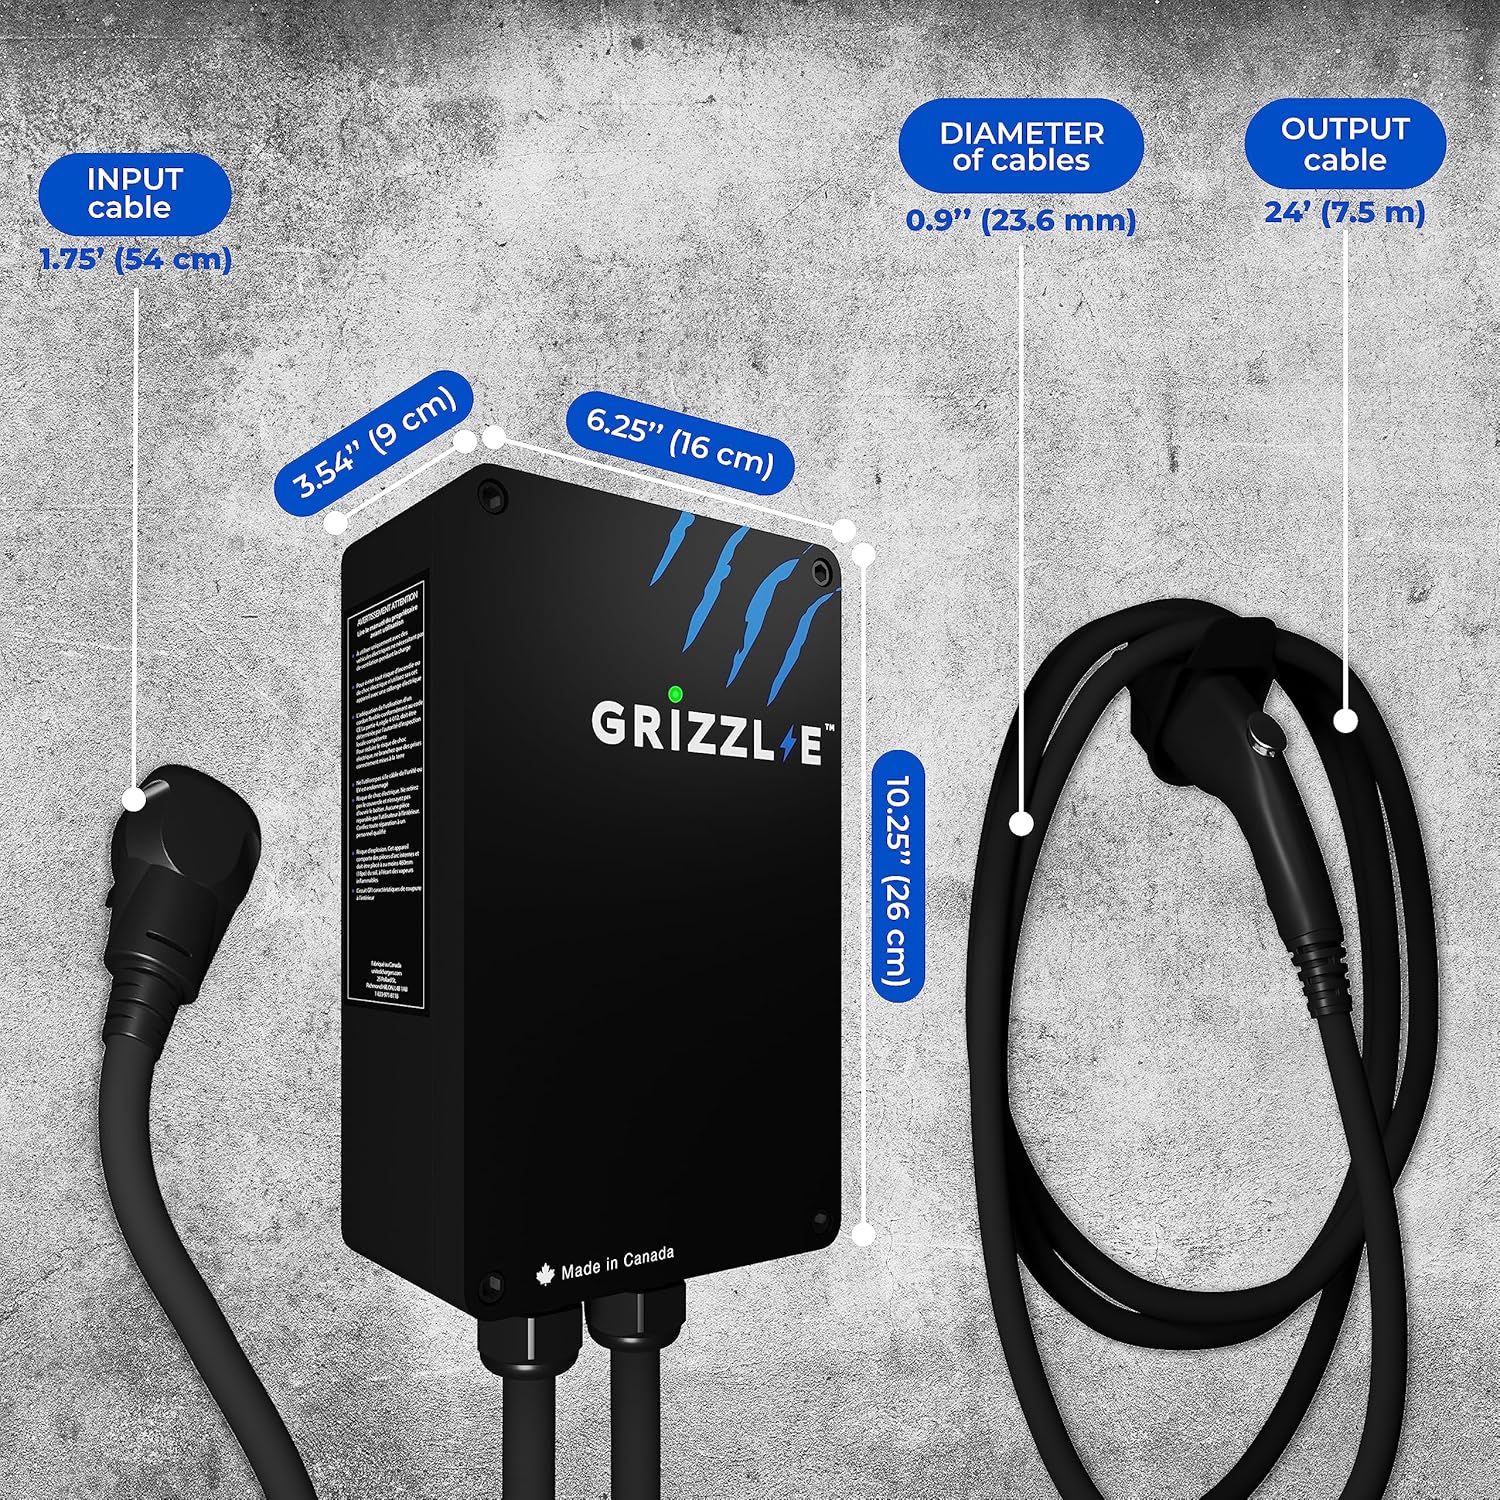
Figure 6: Detailed dimensions of the Grizzl-E Smart EV Charger.
9. Garantía y soporte
Your Grizzl-E Smart Level 2 EV Charger comes with a Garantía de 3 años. For any questions, technical assistance, or warranty claims, please contact Grizzl-E customer support. Detailed contact information can be found on the official Grizzl-E websitio.


