1. Introducción
Thank you for choosing the ATsafepro Open-End Torque Wrench. This manual provides essential information for the safe and effective operation, maintenance, and care of your new tool. Please read it thoroughly before use and retain it for future reference.
This torque wrench is designed for precise fastening applications requiring specific torque values, ranging from 3 to 25 Newton-meters (26.6 to 221.3 lbf.in). Its interchangeable 9x12mm open-end head makes it suitable for various tasks in HVAC, refrigeration systems, bicycle and motorcycle maintenance, and automotive applications.

Figura 1: The ATsafepro torque wrench is suitable for a wide range of applications, including industrial settings, automotive repair, engine maintenance, and HVAC installations.
2. Información de seguridad
WARNING: Read all safety warnings and instructions. Failure to follow the warnings and instructions may result in property damage or injury.
- Utilice siempre equipo de protección personal adecuado, como gafas de seguridad, cuando utilice herramientas.
- Asegúrese de que la pieza de trabajo esté bien sujeta.amped or stable before applying torque.
- Do not exceed the maximum torque capacity of the wrench (25 Nm).
- No utilice la llave dinamométrica como llave de impacto ni para aflojar tornillos. Está diseñada únicamente para un apriete preciso.
- Keep the tool clean and free from oil, grease, and other contaminants to ensure a secure grip.
- Store the torque wrench in its protective case when not in use to prevent damage and maintain accuracy.
- Do not attempt to repair or modify the torque wrench. Refer to qualified personnel for service.
3. Producto terminadoview
The ATsafepro Open-End Torque Wrench is constructed from durable chrome vanadium steel and features an ergonomic design for comfortable and precise use. Key components include:
- Interchangeable Head: Allows for easy replacement with various 9x12mm heads (sold separately) to suit different fastener types.
- Escala de par: Clearly marked scale for setting desired torque values in both N.m and lbf.in.
- Torque Locking Ring: Secures the set torque value to prevent accidental changes during operation.
- Mango antideslizante: Provides a firm and comfortable grip.
- Cuerpo principal: Made from aluminum alloy for durability and light weight.

Figura 2: Detallado view highlighting the main body, accurate torque scale, torque locking ring, non-slip handle, and the 9x12mm opening size of the interchangeable head.
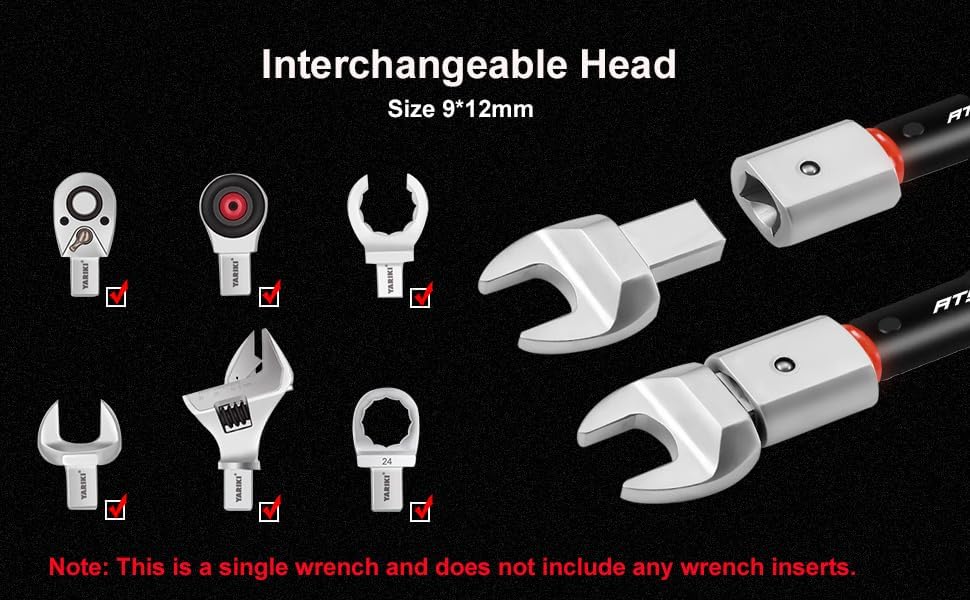
Figura 3: Examples of various interchangeable heads (ratchet, spanner, open-end) that can be used with the 9x12mm interface. Note: Heads are sold separately.
4. Configuración
4.1 Attaching the Head
The torque wrench features an interchangeable head system. To attach a head:
- Align the square drive of the desired 9x12mm head with the receptacle on the wrench body.
- Push the head firmly into place until it clicks and is securely seated.
- Ensure the head is fully engaged and does not wobble before use.

Figura 4: Demonstrates the simple process of installing an interchangeable open-end head onto the torque wrench body.
4.2 Ajuste del valor de torque
To set the desired torque value:
- Descubrir: Slide the red torque locking ring downwards (towards the handle) to unlock the adjustment mechanism.
- Ajustar: Rotate the handle. Turning clockwise increases the torque value, while turning counter-clockwise decreases it. Align the desired value on the main scale with the markings on the handle.
- Cerrar con llave: Slide the red torque locking ring upwards (away from the handle) to lock the set torque value. Ensure it is fully locked before use; the handle should not be able to turn.

Figura 5: Step-by-step guide showing how to unlock, adjust, and lock the torque setting using the red locking ring and rotating handle.
5. Instrucciones de funcionamiento
Once the desired torque value is set and the head is securely attached, you can proceed with tightening fasteners:
- Select the appropriate interchangeable head for your fastener.
- Place the wrench head onto the fastener, ensuring a snug fit.
- Aplicar de forma constante e incremental.asing pressure to the handle in the tightening direction.
- Continue applying pressure until you feel a distinct "click" and a slight release sensation from the wrench head. This indicates that the preset torque value has been reached.
- Immediately stop applying force once the "click" is felt. Over-tightening can damage the fastener or the wrench.
- Retire la llave del sujetador.
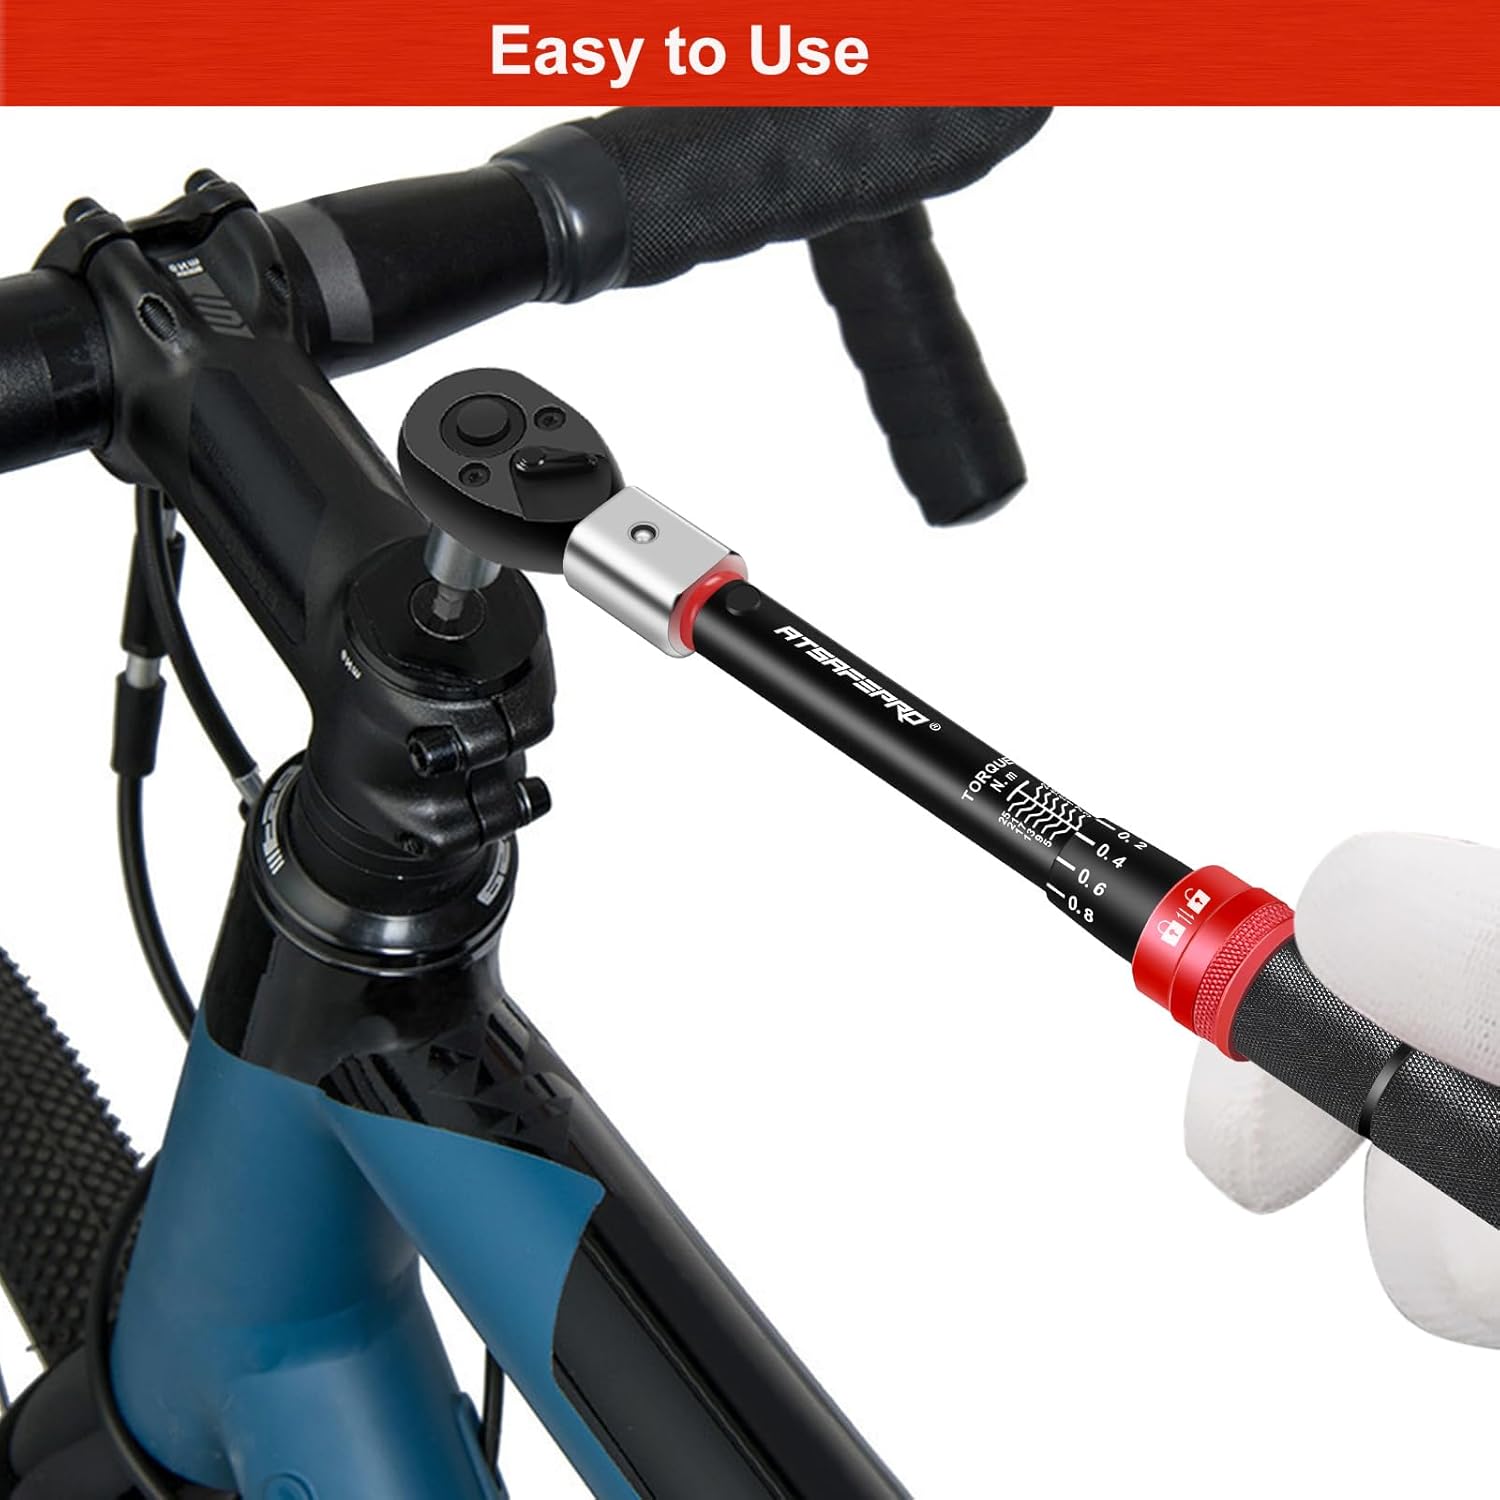
Figura 6: The torque wrench being used to tighten a bolt on a bicycle, demonstrating proper application.
Important: This wrench is designed for tightening only. Do not use it for loosening fasteners.
6. Mantenimiento
- Limpieza: After each use, wipe the wrench clean with a dry, soft cloth. Do not use solvents or harsh chemicals, as these can damage the finish or internal components.
- Almacenamiento: Store the torque wrench in its original protective case in a dry, clean environment. Always set the torque to the lowest setting (3 Nm) before storing to relieve tension on the internal spring, which helps maintain accuracy over time.
- Calibración: Torque wrenches are precision instruments and require periodic calibration to maintain accuracy. It is recommended to have the wrench calibrated annually or after approximately 5,000 cycles of use, whichever comes first.
- Inspección: Regularly inspect the wrench for any signs of damage, wear, or corrosion. Do not use a damaged wrench.
7. Solución de problemas
| Problema | Posible causa | Solución |
|---|---|---|
| La llave no hace "clic" con el torque establecido. |
|
|
| Torque value changes during use. |
|
|
| Interchangeable head is loose. |
|
|
8. Especificaciones
| Característica | Detalle |
|---|---|
| Número de modelo | AT215A002-FT-3NM |
| Marca | ATsafepro |
| Rango de torque | 3-25 Nm (26.6-221.3 lbf.in) |
| Exactitud | ±3% |
| Tipo de cabeza | Interchangeable Open End (9x12mm) |
| Material | Chrome Vanadium Steel (head), Aluminum Alloy (body) |
| Dimensiones (L x An x Al) | 24.5 x 2.5 x 2.5 cm |
| Peso | 360 gramos |
| Modo de funcionamiento | Mecánico |
9. Garantía y soporte
ATsafepro products are manufactured to high-quality standards. For warranty information, technical support, or service inquiries, please refer to the contact information provided with your purchase or visit the official ATsafepro websitio.
Conserve su comprobante de compra para reclamos de garantía.


