Introducción
This manual provides essential information for the safe and efficient use of your vidaXL LED Mirror Bathroom Cabinet. Please read these instructions carefully before assembly and operation, and retain them for future reference.
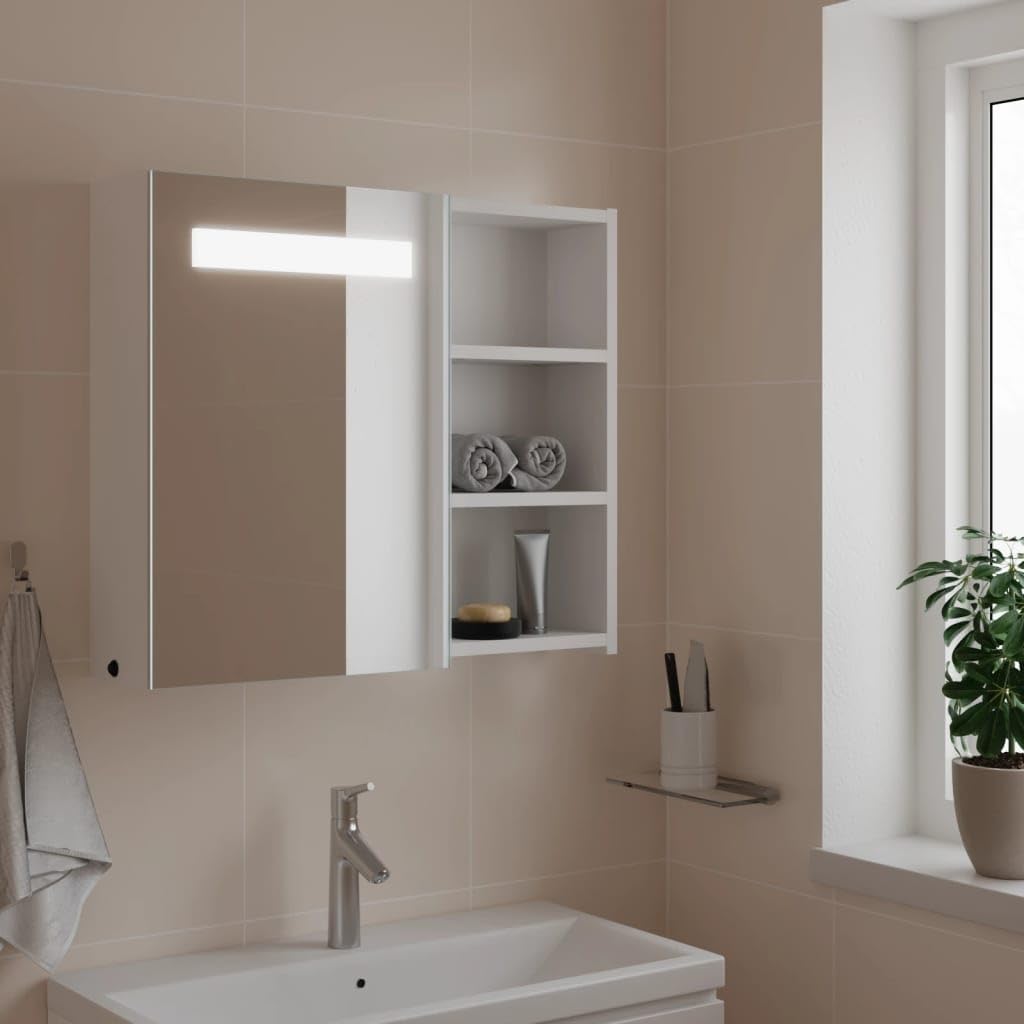
Image: The vidaXL LED Mirror Bathroom Cabinet, showcasing its design and functionality in a bathroom setting.
Información de seguridad
ADVERTENCIA: El incumplimiento de estas instrucciones de seguridad puede provocar lesiones o daños al producto.
- Use screws and wall plugs appropriate for your specific wall type. Consult a professional if you are unsure about suitable fasteners.
- Follow each step of the assembly and installation instructions precisely.
- For the USB port, use a certified 5V USB power source (not included).
- Ensure the cabinet is securely mounted to prevent falling.
Especificaciones del producto
| Característica | Detalle |
|---|---|
| Marca | vidaXL |
| Número de modelo | 357969 |
| Color | Blanco |
| Material | Engineered Wood with Melamine Finish, Glass |
| Dimensiones generales (An. x Pr. x Al.) | 60 x 13 x 52 cm (23.6" x 5.1" x 20.5") |
| Dimensiones del espejo (An x Al) | 38.5 x 52 cm (15.1" x 20.5") |
| Longitud del cable | 1 metros |
| Vol de salidatage | 5 V CC |
| Fuerza | Máx. 10 W |
| Interfaz | USB |
| Características | Fixed shelves, Integrated LED light, On/Off switch, Wall-mountable |
| Peso | 9.35 kilogramos |
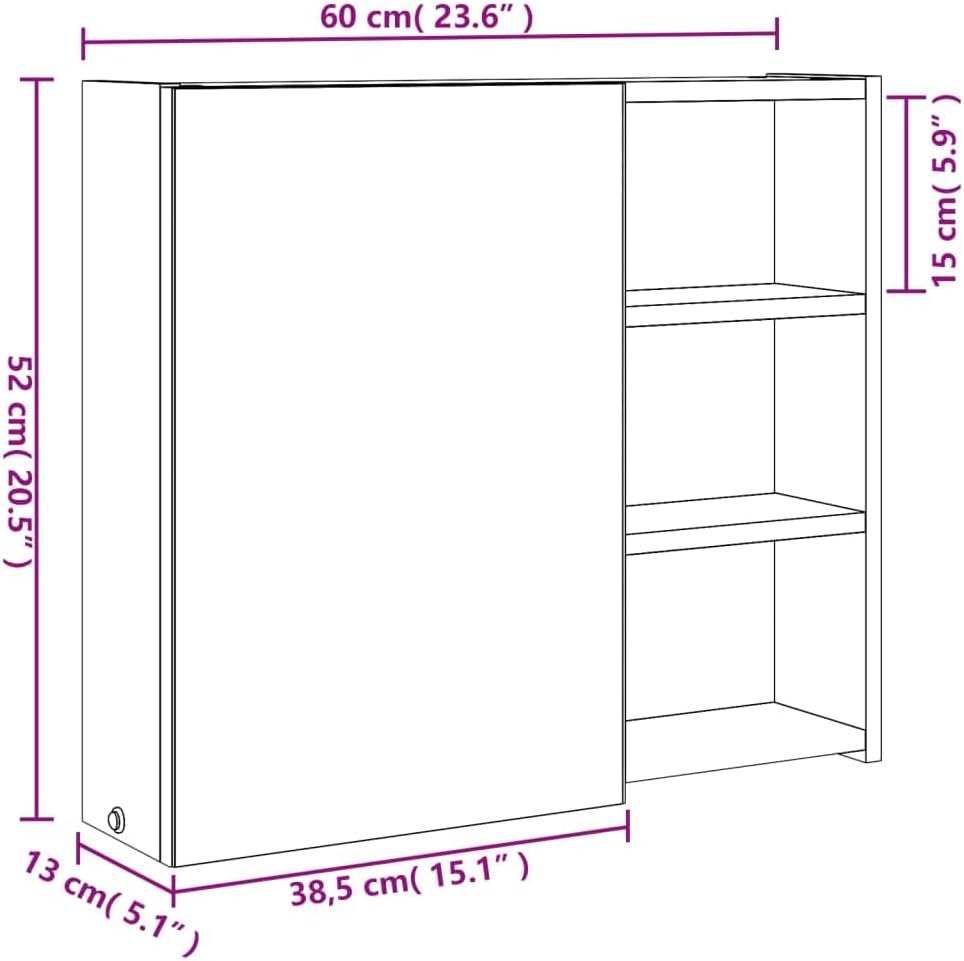
Image: Detailed dimensions of the cabinet for planning installation space.
Configuración e instalación
The cabinet requires assembly and wall mounting. Follow these steps carefully.
1. Desembalaje y verificación de componentes
- Desempaquete con cuidado todos los componentes del embalaje.
- Verify that all parts listed in the assembly instructions (usually provided in the box) are present and undamaged.
- Conserve los materiales de embalaje hasta que se complete el montaje para evitar extraviar piezas pequeñas.
2. Assembly of the Cabinet Structure
Assemble the cabinet body according to the manufacturer's detailed assembly guide included in the package. This typically involves:
- Fijación de paneles laterales a los paneles superior e inferior.
- Inserting fixed shelves into designated slots.
- Asegurando el panel trasero.
- Attaching the mirror door and its hinges.
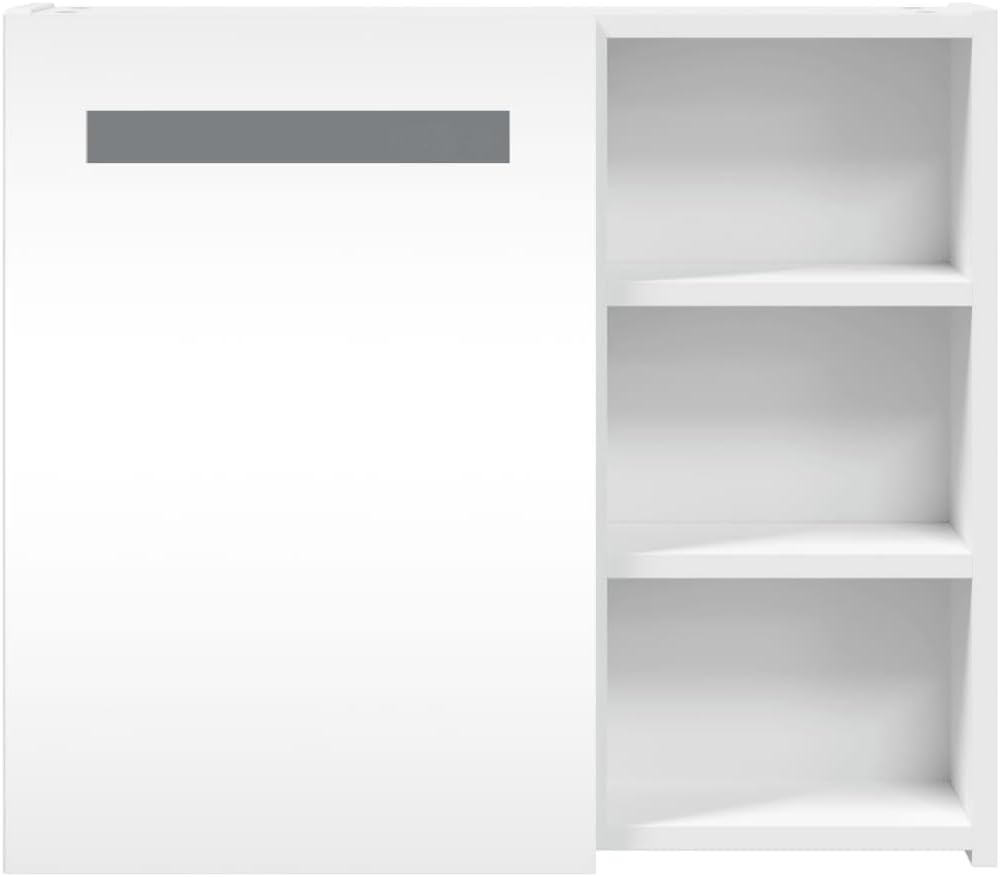
Imagen: Frente view of the assembled cabinet, highlighting the mirror and shelves.
3. Montaje en pared
The cabinet is designed for wall mounting. Proper installation is crucial for safety.
- Elegir la ubicación: Seleccione una ubicación adecuada para la pared de su baño, asegurándose de que esté libre de cables eléctricos o tuberías.
- Medir y marcar: Use the cabinet's dimensions and the pre-drilled mounting points on the back of the cabinet (refer to the image below) to mark the drilling locations on the wall. Ensure marks are level.
- Perforar agujeros: Drill holes at the marked locations using a drill bit appropriate for your wall type (e.g., masonry, drywall).
- Inserte los tacos de pared: Insert appropriate wall plugs into the drilled holes. Note: Screws and wall plugs are not included. Use fasteners suitable for your wall material.
- Adjuntar gabinete: Carefully lift the cabinet and align the mounting brackets on the back with the wall plugs. Secure the cabinet to the wall using appropriate screws. Ensure it is firmly attached and stable.

Imagen: Trasera view of the cabinet, showing mounting brackets for wall installation.
4. Connecting the LED Light
The LED light is powered via a USB connection.
- Locate the USB cable extending from the cabinet.
- Connect the USB cable to a certified 5V USB power source (e.g., a USB wall adapter, not included).
- Asegúrese de que la conexión sea segura.
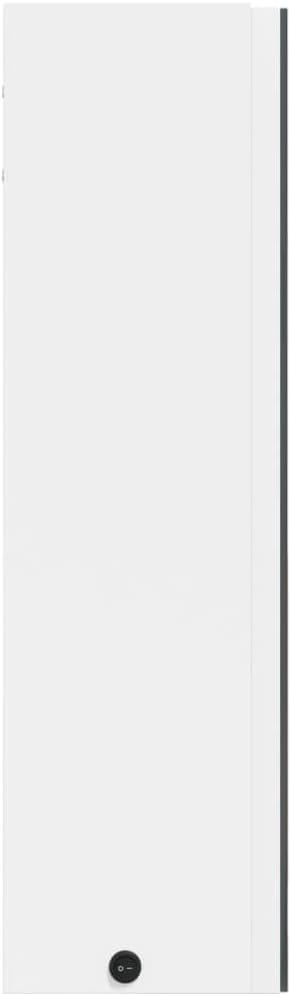
Image: USB port for LED light power connection.
Instrucciones de funcionamiento
The LED light is controlled by an integrated switch.
- Once the USB power source is connected, locate the circular on/off switch on the side of the cabinet.
- Press the switch to turn the LED light ON.
- Press the switch again to turn the LED light OFF.
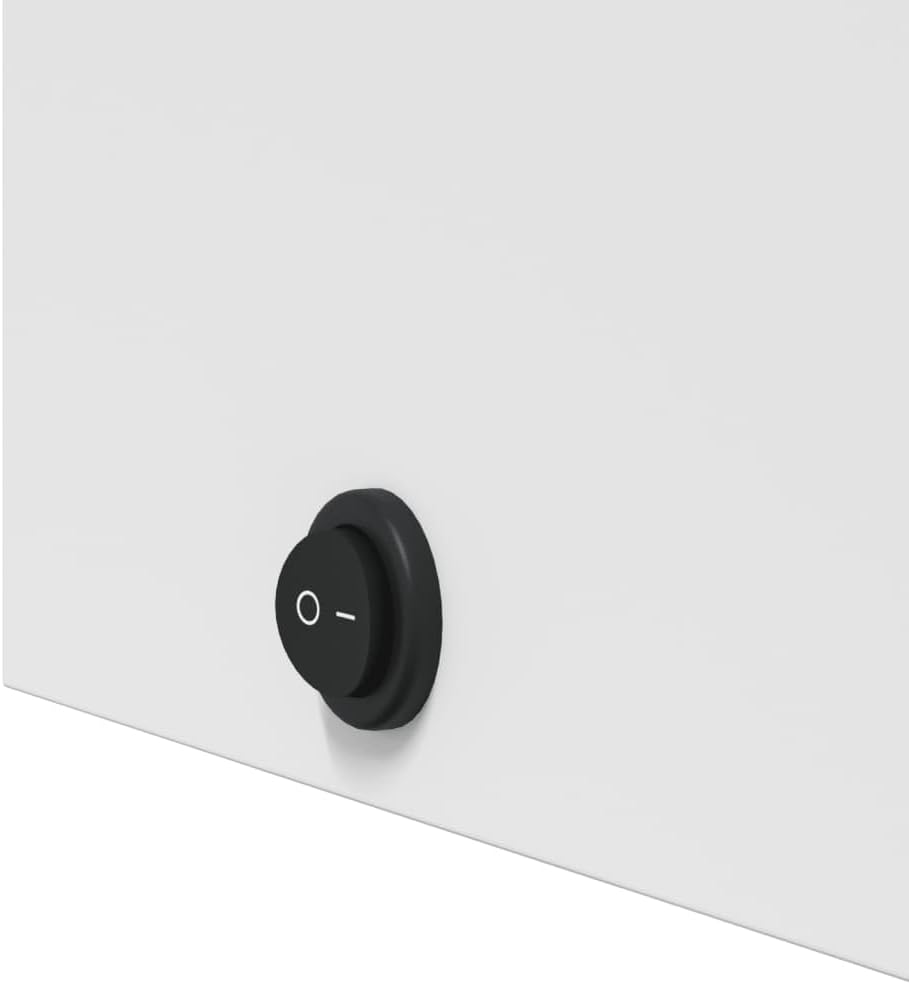
Image: On/Off switch for the integrated LED light.
Mantenimiento
Regular cleaning and care will help maintain the appearance and longevity of your cabinet.
- Limpieza del gabinete: Limpie las superficies con un paño suave yamp cloth. Avoid abrasive cleaners or harsh chemicals, as these can damage the melamine finish.
- Limpiar el espejo: Utilice un limpiador de vidrios estándar y un paño sin pelusa para limpiar la superficie del espejo.
- Cuidado de la luz LED: The LED light strip is integrated. Do not attempt to replace individual LEDs. If the light malfunctions, refer to the troubleshooting section.
- Humedad: While the engineered wood is resistant to humidity, avoid prolonged exposure to excessive moisture. Wipe up spills immediately.
Solución de problemas
If you encounter issues with your cabinet, refer to the following common problems and solutions.
| Problema | Posible causa | Solución |
|---|---|---|
| La luz LED no se enciende. |
|
|
| El gabinete se siente inestable después del montaje. |
|
|
| La puerta del espejo no cierra correctamente. |
|
|
Garantía y soporte
For information regarding warranty terms and conditions, please refer to the documentation provided with your purchase or visit the official vidaXL website. If you require further assistance or have questions not covered in this manual, please contact vidaXL customer support.
Puede encontrar más información y datos de contacto en el Tienda de la marca vidaXL en Amazon.