1. Introducción
Thank you for choosing the Pretul SOIN-110/130P Inverter Welder. This compact and efficient welding machine is designed for both coated electrode (SMAW) and tungsten (TIG) welding processes. It features an automatic BI-VOLTAGE 127-220V adaptation system, ensuring seamless operation across different power inputs without manual adjustments. This manual provides essential information for safe operation, setup, maintenance, and troubleshooting to ensure optimal performance and longevity of your welder.
2. Instrucciones de seguridad
Priorice siempre la seguridad al operar equipos de soldadura. No seguir estas instrucciones puede provocar lesiones graves o la muerte.
- La descarga eléctrica puede matar: No toque piezas eléctricas bajo tensión. Use guantes de soldadura secos y ropa protectora. Aíslese del trabajo y de la tierra.
- Los humos y gases pueden ser peligrosos: Mantenga la cabeza alejada de los vapores. Utilice ventilación o extractor para eliminar los vapores de la zona de respiración.
- Los rayos del arco pueden quemar los ojos y la piel: Use un casco de soldadura con un filtro adecuado. Use gafas de seguridad con protección lateral. Use ropa protectora para cubrir toda la piel expuesta.
- Peligro de incendio y explosión: Remove all flammables from the welding area. Have a fire extinguisher readily available. Do not weld on containers that have held combustibles.
- Las piezas calientes pueden provocar quemaduras graves: Allow the welder and workpieces to cool before handling. Use insulated gloves and tongs.
- Lea el manual completo: Understand all safety warnings and operating procedures before use.
- Uso en un área bien ventilada: Ensure adequate airflow to prevent overheating and fume buildup.
- Puesta a tierra adecuada: Always ensure the welder is properly grounded according to local electrical codes.
3. Contenido del paquete
Desempaque la caja con cuidado y asegúrese de que todos los artículos estén presentes y sin daños. Si falta algún artículo o está dañado, contacte a su proveedor inmediatamente.
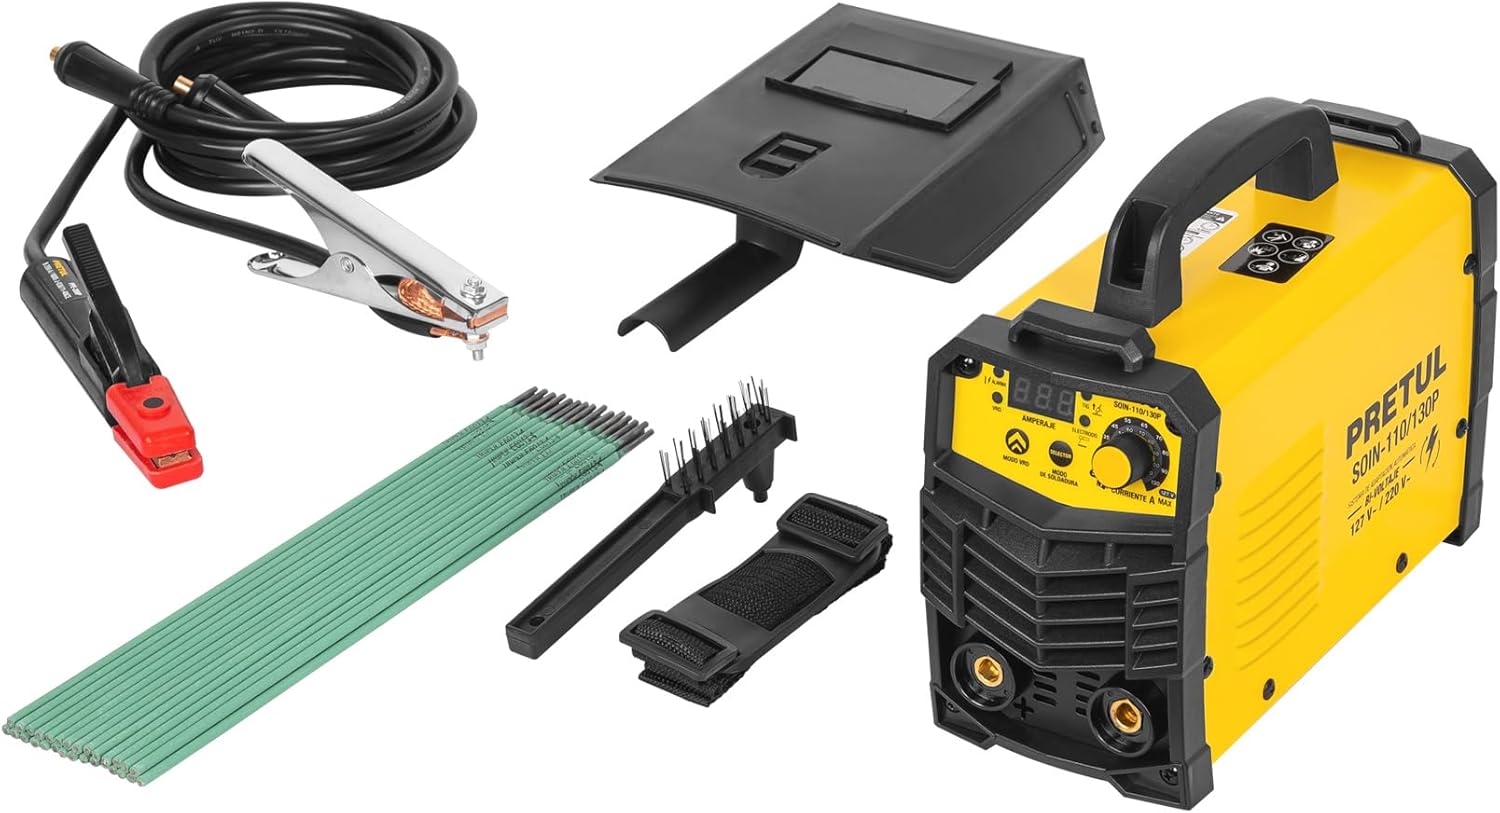
Figure 3.1: Pretul SOIN-110/130P Inverter Welder with all included accessories.
- Pretul SOIN-110/130P Inverter Welder Unit
- Cable de alimentación con enchufe
- 1 kg of 1/8" E6013-4 Electrodes
- Cl de tierraamp Cable (2 m, #5 AWG / 16 mm²)
- Electrode Holder Cable (2 m, #5 AWG / 16 mm²)
- Protective Welding Mask
- Cepillo de alambre
4. Producto terminadoview
Familiarize yourself with the components and controls of your Pretul Inverter Welder.

Figura 4.1: Frente view of the welder with key components labeled.
- Cable de energía: Connects the welder to the electrical supply.
- Interruptor de encendido/apagado: Enciende o apaga la unidad.
- Thermal Protection Light: Illuminates to indicate overheating, activating the thermal protection system.
- Pantalla digital: Shows current settings and other operational information.
- Perilla de ajuste de corriente: Used to precisely set the welding current (Ampedad).
- Quick-Change Terminals (Bornes): 3/8" terminals for quick and secure connection of welding cables.
- Manejar: Para facilitar la portabilidad de la unidad.
Tecnologías clave
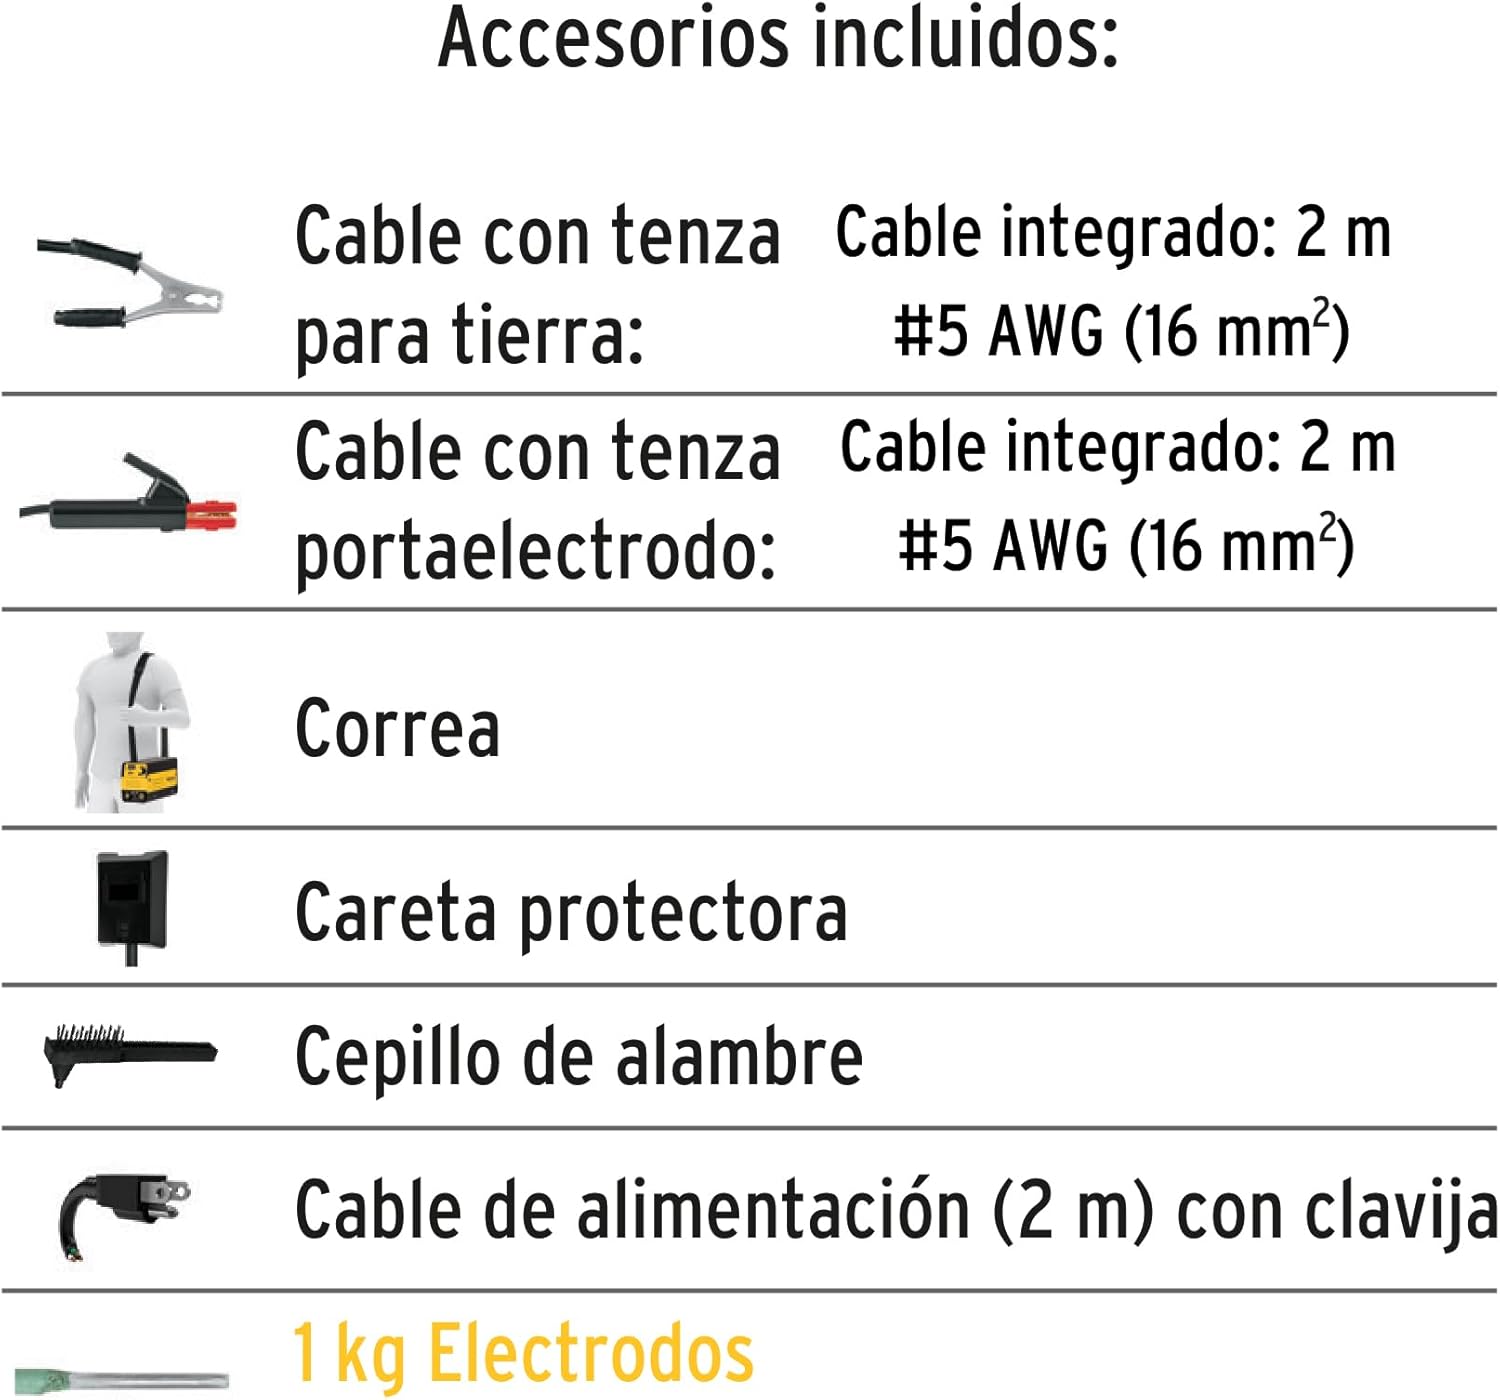
Figura 4.2: Sobreview of integrated welding technologies.
- Tecnología de inversor IGBT: Allows the welder to operate efficiently at any current level, providing a stable arc and reducing power consumption compared to conventional welders.
- Thermal Protect: An integrated protection system that safeguards the machine from overheating due to prolonged use or excessive load. The thermal protection light will illuminate when active.
- Fuerza del arco: Automatically adjusts the optimal arc value, enabling stable welding and allowing for welding in various positions.
- Antiadherente: Prevents the electrode from sticking to the workpiece, reducing overheating and making it easier to restart the arc.
- Arranque en caliente: Facilitates easy arc ignition by providing a temporary increase in current at the start of welding.
5. Especificaciones técnicas
Below are the detailed technical specifications for the Pretul SOIN-110/130P Inverter Welder.
| Característica | Especificación |
|---|---|
| Número de modelo | 29959 |
| Vol de entradatage | BI-VOLTAGE 127V / 220V (Automatic Adaptation) |
| Current Range (1 Phase) | 20 A DC - 110 A DC |
| Current Range (2 Phases) | 20 A DC - 130 A DC |
| Procesos de soldadura | SMAW (Coated Electrode), TIG (Tungsten) |
| Electrode Compatibility (SMAW) | 6013, 6011 (Up to 5/32"), 7018 (Up to 1/8") |
| Tungsten Electrode Compatibility (TIG) | 1 mm (0.039") |
| Quick-Change Terminals | 3/8" |
| Dimensiones (paquete) | 36 x 27 x 22 cm |
| Peso (Paquete) | 6.24 kilogramos |
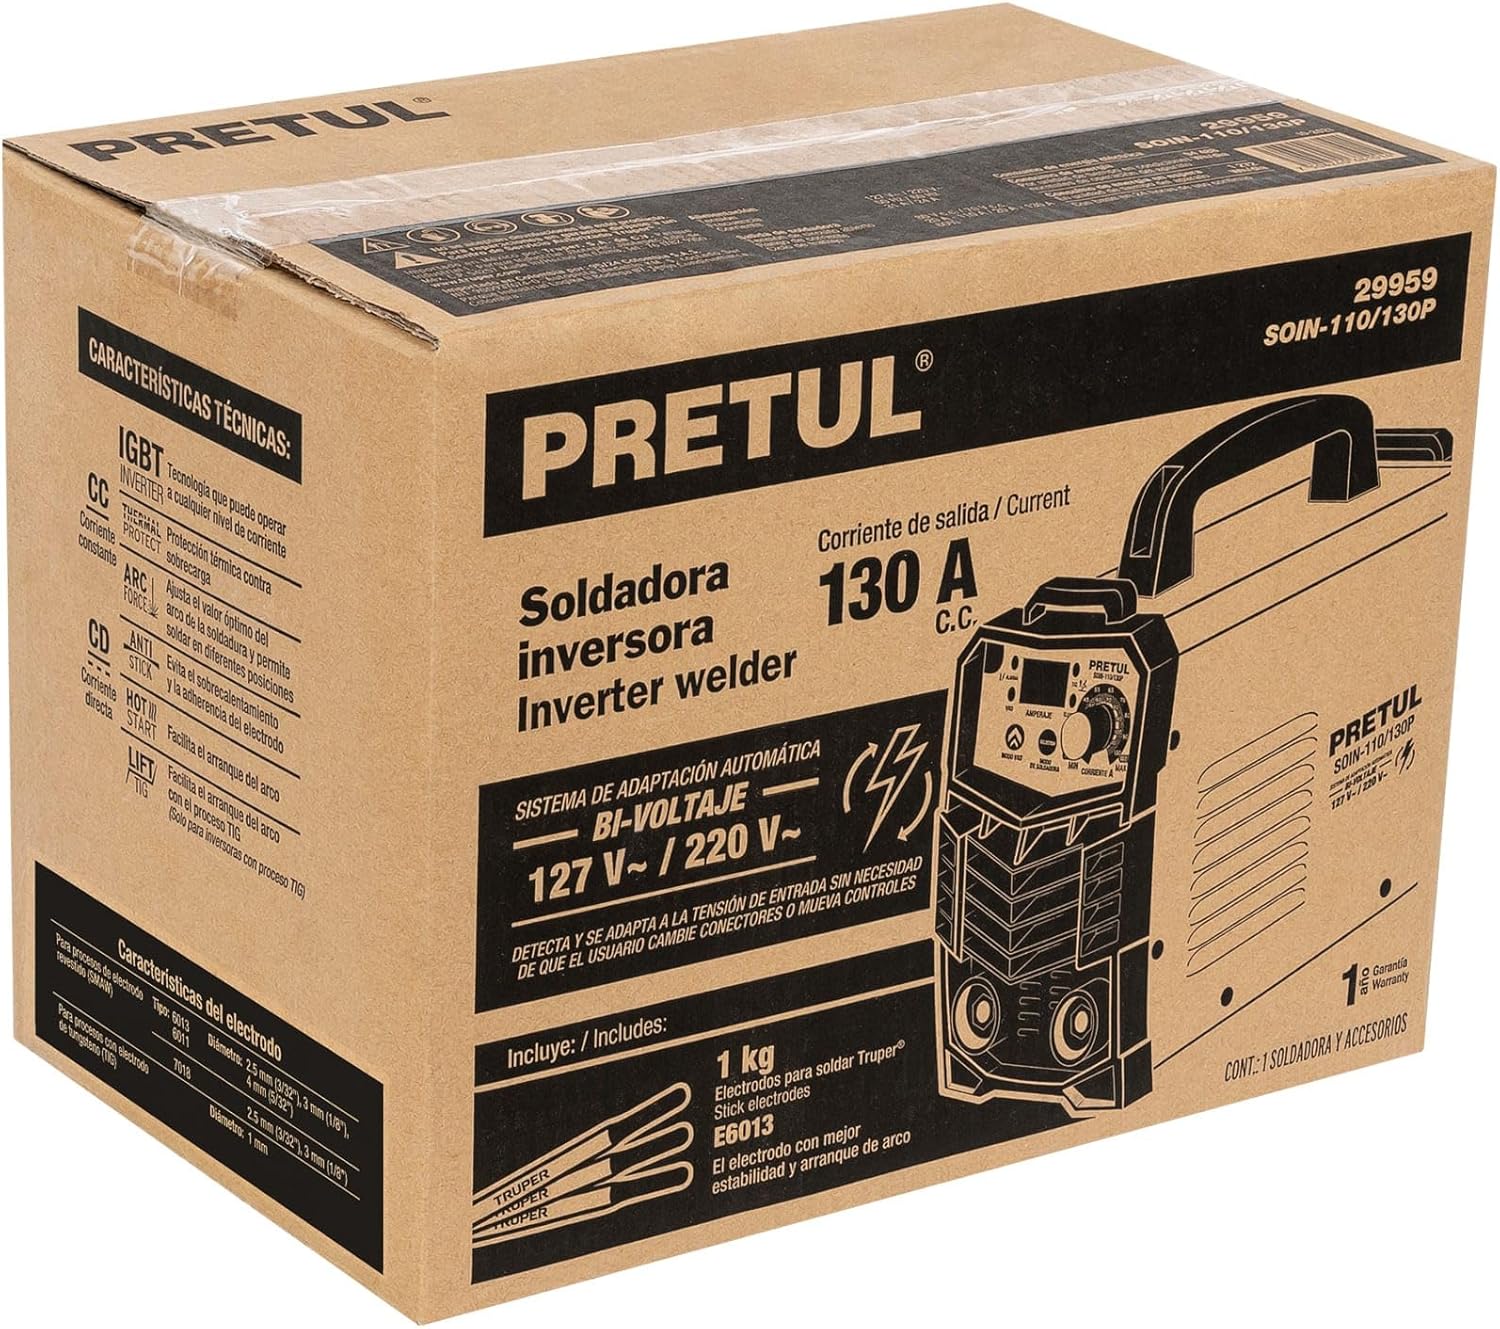
Figure 5.1: Electrode compatibility chart.
6. Configuración
Follow these steps to set up your Pretul Inverter Welder for operation.
- Elija una ubicación adecuada: Select a dry, well-ventilated area free from flammable materials. Ensure stable footing for the welder.
- Conectar la conexión a tierraamp: Adjuntar el suelo clamp cable to the negative (-) quick-change terminal on the welder. Securely attach the ground clamp a la pieza de trabajo o a una parte metálica limpia y desnuda de la mesa de soldadura, asegurando un buen contacto eléctrico.
- Conectar el portaelectrodos: For SMAW (stick welding), attach the electrode holder cable to the positive (+) quick-change terminal. Insert the appropriate electrode into the holder. For TIG welding, connect the TIG torch (not included) to the appropriate terminal and gas supply.
- Conexión de energía: Ensure the welder's ON/OFF switch is in the OFF position. Plug the power cable into a suitable 127V or 220V electrical outlet. The welder will automatically detect and adapt to the input voltage.
- Prepárese para soldar: Put on all necessary personal protective equipment (PPE), including a welding helmet, gloves, and protective clothing.
7. Instrucciones de funcionamiento
Once the welder is set up, follow these steps for safe and effective operation.
- Encendido: Turn the ON/OFF switch to the ON position. The digital display will illuminate.
- Establecer corriente: Use the current adjustment knob to set the desired amperage for your welding task. Refer to electrode manufacturer recommendations or a welding chart for appropriate settings.
- Empezar a soldar: Bring the electrode into contact with the workpiece to initiate the arc. The Hot Start feature will assist in easy arc ignition. Maintain a consistent arc length and travel speed.
- Monitor Thermal Protection: If the thermal protection light illuminates, stop welding immediately. Allow the machine to cool down before resuming operation. Do not bypass this safety feature.
- Soldadura de acabado: When finished, turn the welder off. Allow the workpiece and electrode holder to cool before handling.
- Limpiar: Use the wire brush to clean slag from the weld.
Consejos de soldadura:
- Practice on scrap metal to get a feel for the machine and settings.
- Maintain a consistent arc length for a stable weld.
- Ajustar amperage based on material thickness and electrode type.
- Ensure good ventilation to disperse welding fumes.
8. Mantenimiento
El mantenimiento regular garantiza la longevidad y el funcionamiento seguro de su soldadora.
- Limpieza: Regularly clean the exterior of the welder with a dry cloth. Use compressed air to blow out dust and debris from the ventilation openings. Ensure the welder is unplugged before cleaning.
- Inspección de cables: Periodically inspect all cables (power, ground, electrode) for cuts, fraying, or damaged insulation. Replace damaged cables immediately.
- Comprobación de terminal: Ensure quick-change terminals are clean and free of corrosion. Tighten connections as needed.
- Almacenamiento: Guarde la soldadora en un entorno seco y limpio, alejado de la luz solar directa y de temperaturas extremas.
- Servicio profesional: For internal cleaning or repairs, always consult a qualified service technician. Do not attempt to open the welder casing tú mismo.
9. Solución de problemas
Esta sección aborda problemas comunes que puede encontrar con su soldadora.
| Problema | Posible causa | Solución |
|---|---|---|
| El soldador no se enciende. | No hay fuente de alimentación; cable de alimentación defectuoso; fusible interno fundido. | Check power outlet and connections. Inspect power cable for damage. If problem persists, seek professional service. |
| La luz de protección térmica está encendida. | Overheating due to prolonged use or insufficient ventilation. | Stop welding and allow the machine to cool down. Ensure proper ventilation around the unit. |
| Arc is difficult to strike or unstable. | Incorrecto ampconfiguración de media; mala conexión a tierra; damp or incorrect electrode; worn electrode holder. | Ajustar amperage. Ensure ground clamp has good contact. Use dry, appropriate electrodes. Check electrode holder for wear. |
| El electrodo se pega a la pieza de trabajo. | Bajo amperage setting; improper arc length; Anti Stick feature not functioning. | Aumentar amperage. Practice maintaining proper arc length. If Anti Stick is not working, professional service may be required. |
| Poor weld quality (porosity, spatter). | Incorrect settings; dirty workpiece; improper technique; damp electrodos. | Ajustar amperage and travel speed. Clean workpiece thoroughly. Use proper welding technique. Ensure electrodes are dry. |
10. Garantía y soporte
Pretul products are manufactured to high-quality standards and are backed by a manufacturer's warranty against defects in materials and workmanship. Please refer to the warranty card included with your product for specific terms and conditions, or visit the official Pretul websitio para obtener información detallada sobre la garantía.
For technical support, service, or to inquire about replacement parts, please contact Pretul customer service through their official channels. Keep your purchase receipt as proof of purchase for warranty claims.
Soporte en línea: www.pretul.com.mx (Nota: Este es un marcador de posición URL, consulte la marca real web(Sitio para soporte.)


