1. Introducción
This manual provides essential instructions for the safe and efficient operation of your GROVIEW Miniproyector Bluetooth, Modelo Groview-B2D-US. Please read this manual thoroughly before using the projector and retain it for future reference.
el Groview-B2D-US is a compact and portable projector featuring electric focus, Bluetooth 5.1 connectivity, and a fully sealed optical engine designed for reduced noise and extended lifespan. It supports Full HD 1080P input with a native 720P resolution and offers a digital zoom function.
2. Información de seguridad
- No mire directamente a la lente del proyector cuando la lamp Está encendido.
- Asegúrese de que haya una ventilación adecuada alrededor del proyector para evitar el sobrecalentamiento. No bloquee las aberturas de ventilación.
- Utilice únicamente el adaptador de corriente suministrado con el proyector.
- No exponga el proyector a la lluvia, la humedad o temperaturas extremas.
- Evite colocar el proyector sobre superficies inestables.
- No intente desmontar ni reparar el proyector usted mismo. Contacte con personal de servicio técnico cualificado para obtener ayuda.
- Mantenga el proyector alejado de los niños y las mascotas.
3. ¿Qué hay en la caja?
Verifique que todos los artículos estén presentes en el embalaje:
- 1 x Groview Electric Focus Projector
- 1 cable HDMI
- 1 x Cable de Alimentación
- 1 x control remoto
- 1 x Manual de usuario (este documento)
4. Producto terminadoview
4.1 Componentes del proyector
The following image illustrates the main components of the Groview Mini Projector.

4.2 Puertos de entrada/salida
The rear panel of the projector features various ports for connecting external devices.
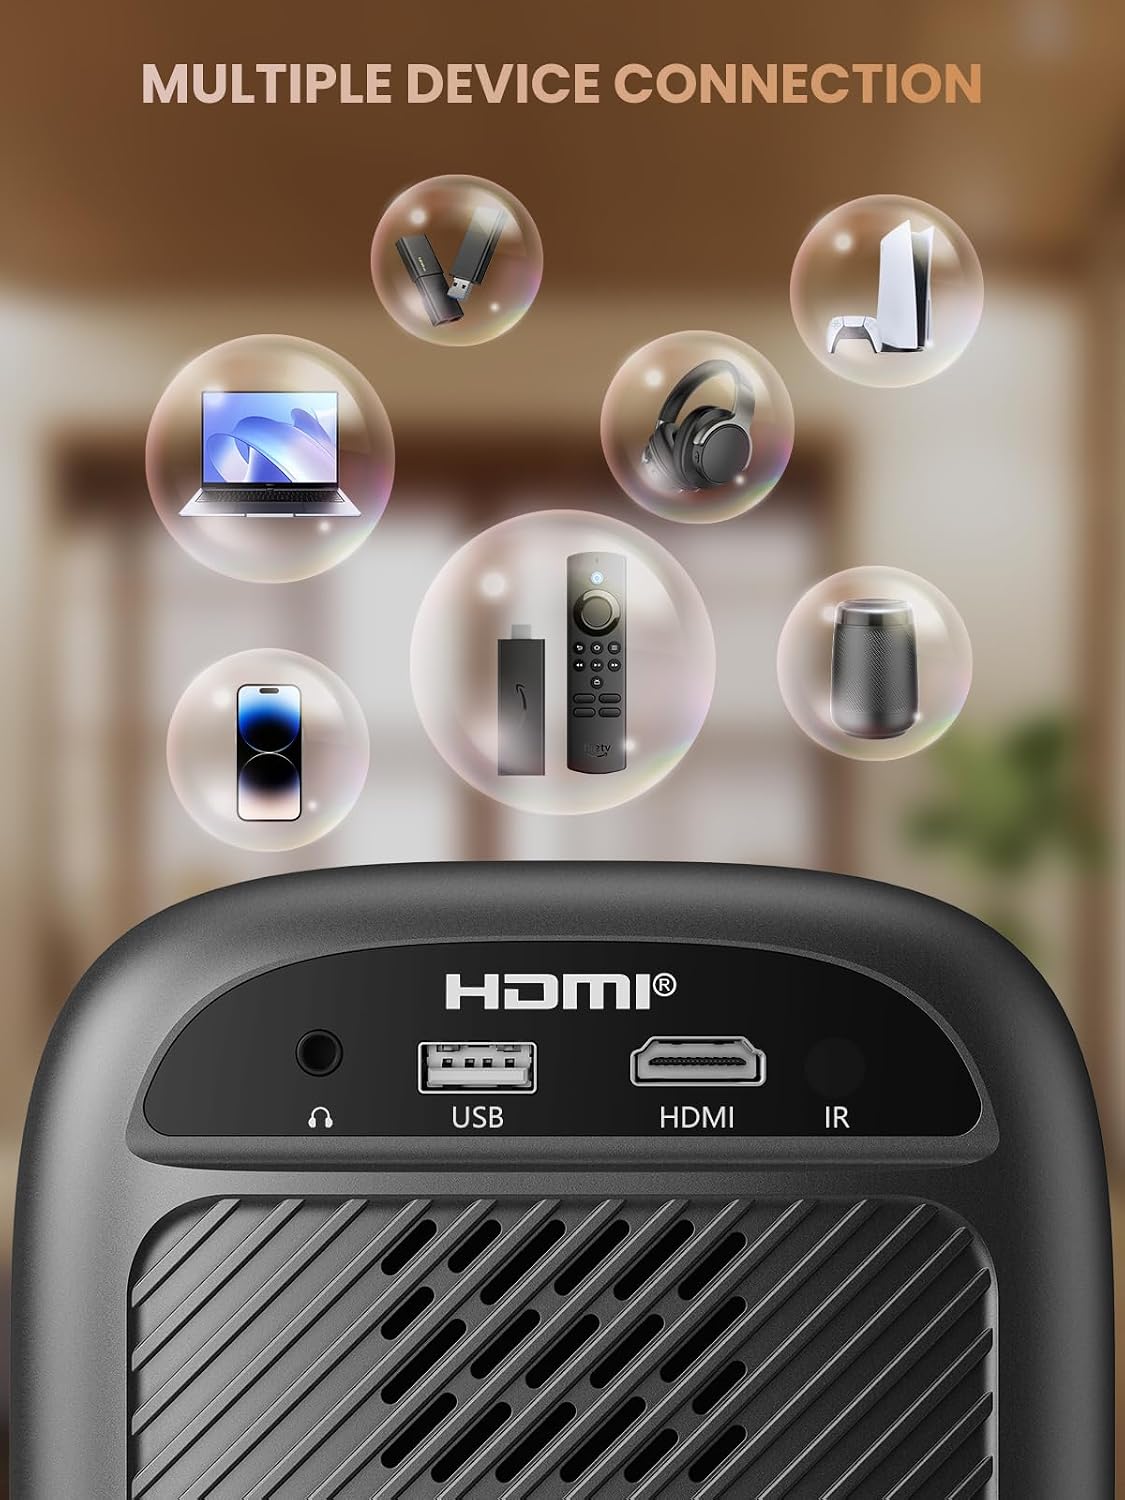
- Puerto HDMI: Connects to devices such as TV sticks, laptops, game consoles, and Blu-ray players.
- Puerto USB: Se conecta a unidades flash USB para reproducción multimedia.
- Audio Port (3.5mm Jack): Se conecta a altavoces externos o auriculares.
- Receptor IR: Para señales de control remoto.
5. Configuración
5.1 Conexión de alimentación
- Conecte el cable de alimentación a la entrada de alimentación del proyector.
- Conecte el otro extremo del cable de alimentación a una toma de corriente.
5.2 Ubicación del proyector
Place the projector on a stable, flat surface. For optimal image quality, position the projector perpendicular to the projection surface (wall or screen). The projector can create a large image from a relatively short distance.
5.3 Ajuste de enfoque
el Groview-B2D-US features electric focus, allowing for precise image clarity adjustment using the remote control.

- Encienda el proyector.
- Point the remote control at the projector.
- Press the dedicated focus buttons (usually marked with 'F+' and 'F-' or similar icons) on the remote until the projected image is sharp and clear.
5.4 Corrección trapezoidal
The projector includes a keystone adjustment slider on the rear panel. This allows you to correct trapezoidal distortion if the projector is not perfectly aligned with the screen. Adjust the slider until the image appears rectangular.
5.5 Encendido inicial
Presione el botón de encendido del proyector o el control remoto para encender el dispositivo. El proyector se encenderá y mostrará la interfaz principal.
6. Instrucciones de funcionamiento
6.1 Conexión de dispositivos
El proyector ofrece múltiples opciones de conectividad:
- HDMI: Connect an HDMI cable from your source device (e.g., TV Stick, laptop, game console) to the projector's HDMI port. Select the HDMI input source from the projector's menu.
- USB: Inserte una unidad flash USB en el puerto USB. El reproductor multimedia del proyector normalmente detectará la unidad automáticamente, lo que le permitirá explorar y reproducir archivos multimedia compatibles. files.
- Bluetooth 5.1: Conéctese a altavoces o auriculares Bluetooth externos para disfrutar de un audio mejorado.

- Habilite Bluetooth en su dispositivo de audio externo y configúrelo en modo de emparejamiento.
- En el proyector, navegue hasta el menú de configuración de Bluetooth.
- Seleccione su dispositivo de la lista de dispositivos disponibles para emparejar.
Note: Bluetooth does not support smartphone mirroring.
6.2 Smartphone Connection Methods
To connect a smartphone, an adapter is required:

- Dispositivos iOS: Utilice un cable adaptador Lightning a HDMI.
- Dispositivos Android: Use a Micro USB/Type C to HDMI adapter cable or a Google Chromecast.
6.3 Navegación y menú
Use the arrow buttons on the remote control to navigate through the projector's on-screen menu. The 'OK' or 'Enter' button confirms selections, and the 'Back' or 'Return' button goes back to the previous menu.
6.4 Función de zoom digital
The projector features a digital zoom function, allowing you to adjust the image size from 75% to 100% without moving the projector.

Access the zoom settings through the projector's menu and use the remote control to adjust the desired size.
6.5 Uso del control remoto
The included remote control operates the projector's functions. Ensure batteries are correctly installed. Note: A coin may be needed to open the battery compartment.
7. Mantenimiento
7.1 Limpieza
- Lente: Limpie suavemente la lente con un paño suave y sin pelusa, especialmente diseñado para superficies ópticas. No utilice limpiadores abrasivos.
- Exterior: Limpie el exterior del proyector con un paño suave y seco. Para manchas difíciles, utilice un paño ligeramente seco.amp Se puede utilizar un paño y luego uno seco.
7.2 Diseño a prueba de polvo
el Groview-B2D-US features a fully sealed optical engine, which helps prevent dust and debris from entering the projector and affecting image quality or lifespan.

7.3 Almacenamiento
Cuando no lo use, guarde el proyector en un lugar fresco y seco, alejado de la luz solar directa y de temperaturas extremas. Use la tapa de la lente para protegerla del polvo y los arañazos.
8. Solución de problemas
- Sin imágen: Check power connection, input source selection, and ensure the lens cap is removed. Verify the connected device is powered on and outputting a signal.
- Imagen borrosa: Adjust the electric focus using the remote control. Ensure the projector is placed at an appropriate distance from the screen.
- Sin sonido: Verifique la configuración de volumen tanto del proyector como del dispositivo fuente conectado. Si usa Bluetooth, asegúrese de que el dispositivo de audio externo esté correctamente emparejado y tenga el volumen alto.
- El control remoto no funciona: Revise las baterías del control remoto y asegúrese de que no haya obstrucciones entre el control remoto y el receptor IR del proyector.
- Advertencia de sobrecalentamiento: Ensure ventilation openings are not blocked. Turn off the projector and allow it to cool down before restarting.
For further assistance, please contact Groview Atención al cliente.
9. Especificaciones
| Característica | Especificación |
|---|---|
| Marca | Groview |
| Número de modelo | Groview-B2D-US |
| Resolución nativa | 1280 x 720 píxeles |
| Resolución admitida | 1080P Full HD |
| Tecnología de conectividad | Conector de 3.5 mm, Bluetooth 5.1, HDMI, USB |
| Características especiales | Electric Focus, Fully Sealed Optical Engine, Mini size & Lightweight, 150" Display, Digital Zoom (75%-100%) |
| Usos recomendados | Interior/exterior |
| Peso del artículo | 2.99 libras |
| Dimensiones del producto | 4.8 x 5.7 x 6.9 pulgadas |
| Color | Gris |
10. Garantía y soporte
Groview products are designed for reliability and performance. For information regarding warranty coverage and customer support, please refer to the warranty card included with your purchase or visit the official Groview website. Our service team is available to assist with any product-related inquiries.


