1. Introducción
The DEERSYNC M-BRIO MIDI CC Controller is a versatile and portable device designed to enhance your digital audio workstation (DAW), virtual instruments, effects, video, and lighting applications. It provides precise control over various parameters, allowing for dynamic expression and variation in your compositions. This manual will guide you through the setup, operation, and maintenance of your M-BRIO controller.

Figure 1.1: DEERSYNC M-BRIO MIDI CC Controller.
2. Características principales
- Universal portable and customizable MIDI remote control for DAWs, instruments, effects, video, and lighting applications.
- Plug and Play functionality, requiring no drivers or complex editor applications for in-depth configuration.
- Sophisticated and robust state-of-the-art CNC aluminum chassis for durability.
- Wide compatibility with macOS, Windows, iOS, and Android operating systems.
- Eight layer modes for easy switching and preset selection, with automatic memorization of the last preset for each layer.
- Eight infinite encoding click-and-turn LED buttons for precise adjustment of parameters.
- Two 100mm premium faders for smooth control.
3. Contenido del paquete
Please verify that all items are present in your M-BRIO package:
- DEERSYNC M-BRIO MIDI CC Controller
- Cable USB-C a USB-A
- Manual de usuario (este documento)
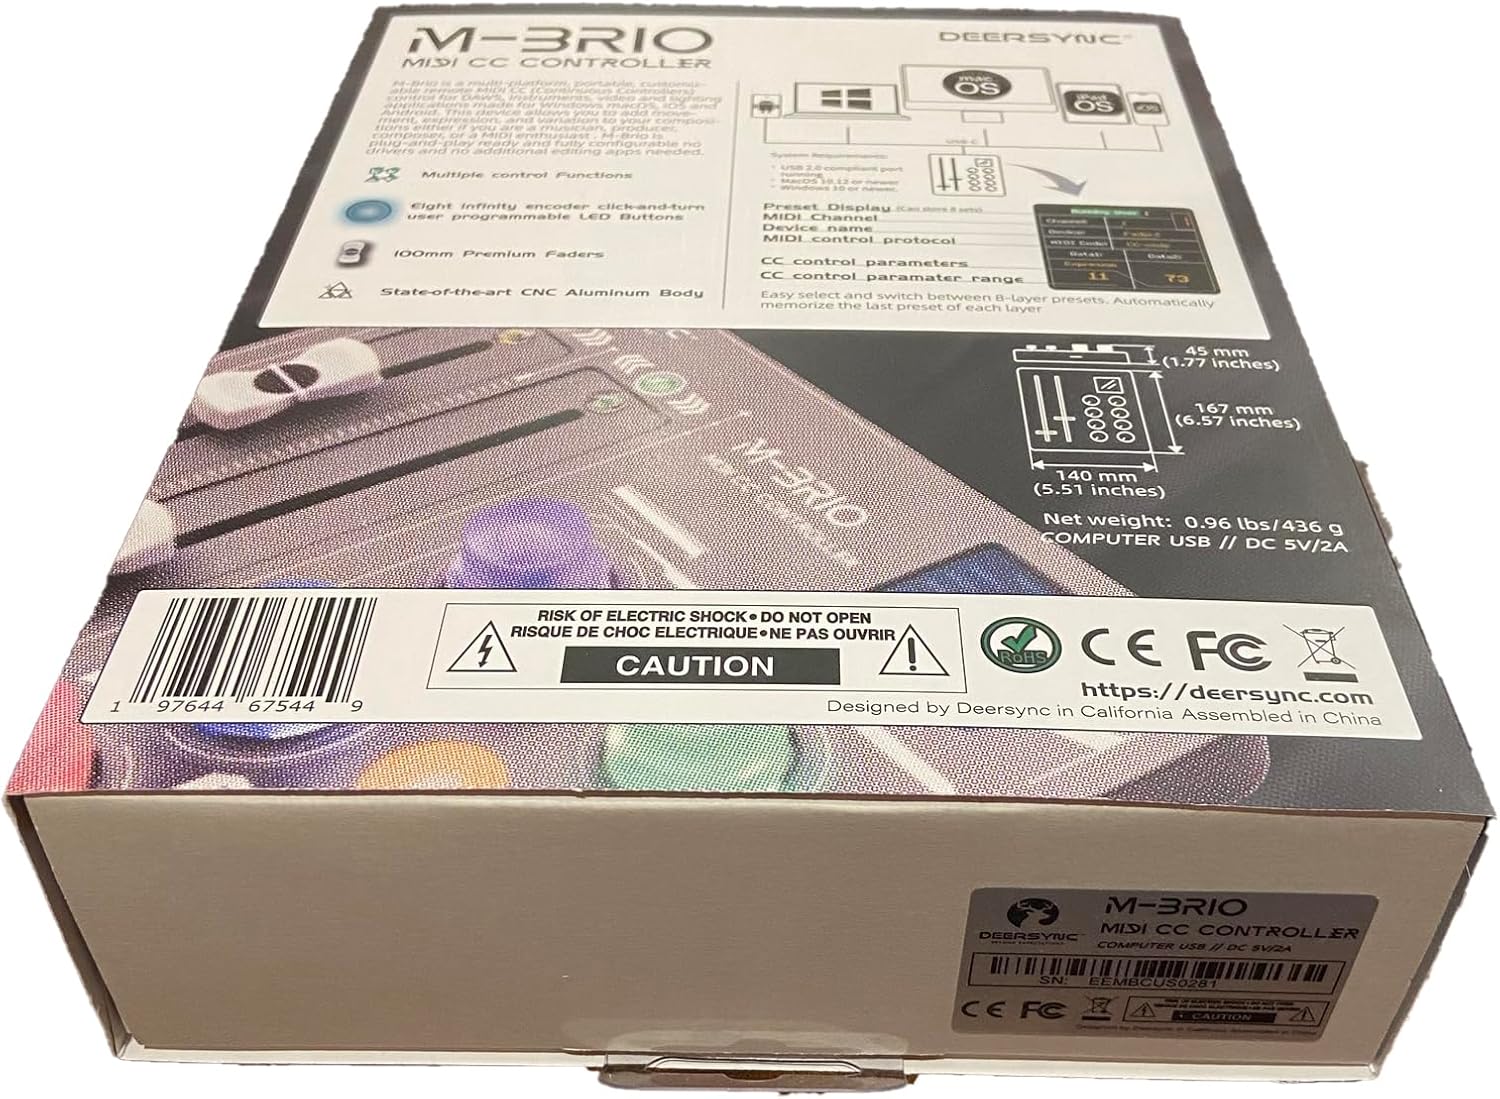
Figure 3.1: M-BRIO MIDI CC Controller retail packaging.
4. Configuración
4.1 Connecting the M-BRIO
The M-BRIO controller is designed for plug-and-play operation. Follow these steps to connect your device:
- Connect one end of the provided USB-C cable to the USB-C port on the M-BRIO controller.
- Connect the other end of the USB-A cable to an available USB port on your computer (macOS or Windows), iOS device, or Android device.
- The M-BRIO will power on automatically and be recognized by your operating system as a standard MIDI device. No additional drivers are required.

Figure 4.1: M-BRIO connected via USB-C.
4.2 Configuración de software
Once connected, open your preferred DAW (Digital Audio Workstation), instrument, or lighting software. The M-BRIO should appear as an available MIDI input device. Refer to your software's documentation for specific instructions on how to assign MIDI Continuous Controller (CC) messages to parameters.
The M-BRIO transmits standard MIDI CC messages, making it compatible with a wide range of applications without complex setup.
5. Operating the M-BRIO
The M-BRIO features two 100mm faders and eight infinite rotary encoders with LED feedback. It also includes an OLED display for parameter visualization and eight layer modes for enhanced control.
5.1 Faders (F1, F2)

The two 100mm faders (labeled F1 and F2) provide smooth, high-resolution control over assigned parameters. These are typically used for volume, expression, or other continuous values in your software.
- Movimiento: Slide the fader up or down to adjust the corresponding parameter.
- Asignación: Assign these faders to specific MIDI CC messages within your software.
Figure 5.1: M-BRIO Faders.
5.2 Rotary Encoders (1-8)

The M-BRIO features eight infinite rotary encoders, each with an integrated LED button. These encoders provide precise, continuous control and can also be pressed to trigger actions.
- Rotación: Turn the encoder clockwise or counter-clockwise to adjust parameters. Being "infinite" means they do not have physical start/end points, allowing for continuous adjustment.
- Función de clic: Press the encoder down to activate a secondary function, such as resetting a parameter, toggling an effect, or selecting an option.
- Retroalimentación del LED: The LEDs around each encoder provide visual feedback, often indicating the current value or status of the assigned parameter.
Figure 5.2: M-BRIO Rotary Encoders.
5.3 Layer Modes and Presets
The M-BRIO supports 8-layer modes, allowing you to switch between different sets of assignments for the faders and encoders. This expands the controller's versatility, enabling you to control numerous parameters without re-mapping.
- Switching Layers: Use the dedicated layer selection buttons or a combination of button presses (refer to the device's display or quick guide for specific commands) to cycle through the 8 layers.
- Automatic Memorization: The M-BRIO automatically memorizes the last preset used for each layer, ensuring your settings are retained when switching between layers.

Figure 5.3: M-BRIO with illuminated encoders, indicating active layer or parameter status.
5.4 Pantalla OLED

The integrated OLED display provides real-time information about the current MIDI channel, device, MIDI code, and data values being transmitted. This helps in monitoring and confirming your controller assignments.
- Monitoreo de parámetros: Observe the display to see which parameters are being controlled and their current values.
- Configuración Acceso: The display also allows access to basic settings and configuration options, such as defining user presets.
Figure 5.4: M-BRIO OLED Display showing active parameters.

Figure 5.5: M-BRIO OLED Display showing settings menu.
5.5 Demostración en vídeo
Watch this video to see the DEERSYNC M-BRIO MIDI CC Controller in action, demonstrating its use in a music production environment.
Video 5.1: Demonstration of the M-BRIO MIDI CC Controller in a studio setup.
6. Mantenimiento
6.1 Limpieza
To maintain the appearance and functionality of your M-BRIO controller:
- Limpie la superficie con un paño suave, seco y sin pelusa.
- Para marcas difíciles, ligeramente dampEnjuague el paño con agua. Evite usar productos químicos agresivos, disolventes o limpiadores abrasivos.
- Ensure no liquid enters the fader slots, encoder bases, or USB port.
6.2 Almacenamiento
When not in use, store the M-BRIO in a cool, dry place away from direct sunlight and extreme temperatures. Protect it from dust and physical impact.
7. Solución de problemas
| Problema | Posible causa | Solución |
|---|---|---|
| El dispositivo no se enciende. | USB cable not connected or faulty; USB port not providing power. | Ensure the USB cable is securely connected to both the M-BRIO and your computer/device. Try a different USB port or cable. |
| Dispositivo no reconocido por la computadora/DAW. | Incorrect USB connection; software not configured to recognize MIDI device. | Verify USB connection. Check your DAW's MIDI settings to ensure the M-BRIO is enabled as an input device. Restart your computer and DAW. |
| Faders/Encoders not controlling parameters. | MIDI CC assignments not configured in software; incorrect layer selected. | Ensure the correct layer is active on the M-BRIO. Verify that MIDI CC messages are correctly assigned to parameters within your software. |
| LEDs not responding. | Device malfunction; specific software settings. | Check if the device is otherwise functional. Some software may override LED behavior. If persistent, contact support. |
8. Especificaciones
| Característica | Detalle |
|---|---|
| Número de modelo | M-BRIO |
| Conectividad | USB-C (USB bus powered) |
| Controles | 2 x 100mm Faders, 8 x Infinite Rotary Encoders with LED Buttons |
| Mostrar | Pantalla OLED |
| Capas | 8 Layer Modes with automatic preset memorization |
| Compatibilidad | macOS, Windows, iOS, Android |
| Material | CNC Aluminum Chassis |
| Dimensiones | 140mm (W) x 167mm (D) x 45mm (H) (approx. 5.51 x 6.57 x 1.77 inches) |
| Peso | 0.96 libras/436 gramos |
| Entrada de potencia | CC 5 V/2 A (a través de USB) |
9. Garantía y soporte
9.1 Información de garantía
The DEERSYNC M-BRIO MIDI CC Controller comes with a 3-year warranty program. Please retain your proof of purchase for warranty claims. The warranty covers manufacturing defects and malfunctions under normal use. It does not cover damage caused by misuse, accidents, unauthorized modifications, or improper maintenance.
9.2 Atención al cliente
For technical assistance, troubleshooting, or warranty inquiries, please contact DEERSYNC customer support. Refer to the official DEERSYNC websitio o embalaje del producto para obtener la información de contacto más actualizada.
When contacting support, please have your product model number (M-BRIO) and proof of purchase readily available.