1. Introducción
This manual provides detailed instructions for assembling, operating, and maintaining your ROBOTIME Sakura Journey 3D Wooden Tram Model Kit. This DIY model building toy features intricate wooden pieces, a movable tram, and integrated LED lighting to create a charming diorama scene.

Image 1.1: The fully assembled ROBOTIME Sakura Journey 3D Wooden Tram Model Kit.
2. Información de seguridad
- Este producto contiene piezas pequeñas y no es apto para niños menores de 3 años debido al riesgo de asfixia.
- Se recomienda la supervisión de un adulto durante el montaje.
- Handle wooden pieces with care to prevent breakage.
- Mantener alejado de llamas abiertas o fuentes de calor elevado.
- No ingiera ninguna parte del kit.
3. Contenido del paquete
Verify that all components are present before beginning assembly. The kit includes:
- Pre-cut wooden sheets for the tram, scenery, and base.
- LED light components.
- Folleto de instrucciones de montaje.
- Other small accessories for decoration.

Imagen 3.1: Másview of the kit contents, showing the wooden sheets and instruction manual.
4. Configuración y montaje
Assembly instructions are included within the kit. Follow the step-by-step diagrams carefully. No glue is typically required for ROBOTIME kits, as pieces are designed to interlock. However, for added stability, a small amount of wood glue may be used on non-moving parts if desired.
4.1 Preparación
- Despeje un espacio de trabajo plano y bien iluminado.
- Familiarize yourself with the instruction booklet and identify all parts.
- Have a Type C cable and a 5V charging head ready for the LED lights (not included).
4.2 Pasos de montaje
- Carefully detach each wooden piece from its sheet. Use a craft knife if necessary to ensure clean breaks.
- Follow the numbered steps in the instruction manual to connect the pieces. Pay close attention to the orientation of each part.
- Assemble the tram body, ensuring all internal details and figures are correctly placed.
- Integrate the LED light wiring as indicated in the instructions. Ensure connections are secure.
- Construct the base and surrounding scenery, including the sakura trees and railway crossing.
- Attach the tram to the base, allowing for its movable function.
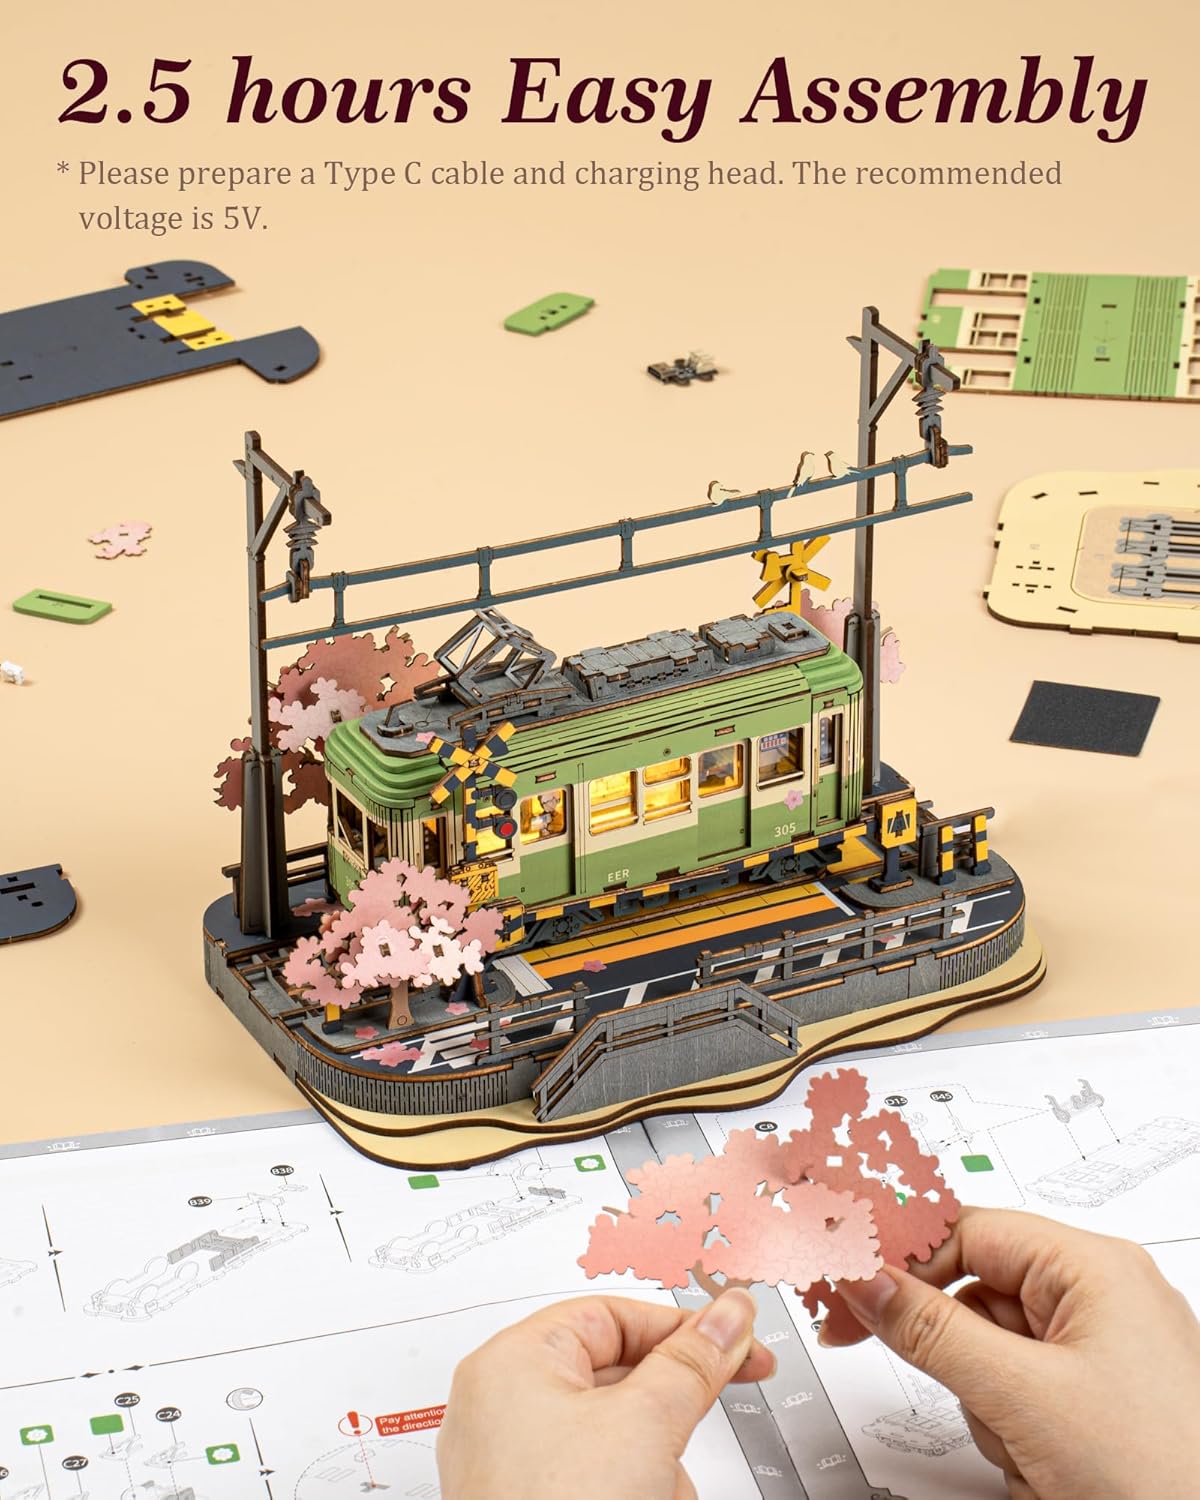
Imagen 4.1: Un example of the assembly process, highlighting the detailed wooden components.
Video 4.1: Official ROBOTIME assembly demonstration for the Sakura Tram TGS02 model. This video illustrates the step-by-step construction and highlights key features of the finished product, including the LED lights and movable tram.
5. Funcionamiento del modelo
5.1 iluminación LED
To activate the LED lights, connect a Type C cable (not included) to the designated port on the model and plug it into a 5V power source. The lights illuminate the interior of the tram, enhancing the diorama's ambiance.

Imagen 5.1: El modelo mostradoasing its LED lights, movable tram, and detailed sakura trees.
5.2 Movable Tram
The tram is designed to be movable along its track on the base. Gently slide the tram back and forth to simulate movement. Avoid excessive force to prevent damage to the wooden components.
6. Mantenimiento
- Limpieza: Use a soft, dry cloth or a small brush to gently remove dust from the model. Avoid using water or cleaning solutions, as they may damage the wood.
- Almacenamiento: Guarde el modelo en un ambiente seco, alejado de la luz solar directa y de cambios extremos de temperatura, para evitar la deformación o decoloración de la madera.
- Manejo: Always handle the model by its base to minimize stress on delicate parts.
7. Solución de problemas
- Pedazos rotos: If a wooden piece breaks during assembly, wood glue can be used to repair it. Allow sufficient drying time.
- Las luces LED no funcionan:
- Ensure the Type C cable is securely connected to both the model and a 5V power source.
- Compruebe si la fuente de alimentación funciona.
- Verify that all internal wiring connections within the model are correctly made as per the instructions.
- Piezas que no encajan: Ensure you are using the correct parts for each step. Some pieces may require gentle pressure to fit, but avoid forcing them to prevent damage. Refer to the instruction diagrams for clarification.
8. Especificaciones
| Característica | Detalle |
|---|---|
| Número de modelo | RBT-TGS02 |
| Dimensiones del producto | 9 x 5.5 x 0.04 inches (assembled size will be larger) |
| Peso del artículo | 1.3 libras |
| Edad recomendada por el fabricante | 0 - 10 years (Note: Product description suggests 'Adults', please refer to packaging for definitive age guidance) |
| Material | Madera |
| Iluminación | Integrated LED (requires external 5V Type C power source, not included) |

Imagen 8.1: Representación visual de las dimensiones del modelo ensamblado.
9. Garantía y soporte
For information regarding product warranty, returns, or technical support, please refer to the contact details provided on the product packaging or the official ROBOTIME webSitio. Conserve su recibo de compra como comprobante de compra.


