1. Información importante de seguridad
Please read all safety instructions carefully before using the VETEK NPX108 camcorder. Keep this manual for future reference.
- No exponga la cámara al agua o la humedad.
- Evite temperaturas extremas.
- No intente desmontar ni reparar la cámara usted mismo.
- Utilice únicamente accesorios y adaptadores de corriente aprobados.
- Mantener fuera del alcance de los niños.
2. Contenido del paquete
Verifique que todos los artículos estén presentes en su paquete:
- VETEK NPX108 4K Camcorder
- Estabilizador de mano
- Parasol
- Micrófono
- Luz de relleno
- Tarjeta SD de 64 GB
- Mando a distancia
- DV-108 Battery (4500mAh)
- Cable USB
- Cargador
- Estuche para la camara
- Manual de usuario

Image: The VETEK NPX108 camcorder with all included accessories, such as the handheld stabilizer, microphone, fill light, SD card, battery, cables, and carrying bag.

Image: A visual representation of the camcorder and its accessories, including microphone, remote control, LED lights, lens hood, battery, bag, 64GB SD card, data line, charger, and user manual.
3. Producto terminadoview
3.1. Componentes y controles

Image: A multi-angle diagram of the camcorder highlighting key components such as Handle Charging Port, Battery, Video Button, Photo Button, Confirmation Button/Control Wheel, DISP Button, USB Interface/Camera Charging Port, MIC Interface, HDMI Interface, Lens, Power Button, Menu Button, Mode Button, Playback Button, SD Card Slot, Speaker, Handle Hot Shoe, Handle Video/Photo Button, Handle Digital Zoom, Camera Zoom, and Camera Hot Shoe.
The VETEK NPX108 camcorder features a 4.0-inch 270-degree rotating touchscreen for flexible viewing and control. It supports 4K Ultra HD 60FPS video resolution and 64MP image resolution, with 18X digital zoom.

Image: The VETEK NPX108 camcorder showcasing its 4K UHD capabilities, 64MP resolution, 270-degree rotating screen, and 3.0-inch HD touch screen.
4. Configuración
4.1. Instalación y carga de la batería
The camcorder uses a 4500mAh Lithium Polymer battery. Ensure the battery is fully charged before first use.
- Abra la tapa del compartimiento de la batería.
- Inserte la batería de acuerdo con los indicadores de polaridad.
- Cierre bien la tapa del compartimento de la batería.
- Connect the USB cable to the camera's charging port and the charger, then plug into a power outlet. The camera supports recording while charging.

Image: The camcorder displaying a 93% battery charge on its screen, emphasizing its 4500mAh battery for longer shooting times.
4.2. Instalación de la tarjeta SD
The camcorder comes with a 64GB SD card. Insert it correctly to store your recordings.
- Localice la ranura para tarjeta SD en la cámara.
- Inserte la tarjeta SD con los contactos metálicos orientados en la dirección correcta hasta que encaje en su lugar.
- To remove, gently press the card until it ejects.
4.3. Colocación de accesorios
Attach the included accessories for enhanced functionality.
- Estabilizador de mano: Attach the stabilizer to the bottom of the camera for improved stability, especially for low-angle shots. It includes zoom and shooting buttons for convenience.
- Micrófono: Connect the external microphone to the MIC interface for clearer audio recording, reducing background noise.
- Luz de relleno: Mount the fill light onto the camera's hot shoe for additional illumination in low-light conditions. Adjust brightness and color temperature as needed.
- Cubierta de lente: Attach the lens hood to protect the lens from damage and improve image contrast by reducing glare.
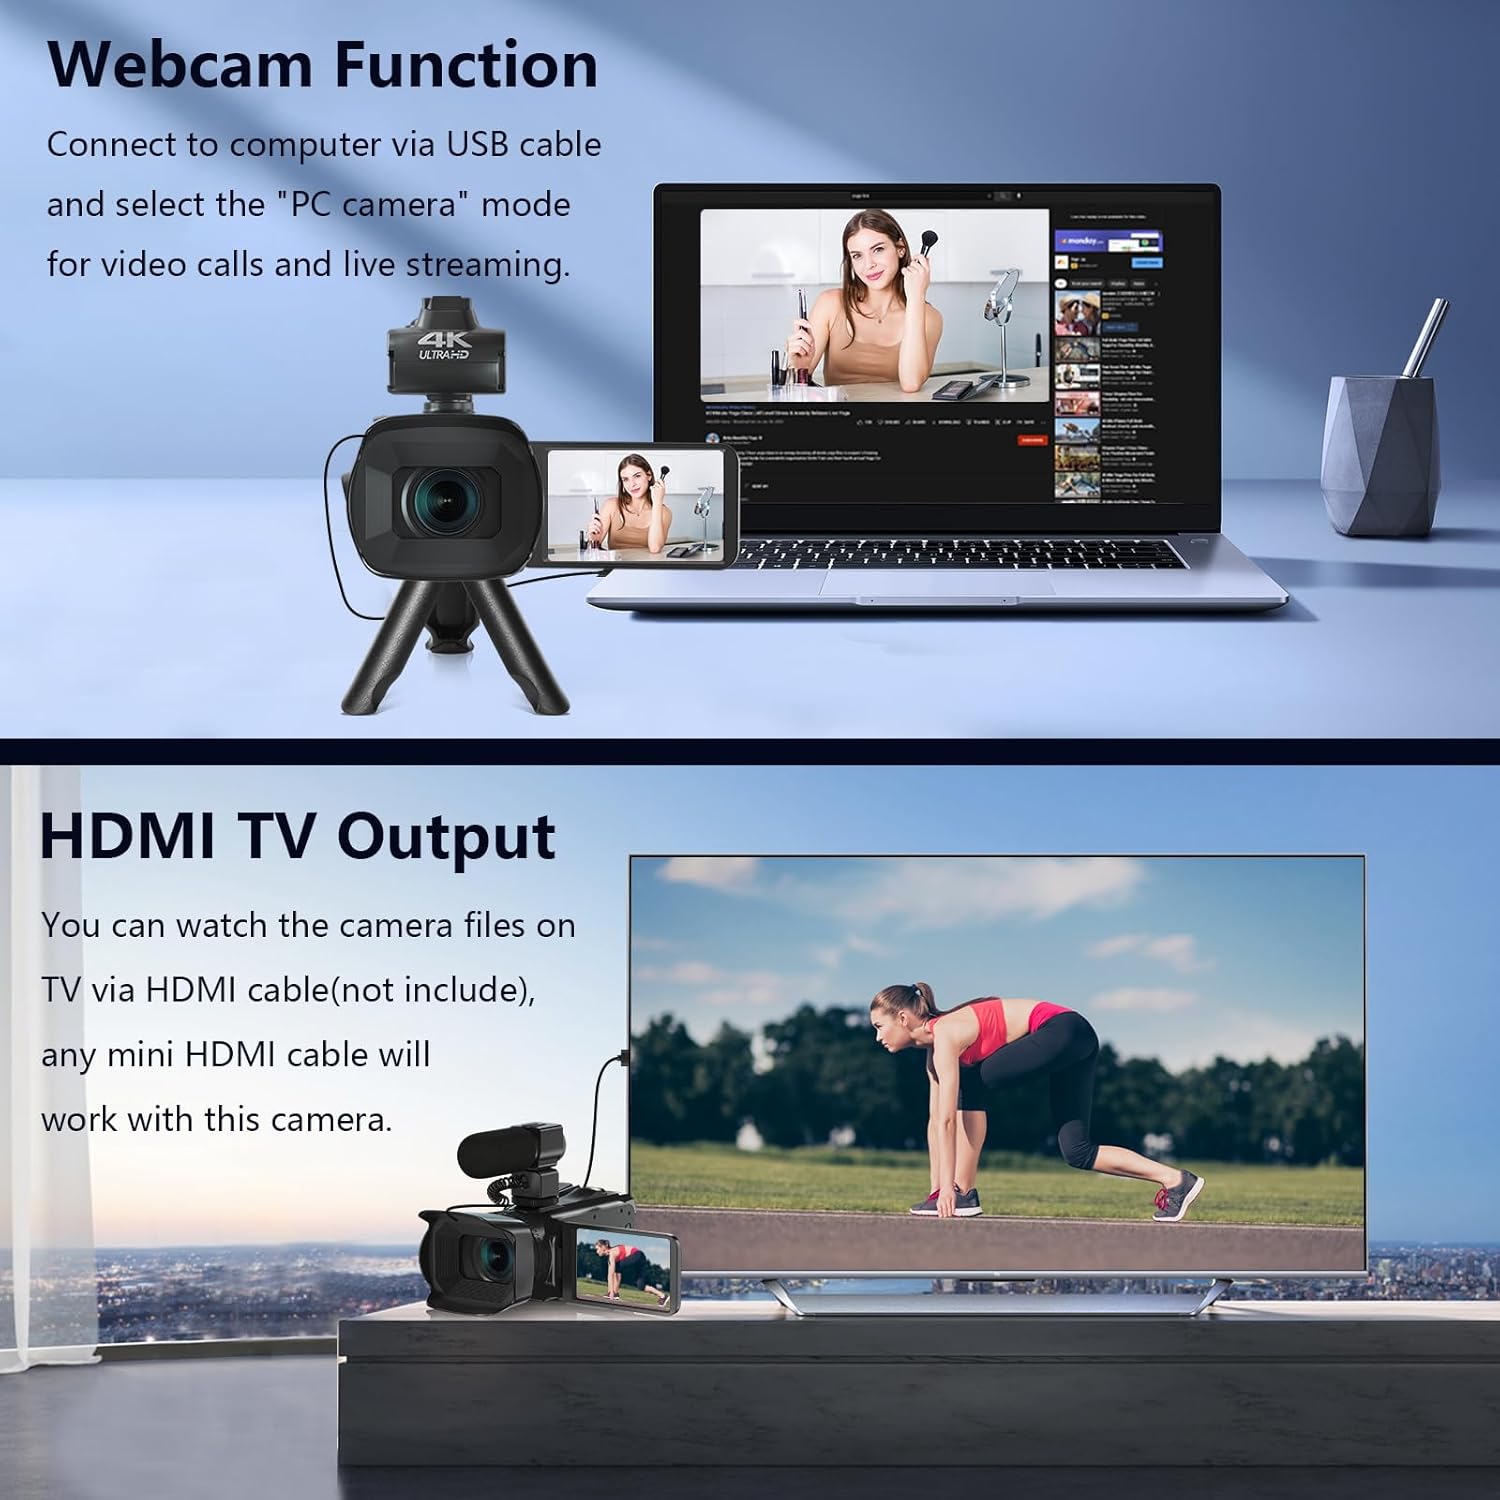
Image: The fill light accessory demonstrating its adjustable brightness (100%, 50%, 10%) and color temperature (3300K-5600K) settings, with examples of white light, white glow, and warm light.
5. Operación de la cámara
5.1. Encendido y apagado
Open the LCD screen to power on the camera. Close it to power off.
5.2. Grabación básica (vídeo/fotografía)
Use the dedicated Video and Photo buttons to switch between modes and start/stop recording or capture images.
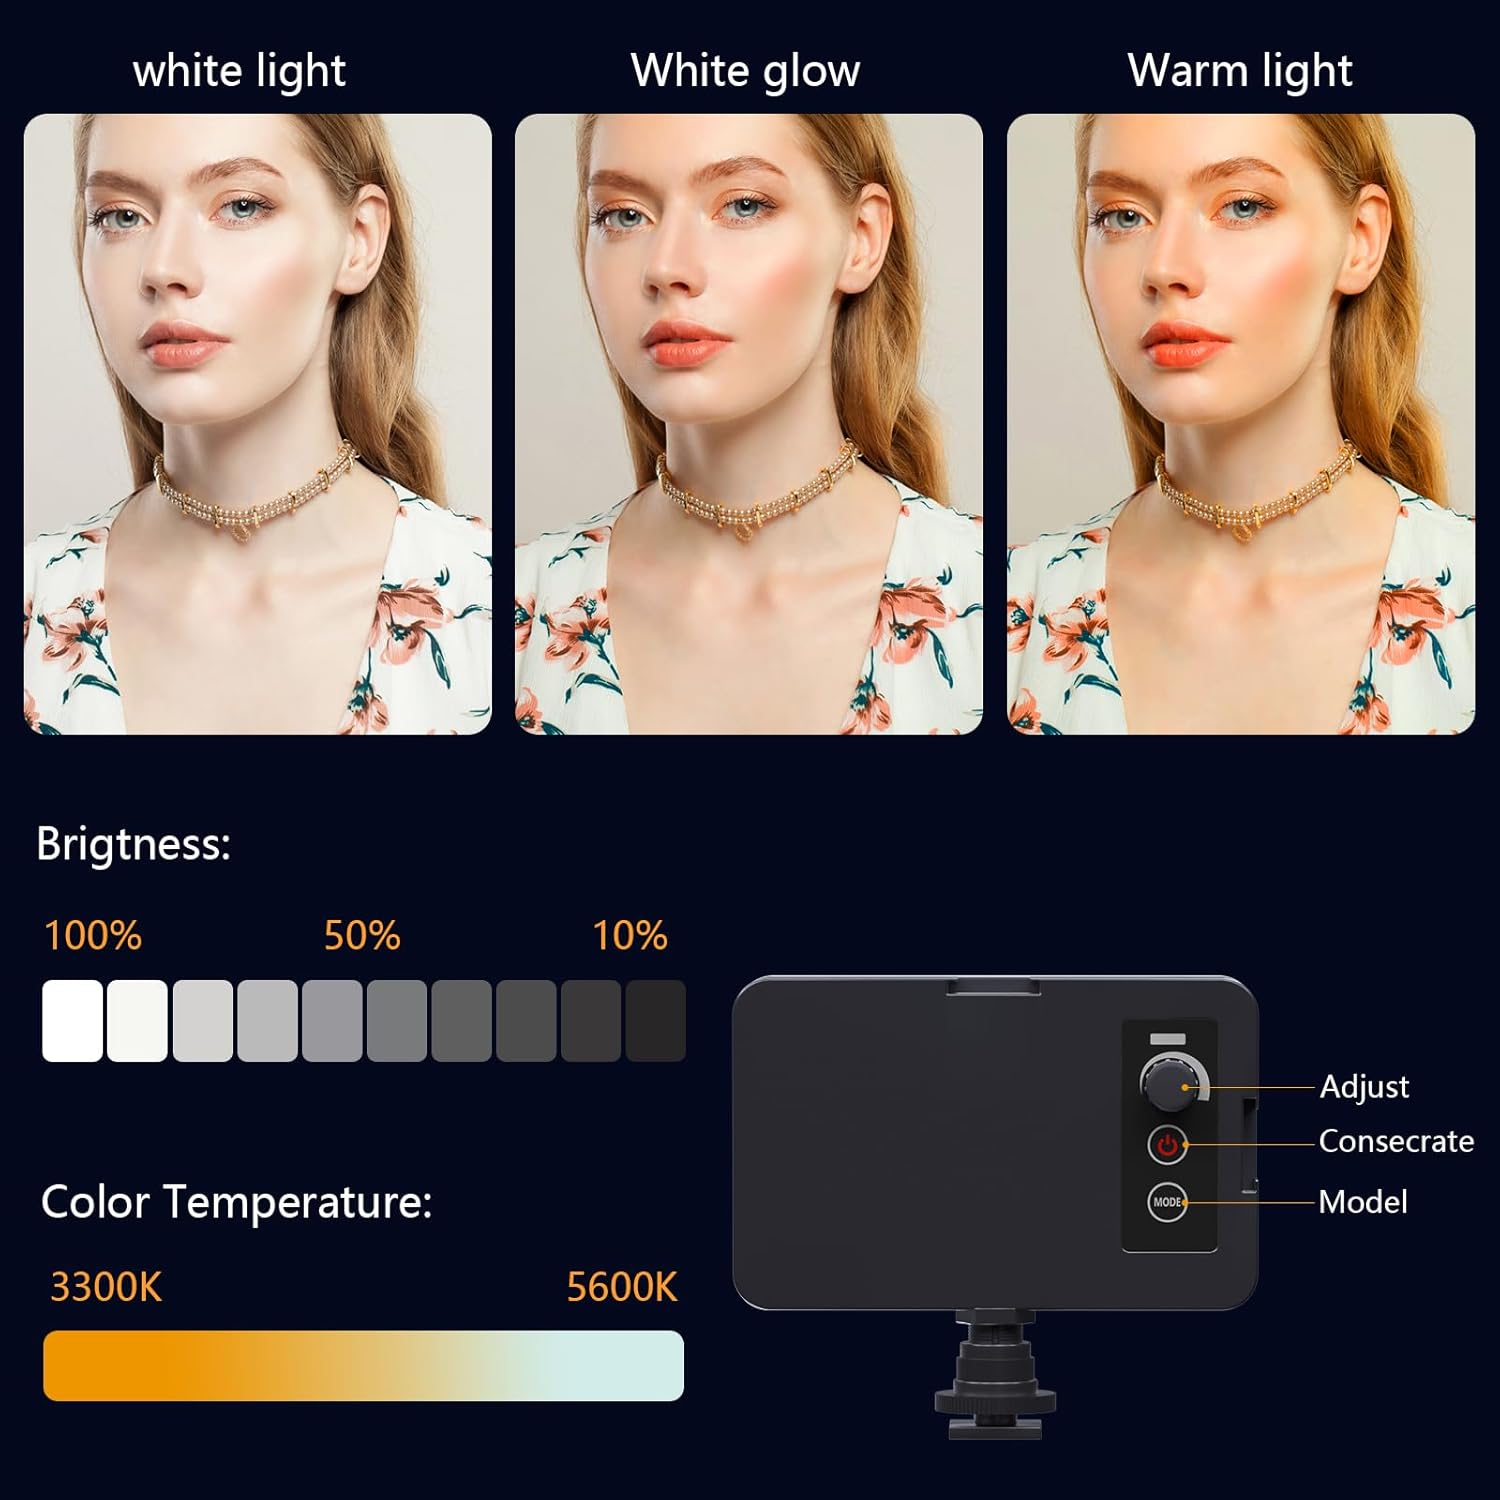
Image: The camcorder recording a 4K 60FPS video, with smaller inset images showing the effect of 18X, 16X, and 12X digital zoom on a subject.
5.3. Función de zoom
Use the zoom controls on the camera body or handheld stabilizer to adjust the 18X digital zoom.
5.4. Operación de la pantalla táctil
Navigate menus and settings directly on the 4.0-inch touchscreen. The screen can rotate 270 degrees for versatile shooting angles.
5.5. Configuración del menú
Press the Menu button to access various settings such as resolution, white balance, exposure, and metering mode. Use the control wheel or touchscreen to make selections.
5.6. Conexión Wi-Fi y uso de aplicaciones
Connect your smartphone to the camcorder via Wi-Fi to control it remotely and transfer files.
- Turn on Wi-Fi on the camcorder via the menu. The screen will display the Wi-Fi ID (e.g., 4K_WIFI) and password (e.g., 12345678), along with a QR code.
- Download the "IDC CAM" app by scanning the QR code or searching on your app store.
- On your smartphone, go to Wi-Fi settings and connect to the camcorder's Wi-Fi network using the provided password.
- Open the "IDC CAM" app. You can now view a live feed, control recording, and capture photos remotely.

Image: The camcorder's screen showing Wi-Fi ID, password, and a QR code for downloading the companion app, with smartphones connected via Wi-Fi in the background.
For a visual guide on Wi-Fi connection and app usage, watch this video:
Video: This video demonstrates how to connect the NPX108 digital video camera to Wi-Fi and use the companion app for remote control and file gestión.
5.7. WebFunción de leva
La videocámara se puede utilizar como webCámara para videollamadas y transmisión en vivo.
- Conecte la videocámara a su computadora mediante el cable USB.
- On the camera's screen, select "PC CAM" mode.
- Su computadora ahora debería reconocer la videocámara como una webleva.
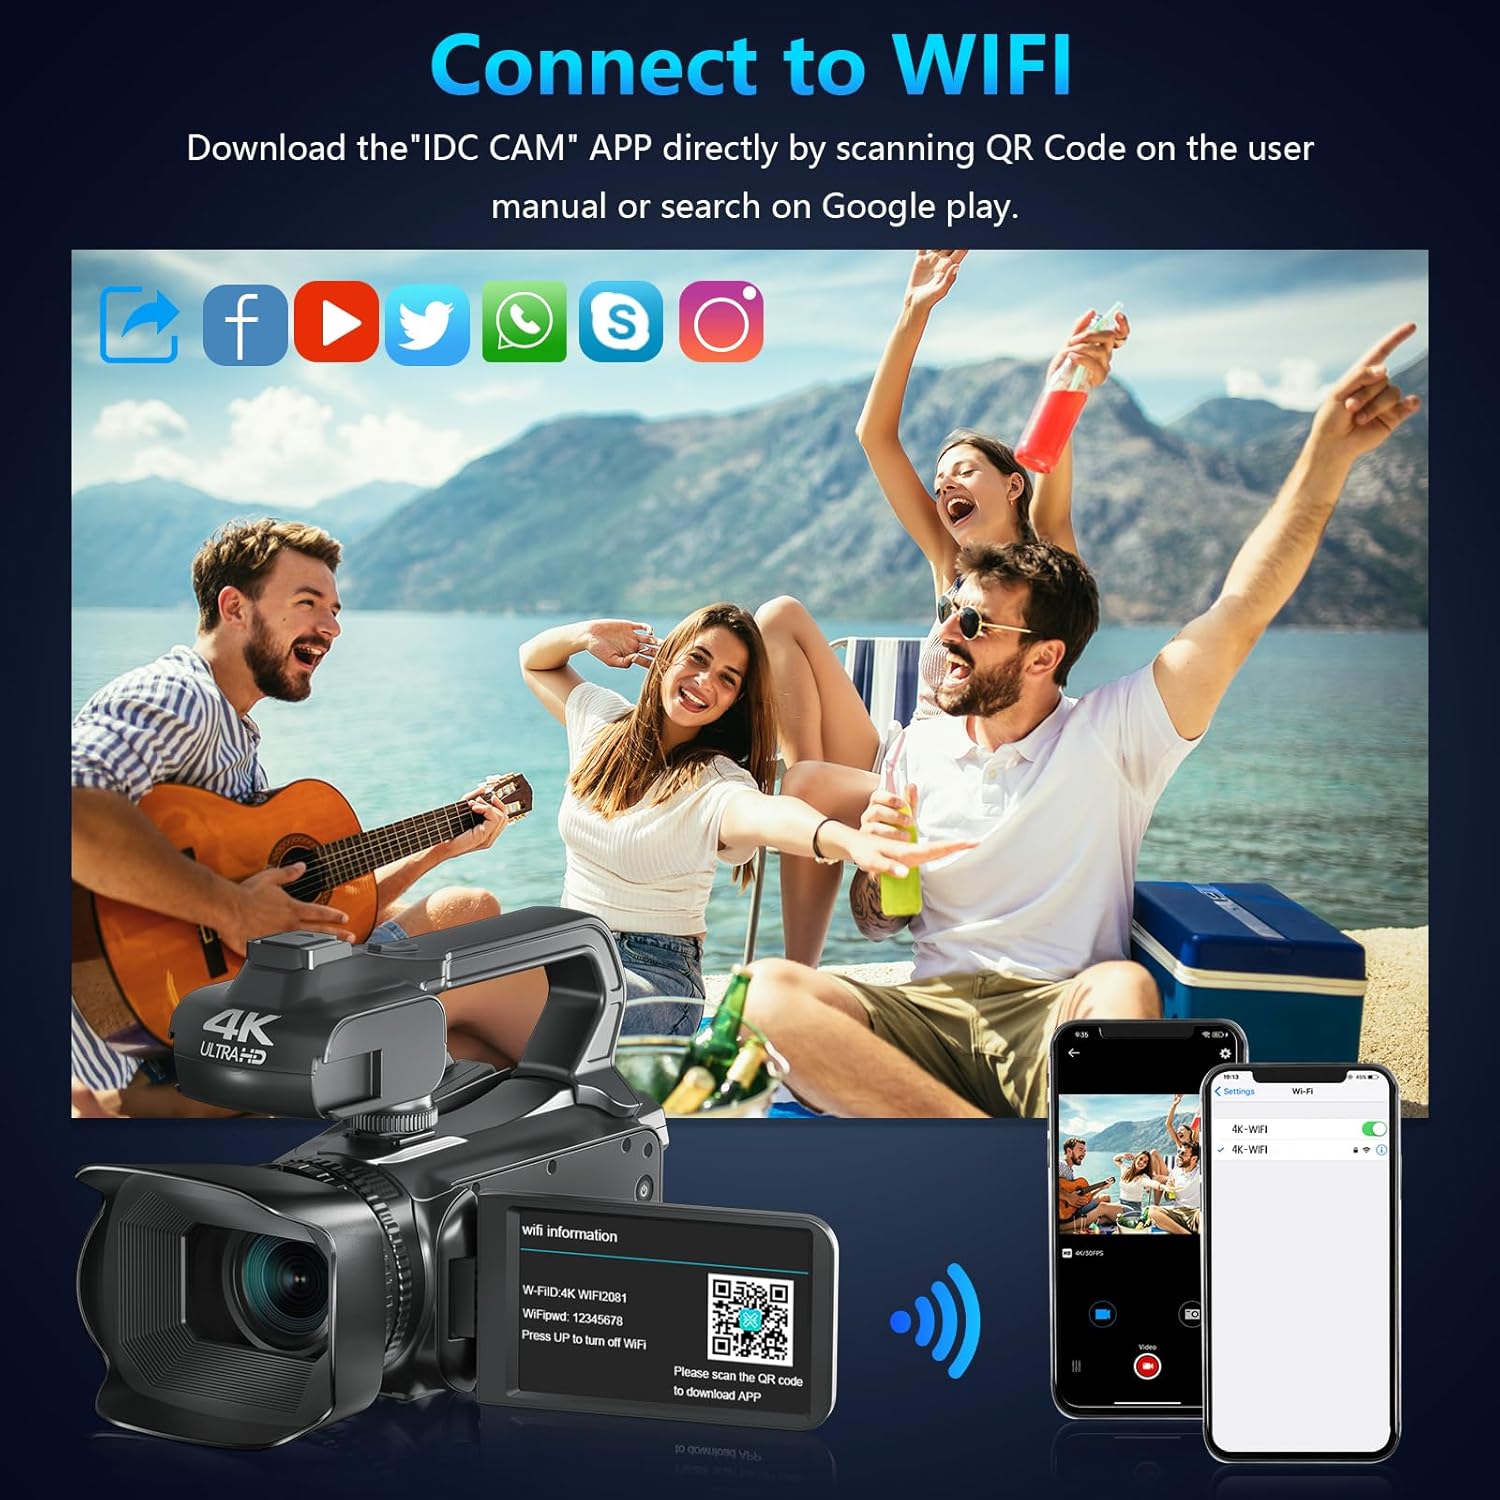
Image: The camcorder functioning as a webcam connected to a laptop, and also connected to a TV via HDMI for output.
5.8. Salida de TV HDMI
View your recorded videos and photos directly on a TV or monitor.
- Connect the camcorder to your TV using a mini HDMI cable (not included).
- Seleccione la entrada HDMI adecuada en su televisor.
- The camera's display will now be mirrored on your TV.

Image: The camcorder connected to a laptop for live streaming (webcam mode) and to a TV via an HDMI cable for real-time viewcontenido.
5.9. Características especiales
- Grabación durante la carga: Continue recording even when the battery is low by connecting the charger.
- Cámara lenta: Captura escenas dinámicas en cámara lenta.
- Lapso de tiempo: Record events over an extended period and condense them into a short video.
- Temporizador automático: Set a delay before capturing a photo or starting a video.
- Anti vibración: La estabilización de imagen digital ayuda a reducir el desenfoque causado por el movimiento de la cámara.
- Visión nocturna: Captura comida claratage en condiciones de poca luz.

Image: A collage demonstrating various camcorder features: recording while charging, pause function, continuous shooting, and anti-shake stabilization.

Image: A sequence of three images illustrating the time-lapse recording feature, capturing the progression of a sunset over water.
6. Mantenimiento
6.1. Limpieza
- Utilice un paño suave y seco para limpiar el cuerpo de la cámara.
- Para la lente, utilice un paño y una solución limpiadora especializada. Evite tocar la lente directamente con los dedos.
- Clean the touchscreen with a microfiber cloth.
6.2. Almacenamiento
- When not in use, store the camera in its protective bag in a cool, dry place.
- Retire la batería si la cámara no se utilizará durante un período prolongado.
7. Solución de problemas
| Problema | Posible causa | Solución |
|---|---|---|
| La cámara no se enciende | La batería está muerta o insertada incorrectamente. | Cargue la batería o vuelva a insertarla correctamente. |
| No se pueden grabar vídeos ni tomar fotografías | La tarjeta SD está llena, no está insertada o está dañada. | Insert a new SD card, ensure it's properly inserted, or format the card (this will erase all data). |
| Mala calidad de vídeo/imagen | La lente está sucia, hay iluminación insuficiente o configuración incorrecta. | Clean the lens, use the fill light, or adjust exposure/white balance settings. |
| Problemas de conexión wifi | Incorrect password, app not installed, or distance too far. | Verify password, install "IDC CAM" app, ensure close proximity to camera. |
8. Especificaciones
- Marca: VETEK
- Número de modelo: NPX108
- Resolución de captura de video: 4K (60 FPS)
- Resolución de la imagen: 64MP
- Zoom digital: 18X
- Tamaño de pantalla: 4.0 Inches (270-degree rotating touchscreen)
- Conectividad: Wi-Fi, USB, HDMI
- Características especiales: Auto Focus, Recording While Charging, Slow Motion, Time-Lapse, Webcam Function, Self-Timer, HD Output, External MIC Support, Handheld Stabilizer Support, Night Vision, Anti-Shake, Face Detection
- Batería: Polímero de litio de 4500 mAh (incluido)
- Almacenamiento: Tarjeta SD (64 GB incluida)
- Peso del artículo: 3.56 libras
- Dimensiones del producto: 6.7 x 3.8 x 3.9 pulgadas
9. Garantía y soporte
VETEK products are designed for quality and reliability. For any issues or inquiries, please refer to the following:
- Política de devoluciones: All products are eligible for a free return within 30 days of purchase.
- Servicio al cliente: VETEK offers 24-hour customer service. Please contact us for assistance.
- Planes de protección: Extended protection plans are available for purchase (e.g., 2-Year Protection Plan, 3-Year Protection Plan, Complete Protect).

Image: The VETEK brand logo, representing quality and customer commitment.


