Introducción
This manual provides detailed instructions for the safe and effective use of your ONNAIS Large Biometric Gun Safe, Model KKNGS009. This safe is designed to secure firearms and valuables using advanced biometric fingerprint technology, a programmable keypad, and traditional key access. It features an internal light for visibility and an emergency power supply for reliable operation.
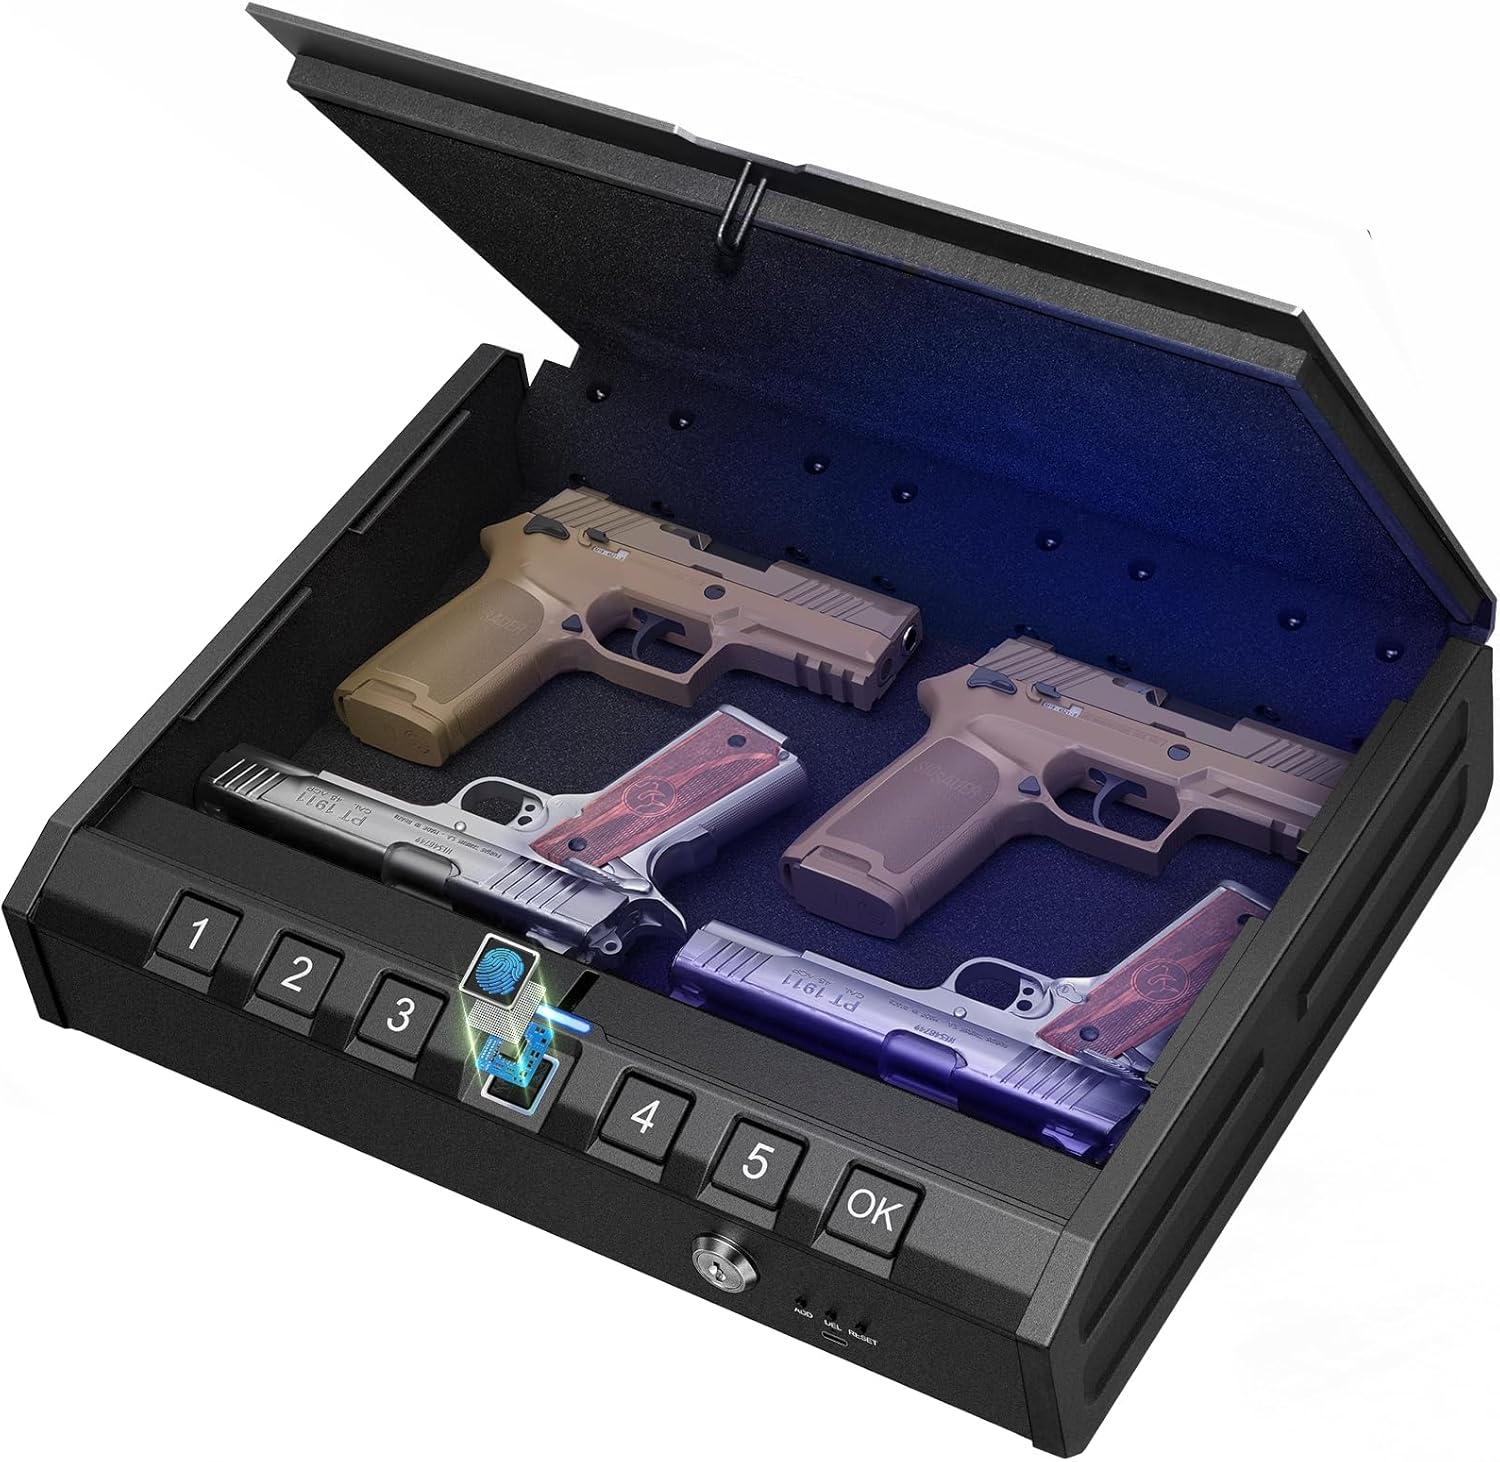
Image: ONNAIS Large Biometric Gun Safe with interior storage.
Contenido del paquete
Verifique que todos los artículos enumerados a continuación estén incluidos en su paquete:
- ONNAIS Large Biometric Gun Safe
- Cable de seguridad
- Llaves mecánicas (2)
- Manual de usuario
- Tornillos de montaje (4)
- USB-C Emergency Power Cable

Image: All components included in the ONNAIS safe package.
Configuración
1. Instalación de la batería
- Locate the battery compartment on the front panel of the safe.
- Abra la tapa del compartimento.
- Inserte 4 pilas AA (no incluidas) de acuerdo con los indicadores de polaridad.
- Cierre bien la tapa del compartimento de la batería.
2. Desbloqueo inicial
Upon first use, the safe must be opened using the mechanical key.
- Insert one of the provided mechanical keys into the keyhole on the front panel.
- Gire la llave en el sentido de las agujas del reloj para desbloquear la caja fuerte.
- Levante la tapa para abrir la caja fuerte.

Image: Manual key access for initial safe opening.
3. Setting a Passcode
The safe must be open to set or change the passcode.
- Locate the 'SET' button inside the safe, usually near the battery compartment.
- Press the 'SET' button once. The keypad will illuminate.
- Enter a 6-digit passcode using the number buttons (1-5).
- Press the 'OK' button to confirm.
- Re-enter the same 6-digit passcode.
- Press the 'OK' button again to finalize. A confirmation sound or light will indicate success.

Image: Keypad for setting and entering passcodes.
4. Registro de huellas dactilares
The safe must be open to register new fingerprints.
- Locate the 'SET' button inside the safe.
- Press the 'SET' button twice. The fingerprint scanner will illuminate.
- Place your finger firmly on the fingerprint scanner. Lift and repeat 5 times, slightly adjusting the finger position each time to capture different angles.
- A confirmation sound or light will indicate successful registration.

Image: Fingerprint scanner for biometric access.
Instrucciones de funcionamiento
1. Apertura con huella dactilar
- Coloque firmemente un dedo registrado sobre el escáner de huellas dactilares.
- The safe will unlock with a confirmation sound and the lid will open automatically.
2. Opening with Passcode
- Enter your 6-digit passcode using the number buttons.
- Press the 'OK' button. The safe will unlock with a confirmation sound and the lid will open automatically.
3. Opening with Mechanical Key
This method is used for initial setup or in case of battery failure.
- Insert the mechanical key into the keyhole.
- Gire la llave en el sentido de las agujas del reloj para desbloquear la caja fuerte.
- Levante la tapa para abrir.
4. Suministro de energía de emergencia
If the batteries are completely drained, the safe can be temporarily powered using a USB-C cable.
- Connect a USB-C cable (provided) to the emergency power port on the front panel.
- Connect the other end of the USB-C cable to a power source (e.g., power bank, USB wall adapter).
- Once powered, use your registered fingerprint or passcode to open the safe.
- Replace the internal AA batteries as soon as possible.

Image: Emergency USB-C power port for external power supply.
Características de seguridad
1. Security Cable
The included security cable allows you to tether the safe to a fixed object, preventing unauthorized removal.
- Unscrew the end of the security cable.
- Thread the cable around a secure, immovable object (e.g., bed frame, car seat anchor).
- Screw the end of the cable back into the designated port on the safe.

Image: Security cable attached to the safe and a fixed object.
2. Opciones de montaje
The safe can be permanently mounted to a surface using the provided screws.
- Choose a suitable mounting location (e.g., inside a cabinet, to a wall).
- Mark the drill points using the pre-drilled holes on the bottom of the safe as a template.
- Taladre agujeros piloto en la superficie de montaje.
- Secure the safe using the provided mounting screws.

Image: Mounting holes and screws for permanent installation.
Mantenimiento
- Reemplazo de batería: Replace all 4 AA batteries when the low battery indicator illuminates (usually a red light on the display).
- Limpieza: Limpie el exterior con un paño suave y seco. Evite el uso de limpiadores abrasivos o disolventes.
- Control de humedad: Place a desiccant packet (e.g., silica gel) inside the safe to absorb moisture and protect contents.
Solución de problemas
- Safe Not Opening with Fingerprint/Passcode: Check battery level. If low, replace batteries or use emergency power. Ensure correct finger placement or passcode entry.
- Contraseña olvidada: Use the mechanical key to open the safe, then reset the passcode following the setup instructions.
- Huella dactilar no reconocida: Re-register your fingerprint, ensuring proper placement and multiple scans. Ensure your finger is clean and dry.
- Sin energía: Replace batteries. If still no power, use the emergency USB-C power supply.
Presupuesto
| Marca | ONNAIS |
| Número de modelo | KKNGS009 |
| Dimensiones del producto | 3.15" de profundidad x 11.81" de ancho x 15.35" de alto |
| Tipo de bloqueo | Electronic Combination Lock, Biometric Fingerprint, Mechanical Key |
| Material | Acero aleado |
| Peso del artículo | 9.81 libras |
| Fuente de poder | 4 AA Batteries (not included), USB-C Emergency Power |
| Características especiales | Anti-Theft, Internal Light, Child-Safe Design |
Garantía y soporte
For warranty information, technical support, or any questions regarding your ONNAIS Large Biometric Gun Safe, please refer to the contact information provided on the product packaging or the official ONNAIS websitio. Guarde su recibo de compra para reclamos de garantía.


