Introducción
Thank you for choosing the Ledvion LED Track Lighting System. This manual provides essential information for the safe and efficient installation, operation, and maintenance of your new lighting system. Please read these instructions carefully before installation and retain them for future reference.
Información importante de seguridad
- Desconecte siempre la alimentación del disyuntor principal antes de realizar la instalación, el mantenimiento o el reemplazo de bombillas.
- La instalación debe ser realizada por un electricista calificado o de acuerdo con los códigos eléctricos locales.
- Ensure the mounting surface can support the weight of the track lighting system.
- No exceda el máximo de agua.tage specified for the GU10 fittings.
- Evite la exposición directa de los ojos a la fuente de luz LED.
- Mantenga los materiales de embalaje fuera del alcance de los niños.
- Este producto está diseñado únicamente para uso en interiores.
Contenido del paquete
Verifique que todos los componentes estén presentes y sin daños antes de continuar con la instalación.
- 1 riel de vía de 2 metro
- 5 focos de riel GU10
- Herrajes de montaje (tornillos, tacos)
- Conector de alimentación
- La tapa extrema
- Optional anti-glare grids (may be included)

Image: Components included in the Ledvion LED Track Lighting System package (SKU: LVT10001_2m5s).
Configuración: Guía de instalación
1. Mounting the Track Rail
- Choose a suitable location for the track rail, ensuring it is a flat and stable surface.
- Mark the drilling points on the ceiling or wall using the track rail as a template.
- Perfore agujeros en los puntos marcados e inserte los tacos (si es necesario).
- Secure the track rail to the surface using the provided screws.
- Connect the power supply wires to the power connector on the track rail, ensuring correct polarity (Live, Neutral, Earth). Consult a qualified electrician if unsure.
- Attach the end cap to the opposite end of the track rail.
2. Attaching the Spotlights
The spotlights feature a plug-and-play installation system for easy attachment and repositioning.
- Ensure the power is OFF at the main circuit breaker.
- Align the spotlight connector with the track rail slot.
- Push the spotlight firmly into the track until it clicks into place.
- Rotate the locking mechanism on the spotlight connector to secure it.
- Repeat for all five spotlights.
- Insert GU10 bulbs (not included) into each spotlight by twisting them into the socket.

Image: Plug and Play Installation for Ledvion track spotlights.
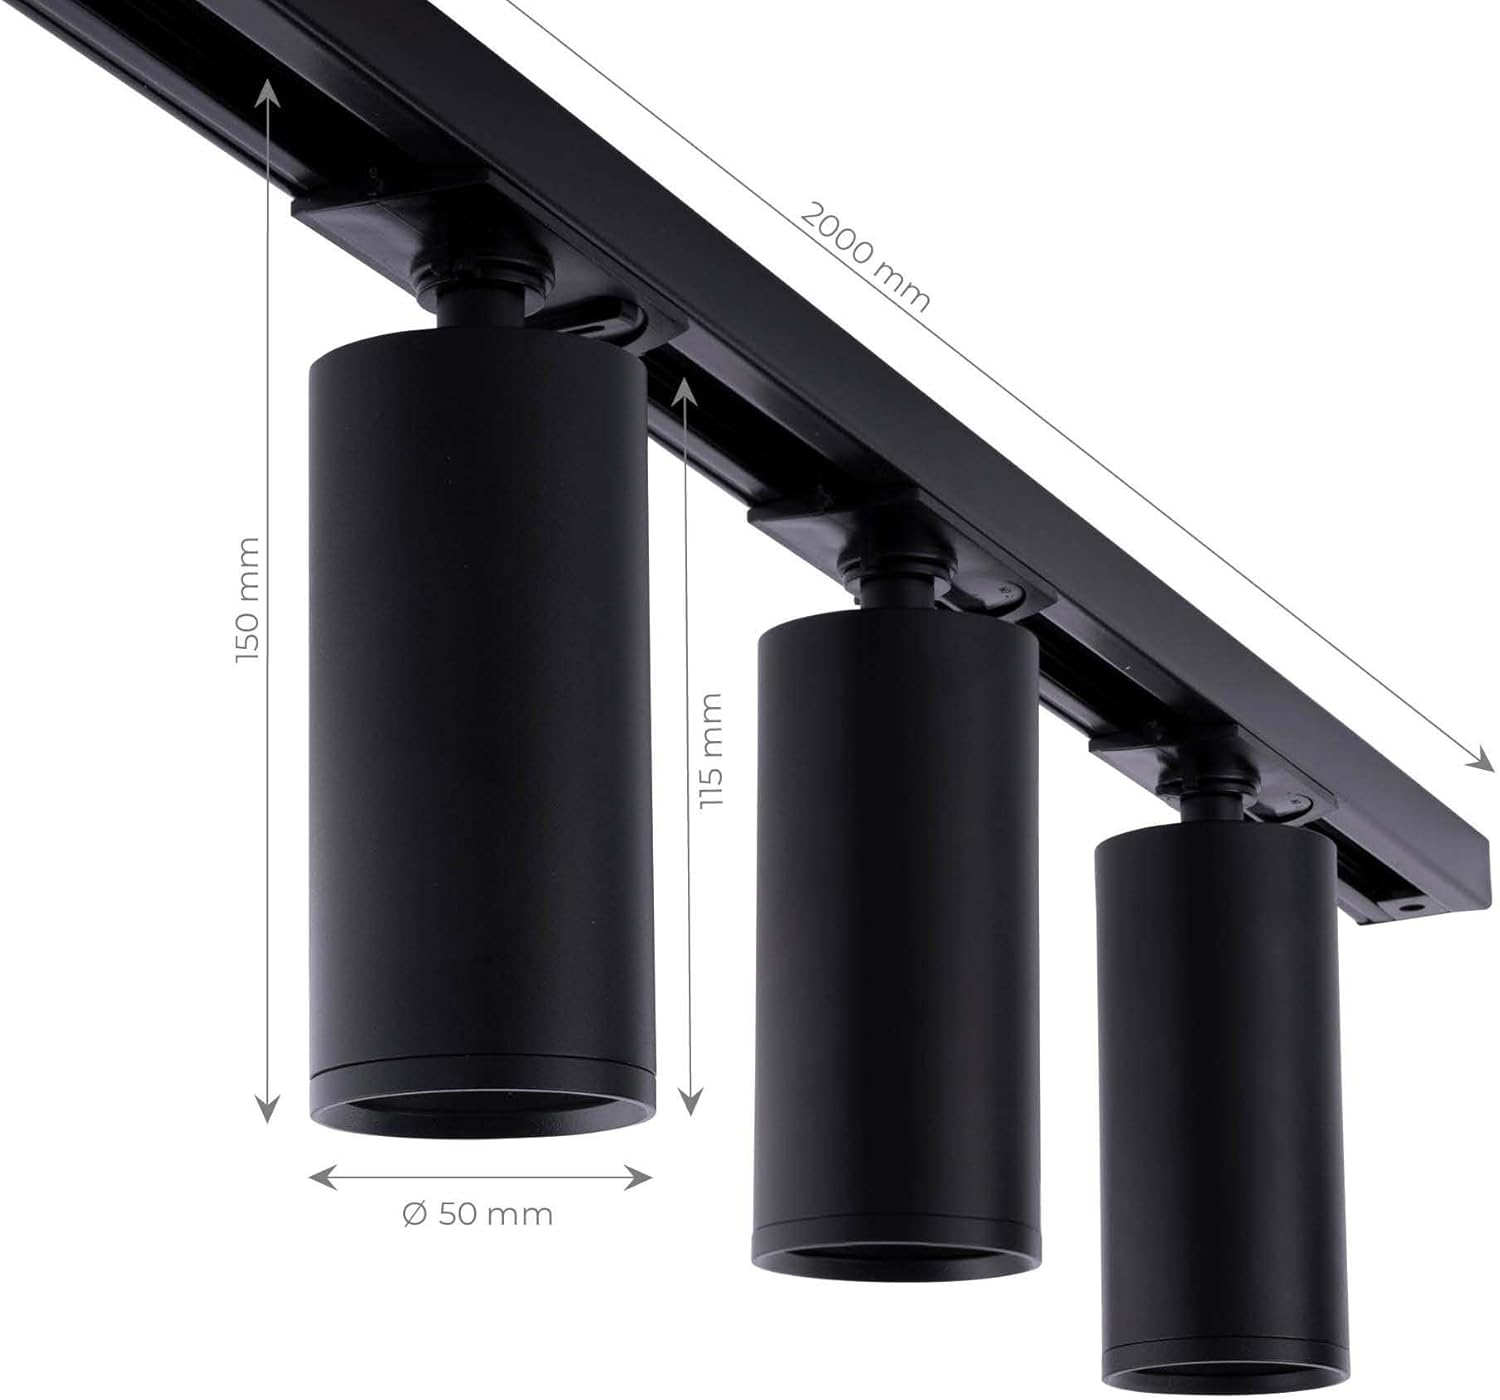
Image: Dimensions of the Ledvion 2M track rail and spotlights.
Instrucciones de funcionamiento
1. Encendido / apagado
Once installed, restore power at the main circuit breaker. Operate the track lighting system using your standard wall switch connected to the circuit.
2. Adjusting Spotlights
Each spotlight can be individually adjusted to direct light precisely where needed. The spotlights can be tilted 350 degrees in all directions and rotated 90 degrees.
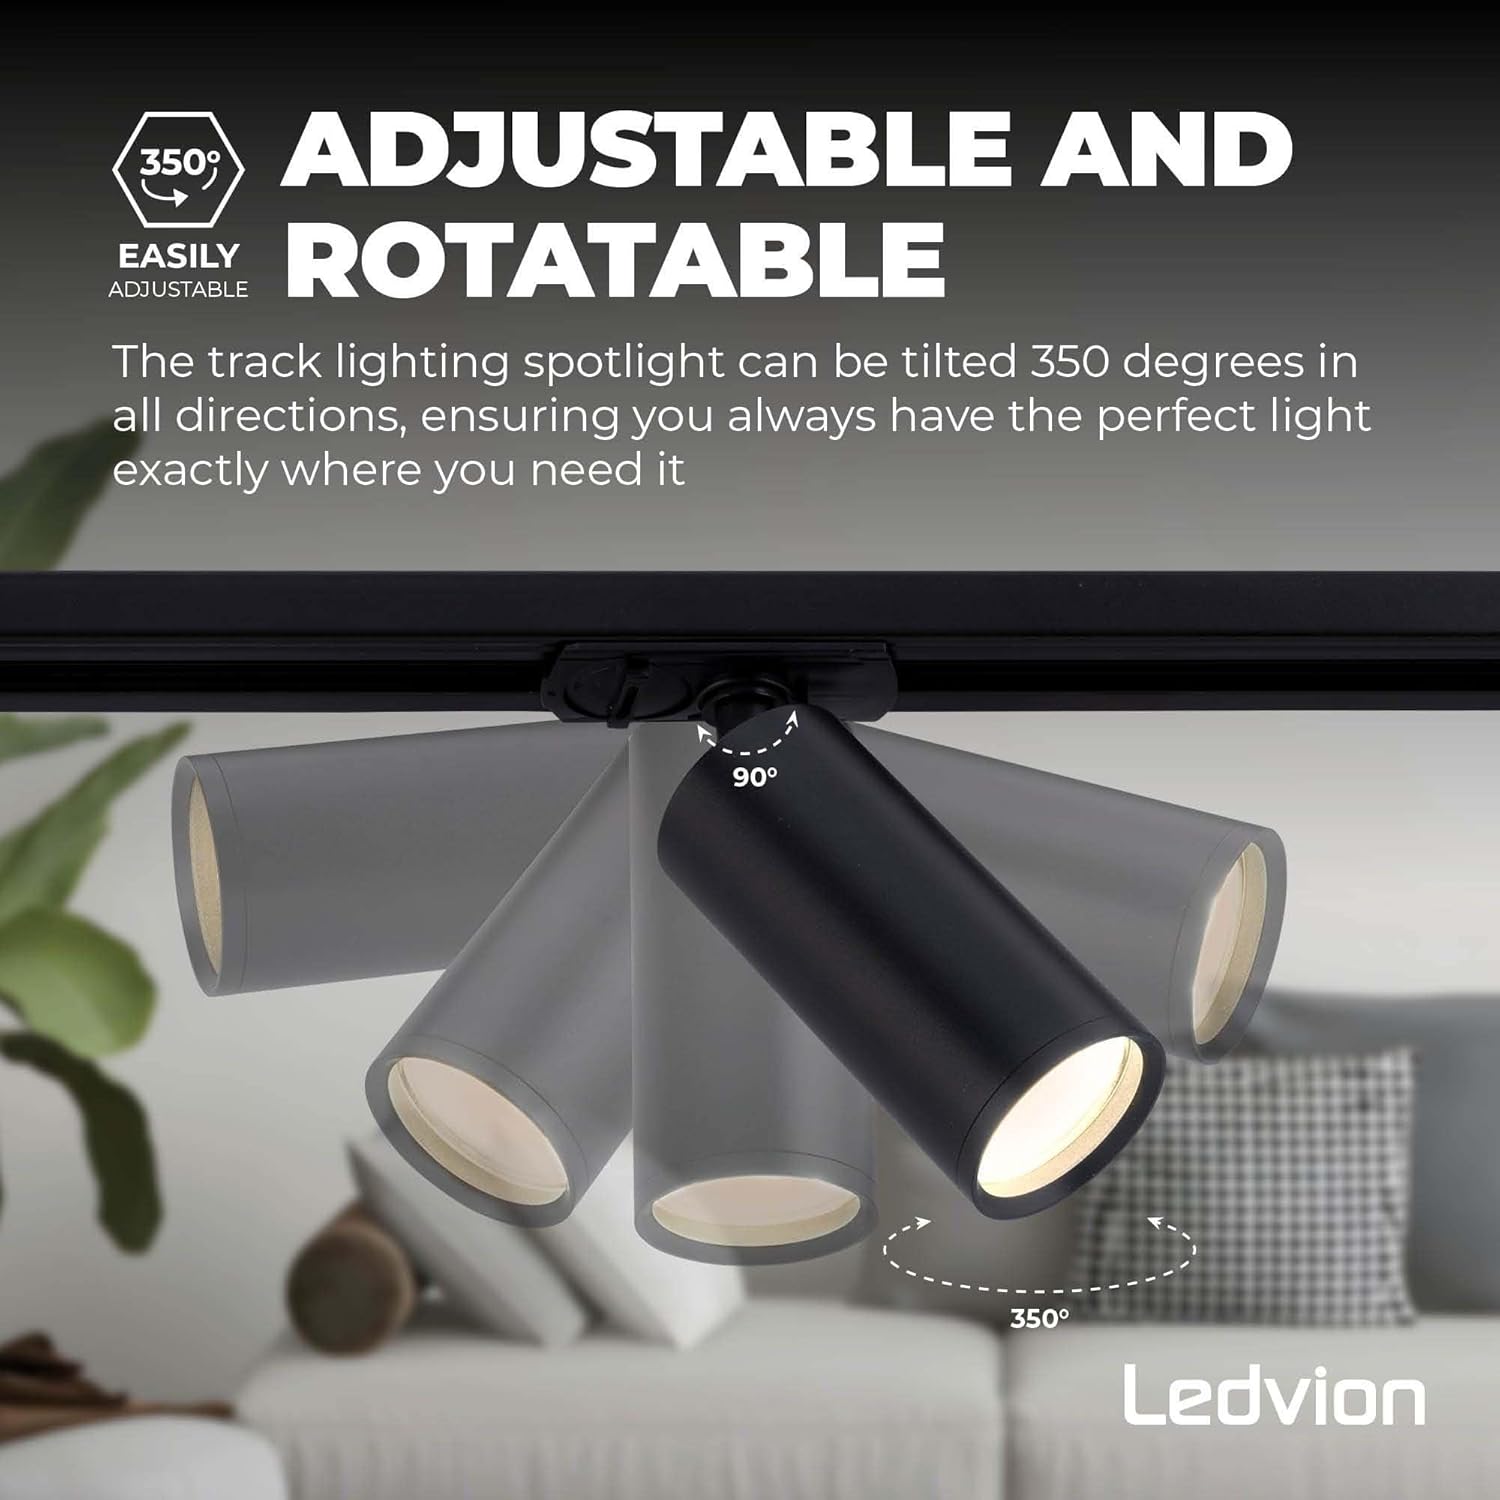
Image: Adjustable and Rotatable features of Ledvion track spotlights.
3. Funcionalidad regulable
If you are using dimmable GU10 LED bulbs and an external dimmer switch compatible with LED lighting, you can adjust the light intensity to create the desired ambiance.
Cuidado y mantenimiento
- Limpieza: Ensure the power is off before cleaning. Wipe the track and spotlights with a soft, dry, or slightly damp Paño. No utilice limpiadores abrasivos ni disolventes.
- Reemplazo de bombilla: Disconnect power before replacing bulbs. Allow bulbs to cool completely. Twist the GU10 bulb counter-clockwise to remove and clockwise to insert a new bulb. Use only GU10 LED bulbs.
- Anti-Glare Grid (Optional): If equipped, the anti-glare grid can be easily added or removed to prevent glare.
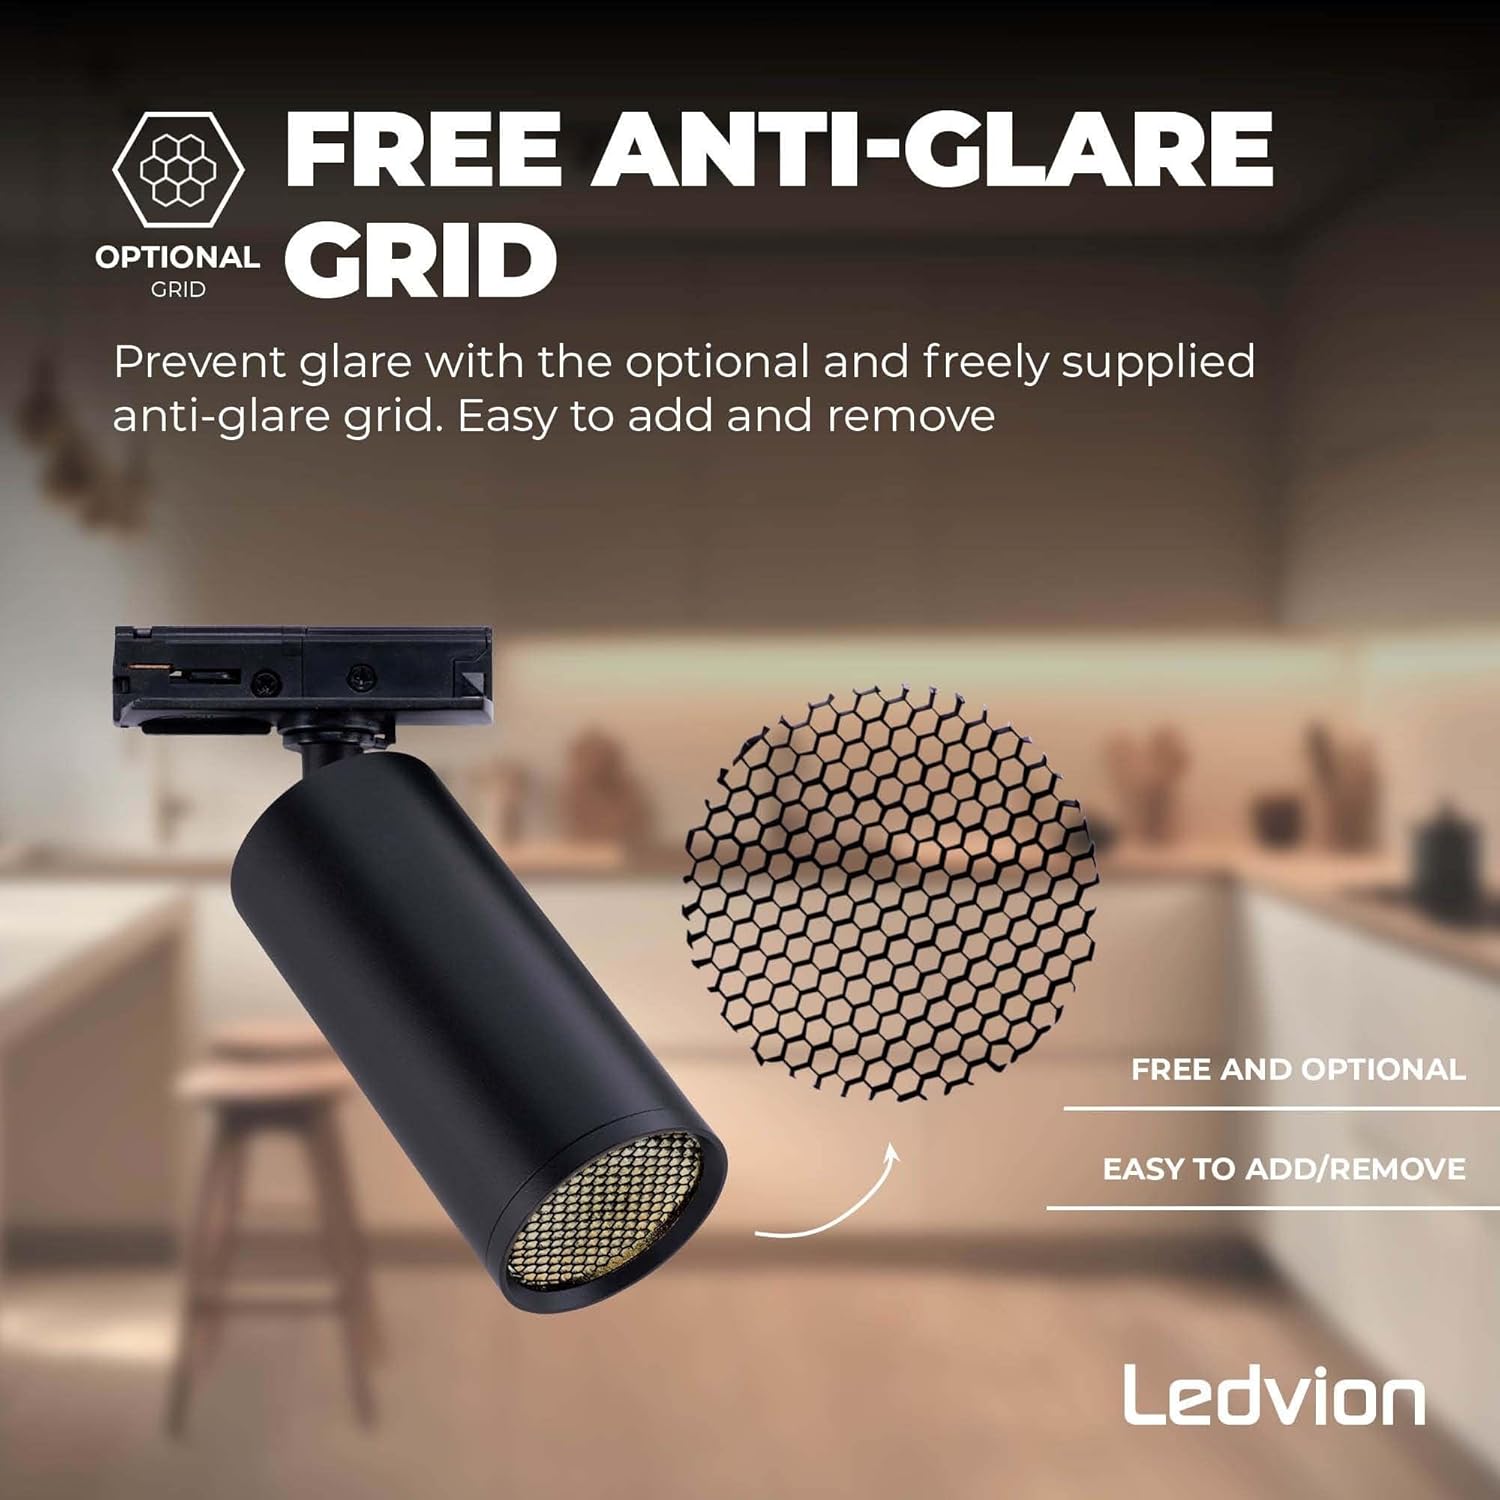
Image: Optional anti-glare grid for Ledvion spotlights.
Solución de problemas
Consulte la siguiente tabla para conocer los problemas más comunes y sus soluciones.
| Problema | Posible causa | Solución |
|---|---|---|
| La luz no se enciende. | Sin energía, conexión suelta, bombilla defectuosa. | Revise el disyuntor. Asegúrese de que todas las conexiones estén seguras. Cambie la bombilla. |
| La luz parpadea. | Bombilla suelta, regulador incompatible, cableado defectuoso. | Tighten bulb. Ensure dimmer is LED compatible. Consult electrician for wiring check. |
| Spotlight not secure on track. | Locking mechanism not engaged. | Ensure spotlight is fully inserted and locking mechanism is rotated to secure position. |
Especificaciones del producto
| Característica | Detalle |
|---|---|
| Marca | Ledvión |
| Número de modelo | LVT10001_2m5s |
| Longitud de la pista | 2 meters (2000 mm) |
| Overall Product Dimensions (packaged) | 105 x 20 x 15 cm |
| Peso del artículo | 2.14 kilogramos |
| Material | Aluminio |
| Color | Negro |
| Volumentage | 230 voltios |
| Tipo de bombilla | LED (adaptación GU10) |
| Regulable | Yes (with compatible GU10 bulbs and external dimmer) |
| Estilo | Track Lighting SET 1 |
| País natal | Porcelana |
Optional Upgrades and Accessories
The Ledvion track lighting system is expandable with various optional accessories to customize your lighting setup. These include different connectors and pendant spots.

Image: Optional upgrades and accessories for Ledvion track lighting.
Información de garantía
Ledvion products are manufactured to high-quality standards. This product comes with a standard manufacturer's warranty against defects in materials and workmanship. Please refer to your purchase documentation or contact customer support for specific warranty terms and conditions applicable in your region.
Atención al cliente
If you have any questions, require technical assistance, or need to report an issue, please contact your retailer or visit the official Ledvion webSitio para recursos de soporte.
Fabricante: Ledvión
Websitio: www.ledvion.com