Nuwave Bravo Pro Smart Air Fryer Toaster Oven Combo
Model: Bravo Pro Toaster Oven Black
Marca: Nuwave
Introducción
This manual provides essential information for the safe and efficient operation of your Nuwave Bravo Pro Smart Air Fryer Toaster Oven Combo. Please read all instructions carefully before initial use and retain this manual for future reference.
Medidas de seguridad importantes
Al utilizar aparatos eléctricos, siempre se deben seguir precauciones básicas de seguridad, incluyendo:
- Lea todas las instrucciones.
- No toque superficies calientes. Utilice asas o perillas.
- Para protegerse contra descargas eléctricas, no sumerja el cable, los enchufes ni el aparato en agua ni en ningún otro líquido.
- Es necesaria una estrecha supervisión cuando cualquier aparato sea utilizado por niños o cerca de ellos.
- Desenchufe el aparato del tomacorriente cuando no lo utilice y antes de limpiarlo. Deje que se enfríe antes de colocar o quitar piezas.
- No opere ningún aparato con un cable o enchufe dañado o después de que el aparato funcione mal o haya sufrido algún daño.
- El uso de accesorios no recomendados por el fabricante del aparato puede provocar lesiones.
- No utilizar en exteriores.
- No deje que el cable cuelgue del borde de la mesa o mostrador, ni que toque superficies calientes.
- No lo coloque sobre o cerca de un quemador de gas o eléctrico caliente, ni dentro de un horno caliente.
- Se debe tener mucho cuidado al mover un aparato que contenga aceite caliente u otros líquidos calientes.
- Siempre conecte primero el enchufe al aparato y luego enchufe el cable a la toma de corriente. Para desconectarlo, apague cualquier control y luego desenchufe el aparato de la toma de corriente.
- No utilice el aparato para ningún fin distinto del previsto.
Qué incluye
Your Nuwave Bravo Pro Smart Air Fryer Toaster Oven Combo package includes the following components:

Image showing the included accessories: Enamel Baking Pan, Heavy Duty Cooking Rack, Air Fry Basket, Crumb Tray, and Recipe Book.
- 1 x Bravo Pro Air Fryer Toaster Oven
- 1 x Heavy-Duty Cooking Rack
- 1 x Molde para hornear esmaltado
- 1 x Cesta para freír al aire
- 1 bandeja para migas.
- 1 x Manual del propietario (este documento)
- 1 x Guía de inicio rápido
- 1 x libro de recetas
All included accessories are PFAS-Free.
Configuración
- Desembalaje del aparato: Carefully remove the oven and all accessories from the packaging. Remove any protective film or packing materials.
- Accesorios limpios: Wash the baking pan, air fry basket, cooking rack, and crumb tray with warm, soapy water. Rinse thoroughly and dry completely. Wipe the interior and exterior of the oven with a damp paño.
- Posición del horno: Place the oven on a stable, heat-resistant, and level surface. Ensure there is adequate clearance (at least 4 inches) on all sides and above the oven for proper ventilation. Do not place it near flammable materials.
- Insertar bandeja recogemigas: Slide the crumb tray into the lowest slot at the bottom of the oven.
- Quema inicial: Before first use, it is recommended to run the oven empty for about 15 minutes at 400°F (200°C) to burn off any manufacturing residues. Some smoke or odor may be present; this is normal. Ensure the area is well-ventilated.
- Conectar: Conecte el cable de alimentación a una toma de corriente con conexión a tierra. La pantalla digital se iluminará.
Instrucciones de funcionamiento
Panel de control sobreview

The user-friendly control panel features an LED display, intuitive control dial, and prominent buttons for easy operation.
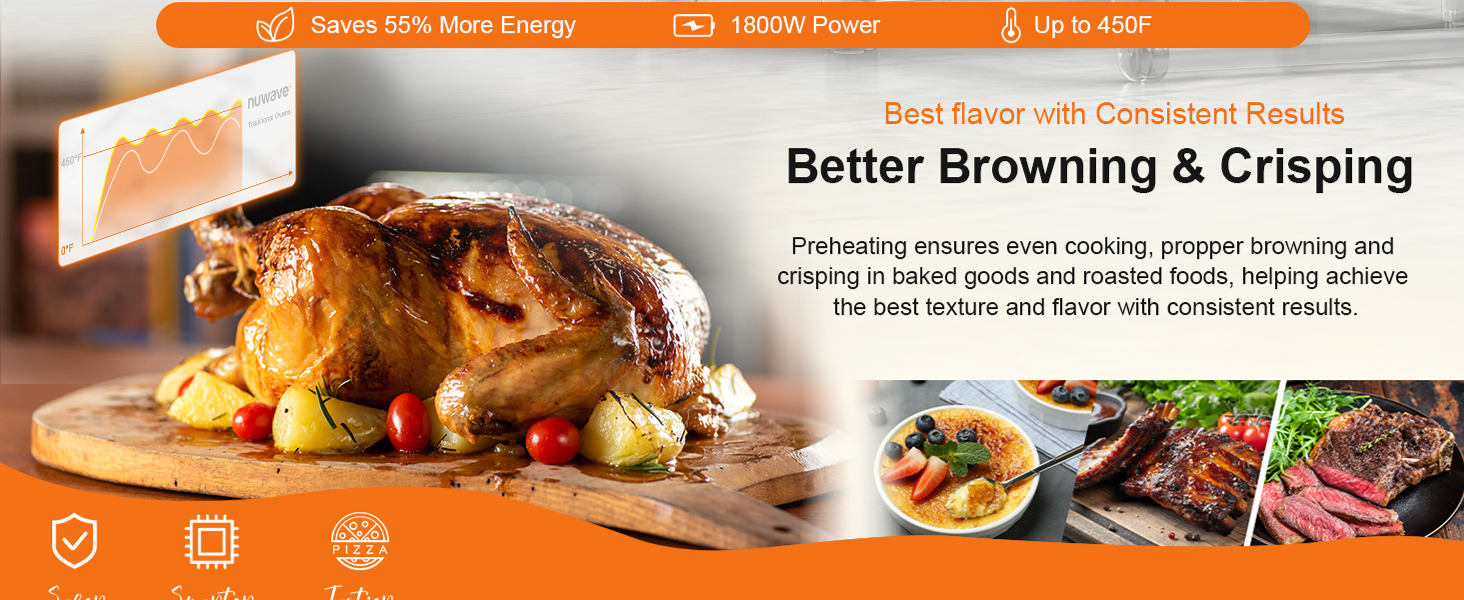
The Nuwave Bravo Pro features an enhanced interactive digital display and intuitive controls for a seamless cooking experience.
- Botón ON/OFF: Enciende o apaga la unidad.
- Botón MENÚ: Cycles through the 12 pre-programmed cooking functions.
- Botón TEMPERATURA: Allows adjustment of cooking temperature.
- Botón HORA: Allows adjustment of cooking time.
- Botón PRECALENTAR: Activa la función de precalentamiento.
- TOP/BTM Button: Adjusts the ratio of top and bottom heating elements.
- Botón VENTILADOR: Adjusts the convection fan speed (0-3 settings).
- Botón INICIO/PAUSA: Inicia o pausa el ciclo de cocción.
- Control Dial (+/-): Used to increase or decrease temperature, time, or other settings.
Funciones preprogramadas

The oven offers 12 pre-programmed presets for various cooking needs, making meal preparation easier.
The Bravo Pro features 12 pre-programmed functions for common cooking tasks:
- Fritura de aire
- Parrilla
- Hornear
- Recalentar
- Rosquilla
- Pizza
- Tostada
- Asar
- Gofre
- Deshidratar
- Congelado
- Mantener caliente
To select a function, press the MENU button repeatedly until the desired function is highlighted on the display.
Ajuste de temperatura y tiempo

The oven allows precise temperature control from 50°F to 450°F in 5°F increments for optimal cooking results.
After selecting a cooking function, you can adjust the temperature and time:
- Presione el TEMPERATURA button, then turn the control dial to set the desired temperature (range: 50°F to 450°F in 5°F increments).
- Presione el TIEMPO button, then turn the control dial to set the desired cooking duration (up to 24 hours).
Customizing Heating Elements and Fan Speed

Customize the ratio of top and bottom heaters from 0% to 100% for precise cooking, such as achieving crispy pizza crusts and melted cheese.
For advanced cooking control, you can adjust the heating elements and fan speed:
- Presione el ARRIBA/BTM button to adjust the ratio of top and bottom heaters from 0% to 100%. This allows for specific browning or cooking requirements.
- Presione el FAN button to select one of the three available convection fan speeds (0-3). Higher fan speeds result in quicker cooking and crispier results.
Capacidad de cocción
The 21 QT capacity of the Bravo Pro is designed to accommodate various meal sizes:
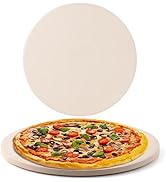
- Se adapta a una pizza de 12 pulgadas.
- Accommodates a 4-lb chicken.
- Suitable for a 4-lb roast.
- Can cook up to 16 oz of French fries.
Visual representation of the oven's capacity, including 16 oz French fries, 4 slices of toast, a 12-inch pizza, and a 4-lb whole chicken.
Mantenimiento y limpieza
Many accessories are dishwasher-safe for easy cleaning.
Regular cleaning and maintenance will ensure the longevity and optimal performance of your Nuwave Bravo Pro.
- Desenchufe siempre el horno y dejar enfriar completamente antes de limpiarlo.
- Bandeja para migas: Remove and empty the crumb tray after each use. Wash it with warm, soapy water or place it in the dishwasher.
- Accesorios: The heavy-duty cooking rack, baking pan, and air fry basket are PFAS-Free and dishwasher-safe. For stubborn food residue, soak in warm, soapy water before cleaning.
- Interior: Limpia las paredes interiores con un anuncio.amp cloth and mild detergent. Avoid abrasive cleaners or scouring pads that can damage the non-stick coating. For baked-on grease, a non-abrasive oven cleaner designed for non-stick surfaces may be used sparingly.
- Exterior: Limpie el exterior con publicidad.amp Paño. No utilice limpiadores abrasivos.
- Puerta: Clean the tempered glass door with a glass cleaner or damp paño.
- Elementos calefactores: Do not attempt to clean the heating elements. Any food splatters on them will burn off during operation.
Solución de problemas
If you encounter any issues with your Nuwave Bravo Pro, refer to the following common troubleshooting steps:
| Problema | Posible causa | Solución |
|---|---|---|
| El horno no enciende. | No enchufado; sin energíatage; toma de corriente defectuosa. | Asegúrese de que el horno esté bien enchufado a una toma de corriente que funcione. Revise el disyuntor. |
| La comida no se cocina de manera uniforme. | Overcrowding; incorrect rack position; fan speed too low. | Avoid overcrowding the oven. Use the recommended rack position. Increase convection fan speed. Ensure proper preheating. |
| Exceso de humo durante la cocción. | Residuos de comida; alimentos con alto contenido de grasa; bandeja recogemigas sin limpiar. | Clean the oven interior and crumb tray thoroughly. Use a baking pan under high-fat foods to catch drips. |
| La pantalla digital no responde. | Fallo electrónico temporal. | Unplug the oven from the power outlet for 1-2 minutes, then plug it back in to reset. |
Si el problema persiste después de intentar estas soluciones, comuníquese con el servicio de atención al cliente de Nuwave.
Presupuesto
| Marca | Nuwave |
| Nombre del modelo | Bravo Pro Toaster Oven Black |
| Color | Negro |
| Dimensiones del producto | 13.5" de profundidad x 17.62" de ancho x 9.5" de alto |
| Capacidad | 21 QT |
| Fuente de poder | Adaptador de CA (1800 W) |
| Rango de temperatura | 50-450°F (in 5°F increments) |
| Tipo de control | Control táctil |
| Características especiales | 12 Cooking Functions, Adjustable Rack, Quick & Even Crisp Technology, Upper and Lower Heaters Adjustable From 0-100%, 3 Selectable Fan Speeds, 10 Toast Settings, Linear T™ Heat Tech, Warm Function, Super-Speed and Quiet Fan, PFAS-Free Accessories |
| Peso del artículo | 16 libras |
| Tipo de material de la puerta | Vidrio templado |
| Código Postal | 652185902169 |
Garantía y soporte
Nuwave is committed to providing excellent customer service. Your Bravo Pro Smart Air Fryer Toaster Oven Combo comes with a commitment to lifetime service support.
- Servicio de por vida: You will receive 24-hour lifetime service support for a first-class customer experience.
- For any questions, technical assistance, or warranty claims, please refer to the contact information provided in your Quick Start Guide or visit the official Nuwave websitio.
Nuwave offers dedicated customer support for assistance.


