1. Introducción
The SINGER M1000 Mending Machine is designed for light to medium weight fabrics, offering portability and ease of use for basic mending and garment repairs. This manual provides essential information to help you operate and maintain your machine effectively.
2. Información importante de seguridad
Siga siempre las precauciones básicas de seguridad al utilizar aparatos eléctricos para reducir el riesgo de incendio, descarga eléctrica o lesiones a las personas.
- Lea todas las instrucciones antes de usar la máquina.
- Mantenga la máquina alejada del agua o de superficies mojadas.
- Desenchufe la máquina del tomacorriente eléctrico cuando no esté en uso, cuando la esté reparando o cuando cambie accesorios.
- No permita que los niños operen la máquina sin supervisión.
- Utilice la máquina únicamente para el fin previsto, tal como se describe en este manual.
- Nunca opere la máquina si tiene un cable o enchufe dañado, si no funciona correctamente o si se ha caído o dañado.
3. Contenido del paquete
Verifique que todos los artículos estén presentes en su paquete:
- SINGER M1000 Mending Machine
- Pie multiusos
- Transparent Class 15 Bobbins
- Extra Needle
- Enhebrador de agujas manual
- Cable de alimentación

Image: The SINGER M1000 Mending Machine in blue, shown with its power cord, foot pedal, bobbins, and other accessories.
4. Máquina terminadaview
Familiarize yourself with the main components of your SINGER M1000 Mending Machine.

Image: This image highlights key features: the Easy Stitch Selection dial, a visual representation of 32 stitch applications, and the Reverse Lever for securing stitches.
- Dial de selección de puntada: Located on the front of the machine, used to choose desired stitch patterns.
- Palanca de marcha atrás: Engages reverse stitching to secure seams.
- Bobina de inserción superior: Provides easy access for bobbin insertion and monitoring thread supply.
- Brazo libre: Accessible by removing the accessory compartment, ideal for sewing cuffs and hems.
- Luz LED: Ilumina el área de costura para una mejor visibilidad.
5. Configuración
5.1 Conexión de alimentación
Connect the power cord to the machine and then to a suitable electrical outlet. Ensure the foot pedal is also connected.
5.2 Bobinado de la bobina
- Place an empty Class 15 transparent bobbin onto the bobbin winder spindle.
- Follow the threading guides for bobbin winding, typically indicated by dashed lines or numbers on the machine.
- Engage the bobbin winder and press the foot pedal to start winding.
- Stop when the bobbin is full and trim the thread.
5.3 Enhebrado de la máquina
Un enhebrado correcto es crucial para una puntada correcta. Siga atentamente las guías de enhebrado numeradas de la máquina.
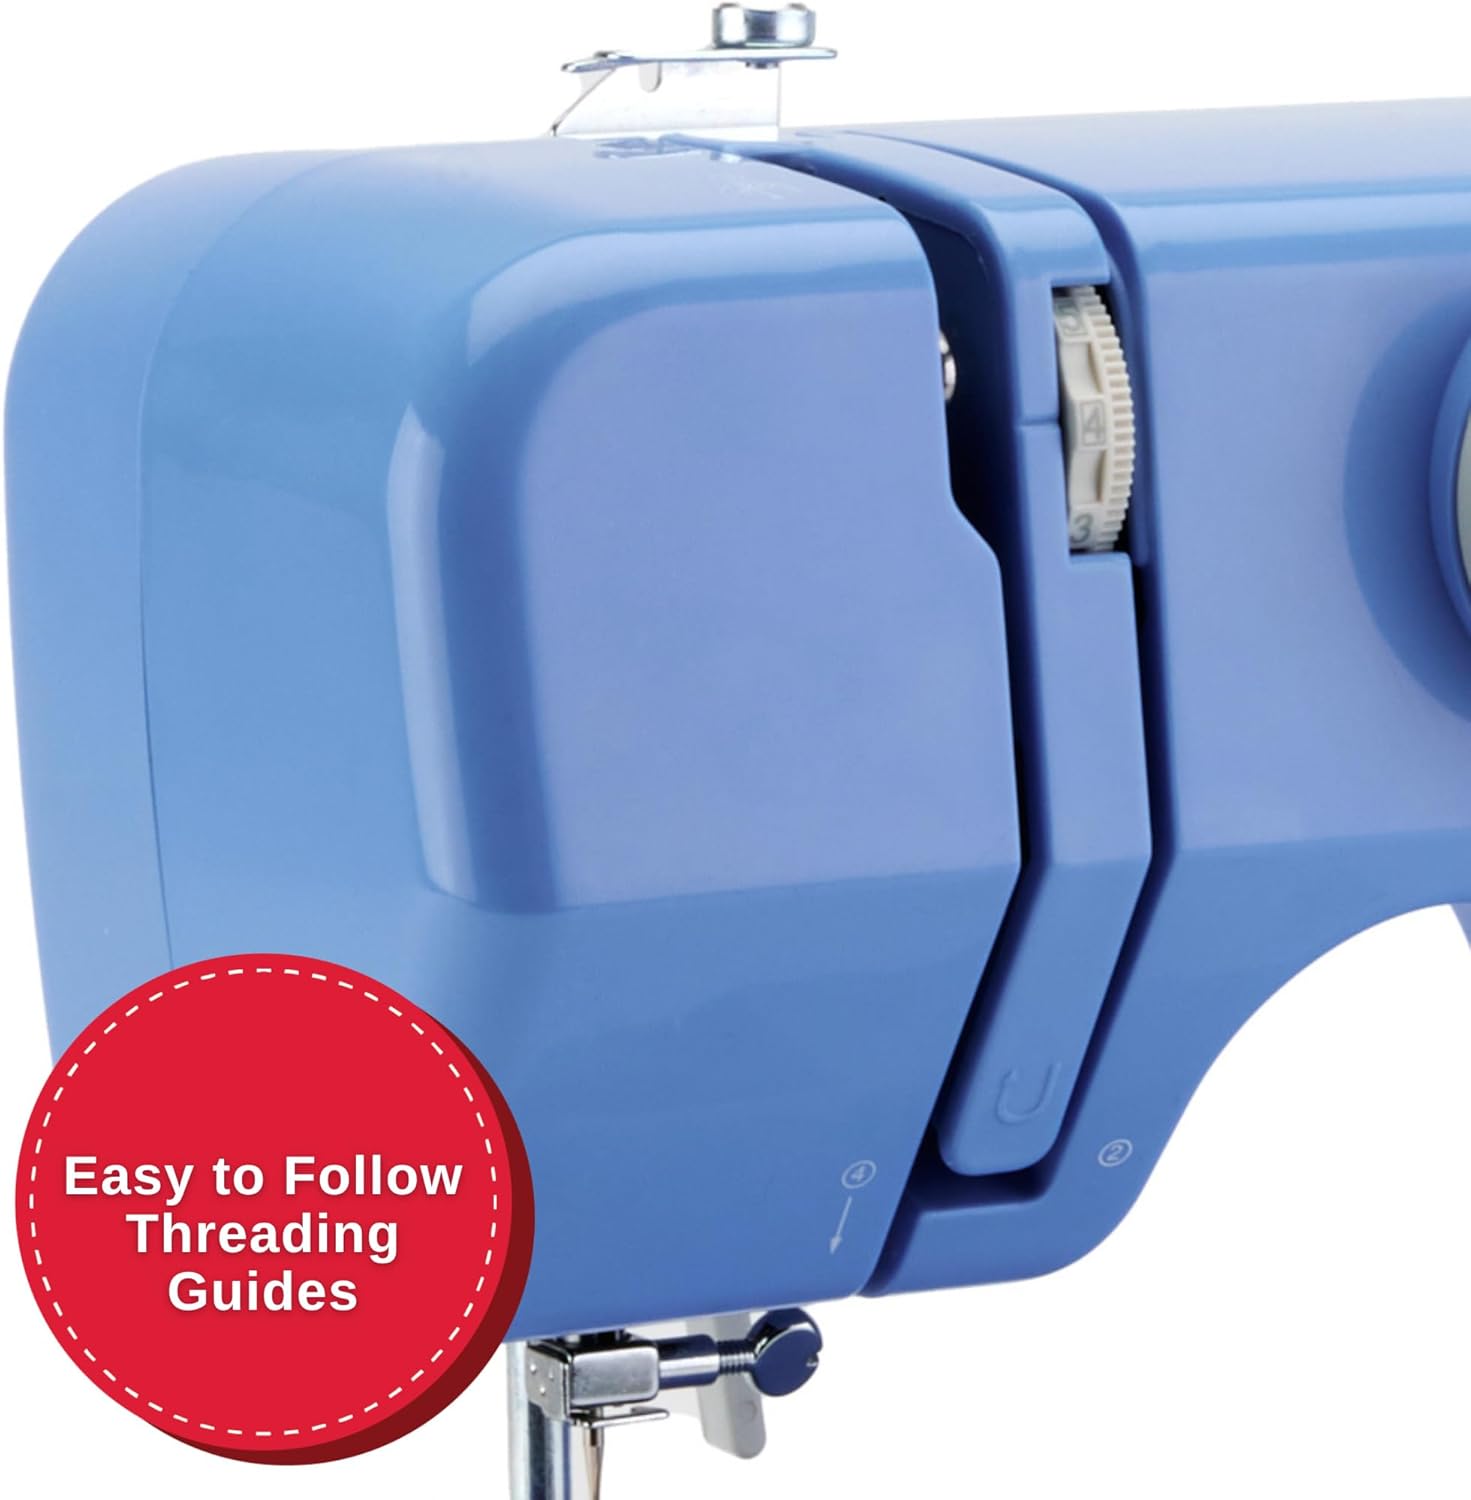
Imagen: Un detalle view of the machine's side, illustrating the clear, numbered threading guides to ensure correct upper thread path.
- Suba el alzador del prensatelas.
- Coloque un carrete de hilo en el portacarrete.
- Guide the thread through the upper threading path, following the numbered steps or arrows.
- Enhebre la aguja de adelante hacia atrás.
- Insert the wound bobbin into the top drop-in bobbin case.
- Pase el hilo de la bobina hacia arriba a través de la abertura de la placa de la aguja.

Image: A close-up showing the transparent cover of the top drop-in bobbin, indicating easy access and visibility of the bobbin thread supply.
6. Instrucciones de funcionamiento
6.1 Selección de puntadas
Turn the Stitch Selection Dial to choose one of the 32 available stitch applications. The machine automatically sets the optimal stitch width and length for the selected stitch.
- Puntada recta: Para costuras básicas y pespuntes.
- Puntada en zigzag: Para el acabado de bordes sin rematar, apliques y fines decorativos.
- Multi-step Zigzag: Suitable for elastic insertion and seam finishing.
- Puntada de dobladillo invisible: Para crear dobladillos invisibles.
6.2 Empezando a coser
- Coloque la tela debajo del prensatelas.
- Bajar el pie prensatela.
- Gently press the foot pedal to begin sewing. The machine operates at a single speed.
6.3 Using the Reverse Lever
To secure the beginning and end of a seam, press and hold the Reverse Lever while sewing. Release the lever to continue sewing forward.
6.4 Costura con brazo libre
Remove the accessory compartment to expose the free arm. This feature is useful for sewing small, tubular items such as cuffs, pant hems, and necklines.
6.5 Adjustable Thread Tension
The machine's tension control allows you to adjust the balance between the upper and bobbin threads. Proper tension ensures a smooth, even stitch. Adjust as needed based on fabric type and thread thickness.
7. Mantenimiento
Regular maintenance ensures optimal performance and longevity of your sewing machine.
- Limpieza: Limpie periódicamente la pelusa y el polvo de la zona de la bobina y los dientes de arrastre con un cepillo pequeño. Desenchufe siempre la máquina antes de limpiarla.
- Reemplazo de aguja: Replace needles regularly, especially if they become bent or dull, to prevent skipped stitches and fabric damage.
- Tipo de bobina: Use only SINGER Class 15 Transparent bobbins for best results.
8. Solución de problemas
Esta sección aborda problemas comunes que podrías encontrar. Para problemas más complejos, consulta los recursos de soporte oficiales de SINGER.
| Problema | Posible causa | Solución |
|---|---|---|
| Puntadas saltadas | Incorrectly threaded needle, bent needle, wrong needle size for fabric. | Re-thread the machine, replace the needle, use appropriate needle for fabric type. |
| Rotura de hilo | Tensión incorrecta, hilo de mala calidad, bobina mal enrollada, rebabas en la placa de la aguja. | Ajuste la tensión, utilice hilo de buena calidad, rebobine la bobina y verifique si hay rebabas. |
| La tela no avanza | El prensatelas no está bajado, los dientes de arrastre están obstruidos con pelusa. | Baje el prensatelas y limpie los dientes de arrastre. |
| Machine Runs Slowly / Stops | Overload (too thick fabric), motor issue, internal jam. | Ensure fabric is suitable for the machine (light to medium weight). If problem persists, contact support. |
9. Especificaciones
- Modelo: M1000
- Dimensiones: 5.1" de profundidad x 11.5" de ancho x 9.4" de alto
- Peso: 5.5 libras (2.5 kg)
- Aplicaciones de puntada: 32
- Tipo de bobina: Class 15 Transparent
- Espacio de costura (de la aguja a la torre): 4.25 pulgadas
- Fuerza: Cable de alimentación incluido

Image: The SINGER M1000 Mending Machine, illustrating its compact dimensions of 11.5 inches width and 9.5 inches height, highlighting its portability.
10. Garantía y soporte
The SINGER M1000 Mending Machine comes with a warranty (1 year / 25 years, as per product description). For detailed warranty information and to register your product, please visit the official SINGER websitio.
For additional support, tutorials, and troubleshooting guides, download the free Creativate app:

Image: A mobile phone displaying the Creativate app, which offers a user manual, quick start guide, tutorials, and troubleshooting assistance for SINGER machines.
Descargar la aplicación:
You can also download the PDF user manual directly: SINGER M1000 User Manual PDF


