Introducción
The Instrukart Keller LEO2 Digital Pressure Gauge is a battery-powered, compact, and highly accurate instrument designed for various industrial applications, servicing, calibration, and testing. It features a robust piezoresistive pressure cell that has undergone extensive pressure and temperature tests, with individual adjustments for each unit to ensure an accuracy of 0.1% FS. This specific model is designed for a pressure range of 0 to 212 psi (0 to 100 Bar). The internal battery provides up to 1,000 hours of continuous operation, making it suitable for extended use in the field.

Imagen: Frente view of the Instrukart Keller LEO2 Digital Pressure Gauge, displaying pressure readings and control buttons.
Configuración
1. Instalación de la batería
The Keller LEO2 gauge operates on a 3V CR 2430 battery. To install or replace the battery:
- Localice la tapa del compartimiento de la batería en la parte posterior del dispositivo.
- Carefully open the cover by twisting or unlatching as indicated.
- Insert the CR 2430 battery, ensuring the correct polarity (+/-).
- Securely close the battery compartment cover to maintain the IP65 protection rating.

Imagen: Trasera view of the Keller LEO2 Digital Pressure Gauge, highlighting the battery compartment for installation.
2. Conexión de presión
The gauge is equipped with a 7/16”-20 UNF pressure connection. An adapter for G 1/4” is included for common applications.
- Asegúrese de que el sistema de presión esté despresurizado antes de conectar el manómetro.
- Thread the gauge directly onto the pressure source or use the provided G 1/4” adapter if necessary.
- Tighten the connection firmly by hand, then use a wrench for a final snug fit, avoiding overtightening.
- Check for any leaks after pressurizing the system.

Imagen: Lateral view of the Keller LEO2 Digital Pressure Gauge, showing the pressure connection point.
Instrucciones de funcionamiento
1. Encendido y apagado
Mantenga pulsado el INGRESAR button to power on the device. The gauge will automatically power off after a period of inactivity to conserve battery life. To manually power off, press and hold the INGRESAR botón de nuevo.
2. Lecturas de la pantalla
The LEO2 features a dual display:
- El top display indicates the current, actual pressure reading.
- El bottom display shows either the maximum (MAX) or minimum (MIN) pressure recorded since the last reset.
The pressure is measured and updated twice per second.
3. Navigating Display Modes (MAX/MIN)
Utilice el SELECCIONAR button to toggle between displaying the MAX and MIN pressure values on the bottom display.
4. Resetting MAX/MIN Values
To reset the recorded maximum and minimum pressure values:
- Ensure the gauge is powered on.
- Mantenga pulsado el SELECCIONAR button until the MAX/MIN values on the bottom display reset to the current pressure.

Imagen: En ángulo view of the Keller LEO2 Digital Pressure Gauge, showing the clear digital display with current and recorded pressure values.
Mantenimiento
1. Reemplazo de la batería
When the battery indicator shows low power or the display becomes dim, replace the 3V CR 2430 battery as described in the Setup section. Always use a fresh, high-quality battery for optimal performance and to ensure the stated 1000-hour operating life.
2. Limpieza
Limpie el exterior del medidor con un paño suave.amp cloth. Do not use abrasive cleaners, solvents, or immerse the device in liquids. Ensure the pressure connection port is free from debris before and after use.
3. Almacenamiento
Store the Keller LEO2 in a dry, cool environment, away from direct sunlight and extreme temperatures. If storing for an extended period, it is recommended to remove the battery to prevent leakage. The gauge comes with a protective case for safe storage and transport.
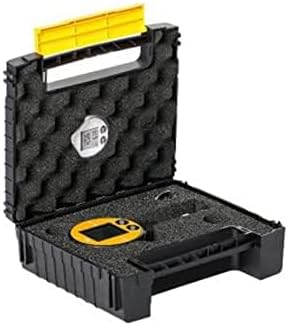
Image: The Instrukart Keller LEO2 Digital Pressure Gauge stored securely within its protective carrying case.
Solución de problemas
| Problema | Posible causa | Solución |
|---|---|---|
| El medidor no se enciende | Batería agotada o mal instalada | Replace battery (CR 2430) and ensure correct polarity. |
| Lecturas de presión inexactas | Gauge not properly connected; Sensor contamination; Calibration required | Check pressure connection for leaks. Ensure sensor port is clean. If issues persist, contact support for calibration. |
| La pantalla está tenue o parpadea | Batería baja | Reemplace la batería. |
| Los valores MÁX/MÍN no se restablecen | Secuencia de pulsación de botón incorrecta | Mantenga pulsado el SELECCIONAR button until values reset. |
Especificaciones técnicas
- Rango de presión: De 0 a 212 psi (de 0 a 100 bar)
- Sobre presión: 145.0 psi (10 bar)
- Resolución: 0.014 psi (1 mbar)
- Exactitud: < 0.1 %FS
- Fuente de alimentación: 3V battery, Type CR 2430
- Duración de la batería: 1000 horas de funcionamiento continuo
- Temperatura de funcionamiento: -4 to 158°F (-20 to 70 °C) for electronics; 32 to 122 °F (0 to 50 °C) for display
- Dimensions (Diameter x Height x Depth): 59 x 95 x 32 mm
- Peso: 0.27 libras (125 g)
- Clasificación de protección: IP65
- Conexión de presión: 7/16”-20 UNF (Adapter G 1/4” included)
- Material: Acero aleado
- Número de modelo: IK-KE-o2
Información de garantía
For detailed warranty information regarding your Instrukart Keller LEO2 Digital Pressure Gauge, please refer to the documentation provided at the time of purchase or visit the official Instrukart webSitio. Los términos de garantía generalmente cubren defectos de fabricación en condiciones normales de uso.
Atención al cliente
If you require further assistance, have questions about the operation, or need technical support for your Instrukart Keller LEO2 Digital Pressure Gauge, please contact Instrukart customer service or your authorized local distributor. Contact details can typically be found on the Instrukart official websitio o su factura de compra.


