1. Introducción
The Parkside PTI 380 B1 Infrared Thermometer is designed for quick and accurate non-contact surface temperature measurements. It is an ideal tool for identifying thermal bridges and areas at risk of mold formation. This manual provides essential information for the safe and proper operation of your device.
2. Información de seguridad
WARNING! Do not look directly into the laser beam. Direct exposure to the laser can cause eye damage.
- Maneje siempre el dispositivo con cuidado.
- No intente desarmar o modificar el dispositivo.
- Mantenga el dispositivo alejado del agua y de temperaturas extremas.
- Ensure proper battery disposal.
3. Producto terminadoview
The Parkside PTI 380 B1 features an ergonomic design with a soft-grip handle for comfortable use. It includes an 8-point laser for precise targeting of the measurement area and a color display with audible signals for easy interpretation of results.
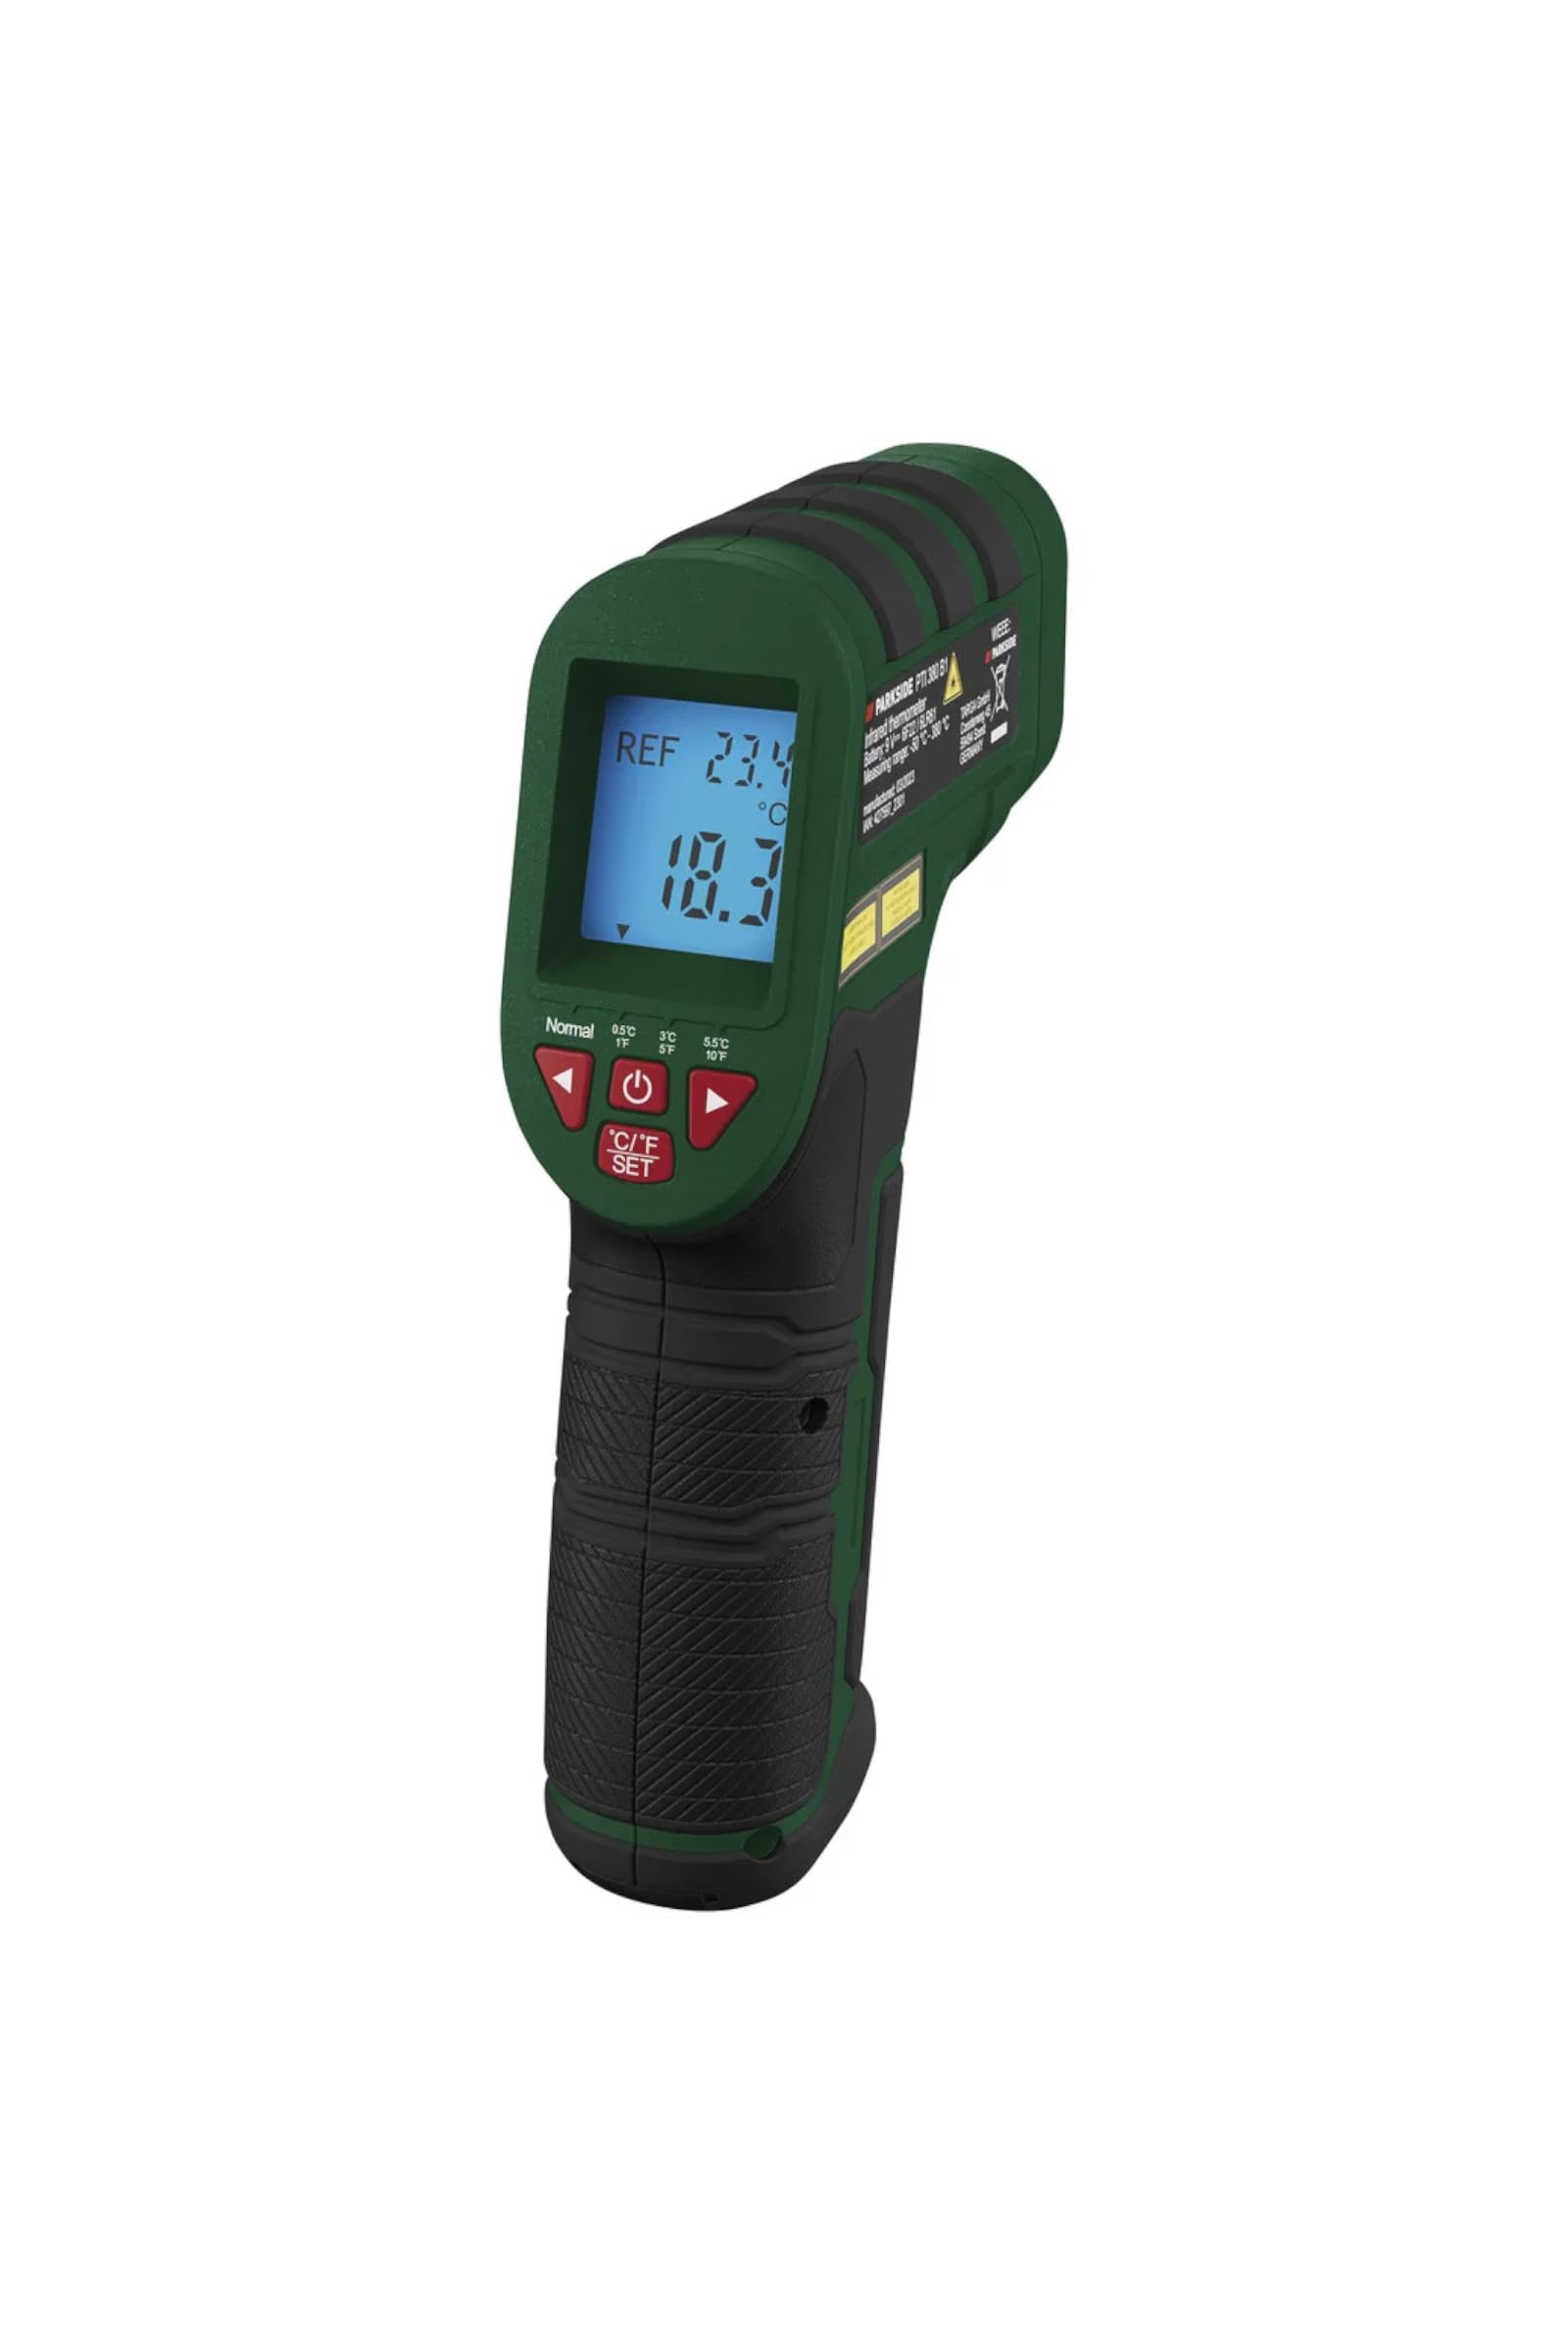
Figura 1: En general view of the Parkside PTI 380 B1 Infrared Thermometer.

Figura 2: Lado view of the thermometer, highlighting the trigger and control buttons.

Figura 3: Frente view, showing the infrared sensor and the 8-point laser aperture.
Componentes:
- Sensor infrarrojo
- Láser de 8 puntos
- Pantalla LCD a color
- Gatillo de medición
- Botones de selección de modo
- Unit Selection Button (°C/°F)
- Battery Compartment (located in the handle)
4. Configuración
4.1 Instalación de la batería
- Localice la tapa del compartimiento de la batería en el mango del dispositivo.
- Abra la tapa.
- Inserte la batería incluida, asegurándose de la polaridad correcta (+/-).
- Cierre bien la tapa del compartimento de la batería.
The device includes a battery change indicator on the display to alert you when the battery level is low.
5. Instrucciones de funcionamiento
5.1 Encendido / Apagado
Press the measurement trigger to power on the device. The device will automatically shut off after approximately 60 seconds of inactivity to conserve battery life.
5.2 Selección de unidades de medida
Presione el °C/°F AJUSTE Botón para cambiar entre unidades de temperatura Celsius (°C) y Fahrenheit (°F).
5.3 Modos de medición
The device offers two operating modes: Medición fácil y Medición de referencia.
5.3.1 Easy Measurement
In this mode, simply point the thermometer at the surface you wish to measure and press the trigger. The current surface temperature will be displayed.
5.3.2 Reference Measurement
This mode is ideal for comparing a measured temperature against a set reference value, useful for detecting thermal bridges or potential mold areas. You can select reference levels of ± 0.5 °C, ± 3 °C, or ± 5.5 °C.
- Set your desired reference temperature.
- Point the thermometer at the surface.
- The display will show a color and emit an audible signal based on the difference between the measured value and the reference value:
- Azul: The measured temperature is colder than the reference value.
- Rojo: The measured temperature is warmer than the reference value.
- Verde: The measured temperature is approximately the reference value.

Figura 4: Pantalla examples showing blue (colder), red (warmer), and green (approximate) indications relative to a reference temperature.
5.4 Realización de una medición
- Aim the 8-point laser at the center of the area you wish to measure. The laser points define the measurement spot.
- Press and hold the measurement trigger.
- La lectura de la temperatura aparecerá en la pantalla.
- Release the trigger to hold the last measurement.

Figure 5: Using the thermometer to measure the surface temperature of a stove top.

Figura 6: Aplicación example: measuring temperature around a fireplace to detect heat loss.
6. Mantenimiento
6.1 Limpieza
Wipe the device with a soft, dry cloth. Do not use abrasive cleaners or solvents. Ensure the infrared sensor lens and laser aperture are kept clean for accurate readings.
6.2 Reemplazo de batería
When the battery indicator appears on the display, replace the battery as described in the "Battery Installation" section (4.1). Always use the correct type of battery.
6.3 Almacenamiento
Store the device in a cool, dry place, away from direct sunlight and extreme temperatures, when not in use for extended periods.
7. Solución de problemas
- El dispositivo no se enciende: Compruebe que la batería esté correctamente instalada y tenga suficiente carga. Reemplácela si es necesario.
- Lecturas inexactas: Ensure the sensor lens is clean and free from obstructions. Make sure the measurement distance is appropriate for the target size.
- Láser no visible: Check if the laser function is enabled (if applicable) and ensure the battery has sufficient charge.
Si los problemas persisten, póngase en contacto con el servicio de atención al cliente.
8. Especificaciones
| Característica | Especificación |
|---|---|
| Modos de funcionamiento | Easy Measurement / Reference Measurement |
| Rango de medición | -50 ° C a +380 ° C (-58 ° F a +716 ° F) |
| Measurement Deviation (> 0 °C) | ± 1.5 °C |
| Measurement Deviation (< 0 °C) | ± 3 °C |
| Niveles de referencia seleccionables | ± 0.5 °C / ± 3 °C / ± 5.5 °C |
| Unidades de medida | ° C y ° F |
| Apagado automático | Aprox. 60 segundos |
| Material | Plástico |
| Dimensiones (L x An x Al) | Aprox. 17.6 x 11 x 4.2 cm (6.9 x 4.3 x 1.7 pulgadas) |
| Peso | Aprox. 260 g (0.57 libras) |
| Fabricante | OWIM GmbH & Co. KG |
| Componentes incluidos | Measuring device, Battery |
9. Garantía y soporte
Para obtener información sobre la garantía y atención al cliente, consulte la documentación incluida con su compra o póngase en contacto con el vendedor. Conserve el comprobante de compra para cualquier reclamación de garantía.
Fabricante: OWIM GmbH & Co. KG


