1. Introducción
Thank you for choosing the Vormooi 96GB Voice Recorder. This device is designed for high-quality audio recording with extensive storage and user-friendly features. Please read this manual carefully to ensure proper use and to maximize the potential of your new voice recorder.

Figure 1: Vormooi 96GB Voice Recorder and accessories.
2. Primeros pasos (Configuración)
2.1 ¿Qué hay en la caja?
Upon unboxing your Vormooi Voice Recorder, please verify that all components are present:
- 1 x Vormooi 96GB Digital Voice Recorder (32GB built-in memory)
- 1 x 64GB TF Memory Card (pre-installed)
- 1 micrófono externo de 3.5 mm
- 1 cable de entrada de línea de 3.5 mm
- 1 x cable USB C a USB C
- 1 x USB C Cable (for charging/data transfer)
- 1 x Cordón
- 1 x Manual de usuario (este documento)
- 1 x Guía de inicio rápido

Figura 2: Todos los elementos incluidos en el paquete del producto.
2.2 Carga del dispositivo
The Vormooi Voice Recorder is equipped with an 1100mAh battery, providing up to 110 hours of continuous recording on a full charge. It takes approximately 2 hours to fully charge the device.
- Connect the provided USB-C cable to the USB-C port on the recorder.
- Conecte el otro extremo del cable USB-C a un adaptador de corriente USB (no incluido) o al puerto USB de una computadora.
- El icono de la batería en la pantalla indicará el estado de carga.
Video 1: Demonstrates how to charge the Vormooi V71 Voice Recorder using the USB-C port. The video shows connecting the device to a power strip and a laptop for charging, highlighting the charging indicator on the screen.

Figure 3: The recorder's USB-C port supports two charging methods, allowing for full charge in 2 hours for 110 hours of continuous recording.
2.3 Encendido y apagado
To power on or off the device, long press the central Power/Play button.
Video 2: Demonstrates powering the device on and off by long-pressing the Power/Play button. The screen displays "WELCOME" upon startup.
2.4 Botones de bloqueo/desbloqueo
To prevent accidental operations during recording or transport, use the physical lock switch on the side of the device.
- Push the switch up to lock all buttons. A lock icon will appear on the screen.
- Push the switch abajo to unlock the buttons. The lock icon will disappear.

Figure 4: The dedicated lock switch prevents unintended button presses.
2.5 Configuración del idioma
Para cambiar el idioma del dispositivo:
- Desde el menú principal, navegue hasta Configuración del sistema.
- Seleccionar Idioma.
- Seleccione el idioma que desee de la lista.
Video 3: Guide on how to set the language on the Vormooi V71 Voice Recorder. It shows navigating through the system settings to the language option and selecting from available languages.
2.6 Setting Date & Time
Ensure the correct date and time are set for accurate file organización:
- De Configuración del sistema, seleccionar Fecha y hora.
- Elegir Configuraciones de fecha to set the year, month, and day. Use the volume buttons (+/-) to adjust values.
- Elegir Ajustes de hora to set the hour and minute. Use the volume buttons (+/-) to adjust values.
Video 4: Instructions on setting the date and time on the Vormooi V71 Voice Recorder. It demonstrates navigating to the date and time settings and adjusting the values.
2.7 Memory and SD Card
The recorder comes with 32GB of built-in memory and an additional 64GB TF card, providing a total of 96GB storage, capable of saving over 7000 hours of 32kbps recordings.
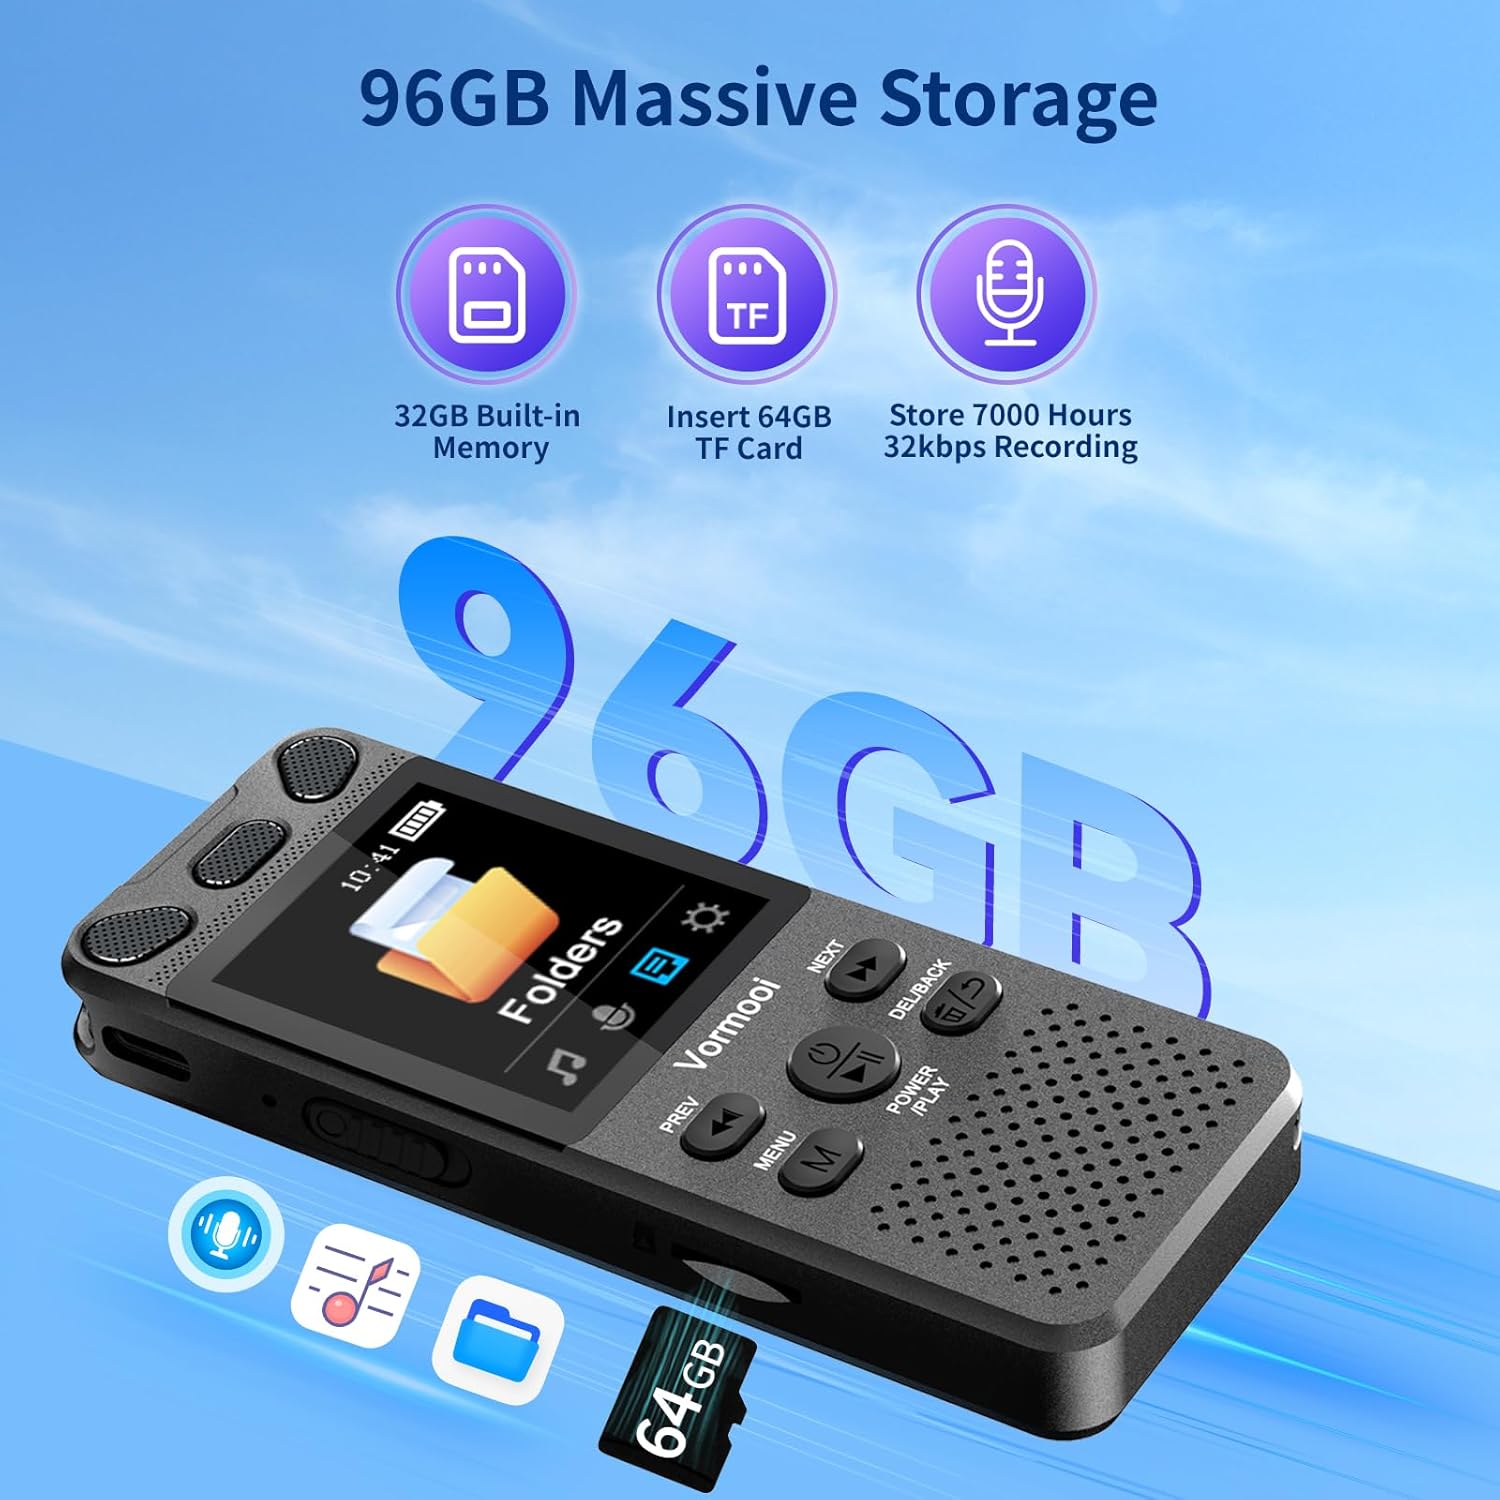
Figura 5: Sobreview of the recorder's substantial storage capacity.

Figure 6: The device supports memory card expansion for increased storage.
3. Funcionamiento de la grabadora
3.1 Grabación con un solo toque
The Vormooi Voice Recorder features a convenient one-touch recording function:
- Para comenzar a grabar, simplemente deslice el REC button upwards. The recording will begin automatically.
- Para guardar la grabación, deslice el REC button downwards. The recording will be saved.

Figure 7: One-touch record/save functionality for quick and easy operation.
Video 5: Demonstrates the one-touch recording feature, showing how to start and save recordings by sliding the REC button. It also shows the recording information displayed on the screen.
Grabación con 3.2 micrófonos
The recorder supports multiple recording modes, including its built-in omni-directional microphone and an external microphone.
- Micrófono interno: The built-in microphone offers 360° omni-directional recording with 1536Kbps HD sound quality and advanced noise reduction.
- Micrófono externo: For enhanced clarity, especially in interviews or specific scenarios, connect the included 3.5mm external microphone.
Note: Before using the external microphone, go to [Recording settings] -> [Recording from] and change to [External microphone].

Figure 8: Using the external microphone for clear and real sound quality.
Video 6: Demonstrates recording with the external microphone, showing how to connect it and clip it to clothing for optimal sound capture.
3.3 Reproducción
Para reproducir sus grabaciones:
- From the Recordings Library, select the desired file.
- Presione brevemente el Poder/Jugar botón para iniciar o pausar la reproducción.
Video 7: Shows how to play and pause recordings using the Power/Play button. The video also demonstrates fast forward and rewind functions.
3.4 Fast Forward/Rewind
During playback, you can quickly navigate through your recordings:
- Mantenga pulsado el PRÓXIMO botón para avanzar rápidamente.
- Mantenga pulsado el ANTERIOR botón para rebobinar.
3.5 AB Repetir
The A-B Repeat function allows you to loop a specific segment of an audio file:
- During playback, short press the MENU (M) button to set the start point (A).
- Presione brevemente el MENU (M) Presione nuevamente el botón para establecer el punto final (B).
- The device will automatically play the audio within the A-B range repeatedly.
Video 8: Demonstrates the A-B repeat function, showing how to set start and end points for looping audio segments.
3.6 Grabación activada por voz (VOR)
The voice-activated recording feature allows the device to start recording automatically when sound is detected and pause when silence occurs, saving storage space.
- Access VOR settings through the menu to enable or disable this feature and adjust sensitivity levels.

Figure 9: Voice Activation is one of the key features for efficient recording.
3.7 Conexión a una computadora
You can easily transfer or backup your recorded files by connecting the recorder to a computer:
- Use the provided USB-C cable to connect the recorder to your computer.
- La grabadora aparecerá como una unidad de disco extraíble en su computadora.
- Luego puedes arrastrar y soltar files para transferirlos.
Video 9: Demonstrates connecting the Vormooi V71 Voice Recorder to a laptop for backing up and transferring files. The video shows the device appearing as a drive on the computer.
4. Mantenimiento
4.1 Formatting Device Memory/SD Card
To clear all data from the internal memory or the SD card:
- De Configuración del sistema, navegar a Formatear dispositivo.
- You will have options to format internal memory or the SD card.
- Confirme su selección. Warning: All data will be permanently deleted. Proceed with caution.
Video 10: Demonstrates how to format the device's internal memory or the SD card. It shows navigating through the system settings to the format option and confirming the deletion of all data.
4.2 Cuidados generales
- Mantenga el dispositivo seco y alejado de temperaturas extremas.
- Evite dejar caer o someter el dispositivo a impactos fuertes.
- Limpie el dispositivo con un paño suave y seco. No utilice productos químicos agresivos ni limpiadores abrasivos.
- Guarde el dispositivo en un lugar seguro cuando no esté en uso.
5. Solución de problemas
| Problema | Posible causa | Solución |
|---|---|---|
| El dispositivo no se enciende. | Batería baja; dispositivo congelado. | Charge the device fully. If frozen, long press the Power/Play button for 10 seconds to force restart. |
| No se puede grabar. | Memory full; device locked; incorrect microphone setting. | Eliminar antiguo files or format memory. Unlock the device. Check recording settings for microphone selection. |
| Mala calidad de grabación. | Distance from source; high background noise; incorrect settings. | Move closer to the sound source. Adjust noise reduction settings. Use external microphone if needed. |
| No se puede conectar a la computadora. | Faulty cable; driver issue; incorrect connection mode. | Try a different USB-C cable. Ensure the device is powered on. Try a different USB port on your computer. |
| Playback issues (no sound, distorted). | Low volume; corrupted file; speaker/headphone issue. | Increase volume. Try playing another file. Test with headphones. |
6. Especificaciones
- Marca: Vormooi
- Modelo: V71
- Capacidad de almacenamiento de memoria: 96 GB (32 GB internos + tarjeta TF de 64 GB)
- Duración media de la batería: 110 horas
- Composición de la celda de la batería: Iones de litio
- Tiempo de carga: Aproximadamente 2 horas
- Calidad de audio: 1536Kbps HD
- Formato de micrófono: Built-In (Omni-directional) & External 3.5mm
- Interfaz de hardware: USB tipo C
- Dispositivos compatibles: Reproductor de MP3, computadora personal, teléfono inteligente
- Formato de medios: Audio MP3, WAV
- Tamaño de pantalla de pie: 2.15 pulgadas
- Dimensiones del producto: 10 x 3.9 x 1.26 cm
- Peso del artículo: 98 gramos
7. Garantía y soporte
Vormooi se compromete a brindar un excelente servicio al cliente y soporte de productos.
- Soporte técnico de por vida: Our dedicated support team is available to assist you with any technical queries or issues you may encounter.
- 2 Years Replacement Service: Enjoy peace of mind with our 2-year replacement service for eligible product defects.
- 24 Hours Rapid Response: The Vormooi support team aims to respond and resolve your problems within 24 hours on weekdays.
For support, please refer to the contact information provided in your Quick Start Guide or visit the official Vormooi store on Amazon.

Figure 10: Vormooi's commitment to customer support.


