1. Introducción
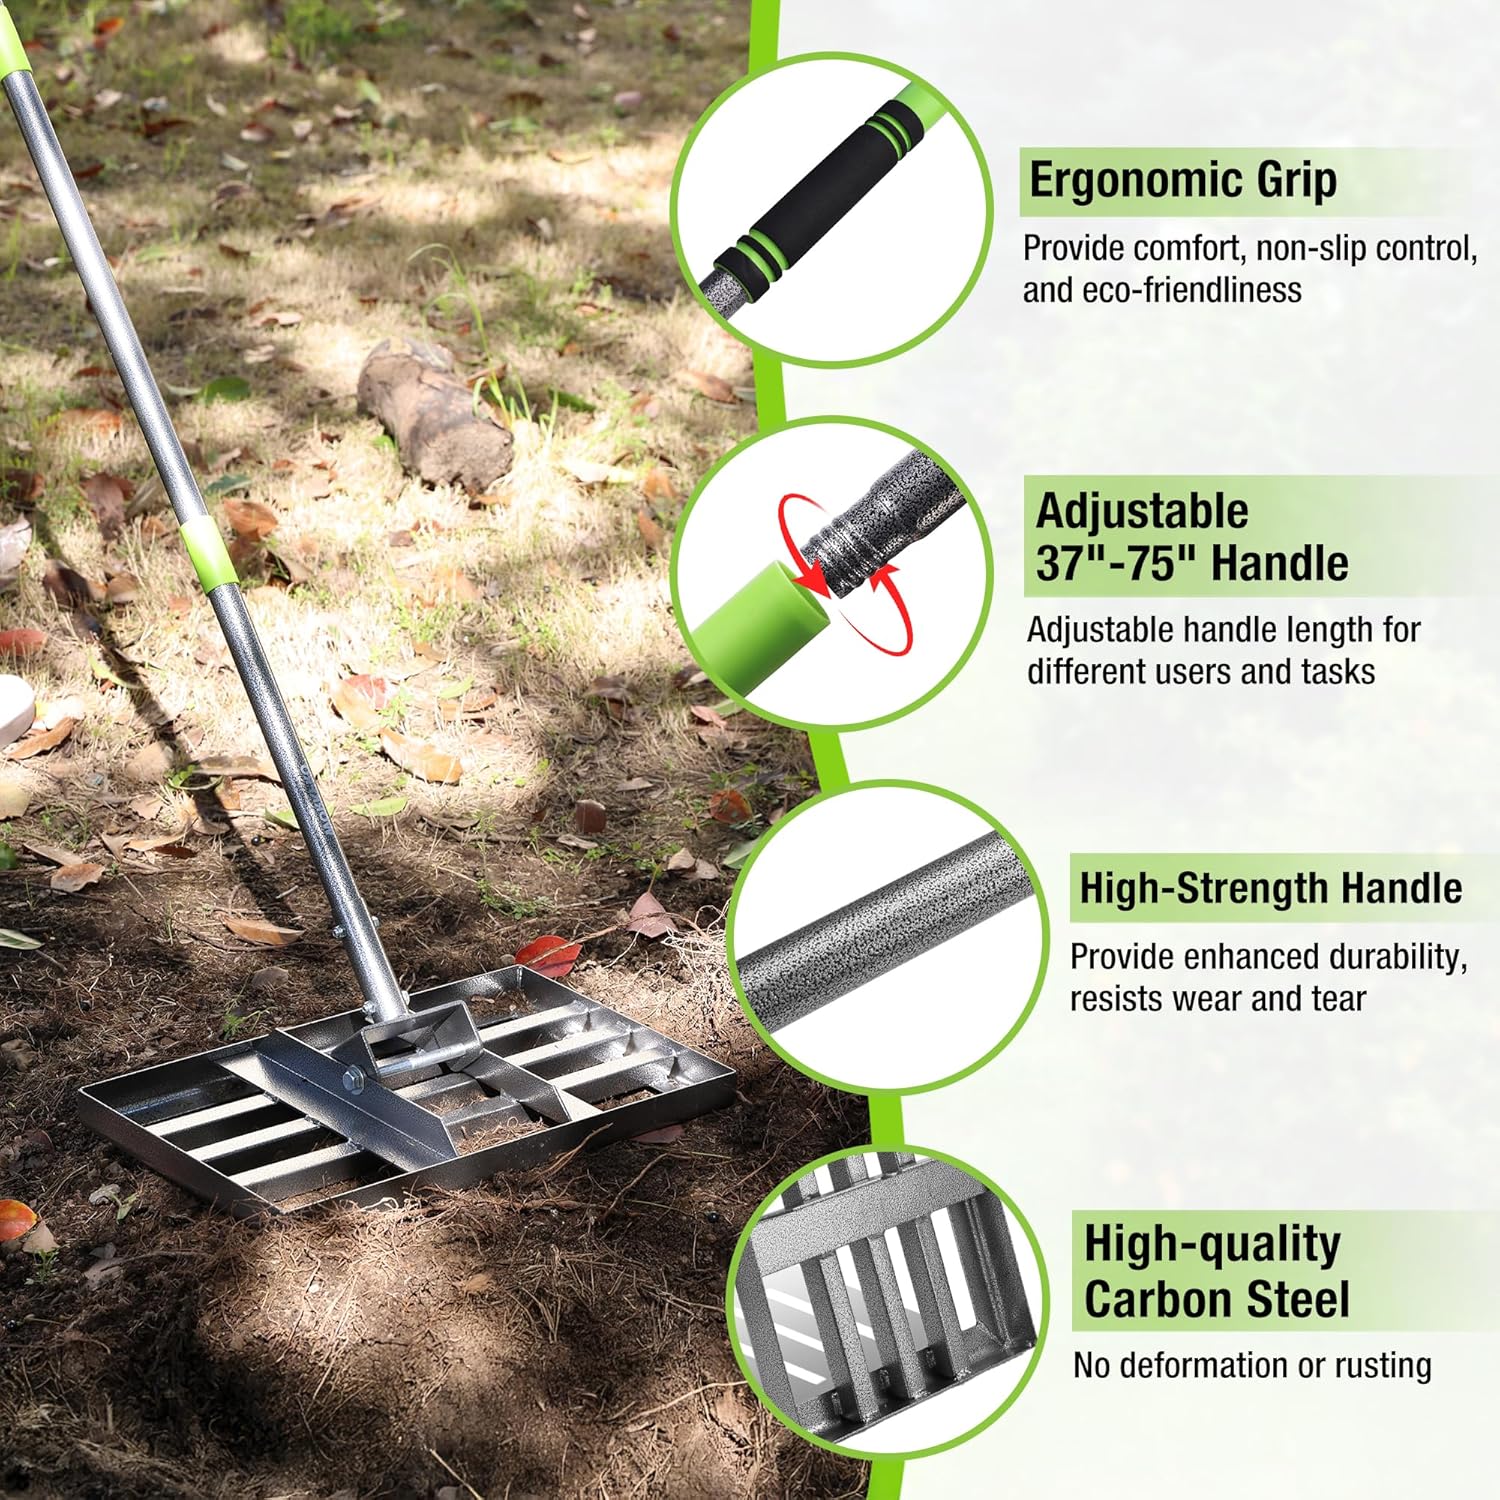
This manual provides instructions for the assembly, operation, maintenance, and troubleshooting of the WORKPRO 17''x10''-6FT Lawn Leveling Rake. This tool is designed for smoothing soil, sand, compost, and other ground materials to create an even surface for lawns, gardens, and other outdoor areas.
2. Información de seguridad
- Always wear appropriate personal protective equipment, such as gloves and sturdy footwear, when operating the leveling rake.
- Ensure the handle sections are securely tightened before use.
- Mantenga a los niños y las mascotas alejados del área de trabajo durante la operación.
- Do not use the rake for purposes other than its intended use of leveling ground materials.
3. Contenido del paquete
Verifique que todos los componentes estén presentes antes del ensamblaje:
- Leveling Rake Ground Plate (17" x 10")
- Adjustable Handle Sections (multiple pieces for total length up to 75 inches)
- Herrajes de montaje (tuercas, pernos, arandelas)
- Assembly Tools (wrenches)
This image displays the individual parts of the leveling rake before assembly, showing the ground plate, handle sections, and ergonomic grip.
4. Configuración y montaje
- Desembale todos los componentes y compruébelos con la lista de contenido del paquete.
- Attach the ground plate to the lowest handle section using the provided hardware. Ensure all bolts and nuts are securely tightened with the included wrenches.
- Connect the remaining handle sections by screwing them together clockwise until firm. The handle length can be adjusted by adding or removing sections to achieve a length between 37 inches and 75 inches.
- Confirme que todas las conexiones sean estables antes de usar.
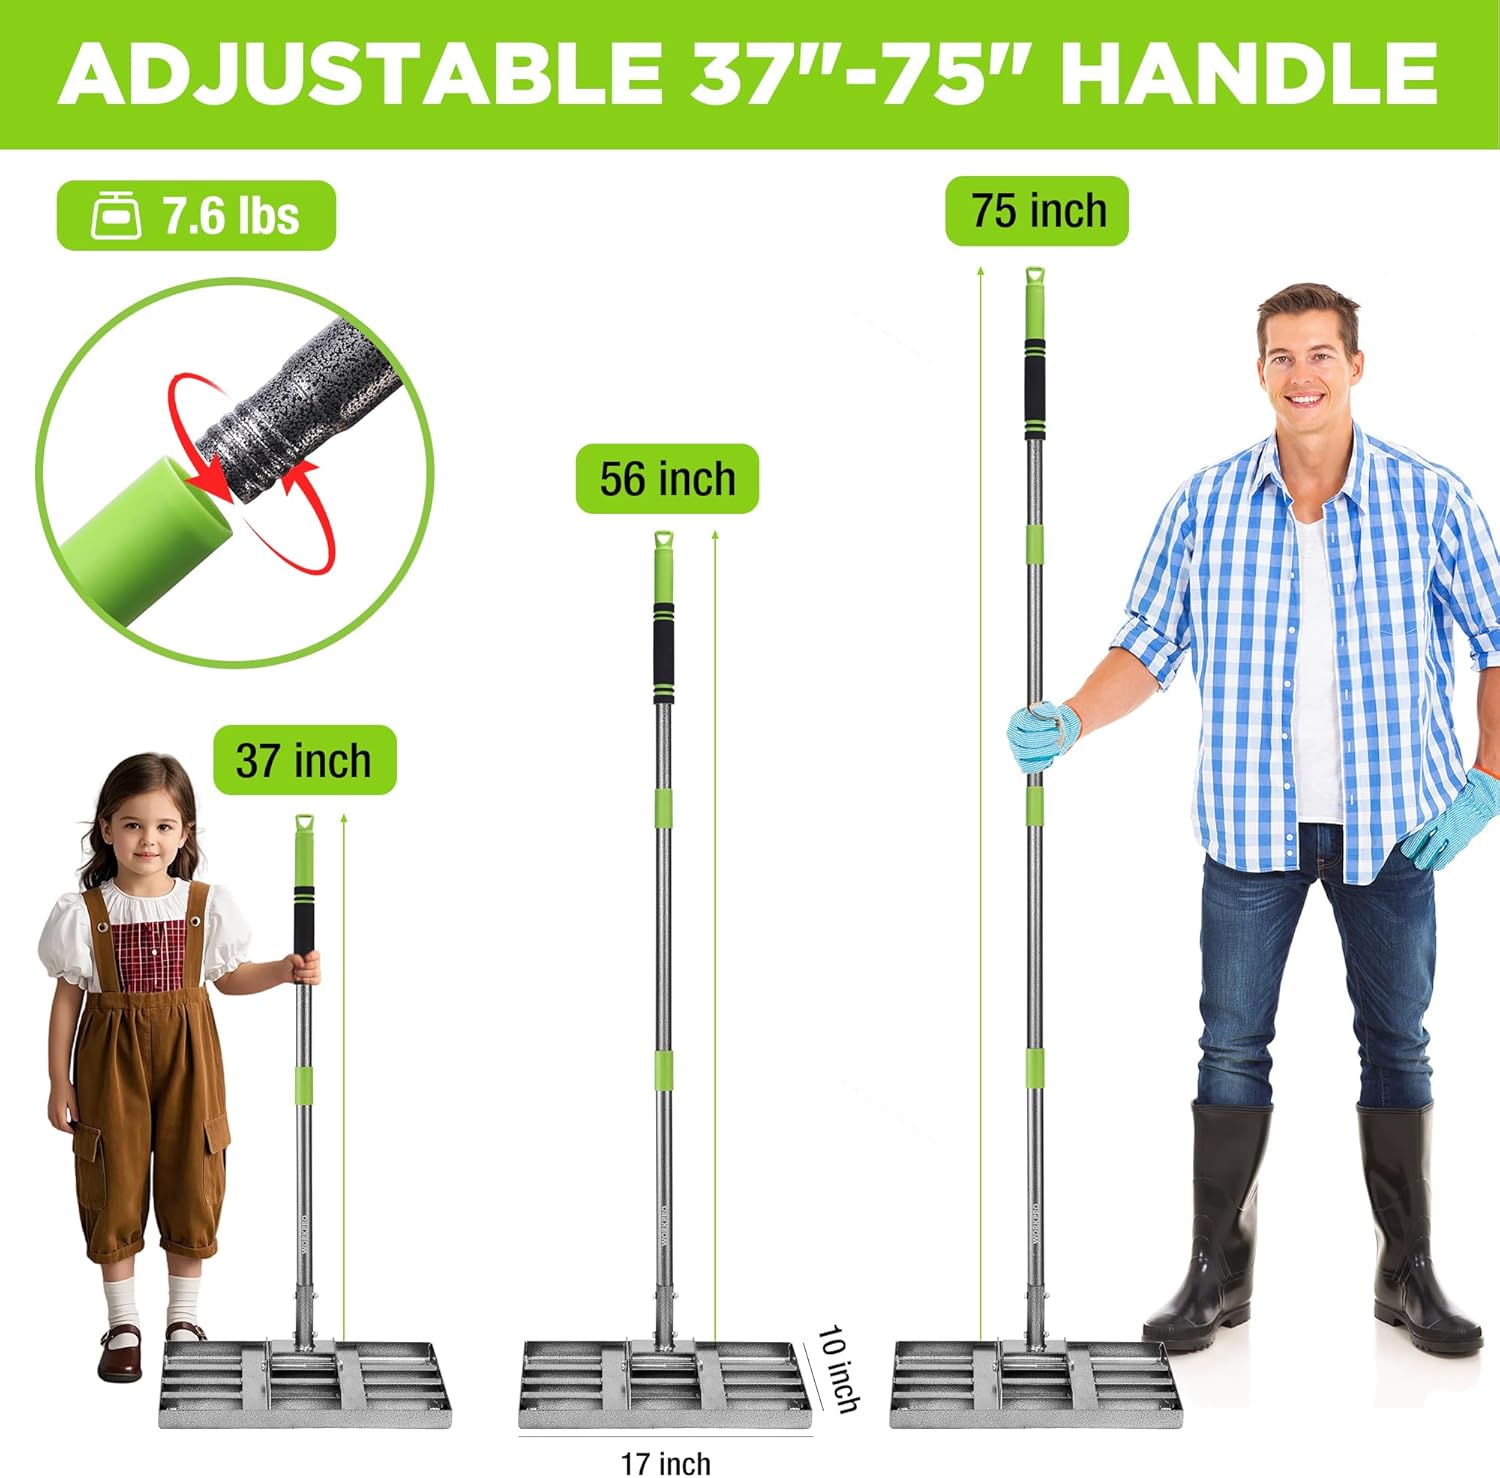
This diagram illustrates the adjustable handle feature, showing the rake at three different lengths (37, 56, and 75 inches) with a child and an adult demonstrating appropriate heights for various users and tasks.
5. Instrucciones de funcionamiento
5.1 Preparación
- Ensure the area to be leveled is free of large debris.
- Distribute the material (soil, sand, compost) evenly in small piles across the area.
5.2 Adjust Handle Length
Adjust the handle to a comfortable height for your posture to minimize strain. The handle can be set from 37 inches to 75 inches by adding or removing sections.
5.3 Leveling Technique
- Place the leveling rake's ground plate flat on the material.
- Push and pull the rake across the surface in a consistent motion to spread the material evenly.
- Overlap passes slightly to avoid creating ridges.
- For best results, work in a grid pattern (e.g., horizontal passes followed by vertical passes).
5.4 Material Application
The rake is effective for spreading topsoil, compost, sand, or preparing seedbeds for lawns, gardens, farms, and golf courses.

This image provides a simple two-step guide to using the rake. Step 1 shows the rake pushing a pile of material, and Step 2 shows it smoothing the material evenly across the ground.

This visual demonstrates the effectiveness of the leveling rake, contrasting an uneven lawn with various materials (compost, sand, soil, peat moss) before use, with a perfectly smooth and manicured lawn after leveling.

A man is shown using the leveling rake on a patch of soil, illustrating its versatility. Insets indicate its suitability for leveling sand, soil, lawns, and sports fields.
This video demonstrates the WORKPRO Lawn Leveling Rake in use, showing its effectiveness in smoothing various ground surfaces.
6. Mantenimiento
- Limpieza: After each use, remove any soil, grass, or debris from the ground plate and handle. A stiff brush and water can be used.
- El secado: Thoroughly dry all metal components to prevent rust, especially the carbon steel ground plate and handle.
- Almacenamiento: Store the rake in a dry place. For compact storage, the handle can be disassembled into sections.
7. Solución de problemas
- Uneven Leveling: Ensure consistent pressure and overlapping passes. Check for large debris in the material being leveled.
- Aflojamiento del mango: Periodically check and tighten all handle connections and assembly hardware to maintain stability.
- Difficulty Spreading Material: Ensure the material is not too wet or clumpy. Break up large clumps before leveling for smoother operation.
8. Especificaciones
| Número de modelo | W153030AE |
| Ground Plate Dimensions | 17 pulgadas (ancho) x 10 pulgadas (profundidad) |
| Longitud del mango ajustable | 37 inches to 75 inches (6 feet) |
| Material (Head & Handle) | Acero carbono |
| Peso del artículo | Aproximadamente 9.61 libras |
| Código Postal | 820909615897 |
9. Garantía y soporte
For warranty information or product support, please refer to the documentation included with your purchase or contact WORKPRO customer service directly. Keep your purchase receipt for warranty claims.